How to Remove a Walk-In Bathtub Safely: Step-by-Step DIY Guide and Cost Tips
To safely remove a walk-in bathtub, you’ll need to follow a structured process that includes planning, obtaining permits, and ensuring you have the right personal protective equipment (PPE). The key steps involve draining and disconnecting utilities, removing any trim and tile, cutting or unfastening the tub, and carefully hauling it away while protecting your floors and walls. After removal, inspect and repair the subflooring, plumbing, and framing for any issues. Factor in costs for tools, disposal, and potential unforeseen repairs. If the plumbing is complex, the tub is heavy, or you’re concerned about resale value, hiring a professional might be the best option. Continue reading for a detailed step-by-step guide and cost-saving tips.
What Removing a Walk-In Bathtub Entails and When to Consider It
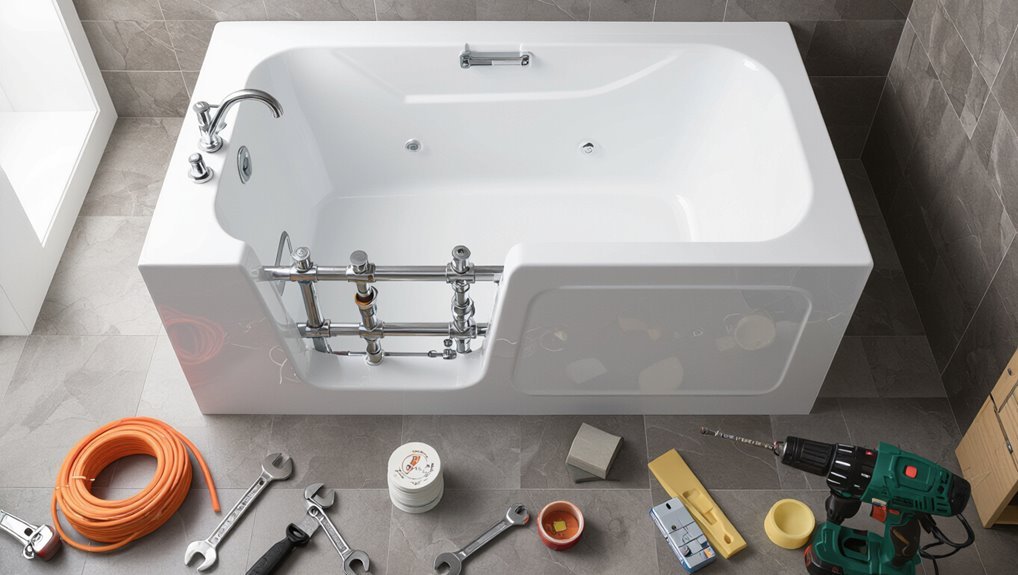
Homeowners commonly choose to remove walk-in tubs due to mobility changes, leaks, or remodeling goals.
Removal complexity depends on the tub type—drop-in, alcove, or freestanding—and on materials, plumbing, and surrounding finishes.
The basic removal process involves disconnecting plumbing and electrical, dismantling or cutting the unit, and repairing the floor and walls, typically taking a day or two for a standard job.
Common reasons homeowners remove walk-in tubs
Many homeowners decide to remove a walk-in bathtub for practical, financial, or health-related reasons, often after weighing long-term use against evolving needs.
Common motives include mobility changes, costly repairs, repeated leaks, plumbing upgrades, or desire for a larger shower.
Decisions often follow research into how to remove a walk-in bathtub, resale impact, and whether replacement better fits current lifestyle and budget.
Types of walk-in tubs and how removal complexity varies
Because walk-in tubs come in several designs—standard alcove, corner, freestanding, and modular units—the complexity of removal depends heavily on the model, installation method, and surrounding finishes.
Alcove tubs often require wall trim removal; corner units involve awkward clearances and plumbing reroutes; freestanding tubs need floor anchoring and weight handling; modular systems can be disassembled but may hide fasteners or integrated utilities.
Quick overview of the removal process and timeline
Removing a walk-in bathtub typically involves disconnecting utilities, unsealing and dismantling surrounding walls or trim, lifting or breaking the tub free from its anchors, and safely hauling the unit away.
Localized repairs or plumbing rework may follow. The full removal often spans a half to two days for DIY, longer for complex installs.
Professionals can finish faster, with permitting or repairs extending timelines.
Safety Preparations and Legal Requirements Before You Start
Before beginning removal, the homeowner should confirm required permits and local building codes to avoid fines or failed inspections.
Decisions about when to hire a licensed plumber, electrician, or contractor hinge on plumbing, electrical, and structural scope and the homeowner’s skill level.
A concise PPE list and job-site safety checklist—including eye, hand, and respiratory protection, safe lifting practices, and lockout/tagout for utilities—should be prepared and reviewed.
Required permits and local code considerations
Several municipalities require permits and inspections for removing a walk-in bathtub, so homeowners should verify local building, plumbing, electrical, and waste-disposal codes before work begins.
Required permits, inspection timelines, approved disposal methods, and contractor licensing rules vary by jurisdiction. Confirm permit fees, submission materials, and inspection scheduling with the local building department to avoid fines, delays, or failed inspections.
When to hire a licensed plumber, electrician, or contractor
Any homeowner planning a walk-in tub removal should assess which tasks exceed personal skill or local licensing requirements and hire licensed professionals accordingly.
Engage a plumber for water-line modifications, gas or drain work and tests.
Retain an electrician for wiring, GFCI circuits and meter-level connections.
Contract a licensed contractor for structural changes, wall repairs, permit coordination and final inspections to guarantee code compliance and warranty protection.
Personal protective equipment and job-site safety checklist
After deciding which trades to hire, the homeowner should assemble appropriate personal protective equipment (PPE) and a concise job-site safety checklist to reduce injury risk and meet basic legal obligations.
PPE: safety glasses, respirator, gloves, steel-toe boots, hearing protection.
Checklist: shut off utilities, ventilate, secure work area, post signage, keep fire extinguisher, document permits, verify licensed trades’ insurance, plan debris removal.
Tools, Materials, and Equipment You’ll Need
A clear inventory of tools, materials, and equipment sets the foundation for a safe and efficient bathtub removal.
The list should cover essential hand and power tools, any specialized gear such as panel lifters, jacks, and wet vacs (noting rental as an option), and disposal supplies plus protective coverings.
Preparing these items in advance reduces delays and minimizes risk during the work.
Essential hand tools and power tools
Gather the correct combination of hand tools and power tools to secure the walk-in bathtub can be removed efficiently and safely.
Essential hand tools include adjustable wrenches, pliers, screwdrivers, utility knife, pry bar, hammer, and pipe wrench.
Power tools: cordless drill/driver, reciprocating saw with demolition blades, oscillating multi-tool, and portable work light.
Confirm sharp blades and charged batteries.
Specialized equipment (panel lifters, jacks, wet vacs) and rental options
Select specialized equipment based on the tub’s size, weight, and surrounding finishes to reduce labor and prevent damage.
Panel lifters and adjustable jacks support heavy sections during detachment; a wet vac manages residual water and debris.
Rent high-capacity lifters, floor jacks, or tub dollies from tool rental centers for occasional use.
Verify load ratings and rental terms before proceeding.
Disposal materials and protective coverings
Prepare appropriate disposal materials and protective coverings before beginning removal to contain debris, protect finishes, and simplify cleanup.
Essential items include heavy-duty contractor bags, rigid bins for glass or sharp fragments, moving blankets, drop cloths, and corrugated cardboard to shield floors.
Use plastic sheeting and painter’s tape to seal doorways, and disposable gloves, masks, and eye protection for safe handling and transport.
Pre-Removal Planning: Measurements, Photographs, and Utilities
Before any removal work begins, measurements of the bathroom and planned access routes should be recorded to confirm that the tub and any sections can be removed through doors and hallways.
Photographs of the existing plumbing and electrical connections should be taken to document how fixtures are configured and to aid reinstallation or repairs.
Water and power must be shut off and adjacent rooms prepared to protect finishes and contain dust or water during the project.
Measuring the bathroom and planning access routes
Several key measurements and a clear access plan are essential to remove a walk-in bathtub without unexpected delays.
Measure tub dimensions, doorways, hallways, stair widths, ceiling heights and turning radii.
Note clearances for removing trim and tiles.
Plan route for debris exit, staging area for tools, and vehicle placement.
Verify load-bearing thresholds and temporary protective coverings for floors and walls.
Documenting current plumbing and electrical connections with photos
A thorough photographic record of all plumbing and electrical connections should be created to guide disconnection, reinstallation, and any future troubleshooting.
Capture wide shots showing component relationships and close-ups of fittings, junctions, labels, wire colors, and shutoff valves.
Date-stamp images, note orientations and cable routing, and store photos with brief written annotations to guarantee accurate reconnection and to document existing conditions.
Shutting off water, power, and preparing adjacent rooms
Cut water and power sources and secure surrounding spaces to prevent damage and streamline removal.
The installer locates and shuts main and local shutoffs, tags circuits at the breaker, and verifies deactivation with testers.
Adjacent rooms are protected with drop cloths, doorways padded, and sensitive items removed.
Temporary drains and moisture barriers are arranged to contain spills during disconnection and transport.
Step-by-Step Walk-In Bathtub Removal Guide
A clear, ordered procedure helps guarantee safety and efficiency during bathtub removal. The following key actions outline the sequence from utilities to hardware so each step can be completed without oversight:
- Disconnect power and label circuits; shut off and isolate water lines; drain and detach drain/overflow
- Remove fixtures, trim, panels, and any surrounding tile as required
- Detach mounting and anchoring hardware and prepare the unit for extraction
Step 1 Disconnect electricity and label circuits
Begin by shutting off power to the bathroom at the main breaker and verify circuits with a non-contact voltage tester to confirm no live wires remain.
Remove cover plates, disconnect tub-specific wiring at junctions or GFCI/isolator, and cap exposed conductors with wire nuts.
Label each circuit clearly (breaker number, function) and photograph connections for safe reconnection later.
Step 2 Shut off and isolate water supply lines
With the electrical circuits secured and documented, attention shifts to the plumbing.
The installer locates and shuts main house valves, then isolates hot and cold supply stops for the walk-in tub.
Flexible lines are depressurized by opening nearby faucets briefly, and supply connectors are capped or taped.
Verify zero flow at valves before proceeding; tag valves to prevent accidental reopening.
Step 3 Drain and detach the tub from drain and overflow
Next, the tub must be fully drained and disconnected from the drain and overflow to prevent leaks and allow safe removal.
Open the drain and use a wet/dry vacuum or pump to remove residual water.
From underneath, loosen and remove the trap and tailpiece, detach the overflow assembly, cap exposed pipes, and inspect for hidden fittings before moving the tub.
Step 4 Remove fixtures, trim, panels, and surrounding tile as needed
Remove all accessible fixtures, trim, access panels, and any loose tile to expose the tub shell and framing, taking care to label and bag fasteners and small parts for reassembly or disposal.
Then remove escutcheons, grab bars, showerheads, faucets, and trim pieces with appropriate tools.
Carefully pry damaged surrounding tile, cutting grout where needed, and protect adjacent surfaces to prevent unnecessary demolition.
Step 5 Detach mounting and anchoring hardware
Begin by locating and documenting all visible mounting and anchoring points that secure the tub to studs, floor, and surrounding walls; this includes flange screws, anchor bolts, adhesive beads, and any brackets hidden behind trim or access panels.
Wear eye and hand protection, then remove fasteners systematically with appropriate tools.
Cut adhesive seams where needed, pry brackets free, and label hardware for reinstallation or disposal.
Step 6 Cut and remove tub in sections for easier extraction (techniques)
Cutting the tub into manageable sections allows for safer, easier extraction through doorways and down stairwells.
The installer scores fiberglass with a circular saw fitted with a fine-tooth blade, then uses a reciprocating saw for metal or cast-iron cores.
Work from top down, support each piece, and cut into sizes that fit exits.
Vacuum dust and remove debris after each cut.
Step 7 Remove the tub from the bathroom and protect walls/doorways
Lifted in coordinated stages, the tub is guided out of the bathroom while protective measures shield walls and doorways from impact.
Movers use sliders, straps, and plywood ramps to control weight and angle. Door frames receive foam padding and drop cloths; corners get corner guards.
Paths remain clear, lighting adequate, and one person monitors clearance while others maneuver steadily toward the exit.
Step 8 Inspect and cap plumbing stub-outs or convert to standard tub/shower
After the tub is removed, inspect the exposed plumbing stub-outs for corrosion, leaks, and correct alignment before proceeding to cap them or reconfigure for a standard tub/shower.
Loose fittings should be tightened and any ruined sections replaced to guarantee a proper seal.
Cap unused lines with appropriate pressure-rated caps, test for leaks, and, if converting, extend or relocate supply and drain to match new fixture rough-in.
Step 9 Repair subfloor, framing or insulation damage
Inspect the exposed subfloor, framing members, and insulation for water damage, rot, mold, or structural compromise before proceeding with repairs.
Remove compromised decking and insulation, cut out and replace rotten joists or sister nearby joists for strength, and install appropriate moisture-resistant sheathing.
Treat remaining framing for mold, guarantee proper fastening and level, and verify vapor barrier or insulation meets local code before closing the floor.
Step 10 Prepare space for replacement or patch and finish
Prepare the opening to accept either a new walk-in tub or a patch by ensuring surfaces are clean, dry, and plumb.
Measure and verify dimensions, adjust framing or backing as needed, and install blocking for fixtures and access panels.
Apply appropriate moisture barrier and level floor substrate.
Confirm plumbing and electrical rough-ins align, then prime painted surfaces and document conditions before proceeding with replacement or final patch.
Converting Plumbing and Electrical After Removal
After the walk-in tub is removed, attention turns to converting plumbing and electrical systems to suit a standard tub or shower.
This typically involves reconfiguring or capping supply and waste lines to meet new fixture locations and code requirements.
Any pumps, heaters, or dedicated lighting circuits should be restored, relocated, or terminated by a licensed plumber and electrician to guarantee safe, code-compliant operation.
Transitioning from walk-in tub plumbing to a standard tub/shower
Reconfiguring the plumbing and electrical systems is essential once the walk-in tub is removed to guarantee the replacement standard tub or tub/shower functions safely and meets code.
Install new tub filler, valve rough-in, and showerhead locations to align with the new surround.
Verify water pressure, adjust risers, relocate GFCI-protected circuits for pumps or heaters, and obtain inspections for compliance.
Re-routing or capping waste and supply lines safely
When a walk-in tub is removed, the remaining supply and waste lines must be inspected, rerouted, or permanently capped to prevent leaks, odor, and code violations.
This process begins with locating all hot, cold, and drain connections and determining whether the new fixture layout requires extensions, reductions, or full termination of lines.
Use proper fittings, shutoff valves, and threaded caps or glued plugs per local code; pressure-test all capped lines.
Restoring or relocating electrical for pumps, heaters, and lighting
Addressing electrical work for pumps, heaters, and lighting requires identifying existing circuits, disconnecting powered components safely, and deciding whether to restore, relocate, or retire each connection based on the new fixture plan and local code.
A licensed electrician should reconfigure wiring, install appropriate junction boxes, update GFCI protection, label circuits, and secure permits.
Inspect and test all changes before concealing walls.
Common Problems During Removal and How to Fix Them
Removal of a walk-in tub often uncovers stubborn issues such as corroded fittings and seized fasteners that require penetrating oil, heat, or cutting tools to free.
Workers may also find water‑damaged subflooring, broken tile, or wall injury that need temporary shoring and targeted repairs before proceeding.
Any unexpected plumbing or structural problems beyond basic fixes should prompt a pause and consultation with a licensed plumber or contractor.
Dealing with corroded fittings and stuck fasteners
Corroded fittings and seized fasteners are common obstacles that can stall a walk-in bathtub removal, requiring patience and the right tools to avoid damage.
Apply penetrating oil, allow soak time, then use appropriate sockets, impact drivers, or heat to free stubborn bolts.
Cut or drill irreparable fasteners, protect surrounding surfaces, and replace corroded plumbing components during reinstallation to guarantee a secure, leak-free fit.
Handling damaged subfloor or water-rot
After freeing stubborn fittings, attention should turn to what lies beneath the tub: subfloor damage and water-rot are often revealed once fixtures are removed.
Inspect joists and plywood for softness, mold, and staining. Remove compromised sections, dry and treat remaining wood with a mold inhibitor.
Replace with pressure-treated or marine-grade plywood, reinforce joists as needed, and guarantee proper ventilation before reinstalling.
Fixing tile or wall damage from removal
Tackle chipped tiles and torn drywall with a systematic assessment: identify loose, cracked, or missing tiles, probe surrounding grout and backer board for hidden damage, and mark areas requiring full replacement versus simple patching.
Remove damaged tiles, clean and level substrate, install cement backer board where needed, apply thinset and new tiles, grout and seal.
Patch drywall, prime, and repaint to match.
Unexpected plumbing or structural issues and when to stop work
Several common surprises can arise during walk-in bathtub removal—leaking or broken supply lines, corroded drain assemblies, hidden rot in framing, and compromised floor joists among them—and recognizing these issues early determines whether to proceed or stop.
If leaks, extensive rot, or structural compromise appear, halt and consult a plumber or structural contractor.
Minor issues may be repaired; major ones require professional assessment and permitted repairs.
Cost Breakdown and Budgeting Tips
A clear budget overview helps readers anticipate expenses for tools, rentals, and disposal when removing a walk-in tub.
The piece compares typical DIY cost ranges with professional quotes and highlights when hiring a contractor may be more economical.
It then outlines key cost drivers such as difficult access, complex plumbing, and permit requirements.
Typical DIY cost ranges for tools, rentals, and disposal
Budgeting for a DIY walk-in bathtub removal typically ranges from modest to moderate depending on tool ownership, rental needs, and disposal fees.
Typical expenses:
- basic hand tools $0–$150 if owned or purchased;
- power tool rentals $40–$100/day;
- dumpster or disposal fees $75–$300;
- specialty materials and fasteners $20–$80.
Contingency of 10–15% is recommended for unexpected costs.
Cost comparison: DIY vs. hiring professionals
With tool, rental, and disposal estimates in hand, homeowners can weigh the full cost implications of doing the removal themselves versus hiring professionals. DIY saves labor but adds time and risk; pros cost more upfront, provide speed, cleanup, and warranty.
| Item | DIY Estimated Cost | Professional Estimate |
|---|---|---|
| Tools/Rentals | $100–$400 | Included/Not applicable |
| Disposal | $50–$200 | Included |
| Labor/Time | Owner’s time | $400–$1,200 |
| Total Range | $150–$600+ | $600–$1,800+ |
Factors that increase cost (accessibility, plumbing complexity, permits)
Several clear factors can drive up the cost of removing a walk-in bathtub: limited accessibility, complex plumbing or electrical connections, and local permit or disposal requirements.
Narrow hallways, stairs or tight turns increase labor and equipment needs. Integrated jets, custom drains or concealed wiring require skilled trades.
Permit fees, inspection costs and specialized waste disposal add administrative and hauling expenses, raising total project budgets.
Disposal, Recycling, and Environmental Considerations
Responsible disposal of a walk-in tub requires identifying its materials and choosing the least environmentally harmful option.
Acrylic and fiberglass components may be eligible for specialized recycling programs, while cast iron can often be reclaimed by metal recyclers.
Homeowners should weigh the cost and convenience of hiring a licensed junk-removal service against local municipal disposal rules and recycling drop-off options.
How to dispose of tub materials responsibly
Begin by sorting removed components into categories—metal, acrylic or fiberglass, plumbing fixtures, and mixed debris—to determine the most appropriate disposal or recycling pathway.
Label hazardous items (sealants, adhesives, lead solder) for special handling.
Contact local waste authorities for bulk pickup, drop-off sites, or hazardous-waste protocols.
Donate reusable fixtures, salvage metal for scrap, and document disposal receipts for compliance and recordkeeping.
Recycling options for acrylic, fiberglass, and cast-iron tubs
After sorting and labeling components, attention turns to specific recycling paths for acrylic, fiberglass, and cast-iron tubs, each of which follows different handling and recovery practices.
Acrylic can be accepted by specialty plastic recyclers or repurposed into composite products.
Fiberglass often requires landfill diversion through reclamation services or upcycling into insulation.
Cast iron is highly recyclable as scrap metal through metal yards or municipal metal recycling programs.
Hiring a junk removal service vs. municipal disposal
When weighing options for removing a walk-in tub, homeowners must compare junk removal services against municipal disposal for cost, convenience, and environmental impact.
Junk haulers offer pickup, labor, and often recycling partnerships but charge fees and require scheduling.
Municipal disposal may be cheaper or free with permits but demands transportation, possible drop-off restrictions, and limited recycling; verify local regulations and receipts.
Preparing the Space for a Replacement or Final Finish
Before installing a replacement unit, the space should be evaluated with a focused subfloor and framing inspection checklist to identify rot, level issues, and structural repairs.
Recommendations for waterproofing and suitable backerboard materials should be outlined to guarantee a durable substrate.
Exact measurements and practical tips for fitting a standard tub, shower, or barrier-free unit complete the preparation process.
Subfloor and framing inspection checklist
Inspect the subfloor and framing systematically to confirm structural integrity and to identify any damage that could compromise a replacement tub or final finish.
Check for rot, mold, soft spots, sagging, and insect damage. Measure joist spacing and confirm proper support beneath the tub footprint.
Verify levelness, fastener integrity, and any previous repairs. Document findings and note required repairs before proceeding.
Waterproofing and backerboard recommendations
After verifying the subfloor and framing are sound, attention shifts to creating a waterproofed substrate and selecting an appropriate backerboard to protect finished surfaces and the new tub.
Cementitious backerboard or foam-backed waterproof panels are recommended. Seal seams with waterproof tape and membrane, extend membrane onto floor, fasten per manufacturer, and allow full cure before installing fixtures or tile.
Measurements and tips for installing a standard tub, shower, or barrier-free unit
When preparing the space for a replacement tub, shower, or barrier-free unit, precise measurements and a clear plan for clearances and rough-in locations are essential to avoid costly adjustments during installation.
Measure width, depth, and finished floor height; confirm drain, supply, and waste offsets.
Allow clearances for doors, transfers, grab bars, and thresholds.
Verify wall studs and framing for mounting and waterproofing.
Time-Saving Tips, Safety Reminders, and Common DIY Mistakes to Avoid
A brief checklist helps frame practical strategies, safety priorities, and costly pitfalls when removing a walk-in tub. Consider these focal points before beginning:
- Streamline removal with organized tools, staged disassembly, and time-saving sequencing.
- Prioritize lockout-tagout, proper lifting techniques, and protective gear.
- Avoid cutting plumbing or structural elements without inspection, underestimating weight, or skipping permits.
Best practices to streamline removal
Streamline the walk-in bathtub removal by organizing tools, labeling connections, and staging debris before work begins; this reduces downtime, limits safety hazards, and clarifies each step for anyone on the crew.
Sequence tasks logically, disconnect utilities in order, and use jigs or lifts for heavy sections. Assign clear roles, keep fasteners grouped, and inspect materials for reuse to avoid delays and extra costs.
Safety reminders to prevent injury or property damage
Begin by prioritizing safety: assess the work area for trip hazards, secure power and water shutoffs, and confirm that all electrical, plumbing, and structural risks are identified before any cutting or lifting begins.
Wear PPE (gloves, eye protection, sturdy boots), use proper lifting technique or mechanical aids, ventilate the space, protect surrounding finishes, and keep a fire extinguisher and first aid kit accessible.
Mistakes that lead to higher costs or failed conversions
Avoiding common missteps early can prevent costly delays and botched conversions; homeowners should plan for accurate measurements, proper structural assessment, and realistic labor needs before removing a walk-in tub.
Common costly errors include skipping permits, underestimating plumbing/electrical complexity, destroying surrounding finishes, and failing to secure proper disposal.
Hiring skilled help for critical tasks often saves money and prevents failed conversions.
When to Call a Professional and How to Vet Contractors
If structural damage, complex plumbing or electrical work, or hazardous material concerns arise, the task should be handed to a professional.
Homeowners should ask contractors about licenses, insurance, references, specific experience with walk-in tubs, and written timelines before hiring.
Obtaining itemized quotes and comparing scope, warranties, and permit responsibilities helps guarantee accurate bidding and fair selection.
Signs the job is beyond DIY scope
Recognize when a walk-in tub removal exceeds typical DIY skills by watching for specific red flags: extensive plumbing or electrical work, structural modifications to the floor or surrounding walls, evidence of mold or water damage within framing, tubs anchored to load-bearing elements, or installations involving integrated door seals and complex drain/waste systems.
If any are present, prioritize safety and consult a licensed professional to assess risks and scope before proceeding.
Questions to ask potential contractors and required credentials
Why ask detailed questions before hiring a contractor?
Prospective contractors should be asked about licensing, insurance (liability and workers’ comp), relevant experience with walk-in tubs, references, warranty terms, subcontractor use, timeline, and scope clarity.
Verify license numbers and insurance certificates, contact past clients, and confirm permits.
Proper vetting reduces liability, guarantees compliance, and protects project quality and payment expectations.
How to get accurate quotes and compare bids
After confirming licenses, insurance, references, and scope, the next step is obtaining comparable, accurate bids to protect budget and schedule.
Seek written estimates, itemized costs, timelines, and permit responsibilities. Compare inclusions, contingencies, and warranties. Prefer local contractors with clear communication and responsive follow-up.
- Itemized labor, materials, disposal
- Permit and inspection fees
- Payment schedule and warranty
Conclusion
Removing a walk-in bathtub demands patience, planning, and respect for safety—like untangling a knotted string—so the process stays orderly and damage-free. Following proper preparations, permits, and stepwise removal minimizes hazards and unexpected costs. Disposal and recycling options should be considered, and replacement readiness guaranteed. For complex plumbing, structural changes, or limited mobility concerns, hiring a vetted professional is prudent to protect both the home and its occupants.