How to Unclog a Standpipe Drain Fast: Step-by-Step Fixes for Homeowners
If you’re dealing with a clogged standpipe drain, the quickest way to resolve it is by following these steps: First, wear gloves and eye protection, then manually remove any visible debris like lint, hair, or grease. Next, flush the drain with a mixture of hot water and dish soap. If the clog persists, use a plunger or a flexible drain snake. Should these methods fail, clean the P-trap or apply an enzymatic cleaner—avoid mixing harsh chemicals. For ongoing issues, a camera inspection or professional help may be necessary. Read on for detailed step-by-step fixes and tips to prevent future clogs.
What a standpipe drain is and why it clogs
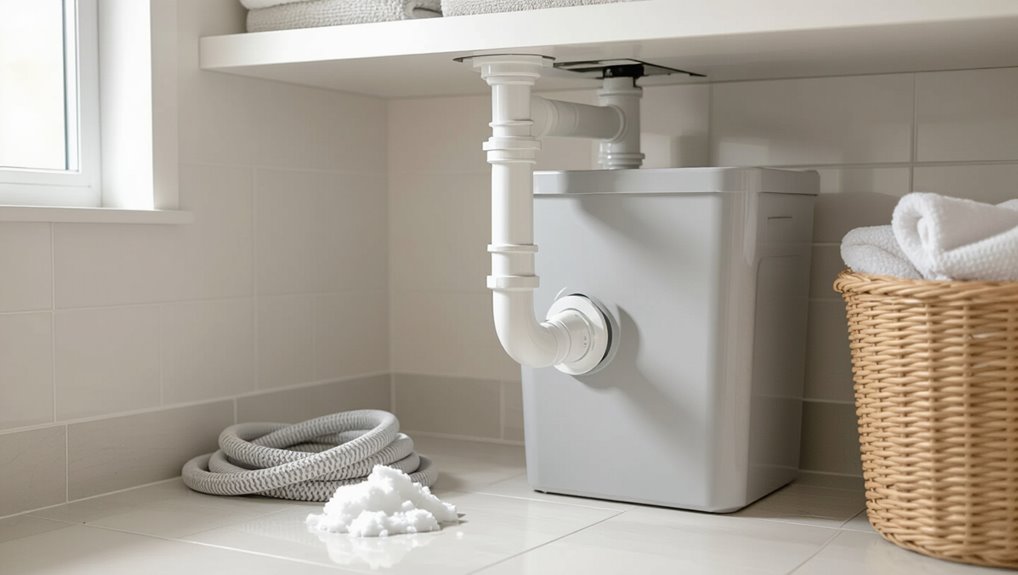
A standpipe drain is a vertical pipe found near laundry areas, utility sinks, and some basement fixtures that directs wastewater into the main drain line.
Clogs commonly form from hair, soap scum, lint, solids, and occasionally tree roots invading the line.
Typical signs of a clogged standpipe include slow draining, gurgling sounds, and water backing up.
Definition and common locations in homes
Standpipe drains are vertical pipes designed to receive wastewater from appliances like washing machines, utility sinks, or pump discharge lines. They provide an accessible connection point for hoses and a short-term reservoir to prevent backflow.
Commonly found in laundry rooms, basements, garages, or utility closets, they sit near appliances and floor drains. Guidance on how to unclog standpipe drain focuses on these accessible locations.
Typical causes of standpipe clogs (hair, soap scum, lint, solids, tree roots)
Having situated standpipe drains in their typical household locations, attention turns to why they become obstructed.
Common causes include accumulated hair and soap scum forming sticky masses, lint from laundry collecting on trap edges, debris and solids flushed down drains, and invasive tree roots intruding older sewer lines.
Mineral buildup and degraded pipe joints also narrow passages, promoting blockages over time.
Signs your standpipe drain is clogged (slow draining, gurgling, water backup)
Although often out of sight, the standpipe drain reveals trouble through clear symptoms: slow draining, gurgling noises, and occasional water backup.
Homeowners may notice sinks or appliances draining sluggishly, foul odors, or bubbling air as water struggles past partial blockages.
Recurrent backups, wet floor near the pipe, and decreased fixture performance indicate accumulation of hair, lint, soap, or debris requiring prompt inspection and clearing.
Quick safety precautions before you begin
Before attempting to clear a standpipe, the reader should put on gloves, eye protection, and wash hands afterward to limit exposure to contaminants.
They should also gather necessary tools and materials—plunger, drain snake, bucket, and appropriate cleaners—within reach.
If resistance, visible damage, or sewage backup occurs, the reader should stop and call a licensed plumber.
Personal protective equipment and hygiene
Put on gloves, eye protection, and a mask to guard against contaminated water, chemical splashes, and airborne particles when preparing to work on a standpipe drain.
Use water-resistant gloves, sealed goggles, and a fitted respirator or surgical mask.
Tie back hair, remove jewelry, and avoid touching face.
Wash hands and disinfect tools and exposed skin immediately after completing the task.
Tools and materials to have on hand
When gathering tools and materials for clearing a standpipe drain, the person should prioritize items that reduce risk and speed the job: chemical-resistant gloves, eye protection, a respirator or surgical mask, and durable, slip-resistant footwear.
Also assemble a bucket, adjustable pliers, a drain snake or auger, a plunger, disposable rags, flashlight, and biodegradable drain cleaner.
Keep a first-aid kit nearby.
When to stop and call a professional
After gathering protective gear and tools, a clear plan for when to stop and call a professional helps prevent injury and further damage.
If water won’t drain after reasonable plunging, smells persist, sewage backs up, pipes leak, or sensitive components require disassembly, cease attempts.
Call a licensed plumber for persistent blockages, sewer-line issues, damaged traps, or electrical hazards.
Prioritize safety and property protection.
Fast, immediate fixes to try first (under 30 minutes)
When a standpipe drain clogs, a few quick actions can often restore flow in under 30 minutes.
Try these targeted fixes:
- Plunging correctly for a standpipe
- Using hot water and dish soap to dissolve grease and soap scum
- Manual removal with a grabber or gloved hand
- Wet-dry vacuum method to suction the clog.
Each method is presented with steps and cautions to allow a fast, safe attempt before moving to longer repairs.
Plunging correctly for a standpipe
Start by selecting a flange or cup plunger that fits the standpipe opening snugly.
Seal the plunger over the pipe, guarantee an airtight fit, then push down firmly and pull up sharply without breaking the seal.
Repeat 8–12 times, checking flow between sets.
If water drains slowly, finish with a final vigorous plunge to clear residual blockage.
Using hot water and dish soap to dissolve grease and soap scum
If plunging loosens but does not fully clear a standpipe, a quick hot-water-and-dish-soap method can often dissolve grease and soap scum causing the backup.
Pour a generous squirt of degreasing dish soap into the drain, then slowly pour several liters of near-boiling water (not scalding) in stages.
Allow ten minutes to soften residues, then test flow; repeat once if needed.
Manual removal with a grabber or gloved hand
Reach for a long, flexible grabber or slip on thick, waterproof gloves to reach into the standpipe and extract visible clogs such as hair, lint, or compacted soap scum.
Work methodically, feeling for obstructions and pulling them out slowly to avoid pushing debris deeper.
Dispose of removed material, rinse the pipe with hot water, and inspect with a flashlight before testing flow.
Wet-dry vacuum method to suction the clog
Power through the clog by using a wet-dry vacuum to create strong suction at the standpipe opening.
Seal hose end with a rag or rubber adapter, set vacuum to liquid mode, and briefly pulse suction.
Extract debris into the tank, checking filter and emptying as needed.
Repeat until flow resumes.
Sanitize the standpipe and vacuum components after use to prevent odors and contamination.
Step-by-step mechanical methods for stubborn clogs
The following section outlines concise, step-by-step mechanical approaches for stubborn standpipe clogs, beginning with hand-operated tools and progressing to powered equipment.
It covers proper use of a drain snake, when to switch to a motorized auger, the advantages of a closet auger for tight traps, and procedures for accessing and cleaning the P-trap and nearby fittings.
Each method emphasizes safety, correct technique, and when to stop and call a professional.
Using a drain snake (hand auger): step-by-step
Begin by preparing the area and gathering a hand auger, gloves, bucket, and towels to contain any spills.
Feed the cable slowly into the standpipe, rotating the handle to navigate bends. When resistance is felt, crank gently to break the obstruction or hook debris.
Withdraw the cable, depositing debris into the bucket. Repeat until water drains freely, then flush with hot water.
Using a motorized auger for deeper or tougher blockages
Move a motorized auger into position when a hand snake cannot reach or clear the obstruction, ensuring the unit is rated for the pipe diameter and length of the standpipe.
Secure power, feed cable slowly while the motor runs, advance to the clog, then use controlled thrusts and reverse cycles to break and retrieve debris.
Withdraw cable, flush the line, inspect for damage.
Using a closet auger for tight standpipe traps
For tight standpipe traps that resist a hand snake, a closet auger offers a compact, flexible solution designed to reach and clear close-quartered bends without dismantling fixtures.
Feed the coiled cable gently, turn the handle clockwise to engage obstruction, then withdraw while maintaining tension. Repeat until water drains freely.
Clean and sanitize the auger after use and inspect for remaining slow drainage.
Cleaning the P-trap and nearby access points
Access the P-trap and adjacent cleanouts to inspect and remove mechanical blockages using basic tools: a bucket under the trap to catch water, a wrench or channel-lock pliers to loosen slip nuts, and a hand snake or small auger for deeper reaches.
Remove debris, scrub interior with a brush, clear threads and seals, reassemble snugly, run water to verify flow, and check for leaks.
Safe chemical and enzymatic options
When mechanical methods fail, chemical drain cleaners can offer a targeted solution but should be reserved for organic clogs and avoided near plastic fittings, septic systems, or after recent use of other chemicals.
Enzymatic cleaners provide a gentler, environmentally friendlier alternative when used according to label directions and given time to work.
Readers should also be warned that corrosive agents pose risks to pipes, fixtures, and the environment and require careful handling and proper disposal.
When chemical drain cleaners can help and when to avoid them
Although chemical and enzymatic drain cleaners can clear certain clogs quickly, their effectiveness and safety depend on the clog type, pipe material, and recent repairs.
They suit organic buildups in metal or durable plastic pipes but should be avoided for older galvanized, PVC softened by heat, or damaged seals.
Never mix products; instead choose formulation compatible with plumbing and follow label precautions.
How to use enzymatic cleaners safely and effectively
Choose an enzymatic cleaner formulated for organic clogs—protease- and lipase-based products work best on hair, grease, and food residues—then follow label directions for dosage and contact time.
Apply to standing water or pour directly if dry, avoid mixing with other cleaners, maintain recommended temperature range, and repeat as instructed.
Rinse thoroughly after treatment and store product per label to preserve activity.
Environmental and plumbing risks of corrosive cleaners
Corrosive drain cleaners—typically containing lye (sodium hydroxide), sulfuric acid, or similar caustic agents—pose significant risks to plumbing systems and the environment: they can eat through PVC and older metal pipes, damage seals and finishes, and produce heat and toxic fumes that harm sewer microbiomes and aquatic life if discharged.
Safer alternatives include enzyme-based products and mild, biodegradable formulations; professionals recommend mechanical clearing before chemicals.
Preventive maintenance to keep standpipes clear
Preventive maintenance keeps standpipes flowing and minimizes emergency unclogs. Recommended actions include a simple routine and handyman measures:
- Weekly: flush with hot water and clear visible lint or hair.
- Monthly: use a gentle enzyme treatment and inspect trap connections.
- Install strainers or lint traps on hoses and shower drains.
- Adopt laundry and bathroom habits that limit greasy, fibrous, or bulky debris.
Routine cleaning schedule and what to do weekly/monthly
While regular attention may seem minor, a simple weekly and monthly cleaning routine is essential to keep standpipe drains flowing and to prevent buildups that lead to backups.
Weekly: flush with hot water, remove visible debris from the trap and surrounding area, and run a biodegradable enzyme cleaner.
Monthly: inspect for slow drainage, snake lightly if needed, and wipe connections to spot leaks or corrosion early.
Simple barriers and strainers to catch debris
After establishing a routine of weekly flushing and monthly inspections, attention turns to simple physical devices that stop hair, lint, and large debris before they enter the standpipe.
Strainers, mesh covers, and removable baskets fit over or inside the standpipe, trapping solids for periodic removal.
Choose rust-resistant materials, correct sizes, and easy-access designs to simplify maintenance and prevent accumulation without altering flow.
Best laundry and bathroom habits to reduce clogs
Many small habit changes in the laundry room and bathroom can markedly reduce the risk of standpipe clogs.
Regularly empty lint traps, use mesh lint catchers on washer drains, and avoid flushing hair, wipes, or cotton down sinks and toilets.
Dispose of grease and solids in trash, run hot water after detergent, and schedule periodic inspections to catch buildup before it blocks the standpipe.
Troubleshooting persistent or recurring clogs
When clogs return despite routine care, attention shifts from the standpipe to the broader sewer system to determine whether the obstruction is local or downstream.
Persistent backups, sudden repeat blockages after clearing, or signs of sinking ground and displaced joints suggest tree roots or a collapsed pipe may be involved.
In those cases, a camera inspection or professional hydro-jetting is often the next diagnostic and remedial step.
Diagnosing deeper sewer line vs. local standpipe issues
How can one tell if recurring standpipe backups stem from a localized clog or a deeper sewer-line issue? Observable signs include multiple fixtures backing up, slow drainage throughout the house, foul sewer odors, or gurgling toilets—these suggest a main sewer problem.
If issues are isolated to one standpipe and respond to plunging or snaking, the clog is likely local.
Call a pro for camera inspection.
When tree roots or collapsed pipes are likely causes
If local clogs have been ruled out or problems recur despite repeated clearing, attention should turn to structural intrusions such as tree roots or collapsed sections of pipe.
Persistent backups, soft or sinking ground above lines, foul sewage odors outdoors, and repeated repairs in the same area suggest external damage.
These causes require assessment of line integrity and targeted repair or replacement rather than simple mechanical clearing.
Signs you need camera inspection or professional hydro-jetting
Recognize persistent or recurring clogs as signals that basic mechanical clearing has failed and that a deeper diagnostic or cleaning method is needed.
Homeowners should consider camera inspection when blockages recur, odors persist, slow drainage returns, or multiple fixtures are affected.
Opt for professional hydro-jetting if camera reveals extensive build-up, grease, mineral scale, invasive roots, or structural damage—situations beyond snaking or DIY methods.
Cost, time, and difficulty comparison of common fixes
A concise comparison of cost, time, and DIY difficulty helps homeowners choose the most appropriate fix for a clogged standpipe. Below is a quick-reference table with typical estimates for common methods to guide decision-making. Further details can follow based on the chosen approach.
| Method | Quick estimates |
|---|---|
| Plunger | Low cost, ~10–30 minutes, easy |
| Drain snake | Moderate cost, ~15–45 minutes, moderate |
Quick-reference cost and DIY difficulty estimates for each method
Several common standpipe drain fixes—plunging, snaking, enzymatic cleaners, hydro jetting, and trap replacement—vary widely in cost, time, and required skill; the following quick-reference estimates help homeowners choose between DIY attempts and professional services.
| Method | Cost | Difficulty/Time |
|---|---|---|
| Plunging | Low | Easy / 10–30 min |
| Snaking | Low–Med | Moderate / 30–90 min |
| Enzymatic | Low | Easy / 24–72 hrs |
Real homeowner scenarios and step-by-step examples
The article now presents real homeowner scenarios with concise, step-by-step actions for common standpipe clogs.
Readers can reference these situations and follow practical steps for resolution:
- Hair-heavy bathroom standpipe — step actions taken
- Laundry standpipe clogged with lint and soap — step actions taken
- Recurring backups after multiple fixes — escalation steps
These examples show which tools and next steps are effective and when to call a professional.
Scenario: Hair-heavy bathroom standpipe step actions taken
Begins with a homeowner discovering slow drainage and visible hair buildup at the standpipe opening.
They remove the cover, extract surface hair with gloves and pliers, flush with hot water, and use a flexible drain snake to pull deeper clogs.
A baking soda and vinegar rinse follows, then hot water.
They reassemble, test flow, and note prevention: hair catcher and monthly maintenance.
Scenario: Laundry standpipe clogged with lint and soap step actions taken
Facing a slow-draining laundry standpipe, a homeowner inspects and finds a compacted mix of lint and soap residue near the opening and lower in the trap.
They remove the washer hose, use a plumber’s snake to dislodge debris, flush hot water to dissolve soap scum, extract trapped lint with needle-nose pliers, then reassemble.
They run a test cycle and confirm normal flow.
Scenario: Recurring backups after multiple fixes escalation steps
Several homeowners report recurring laundry standpipe backups despite multiple DIY fixes, prompting a shift from basic cleaning to systematic escalation.
They document progressive steps: inspect trap and vent, camera-scan the line, clear deeper blockages with an auger, replace deteriorated trap or standpipe sections, and install lint traps or washer discharge filters.
If problems persist, hire a licensed plumber for hydro-jetting and code-compliant repairs.
Final checklist before finishing the job
The technician verifies full drain flow and inspects fittings for leaks to guarantee the problem is resolved.
Tools and work area are cleaned and stored according to safety practices.
A decision is made about scheduling a professional follow-up if flow is incomplete or leaks persist.
Confirming full drain flow and testing for leaks
Before declaring the job complete, a systematic final check verifies that the standpipe drains at full capacity and remains watertight under normal and test conditions.
Run multiple fill-and-drain cycles, observe flow speed, listen for gurgles, and inspect visible joints for moisture.
Apply a brief pressure or bucket test, monitor for slow drains or leaks, and document any abnormalities for prompt repair.
Cleaning and storing tools safely
After confirming full flow and watertight joints, attention moves to cleaning and storing tools to prevent damage and contamination.
Gloves, augers, snakes and wrenches are rinsed, disinfected, and dried. Inspect for wear or rust; replace compromised parts.
Coil cables neatly, secure blades, and store chemicals upright in labeled containers away from children and pets.
Record any needed repairs or inventory.
When to schedule professional follow-up
When should a professional be called back to inspect a repaired standpipe?
A follow-up visit is advised if slow drainage, recurring clogs, bad odors, visible leaks, water backing up into appliances, or fluctuating water pressure persist after DIY fixes.
Also schedule inspection if drains required repeated plunging, chemical use, or if the home’s plumbing is older.
Keep a record of repairs and symptoms.
Conclusion
A standpipe clog can be quick to clear with simple tools, stubborn enough to demand effort, and persistent enough to require a professional. Homeowners can start with safety, try immediate fixes, move to mechanical methods, and opt for safe chemicals or enzymes when needed. They can track cost, time, and difficulty, learn from real scenarios, and confirm results with a final checklist. With patience, care, and the right method, flow is restored and problems stay solved.