
How to Convert a Double Sink to a Single Sink: Step-by-Step Guide for DIYers
To convert a double sink to a single sink, you’ll need to remove one basin, adjust the countertop, and reroute plumbing. This DIY project involves shutting off the water, disconnecting fixtures, modifying the countertop, relocating the drain and P-trap, and installing a new sink and faucet. While minor tasks are manageable for experienced DIYers, complex plumbing reroutes may require a licensed professional. Continue reading for detailed steps, necessary tools, costs, and common pitfalls to avoid.
What it Involves to Convert a Double Sink into a Single Sink
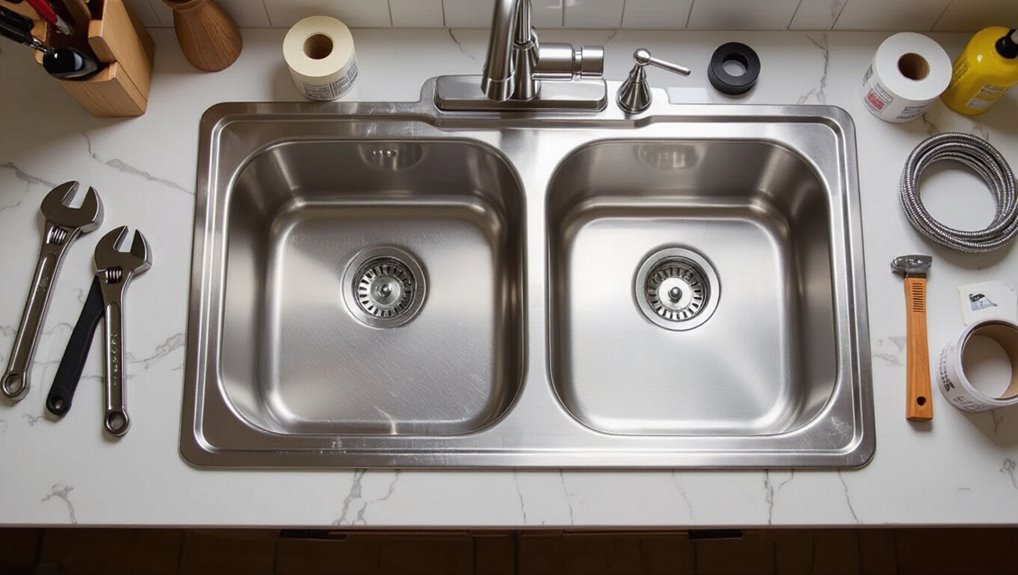
The conversion typically involves removing one basin, filling or replacing the countertop, reconfiguring plumbing and drain lines, and matching fixtures for a finished look.
Homeowners often choose the remodel to create more counter space, simplify cleaning, or update style and functionality.
Simple swaps and countertop patching can be DIY for those with plumbing experience, but complex plumbing reroutes, vanity alterations, or structural countertop work usually require a professional.
Overview of the conversion process
Begin by removing fixtures and prepping the workspace: the overview summarizes steps for how to change double sink to single, including disconnecting plumbing, removing the secondary basin, modifying the countertop and cabinet, relocating or capping drains and supply lines, selecting a new sink and faucet, securing and sealing the installation, and testing for leaks.
Tasks may require cutting, patching, and basic plumbing adjustments.
Typical reasons homeowners choose this remodel
After outlining the steps for removing a secondary basin and preparing plumbing and cabinetry, homeowners often opt to convert a double sink into a single sink for practical and aesthetic reasons.
Common motivations include reclaiming counter space, accommodating a larger basin for bulky items, simplifying cleaning, modernizing appearance, improving storage under the cabinet, and aligning sink size with household needs or updated bathroom design.
When to hire a pro vs. DIY feasibility
Deciding whether to hire a professional hinges on the project’s scope, the homeowner’s comfort with plumbing and cabinetry work, and local code requirements.
DIY suits minor sink removal, simple countertop patching, and basic rerouting of drain and supply lines.
Hire a pro for structural countertop alterations, complex plumbing relocations, gas appliance proximity issues, permit requirements, or uncertain waterproofing to guarantee code compliance and lasting results.
Quick Answer: Can You Convert a Double Sink to a Single Sink?
Converting a double sink to a single sink is generally feasible and can result in a single, deeper basin or a larger single bowl that improves countertop continuity.
Typical projects take a few hours to a full day for a DIYer and a few hours for a professional, depending on countertop material and plumbing complexity.
Costs vary widely: a DIY conversion can range from minimal supply expenses to a few hundred dollars, while hiring a contractor often totals several hundred to over a thousand dollars when countertop modification and plumbing work are required.
Typical outcomes and timeline
Removing one basin from a double sink and installing a single unit typically takes a skilled plumber or experienced DIYer between half a day and two days, depending on cabinet modifications and plumbing rerouting.
Expected outcomes include a more spacious basin, simplified plumbing, and often a need to patch countertop or cabinet openings.
Final steps involve testing drains, sealing edges, and ensuring proper water flow.
Cost range summary for DIY vs. professional
Although complexity and materials influence the final bill, a typical DIY conversion ranges from about $150 to $800 for a new single sink, basic plumbing parts, and countertop patching.
Hiring a professional usually raises the total to $500–$2,500 depending on labor rates, cabinet modifications, and any required rerouting of drains or supply lines.
Costs vary with sink quality, countertop repair extent, permits, and unforeseen issues.
Essential Preparations Before You Start
Before beginning the conversion, a clear checklist of tools and materials should be assembled and safety steps taken, including shutting off water and electricity as needed.
Accurate measurements of the countertop and cabinet space must be recorded to guarantee the new single sink will fit and to plan any cutbacks.
Finally, the existing plumbing layout and drain locations should be inspected to confirm compatibility or identify required rerouting.
Tools and materials checklist
A concise list of tools and materials assures the conversion proceeds efficiently and safely.
The writer outlines required items for removing the secondary basin, modifying plumbing, sealing, and finishing. Quality supplies reduce rework and assure a tidy result.
- Adjustable wrench, basin wrench
- Pipe cutter and plumber’s tape
- Replacement sink or cover plate
- Silicone sealant, caulk gun
- Sheet metal screws, mounting hardware
Safety precautions and plumbing shutoff steps
Shut off the water supply and disconnect power to any nearby garbage disposals or instant hot units before removing fixtures to prevent leaks, shocks, or unexpected appliance activation.
Next, drain remaining water by opening faucets and place buckets under traps.
Wear gloves and eye protection.
Label and cap supply lines.
Keep a flashlight and phone handy.
Verify zero water pressure before cutting or disassembling.
Measuring the countertop and cabinet space
With water and power secured, attention turns to measuring the countertop and cabinet space to guarantee the single sink fits and functions properly.
Measure countertop cutout length, width, and thickness; note backsplash and edge profiles.
Inside the cabinet, record available width, depth, and height, clearance for trap and P-trap, and obstructing shelves or braces.
Document measurements for template selection and modifications.
Checking plumbing layout and drain locations
Begin by mapping the existing plumbing: locate the drain tailpiece, P-trap, and supply shutoffs relative to the proposed single-basin centerline, and note any offset drains or tied-in fixtures that will affect repositioning.
Verify trap arm slope, pipe sizes, and vent locations. Determine whether rerouting, extending supply lines, or installing an offset adapter is required.
Plan for access panels and shutoff isolation.
Step-by-Step Conversion Guide
The conversion proceeds through a clear sequence of tasks beginning with removal of the old sinks and fixtures.
Next comes assessment and modification of the countertop opening, followed by any necessary patching, cutting, or replacement and reconfiguration of the cabinet interior and supports for a single basin.
Finally, the drain and P-trap are rerouted or extended to align with the new sink location.
Step 1 Remove the old sinks and fixtures
Disconnect water supply and power, then clear surrounding area to provide unobstructed access to both basins.
The installer loosens supply lines and removes P-traps, then detaches faucets and drain assemblies.
Sink clips or caulk are cut, and each basin is lifted out.
Debris and old sealant are cleared from the countertop and cabinet, and removed fixtures are set aside for disposal or reuse.
Step 2 Assess and modify countertop opening
Measure the existing cutout and surrounding countertop carefully to determine how much material must be removed or filled to accommodate a single larger sink.
Verify rim dimensions, faucet hole placement, and support beneath. Note any overhangs, backsplash alignment, and cabinet clearances.
Document measurements and photograph conditions for reference.
Identify constraints that affect sink size selection and mounting type before altering countertop.
Step 3 Reconfigure the countertop if needed (patching, cutting, or replacing)
Begin by marking the countertop changes based on the documented measurements and sink choice. Then proceed with the appropriate repair or cutting method.
Remove damaged material, score and cut following marked lines, and support adjacent surfaces.
Patch gaps with matching substrate or filler, sand smooth, and seal seams.
For irreparable tops, measure and install a replacement section sized to the new single-sink configuration.
Step 4 Reconfigure cabinet interior and support for single sink
Prepare the cabinet interior to accept the single basin by removing the old divider, trim, and any obstructing fixtures.
Then inspect the structural frame, bottom panel, and surrounding studs for rot or damage.
Reinforce weakened areas with new cleats or plywood, level and secure a support ledger for the sink weight.
Reinstall or relocate shelving, and seal seams to prevent future moisture intrusion.
Step 5 Reroute or extend drain and P-trap to align with new sink
With the cabinet interior ready, the plumbing must be adjusted so the drain and P-trap align with the single-basin outlet. This typically requires cutting and repositioning the waste arm, extending or shortening pipe segments, and installing new fittings to maintain proper slope and venting.
The installer measures the offset, dry-fits PVC or metal components, secures joints with solvent or compression fittings, and tests for leaks and correct trap seal.
Step 6 Adjust supply lines and install shutoff valves
After the drain and P-trap are repositioned and sealed, attention turns to the water supply: the hot and cold lines must be rerouted or shortened to meet the single faucet location and new shutoff valves installed to allow future maintenance without shutting off the house.
A plumber’s tape and proper fittings guarantee leak-free connections; test each valve, check for drips, and secure lines to prevent strain.
Step 7 Install the new single sink and faucet
Begin by positioning the new sink into the countertop cutout to confirm fit and alignment.
Then mark and apply the manufacturer’s gasket or sealant as specified.
Lower the sink, secure mounting clips or brackets, and tighten evenly.
Install the faucet onto the sink following manufacturer instructions, thread supply lines to shutoffs, and attach pop-up drain assembly, ensuring proper component orientation and torque.
Step 8 Seal, test for leaks, and finish cosmetic touches
Carefully apply a continuous bead of silicone sealant around the sink rim where it meets the countertop, smoothing it to a uniform, waterproof fillet.
Then reconnect and run water through the faucet and drains while inspecting all joints, supply connections, trap, and disposal for leaks, tightening fittings as needed and wiping away excess sealant before it skins over to guarantee a clean, finished edge.
After leak testing, trim cured sealant, polish surfaces, reinstall sink accessories, and verify operation.
Dealing with Common Plumbing and Structural Challenges
Converting to a single sink often requires practical solutions for relocating drains, modifying obstructed cabinet framing, and adapting to different countertop materials.
The discussion covers options for moving or offsetting the drain, cutting and reinforcing laminate, granite, or solid-surface tops, and addressing electrical, garbage disposal, and dishwasher hookups.
Practical trade-offs and code considerations guide which techniques are safest and most cost-effective.
Moving the drain location: options and techniques
Moving a sink drain requires evaluating both the existing plumbing layout and the structural constraints beneath the countertop. Decisions hinge on whether the new location aligns with the home’s drain-waste-vent system, joist placement, and cabinet layout.
Options include rerouting waste to the existing trap via new PVC runs, installing a new trap arm to a nearby stack, or using an approved flexible connector when minor offsets are required.
Handling offset or obstructed cabinet framing
When rerouting drain lines or adding a new trap arm, installers frequently encounter cabinet framing that does not align with the planned pipe path—blocked by studs, cross-bracing, or narrow chase spaces.
Assess structural members, locate alternative routes, and mark safe drill points.
Use reinforced drill plates, reprovision studs if permitted, or employ offset fittings and short, swept elbows to navigate obstructions while maintaining proper slope and code compliance.
Working with laminate, granite, or solid-surface countertops
Work carefully around laminate, granite, and solid-surface countertops to avoid damaging finishes or compromising structural integrity while modifying plumbing.
Inspect underside support, locate sink cutouts, and plan fastener and brace placement.
Use appropriate blades and dampening to prevent cracks or delamination.
Seal edges after adjustments to maintain moisture resistance.
Protect visible surfaces with tape and soft pads during work.
Electrical, garbage disposal, and dishwasher connections
After protecting countertop finishes and confirming sink cutouts, attention should shift to electrical, garbage disposal, and dishwasher connections that often share the same under-sink space.
Inspect wiring and switch locations, shut power at the breaker, and label circuits.
Disconnect and cap disposal wiring if removing or relocating it.
Re-route dishwasher drain and air gap as needed, ensuring proper venting and code-compliant electrical protection.
Materials, Fixtures, and Design Choices
Selection of sink style and size should be guided by the existing countertop cutout and the planned use of the space.
Faucet choices, hole configuration, and finish must be coordinated to guarantee proper fit and visual harmony with surrounding fixtures.
Cabinet alterations can optimize storage and accommodate plumbing changes while maintaining a cohesive design.
Choosing the right sink style and size for the existing countertop
Choosing the right sink style and size for an existing countertop requires measuring the current cutout, evaluating the countertop material, and matching the sink profile to both functional needs and aesthetic lines.
Consider undermount versus drop-in based on countertop edge and support, verify clearance for cabinets and appliances, choose bowl depth for usability, and select dimensions that minimize cutting while preserving workspace and structural integrity.
Faucet types and hole configuration considerations
When converting to a single sink, faucet type and hole configuration must be matched to both the new basin and the existing countertop cutout; the choice influences plumbing layout, mounting stability, and overall style.
Consider centerset, widespread, single-hole, and wall-mount options; verify hole count, spacing, and deck thickness.
Confirm valve reach, supply line alignment, and whether escutcheons or adapters are needed for retrofit installations.
Matching finishes and integrating with bathroom or kitchen design
A cohesive finish scheme ties the single sink to the surrounding room by aligning metal tones, surface textures, and material palettes so fixtures feel intentional rather than afterthoughts.
Select faucets, drains, and hardware that echo cabinet pulls and lighting. Coordinate countertop and backsplash materials for continuity.
Balance bold finishes with neutral surfaces to avoid visual clutter. Test samples under room lighting before finalizing choices.
Cabinet modification options and storage optimization
Evaluate the existing cabinet layout to determine which walls, supports, and plumbing runs must remain intact and which can be altered to accommodate a single sink plus optimized storage.
Options include removing divider panels, adding pull-out trays, installing false fronts for concealed drawers, reinforcing toe-kicks for heavy shelving, and relocating plumbing for improved drawer clearance.
- Remove divider panels
- Pull-out trays
- False-front drawers
- Reinforced shelving
- Relocate plumbing
Cost Breakdown and Time Estimates
A concise cost overview distinguishes DIY material estimates across basic, mid-range, and high-end scenarios, noting how fixture selection and cabinet alterations affect totals.
Typical contractor pricing is summarized with common markups and the factors—accessibility, plumbing changes, and countertop work—that drive increases.
Estimated timelines compare a homeowner’s multi-day project to a professional’s one- to two-day completion, with contingencies for unforeseen complications.
DIY material cost estimate by scenario
When converting a double sink to a single sink, material costs vary widely based on the chosen approach—simple closure of one basin, full countertop replacement, or cabinet reconfiguration—so providing scenario-specific estimates helps set realistic budgets. Typical DIY ranges: basic kit $30–$100, countertop patch $150–$600, full replacement $300–$1,200; cabinets $50–$400.
| Scenario | Typical Materials | Estimated Cost |
|---|---|---|
| Basin closure | Plug, trim, sealant | $30–$100 |
| Counter patch | Resin, sanding, finish | $150–$600 |
| Full replace | New countertop, seal | $300–$1,200 |
Typical contractor pricing and when costs increase
Contractor quotes for converting a double sink to a single typically range from $350 for a simple basin closure to $2,500 or more for a full countertop and cabinet rework.
Prices increase when plumbing rerouting, custom cabinetry, stone countertop fabrication, permit fees, or structural modifications are required.
Hourly rates, regional labor costs, and unforeseen issues like water damage also elevate final invoices.
Time required for DIY conversion vs. professional job
Although complexity varies with scope and site conditions, converting a double sink to a single generally takes a DIYer 4–16 hours spread over a weekend or several evenings.
In contrast, a licensed professional typically completes the job in 2–8 hours on-site.
Time differences stem from skill, tool access, permit navigation, and unforeseen plumbing or countertop modifications.
Professionals work faster but cost more, while DIY saves money yet demands patience.
Permits, Codes, and When to Consult a Pro
Local plumbing codes determine which sink modifications require permits and inspections and can vary by municipality.
Major changes—altering drain lines, moving supply or venting, or removing walls—usually require a licensed plumber or carpenter.
Homeowners should keep receipts, permit paperwork, and before-and-after photos to document the work for inspectors.
Local code requirements for plumbing modifications
When modifying plumbing to convert a double sink to a single basin, homeowners should first verify permit and inspection requirements with their municipality because plumbing changes can affect water supply, drainage, and venting that are regulated for safety and sanitation.
Local codes dictate pipe materials, trap and vent configuration, fixture clearances, and backflow prevention.
Documentation and approved inspections guarantee compliance and protect resale value.
Situations that typically require a licensed plumber or carpenter
Verifying permit and inspection requirements is the practical first step before altering plumbing.
However, certain situations typically go beyond DIY scope and warrant a licensed professional.
Structural changes, moving drain lines or vents, replacing main waste stacks, complex rerouting behind walls, gas line proximity, significant electrical work, or older homes with unknown plumbing conditions should prompt hiring a licensed plumber or carpenter to guarantee code compliance and safety.
How to document work for inspections
Begin by assembling a clear record of the planned work: permit applications, scope-of-work descriptions, product specifications (faucets, sinks, trap assemblies), and a simple diagram showing existing and proposed plumbing locations.
Log receipts, photos of demo and rough-in stages, and serial/model numbers. Reference local code sections and inspector contact.
Note contractor involvement and final test results to expedite approval or identify when a licensed pro is required.
Mistakes to Avoid and Troubleshooting
Common DIY errors—such as improper sealant application, misaligned drain fittings, and undersized or poorly supported piping—often cause leaks or a poor fit when converting to a single sink.
Minor leaks and alignment issues can usually be corrected by tightening connections, replacing worn gaskets, or shimming and repositioning the sink and mounting hardware.
If temporary fixes recur or conceal structural or plumbing problems, a professional repair is warranted to prevent long‑term damage.
Common DIY errors that lead to leaks or poor fit
Mistakes during a double-to-single sink conversion often stem from measurement errors, improper sealant application, and mismatched plumbing connections, each of which can cause leaks or poor fit. Ensuring the cutout aligns with the new basin, using the correct RTV or plumber’s putty without over- or under-applying it, and matching drain and tailpiece sizes and thread types prevents most failures.
Other common errors include uneven countertop support, overtightened mounting clips that warp the rim, reused damaged gaskets, and ignoring pipe slope and venting—each increases leak risk or misalignment.
How to fix minor leaks and alignment issues
Address minor leaks and alignment issues promptly to prevent water damage and worsening fit; most problems can be resolved with targeted adjustments rather than full rework.
Inspect seals, tighten or replace loose mounting bolts, reseal gaps with proper caulk, and realign trap and supply lines for smooth drainage.
Test under pressure, watch for slow drips, and repeat small adjustments until dry and level.
When a temporary fix becomes a permanent problem
Recognize that quick patches meant to hold until a proper repair can become long-term problems when left unchecked. Temporary seals, loose fittings, and makeshift supports often degrade or shift, causing leaks, clogs, or structural stress.
DIYers should inspect joints, replace tape with proper seals, secure mounts, and correct misaligned drains. Ignoring short-term fixes risks water damage, mold, and costly future repairs.
Final Inspection, Maintenance, and Care
A final inspection should include running water through the new sink, checking under the cabinet for leaks, and verifying drain and supply connections are secure.
Routine maintenance recommendations include periodic seal checks, clearing trap and aerator buildup, and re-tightening fittings as needed.
Owners should watch for slow drainage, recurring puddles, or unusual odors as early signs of future problems.
How to test and inspect your work for plumbing integrity
Begin by conducting a systematic final inspection to confirm all connections, seals, and fixtures installed during the conversion are watertight and functioning as planned.
Check for visible leaks, tighten fittings, run hot and cold water separately, and operate the drain to observe flow and trap integrity.
Use a dry paper towel for hidden joints, monitor for slow drips, and retest after thirty minutes.
Routine maintenance after conversion
Perform a thorough final inspection and establish a simple maintenance routine to preserve functionality and prevent leaks after converting a double sink to a single basin.
Check seals, drain connections, and trap alignment monthly.
Clean the strainer and run hot water with mild detergent to clear residues.
Tighten fittings as needed, monitor water flow, and promptly address any minor drips to avoid escalation.
Signs of future problems to watch for
Watch for early indicators of trouble after conversion, since catching issues promptly prevents costly repairs.
Observe slow drainage, persistent odors, new leaks beneath the cabinet, or water stains on floors and walls.
Listen for gurgling or air locks and check for loose fittings, shifting sealant, or worsening corrosion.
Document changes and address them immediately to avoid escalation.
Example Project Plans and Timeframes
Three example project plans outline typical steps and expected durations for converting a double sink to a single sink.
The first covers a simple swap where the countertop is compatible, with a concise step-by-step timeline.
The second and third present progressively longer timelines for countertop modification and for an extensive remodel involving cabinet and plumbing relocation, respectively.
Simple swap with compatible countertop: step-by-step timeline
Start by outlining a clear timeline that breaks the swap into discrete tasks—disconnecting plumbing, removing the old sink, preparing the countertop opening, installing the new single-basin unit, reconnecting plumbing, and final testing—so homeowners can see the sequence and estimated duration at a glance.
Allocate:
- 30–60 minutes for plumbing,
- 30–45 for removal,
- 15–30 for prep,
- 45–90 for installation,
- 30 for reconnection,
- 15–30 for testing.
Moderate job with countertop modification: step-by-step timeline
Tackle the moderate conversion by breaking the job into clear phases—demolition of the existing sink and partial countertop removal, template and cut adjustments to the countertop, installation of the new single-basin unit, and plumbing reconnection and sealing—so homeowners and contractors can map tasks to a realistic timeline and required skill level.
Typical timeline:
1 day demo,
1 day countertop work,
1 day install,
½ day plumbing/testing.
Extensive remodel with cabinet and plumbing relocation: step-by-step timeline
Undertaking an extensive remodel that converts a double sink to a single basin with cabinet and plumbing relocation requires phased planning to coordinate demolition, structural modifications, cabinet rebuilding or replacement, rerouting water and drain lines, and final finishing.
A typical timeline:
- week 1: demolition and inspections
- week 2: structural repairs and framing
- week 3: rough plumbing and electrical
- week 4: cabinet install
- week 5: countertop fitting
- week 6: finish plumbing, trim, and cleanup.
Additional Resources and Tools
The article points readers to reputable online guides, step‑by‑step videos, and manufacturer installation instructions to clarify specific techniques and parts.
It also recommends downloading or printing a concise pre‑project checklist covering tools, measurements, permits, and safety items.
These resources help guarantee the conversion proceeds efficiently and with fewer surprises.
Recommended online guides, videos, and manufacturer instructions
When preparing to convert a double sink to a single basin, consulting reputable online guides, step‑by‑step videos, and manufacturer installation instructions provides essential, task‑specific guidance.
These resources clarify required tools, parts compatibility, and common pitfalls that could otherwise delay the project.
- Manufacturer installation manuals
- Step‑by‑step video tutorials
- Plumbing forum threads with photos
- Parts supplier compatibility charts
- Official countertop and sink templates
Checklist to print before you start
After reviewing manuals, videos, and compatibility charts, a printable pre‑start checklist helps consolidate tools, parts, and measurements so nothing is missed at the worksite.
It lists required tools, replacement components, plumbing parts, safety gear, and measurements. Use it to verify clearance, drain alignment, faucet compatibility, and disposal fit before disassembly to prevent delays and returns.
- Tape measure
- Adjustable wrench
- Replacement flange and gasket
- Plumber’s putty and sealant
- Safety goggles
Conclusion
A neatly centered single basin amid the ghost of its twin captures change: one smooth sink where two once jostled, and the removed drain’s absence like a calm shore after a tide. The DIYer sees both stripped pipes and future flow—old complexity yielding to new simplicity. With careful prep, measured cuts, and patient sealing, a compact, functional centerpiece replaces awkward symmetry, marrying practical plumbing lessons to the quiet elegance of pared-down design.
