
How to Add a Bathroom on a Slab: Step-by-Step Guide for Renovators
To successfully add a bathroom on a concrete slab, start by assessing the site and ensuring you have the necessary permits. Choose between a full or half layout based on your space. Budget for essential elements like plumbing, electrical, ventilation, and waterproofing. For plumbing, you may need to core the slab or create channels, and consider a macerator or ejector pump if gravity drainage is not feasible. Ensure electrical work includes GFCI outlets and proper vent fan ducting. Install a subfloor or waterproof membrane, set your fixtures, test all systems, and finish with tile and trim. This guide will provide detailed stepwise procedures, cost estimates, and helpful tips for your renovation project.
Overview of Adding a Bathroom on a Concrete Slab
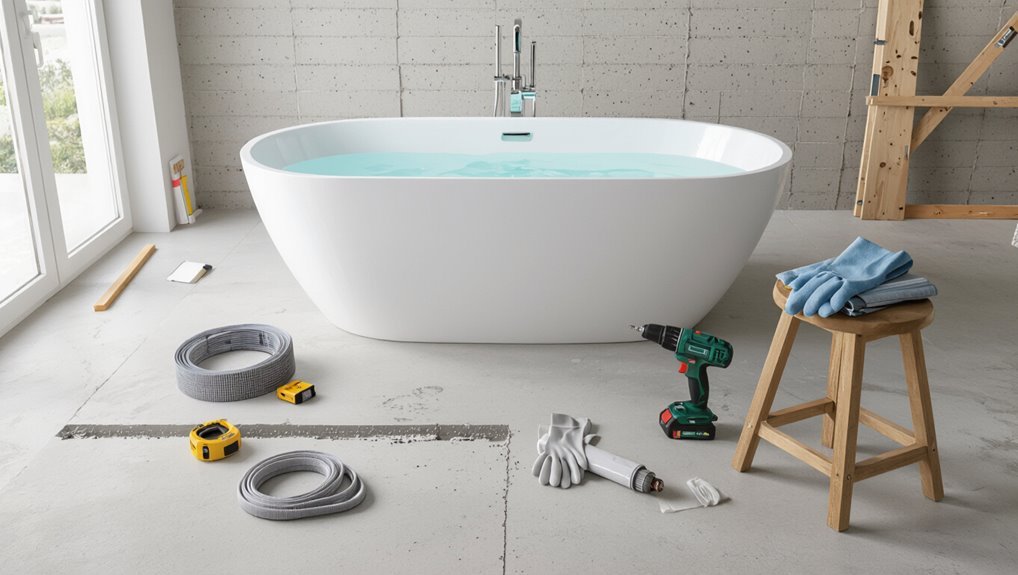
“On a slab” indicates the bathroom will be installed directly on a concrete foundation rather than over a basement or crawlspace, which affects plumbing, drainage, and installation choices.
Homeowners commonly add slab bathrooms to create a main-floor bath, improve resale value, or accommodate aging in place.
The project typically involves site selection, plumbing and electrical rough-in (often using slab-appropriate techniques), fixture installation, and finishes, with timelines ranging from a few days for simple conversions to several weeks for full remodels.
What “on a slab” means and how it changes the project
A bathroom built on a concrete slab means the fixtures, drains, and plumbing must be integrated directly into or routed across the slab rather than through a raised basement or crawlspace.
That condition alters decisions about waste lines, water supply routing, venting, and floor height.
Guidance on how to add a bathroom on a slab emphasizes concrete cutting, slab-mounted drains, possible upfeed water systems, and clearances.
Typical reasons homeowners add a bathroom on a slab
Many homeowners choose to add a bathroom on a concrete slab to improve functionality, increase property value, or accommodate changing household needs.
Typical motivations include creating a guest or accessible bath, converting underused space into practical living area, supporting multigenerational living, and improving resale appeal.
Budgetary considerations and local zoning or plumbing constraints often shape where and how the addition proceeds.
Quick summary of steps and timeline
Begin by outlining scope, budget, permits, and site constraints to create a clear plan and schedule.
Next, finalize design and plumbing layout, obtain permits, and arrange inspections.
Demolition, slab preparation, and plumbing rough-in follow.
Install subflooring, fixtures, and finishes, then complete mechanical and electrical work.
Allow 4–8 weeks typical timeline, varying with complexity, inspections, and contractor availability.
Initial Planning and Feasibility
Before any work begins, the homeowner should evaluate space and layout options—deciding between a full bath, half bath, or wet room—while confirming that local building codes, permits, and inspection requirements can be met.
Structural constraints and load considerations must be reviewed to guarantee the slab and framing can support fixtures and any alterations.
A realistic budget with itemized cost ranges and a contingency reserve completes the feasibility assessment.
Assessing space and layout options (full bath vs. half bath vs. wet room)
Where will the plumbing and circulation fit within the available footprint?
The renovator evaluates dimensions, clearances, and access to stack lines, balancing a full bath (tub/shower, toilet, vanity), a half bath (toilet, sink) or a wet room (open shower, waterproofing).
Prioritize user needs, drainage slope feasibility, fixture spacing, storage, and ventilation while minimizing invasive slab work and plumbing runs.
Checking local building codes, permits, and inspections
After selecting a layout and estimating plumbing needs, the renovator must verify local building codes and permit requirements to confirm the plan is viable.
Research zoning, plumbing, electrical, and ventilation standards; obtain required permits before work starts.
Schedule mandatory inspections at rough-in and final stages, factor permit fees and turnaround times into the timeline, and document approvals to avoid fines or rework.
Evaluating structural constraints and load considerations
Any proposed bathroom addition on a concrete slab requires an early assessment of structural constraints and load capacity to guarantee the slab, foundations, and surrounding framing can support new loads and penetrations.
A structural engineer should evaluate slab thickness, reinforcement, soil bearing, and load paths; identify required footings or beams for heavy fixtures; and specify allowable core drilling and vibration limits to prevent cracking or settlement.
Budgeting: realistic cost ranges and contingency planning
A realistic budget for adding a bathroom on a slab begins with clear line-item estimates for demolition, plumbing and electrical rerouting, slab cutting and patching, framing, fixtures, finishes, and permits.
Typical ranges vary by region and scope; include a 15–25% contingency, separate allowances for unforeseen site conditions, and a clear payment schedule.
Plumbing Considerations Specific to Slab Foundations
Plumbing for a bathroom on a slab requires careful assessment of existing waste line elevations and soil stack locations to determine feasible fixture placement and fall.
The author compares options for supplying water—tying into current lines versus running new supply—and describes methods for connecting new drains through the slab, including when a sewage ejector or macerating pump is necessary.
Attention is also given to frost protection and insulation strategies for any exposed piping.
Understanding waste line elevations and soil stack locations
Waste line elevations and soil stack locations determine whether fixtures can drain by gravity and where penetrations through the slab must be made.
Accurate elevation measurements, slope calculations and mapping of the existing soil stack guide fixture placement. If gravity drainage isn’t achievable, alternatives or reconfigurations are required.
Coordination with structural plans avoids cutting reinforcement or undermining the slab during waste openings.
Options for supplying water: tying to existing lines vs. new runs
Once waste routing and soil stack locations are confirmed, attention turns to how water will be brought to the new fixtures—either by tying into existing supply lines under the slab or by running new lines above or through the slab.
Tying minimizes material but requires slab access and leak risk mitigation; new runs offer easier isolation, slope and insulation control, and simpler future repairs, though at higher cost and potential floor build-up.
Solutions for slab-to-new-bathroom drain connections
Connect the new bathroom’s drains to the slab requires careful planning to maintain slope, prevent leaks, and meet code constraints.
Options include core-drilling existing slab for new PVC or cast-iron lines, routing via shallow trenching with proper bedding, or using above-slab floor-mounted assemblies with flexible connectors to minimize slab work.
All approaches demand verified fall, secure seals, and local code compliance.
Installing a sewage ejector or macerating pump: when and how
Consider a sewage ejector or macerating pump when gravity cannot carry wastewater from the new bathroom to the house sewer due to slab elevation, long horizontal runs above allowable slope, or tie-in points located uphill.
These devices lift or grind effluent to a pressurized discharge that can be routed over or through the slab.
Select capacity for fixture units, install a dedicated power circuit, provide an accessible sump or unit location, and include check valves and alarm systems per code.
Frost protection and insulation for exposed piping (if applicable)
After addressing lift or maceration needs to route wastewater over or through a slab, attention must turn to protecting any exposed supply or discharge piping from freezing temperatures.
Install closed‑cell foam insulation, heat tape with thermostat control, and weatherproof vapor barriers.
Bury lines below frost depth where possible, slope for drainage, and guarantee access panels for maintenance.
Verify local code and test systems before finishing.
Electrical and Ventilation Requirements
Electrical and ventilation planning must address GFCI protection and dedicated circuits for bathroom loads to meet code and guarantee safety.
Lighting layout and fixture placement should provide task and ambient illumination while coordination with fan location optimizes air movement.
Ventilation fan selection, duct routing and termination, and choices for heating—radiant floor, baseboard, or towel warmer—need to be specified early to integrate electrical feeds and ductwork with the slab constraints.
GFCI and circuit planning for bathroom loads
Plan circuits carefully to protect users and meet code: bathroom receptacles must be GFCI-protected and typically require a dedicated 20-amp circuit, while lighting, exhaust fans, and hardwired heaters may share a separate general lighting circuit unless local code or load calculations dictate otherwise.
Confirm load calculations, zone separation, and neutral/grounding integrity.
Label panels, use protected switch locations, and follow local inspection requirements.
Lighting layout and fixture placement
Several key considerations determine a bathroom’s lighting layout and fixture placement, balancing safety, functionality, and ventilation requirements.
Lighting zones should separate wet areas from dry, use damp- or wet-rated fixtures near showers and tubs, and guarantee glare-free mirror illumination.
Locate switches and outlets per code, provide layered ambient, task, and accent lighting, and coordinate fixtures with ventilation equipment locations to avoid conflicts.
Ventilation fan selection, ducting, and vent termination
After locating lighting and switches to prevent conflicts with wet zones, attention turns to ventilation: selecting an appropriately sized fan, planning duct routes, and specifying where the exhaust will terminate.
Choose a fan rated by CFM for room size, prefer quiet, energy-efficient models with humidity sensors.
Route short, straight ducts to an exterior wall or roof vent, seal joints, include a backdraft damper and proper termination cap.
Heating considerations: radiant floor, baseboard, or towel warmer
When choosing between radiant floor heating, electric baseboard units, or a towel warmer, prioritize heat output, control method, and the electrical and ventilation implications each option imposes:
Radiant requires under-slab wiring or hydronic tubing routed in thinset, higher installation and thermostat zoning.
Baseboard heaters need dedicated circuits and clearance.
Towel warmers draw less power but require GFCI protection and proper ventilation to prevent moisture buildup and corrosion.
Subfloor and Floor Preparation on Concrete
Before installing fixtures, the condition of the concrete slab must be assessed for moisture and fitted with an appropriate vapor barrier where required.
Any unevenness should be corrected with leveling techniques or self-leveling compounds, and a decision made whether plumbing fixtures will mount directly to the slab or on a raised platform.
Finally, the choice of flooring—tile, vinyl, engineered wood, or moisture-tolerant options—should align with slab conditions and moisture management strategies.
Moisture testing and vapor barriers
Proper moisture testing is essential to guarantee a durable bathroom floor on a concrete slab: it identifies vapor emission levels that can damage adhesives, flooring materials, and finishes.
Use calcium chloride or relative humidity probes per standards to quantify moisture. If results exceed limits, install an appropriate vapor barrier or vapor mitigation system compatible with chosen flooring and adhesives, following manufacturer and code requirements.
Leveling and self-leveling compounds for concrete slabs
After moisture levels are verified and any required vapor mitigation is in place, attention shifts to creating a flat, stable surface so floor coverings bond correctly and fixtures sit plumb.
Technicians inspect for cracks, spalls and depressions, then clean and prime. Self-leveling compounds are mixed per manufacturer instructions, poured to specified thickness, and allowed to cure before tile or other finishes are installed.
Deciding between direct-floor fixtures and platform builds
Decide whether fixtures will mount directly to the slab or on a raised platform by weighing structural constraints, plumbing layout, and finished-floor height requirements.
Direct-floor installations minimize height and materials but demand precise slab flatness, adequate anchoring, and accessible waste/drain locations.
Platforms allow routing, insulation, and minor leveling yet add height, framing, and load considerations.
Choose based on plumbing access, code, and user needs.
Flooring options compatible with slab installations
When installing flooring over a concrete slab, selection should balance moisture control, thermal performance, and the finished-level requirements of the room.
Suitable choices include tile with cement backer and waterproof membrane, engineered hardwood over a vapor barrier and underlayment, luxury vinyl plank with adhesive or floating installation, and sealed polished concrete.
Consider insulation, adhesive compatibility, and slope for drains before finalizing materials.
Step-by-Step Construction Sequence
The construction sequence begins with site preparation and selective demolition to expose the slab and establish work boundaries.
Next, drain and plumbing locations are marked on the slab, followed by either coring holes or routing channels—each method’s procedure and trade-offs are compared.
Once openings are made, rough-in plumbing is installed and pressure-tested. Then rough electrical and ventilation work is completed before finishing.
Step 1 Site preparation and demo
Clear the work area and establish safe access before any demolition begins.
Remove fixtures, cabinetry, flooring, and finishes to expose the slab and framing.
Disconnect utilities at the meter or main and cap lines.
Protect adjacent spaces with dust barriers and drop cloths.
Inspect slab for cracks or contaminants.
Salvage reusable materials and arrange debris removal per local disposal regulations.
Step 2 Marking drain and plumbing locations on slab
With the slab exposed and utilities isolated, the crew shifts focus to laying out drain and plumbing locations directly on the concrete.
They consult the plan, mark fixture centers, trap locations, and pipe runs with chalk and tape, note elevations and fall, and verify routing clearances.
Marks include cleanouts, vent penetrations, and anchor points, creating an accurate template for cutting or coring.
Step 3 Coring holes vs. routing channels: methods and pros/cons
Several core methods exist for creating penetrations in a concrete slab—coring holes and routing channels—each chosen for different scopes and constraints.
Coring uses diamond bits for round, full-depth openings—clean, fast, suited to stacks and vents.
Routing/grinding creates shallow channels for lateral runs, less invasive but slower and dustier.
Choose by pipe size, slab thickness, structural impact and equipment access.
Step 4 Rough-in plumbing installation and pressure testing
Begin the rough-in by laying out and securing the drain, waste, and vent piping according to the plan, ensuring all pipe slopes, fixture locations, and cleanout access match the approved layout.
Install water supply lines, shutoffs, and isolation valves; pressure-test both DWV and potable systems per code using air or water.
Repair leaks, adjust supports, document results, and obtain inspection approval before covering.
Step 5 Rough electrical and ventilation installation
Proceed to rough electrical and ventilation installation once plumbing and inspections are approved.
Install electrical boxes, run circuits for lighting, outlets, heater, and guarantee GFCI protection for wet areas.
Route wiring through studs, secure per code, and label circuits.
Mount exhaust fan ducting, terminate to roof or sidewall vent, and coordinate with inspector before closing walls to verify clearances and airflow capacity.
Step 6 Subfloor/floor preparation and moisture mitigation
With electrical and ventilation rough-ins inspected and approved, attention shifts to preparing the subfloor and implementing moisture-mitigation measures on the slab.
Technicians verify levelness, install sleepers or a decoupling membrane as needed, and apply a vapor barrier or liquid waterproofing system.
Floor changes and slope for drains are set, and substrates are primed for tile or resilient flooring installation.
Step 7 Wall framing, insulation, and backer board
Framing for the new walls is erected next, establishing the structural layout for fixtures, doorways, and plumbing chases.
Studs are spaced to accommodate drywall and backer board while headers and blocking are installed where cabinets, grab bars, or heavy fixtures will be mounted.
Insulation is installed for sound and thermal control, vapor barriers applied as required, and cement backer board fastened at wet zones, seams sealed and waterproofed.
Step 8 Fixture installation (toilet, tub/shower, vanity)
Once rough plumbing and wall finishes are confirmed plumb and level, fixture installation begins, sequencing components to protect finishes and guarantee proper clearances.
Install tub/shower assemblies, secure flanges to the slab, and set waterproofing connections.
Position and anchor the vanity, ensuring outlet and drain alignment.
Finally, mount the toilet on a slotted flange with wax or wax-free seal, torquing bolts evenly and checking for stability.
Step 9 Finish plumbing, electrical, and painting
After fixtures are set and secured, finish plumbing, electrical, and painting complete the bathroom’s functional and aesthetic systems.
Finalize water connections, test drains for leaks, and install shutoff valves.
Complete electrical wiring, connect fan, lights, and GFCI outlets, then verify circuits.
Patch and prime walls, apply moisture-resistant paint, and seal trim.
Clean surfaces and confirm all finishes are ready for use.
Step 10 Final inspections and commissioning
Initiate final inspections and commissioning by scheduling required municipal and, if applicable, third-party approvals.
Then walk through a systematic verification of every installed system. Inspect plumbing for leaks, flow, and venting; test electrical circuits, GFCIs, and lighting; confirm HVAC or ventilation operation; verify fixtures, seals, and tile integrity.
Document approvals, obtain sign-offs, and deliver maintenance guidance to the owner.
Common Problems and How to Avoid Them
Common problems when adding a bathroom on a slab include inadequate drain slope or elevation, slab cracking and water intrusion, improper venting or drain layout that violates code, and low water pressure or noisy drains.
Each issue has specific diagnostic steps and preventive measures to keep the new installation functional and compliant.
The following section outlines practical checks and remedies to avoid these common pitfalls.
Dealing with inadequate drain slope or elevation
Addressing inadequate drain slope or elevation is essential when adding a bathroom on a slab because improper pitch or too-low fixture outlets can lead to slow drainage, backups, and persistent odors.
Inspect existing slab elevations and pipe runs; calculate required fall (typically 1/4″ per foot).
Use upturned fittings, low-profile traps, or recessed carrier systems to achieve correct outlet height without excessive slab removal.
Preventing slab cracks and water intrusion
Fixing drain slope or raising fixture outlets can prevent backups, but cutting into a slab introduces new risks: slab cracks and water intrusion.
Careful planning minimizes harm: map reinforcement, use proper cutting tools, control vibrations, and maintain correct joint placement.
Restore concrete with compatible mix, seal penetrations with waterproof membranes and elastomeric sealants, and test for leaks before finishing to protect structure.
Avoiding code violations with improper venting or drains
Because plumbing codes tightly regulate venting and drain configurations to protect public health and system function, improper layouts on a slab can quickly create violations that lead to slow drains, sewer gas, or failed inspections.
Install vents per code, maintain trap seal integrity, size and slope drains correctly, and obtain permits with inspections.
Engage a licensed plumber to guarantee compliant routing and documentation.
Troubleshooting low water pressure and noisy drains
Troubleshooting low water pressure and noisy drains begins with diagnosing whether the issue stems from the supply lines, fixtures, or waste system: common causes include partially closed valves, mineral buildup in aerators and cartridges, undersized or long runs from the main, restricted flow from corroded pipes, and air or partial blockages in the drain line that create gurgling or rattling.
Recommended fixes: clean aerators, inspect valves, flush lines, snake drains, and consult a plumber.
Tools, Materials, and When to Hire Professionals
A concise inventory of the essential tools and materials for building a bathroom on a slab sets expectations for scope and cost.
Guidance follows on when to call a plumber, electrician, or concrete contractor for tasks that require licensed expertise.
Practical tips are provided for vetting contractors and obtaining accurate, comparable bids.
List of essential tools and materials for slab bathroom build
Several essential tools and materials are required to build a bathroom on a concrete slab, covering layout, plumbing, electrical, and finishing tasks.
Necessary items include concrete saw, core drill, PVC/PEX, trap primer, backer board, waterproofing, fixtures, and fasteners. Protective gear and sealants are also essential.
- Concrete cutting and drilling tools
- Plumbing pipes and fittings
- Waterproofing and backer materials
- Fixtures and installation supplies
When to hire a plumber, electrician, or concrete contractor
Determine which trades to hire early based on task complexity and local code requirements:
Plumbing work that penetrates the slab, ties into main sewers, or requires new gas lines and pressure testing should be handled by a licensed plumber;
Electrical installations that add new circuits, service upgrades, or require conduit through concrete demand a certified electrician;
and any slab cutting, coring, or structural modification—especially when reinforcing steel or load-bearing elements are involved—warrants a concrete contractor with experience in slab repair and patching.
Follow permit rules and schedule professionals before demolition to avoid delays.
How to vet contractors and request accurate bids
Start by assembling a clear scope of work that lists required trades, materials, timeline, and permit responsibilities so contractors can produce comparable bids.
Verify licenses, insurance, and local references; inspect recent job sites.
Request itemized bids with labor, materials, disposal, contingencies, and payment schedule.
Compare warranties and change-order policies.
Prefer contractors who provide written contracts, clear communication, and documented permits before work begins.
Cost Breakdown and Time Estimates
A clear itemized budget helps separate expected costs for plumbing, fixtures, concrete work, and finishes.
Time estimates should compare typical DIY schedules to professional timelines and highlight critical path tasks.
Practical cost-saving measures that preserve code compliance and quality can trim the budget without increasing risk.
Typical itemized costs: plumbing, fixtures, concrete work, finishes
Several key cost categories typically make up the budget for adding a bathroom on a concrete slab: plumbing, fixtures, concrete work, and finishes each drive expenses. Typical itemized estimates vary by region and scope but generally include labor, materials, and permitting.
| Item | Typical cost range |
|---|---|
| Plumbing labor/materials | $1,000–$5,000 |
| Fixtures/finishes | $800–$6,000 |
Time estimates for DIY vs. professional installations
After outlining typical cost categories—plumbing, fixtures, concrete work, and finishes—attention turns to how long those scopes take when handled by a homeowner versus a licensed contractor.
DIY timelines often double or triple due to learning curves, permits, and part-time work, spanning weeks to months.
Professionals complete coordinated installs in days to a few weeks, minimizing delays and rework through experience and subcontractor scheduling.
Ways to save money without compromising code or quality
Trim costs strategically by prioritizing decisions that reduce expense without cutting safety or code compliance.
Choose durable, mid-range fixtures, reuse or refinish cabinets, and compare contractor bids.
Bundle permits and inspections to avoid repeat fees.
Schedule work to minimize downtime and subcontractor overlap.
Invest in quality waterproofing and labor for critical tasks; economize on finishes and DIY nonstructural work.
Examples, Layout Ideas, and Case Scenarios
The section presents concrete examples and layout ideas for adding a bathroom on a slab, starting with a compact half-bath mini plan that outlines steps and space requirements.
It compares installing a full bath adjacent to an existing soil stack versus in a remote location, highlighting plumbing complexity and cost differences.
Real-world timelines and before/after considerations illustrate typical project durations, disruptions, and finishing choices.
Compact half-bath on slab: step-by-step mini plan
Begin by evaluating usable square footage, existing plumbing stack location, and entry clearances to determine whether a compact half-bath on a slab is feasible. These constraints drive fixture placement, door swing, and required slab modifications.
Plan WC and lavatory positions to minimize new drain runs. Select wall-hung or corner fixtures for clearance, locate venting strategy, choose access panels, sequence concrete cutting, backfill, and finish flooring.
Adding a full bath near existing stack vs. remote location comparison
Whether placed adjacent to an existing soil stack or positioned remotely across the slab, adding a full bathroom requires balancing plumbing complexity, cost, and usable layout; proximity to the stack typically reduces excavation and venting work, while remote locations demand longer waste runs, potential up-sizing of traps and vents, and creative drainage routes.
| Scenario | Pros | Cons |
|---|---|---|
| Near stack | Lower cost | Limited placement |
| Remote | Flexible layout | Higher excavation |
Real-world project timelines and before/after considerations
A realistic timeline for adding a bathroom on a slab typically spans from a few days for a simple hookup near an existing stack to several weeks when slabs must be broken, drains rerouted, and inspections scheduled.
Project length depends on excavation extent, permit lead times, subcontractor availability, and finish selections.
- Site prep and permits: 3–14 days.
- Plumbing rough-in: 1–7 days.
- Inspections and corrections: 2–10 days.
- Finishes and cleanup: 3–14 days.
Maintenance Tips After Installation
After installation, regular inspections focus on detecting leaks and monitoring slab moisture to prevent structural damage.
Routine servicing of pumps and vents is recommended to maintain proper drainage and ventilation.
Long-term care includes sealing grout, inspecting tile adhesion, and using appropriate cleaners to preserve flooring on the slab.
Routine checks for leaks and slab moisture
Regular inspections of plumbing fixtures, drains, and visible slab areas help catch leaks and moisture issues before they escalate into structural damage or mold.
Technicians or homeowners should check grout lines, baseboard dampness, floor temperature variances, and under-sink areas monthly.
Use a moisture meter, inspect seals and pipe joints, document findings, and address seepage immediately to prevent long-term slab deterioration.
Preventive maintenance for pumps and vents
Schedule routine inspections and basic servicing of sewage ejector pumps, condensate pumps, and venting components to guarantee reliable operation and prevent backups or odors.
Verify electrical connections, test float switches, clean strainers and discharge lines, and clear vent caps of debris.
Replace worn seals and check check-valves. Maintain access panels and document service dates to anticipate part replacement and reduce emergency failures.
Long-term care for grout, tile, and flooring on slab
Attention to mechanical systems should be matched by a routine approach to the finished surfaces atop the slab, since proper care preserves appearance and prevents moisture-related damage.
Clean grout regularly with pH-neutral cleaners, reseal grout annually, and inspect tiles for cracks or loosened sections.
Maintain grout joints to prevent water infiltration, use mats at wet zones, and address spills promptly to avoid staining or substrate issues.
Additional Resources and Checklist
A concise set of documents and checklists helps guarantee compliance and smooth operation after installation.
Included are a permits and inspection checklist, a quick troubleshooting checklist for the first 30 days, and suggested manufacturer spec sheets plus relevant code references.
These resources support final inspections, early problem resolution, and ongoing maintenance.
Permits and inspection checklist
Why does obtaining the right permits matter before cutting into a slab? Proper permits guarantee code compliance, legal protection, and clear inspection milestones.
Inspectors verify structural, plumbing, electrical, and waterproofing work to avoid costly corrections.
- Confirm local permit requirements and scope.
- Schedule rough-in and final inspections.
- Provide plans and contractor credentials.
- Keep records of approvals on-site.
Quick troubleshooting checklist for first 30 days
Several straightforward checks should be completed during the first 30 days after a new bathroom is installed on a slab to catch early issues before they escalate.
A concise troubleshooting checklist guides prompt detection and response to leaks, drainage, fixtures, and finishes.
- Inspect for visible leaks (toilets, sinks, showers).
- Confirm proper drainage and trap seal.
- Check flooring and grout for moisture.
- Verify fixture operation and valve access.
Suggested manufacturer spec sheets and code references
Recommended manufacturer specification sheets and applicable code references provide essential technical details and legal requirements for adding a bathroom on a slab, serving as the definitive resources for materials, installation tolerances, and inspection criteria.
Contractors and renovators should consult them before procurement, rough‑in, and final inspection to guarantee compliance and warranty validity.
- Fixture and flange manufacturer datasheets
- Waterproofing membrane specifications
- Local plumbing and building codes
- ADA and accessibility guidelines
Conclusion
After all the careful plans, permits, and the heroic battle with concrete, the renovator finds that adding a bathroom on a slab was, predictably, both simple and impossible. The irony is gentle: the slab that seemed immovable ultimately defined possibilities, costs, and creativity. Having learned that patience, proper drains, and a realistic budget trump ambition, the renovator leaves wiser—comfort achieved not by conquering the slab, but by befriending its limits and working smart around them.

