How to Neutralize Bleach in a Septic System Safely: Step-by-Step Guide
If bleach has entered your septic system, it’s crucial to neutralize it to protect the beneficial bacteria essential for proper function. Start by ventilating the area and wearing gloves and eye protection. Immediately stop all water use in the system. Dilute any remaining bleach with large amounts of fresh water, then add a measured dose of sodium thiosulfate (or sodium bisulfite) to neutralize the free chlorine. Allow sufficient contact time, and test for free chlorine levels to ensure they are at or below 0.1 mg/L before proceeding with controlled flushing. Continue to monitor the system and consult a septic professional if issues persist.
What Happens When Bleach Enters a Septic System
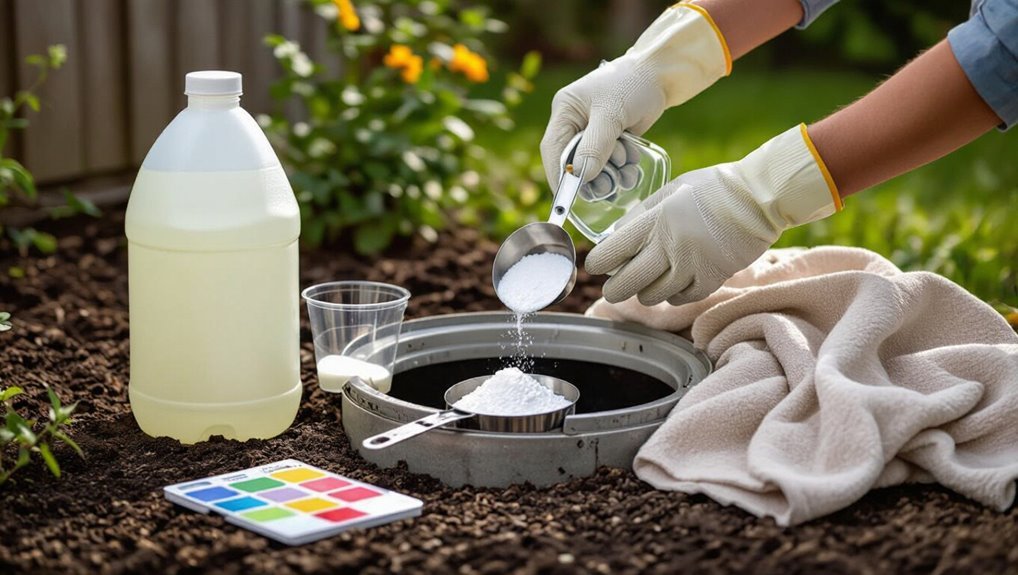
When bleach enters a septic system it can kill the beneficial bacteria that break down solids, upsetting the tank’s biological balance.
This disruption may cause only temporary plumbing smells and slower drainage if exposure is limited, but repeated or heavy contamination can harm the drainfield and lead to costly repairs.
Visible signs of damage include persistent sewer odors, soggy or unusually green areas above the drainfield, and backups or slow drains inside the home.
How bleach affects septic bacteria and tank balance
Introducing bleach into a septic system can disrupt the delicate microbial ecosystem that breaks down household waste.
Chlorine compounds reduce bacterial populations, slowing digestion of solids and altering tank balance. Reduced microbial activity can cause solids accumulation, odors, and treatment inefficiency.
Promptly learning how to neutralize bleach in septic system applications helps restore microbial health and prevents prolonged system upset.
Short-term vs long-term risks to drainfield and plumbing
Disrupting septic bacteria with bleach can have both immediate and lasting consequences for plumbing and the drainfield.
Short-term risks include reduced breakdown of solids, temporary odors, and potential clogs as biological activity drops.
Long-term exposure can compact sludge, clog soil pores, cause drainfield failure, and increase repair or replacement needs.
Pipe corrosion risk rises with repeated high-concentration exposures.
Signs that bleach has damaged your septic system
Several clear indicators can reveal that bleach has harmed a septic system: persistent chlorine odor in drains, slow or gurgling drains, sewage backups, unusually lush or dead patches on the drainfield, and rapid tank scum changes.
Additionally, reduced bacterial activity may be inferred from repeated pump-outs or lab tests showing low microbial counts.
Immediate inspection and remediation are advised.
Immediate Safety Steps After Pouring Bleach
After bleach has been poured into a septic system, the person nearby should immediately prioritize personal safety by ensuring adequate ventilation and donning protective gloves and eye protection.
They should stop any further bleach introduction, isolate containers and contaminated tools, and prevent runoff into drains.
If strong fumes, skin or eye irritation, or large-volume spills occur, evacuation and contacting emergency services are warranted.
Personal safety precautions (ventilation, protective gear)
Guarantee adequate ventilation and use appropriate protective gear when addressing bleach in a septic system, because fumes and splashes can irritate eyes, skin, and the respiratory tract.
Wear chemical-resistant gloves, splash goggles, and a long-sleeved impermeable garment.
If indoors, open windows and run exhaust fans.
Consider a respirator with appropriate cartridges for chlorine gas if ventilation is poor or exposure risk is elevated.
Stop further bleach introduction and isolate sources
Stop any additional bleach from entering the septic system immediately and isolate the source to prevent further contamination.
The person should shut off faucets, close affected drains, and unplug or block appliances connected to the system.
Collect containers, close lids, and relocate them outdoors away from drainage.
Clearly mark the area and inform household members to avoid using water or adding chemicals until neutralization steps commence.
When to evacuate the area or call emergency services
If there is any strong chlorine odor, visible fumes, difficulty breathing, dizziness, chest pain, eye irritation that does not resolve after flushing with water, or chemical burns on skin, the area should be evacuated immediately and emergency services contacted.
Personnel should move to fresh air, account for others, avoid reentry, and warn responders about bleach exposure and any mixing with other chemicals.
How to Neutralize Bleach in a Septic System Step-by-Step
The following step-by-step procedure outlines how to assess and neutralize bleach in a septic system after a spill.
It covers estimating the bleach concentration and volume, diluting with water and where to introduce it, and dosing with sodium thiosulfate.
Alternative reducers (sodium bisulfite or hydrogen peroxide), safety precautions, and guidelines for allowing reaction time and testing residual chlorine are also summarized.
Step 1: Calculate approximate concentration and volume of bleach spilled
Estimate the amount and strength of the bleach that entered the septic system to determine the scale of the neutralization needed.
Personnel should record product label concentration (typically 3–8% sodium hypochlorite), approximate volume spilled, and likely dilution by household water.
Convert to moles or grams if possible, then calculate resulting free chlorine concentration in the tank volume to guide neutralizer dosing.
Step 2: Dilution with water how much and where to add it
Once the spill concentration is known, operators should dilute the bleach by adding large volumes of fresh water directly into the septic tank to lower free-chlorine levels before neutralization.
Water should be added gradually via inlet or service port until measured chlorine falls to safe handling range; aim for at least tenfold dilution of the estimated bleach concentration, monitoring levels and avoiding overflow or drainfield saturation.
Step 3: Use of neutralizing agents (sodium thiosulfate) dosing guidelines
After sufficient dilution has lowered free-chlorine readings into a manageable range, operators should proceed with neutralization using sodium thiosulfate; this reagent rapidly reduces free chlorine to chloride when dosed correctly.
Calculate dose from measured free-chlorine (mg/L): about 0.5 g sodium thiosulfate pentahydrate per mg/L per liter of contaminated liquid, adjust for volume, add gradually, and re-test until free chlorine reads near zero.
Step 4: Use of sodium bisulfite or hydrogen peroxide alternatives precautions and dosing
Consider sodium bisulfite or hydrogen peroxide as alternative neutralizers when sodium thiosulfate is unavailable or unsuitable; both react with residual chlorine but require different handling and dosing.
Sodium bisulfite is potent, add gradually at manufacturer’s ppm recommendations, avoid acidic mixtures and inhalation.
Hydrogen peroxide decomposes to water and oxygen; use low concentrations, add slowly, monitor for foaming, and follow safety data sheets and local disposal guidance.
Step 5: Allowing time for neutralization and testing residual chlorine
Allow sufficient contact time for neutralizers to react with residual chlorine before proceeding with any further testing or wastewater handling.
The recommended wait is typically 15–60 minutes depending on dose, temperature, and mixing.
After contact time, use a reliable chlorine test kit to measure free and total chlorine.
If detectable chlorine remains, repeat neutralization in measured increments and retest until readings fall within safe limits.
Step 6: Flushing and monitoring system response over 24 to 72 hours
Once testing shows chlorine levels within acceptable limits, proceed to flush the neutralized wastewater through the household drains into the septic tank in controlled volumes to observe system response.
Over 24–72 hours, monitor tank odor, effluent clarity, and drainfield saturation. Record any unusual smells, slow drains, or backups.
If adverse signs appear, stop flushing and consult a septic professional immediately.
Tools and Materials You’ll Need
Necessary items include protective equipment (gloves, goggles), measurement tools (graduated containers, pipettes), and simple test kits to monitor chlorine and overall septic health.
Approved neutralizing chemicals—such as sodium thiosulfate or commercially labeled septic neutralizers—should be obtained from reputable retailers or septic supply companies.
The following section will outline selection, sourcing, and proper use of these tools and tests.
Protective equipment and measurement tools
Personal protective equipment and accurate measurement tools are essential for safely neutralizing bleach in a septic system.
Recommended PPE includes chemical-resistant gloves, splash goggles, a respirator rated for chlorine/oxidants, and impermeable outerwear.
Measurement tools should comprise calibrated graduated cylinders or measuring cups, a digital scale for powders, pH strips or a meter, and labeled containers to prevent dosing errors and contamination.
Approved neutralizing chemicals and where to buy them
Several proven neutralizing agents are suitable for dechlorinating bleach in a septic system, each with specific strengths, dosing requirements, and availability.
Commonly recommended chemicals include sodium thiosulfate (fast, precise dosing), sodium bisulfite (effective for larger volumes), and hydrogen peroxide (breaks down to water/oxygen).
These are sold by pool supply stores, laboratory suppliers, septic service retailers, and online industrial chemical distributors.
Test kits for chlorine levels and septic health
When verifying that bleach has been effectively neutralized and that the septic system remains biologically healthy, reliable test kits and meters are essential tools.
Recommend chlorine test strips or handheld colorimetric kits for residual free chlorine; digital ORP or amperometric meters for precise readings.
Include bacteria/activity test kits (respirometry or enzyme-based) to monitor microbial health.
Calibrate, follow manufacturer instructions, and record results.
How to Test and Confirm Bleach Neutralization
After neutralization, the presence of residual chlorine should be checked with chlorine test strips or a portable meter to confirm levels are safe for septic microbes.
Results are compared to accepted residual limits (typically near zero to trace amounts), and readings above those limits indicate additional neutralizer or dilution is needed.
If repeated tests remain high or uncertainty persists, professional laboratory testing or a septic service should be contacted.
Using chlorine test strips or portable meters
Use chlorine test strips or a handheld chlorine meter to verify that bleach has been neutralized before wastewater reenters the septic system.
Select strips/meters rated for free chlorine, follow manufacturer instructions for sampling, timing, and temperature control, and avoid cross-contamination.
Record measurements, test multiple points or batches if neutralization occurred in stages, and recalibrate meters regularly to guarantee reliable, reproducible readings.
Interpreting test results and acceptable residual limits
How low must chlorine levels be to safely return neutralized wastewater to a septic system? Guidance typically targets free chlorine below 0.1 mg/L (ppm); total chlorine should also be minimal. Test results showing nondetectable or ≤0.1 mg/L indicate acceptable residuals for septic microbes. Record values, compare with local regulations, and confirm with repeat measurement before discharge.
When to repeat neutralization or seek professional testing
Once residuals register nondetectable or ≤0.1 mg/L, operators should still verify stability before discharge. If readings approach the 0.1 mg/L threshold, are inconsistent between repeats, or were obtained long after neutralizer addition, another neutralization cycle and retest are warranted.
If repeated tests remain marginal or results vary, engage a certified lab or septic professional for quantitative analysis, source assessment, and remedial recommendations.
When to Call a Septic Professional
Signs such as strong chemical odors, persistent system backups, or visible damage to the drain field indicate the need for expert intervention.
A professional assessment typically includes inspection, testing of effluent and soil, and recommendations for neutralization, repairs, or component replacement.
Costs and timelines vary by severity but commonly range from a few hundred dollars for simple treatments to several thousand and several days to weeks for excavation or major repairs.
Red flags that require expert intervention
When should a homeowner stop attempting DIY remedies and contact a septic professional?
Immediate expert help is warranted for persistent strong chemical odors, sewage backup, rapidly sinking or saturated drainfield, visible pooling or contamination near wells or water sources, bubbling in toilets or drains after treatment, and signs of extensive biological kill (clear effluent, slimy scum loss).
Any structural damage or health risk requires prompt professional intervention.
What to expect from a professional assessment and remediation
Contacting a septic professional initiates a structured assessment that identifies chemical damage, biological decline, and any mechanical or structural issues. The technician will interview the homeowner about recent bleach use and symptoms, inspect accessible components (tank lid, inlet and outlet baffles, distribution box, and visible drainfield), measure effluent clarity and scum/slag layers, and may collect samples for laboratory testing to quantify residual chlorine and microbial activity before recommending targeted remediation steps.
Subsequent remediation may include neutralization, aeration, bioaugmentation, targeted repairs, and monitored follow-up testing to confirm system recovery.
Typical costs and timelines for repairs related to bleach damage
After the professional assessment and any recommended remediation steps are outlined, homeowners typically want a clear picture of expected costs and timelines for repairs related to bleach damage.
Repair costs vary: minor bacterial recovery and tank additives $100–$500; pump or drainfield repairs $1,000–$5,000+; full drainfield replacement $5,000–$20,000.
Timelines range from days for treatments to weeks or months for major replacements.
Preventing Future Bleach Incidents
To reduce the risk of future bleach-related damage, homeowners should adopt safe household practices for using and disposing of bleach and consider septic-safe alternative cleaners.
Regularly scheduled septic maintenance and inspections help detect early harm from accidental bleach exposure and reinforce proper habits.
Clear guidelines and a maintenance routine together minimize the chance of recurrence.
Safe household practices for bleach use and disposal
When households adopt clear rules for bleach use and disposal, they markedly reduce the risk of accidental overloading or contamination of their septic systems.
Establish measured dosing, avoid pouring concentrated bleach down drains, treat diluted solutions before disposal, store containers securely, label and date open bottles, train occupants on limits, and collect excess for hazardous-waste disposal.
Regularly review practices to maintain compliance and protect system biology.
Alternative cleaning products safe for septic systems
Choosing safer cleaners preserves septic biology while still maintaining household hygiene. Alternatives minimize microbial harm and reduce chemical load.
Recommended options balance effectiveness with septic safety:
- Vinegar and baking soda for deodorizing and mild cleaning.
- Oxygen bleach (sodium percarbonate) for whitening without chlorine.
- Enzyme-based drain cleaners to digest organic buildup.
- Castile soap or biodegradable cleaners labeled septic-safe.
Scheduling regular septic maintenance and inspections
Regular septic maintenance and inspections reinforce the protection offered by septic-safe cleaning choices by catching problems early and preventing accidental chlorine overloads.
Homeowners should schedule professional pump-outs every 3–5 years, inspect baffles, distribution boxes, and drainfields annually, and document cleaning product usage.
Promptly address odors, backups, or soggy areas. Consistent records and timely service reduce chemical risks and extend system lifespan.
Common Myths and Mistakes About Bleach and Septic Systems
Many assume that small amounts of bleach are always harmless to septic systems, but even low concentrations can disrupt bacterial balance.
Combining bleach with other strong chemicals can create toxic gases that pose health and system risks.
Overdosing neutralizers without testing may leave harmful residues or fail to correct pH, so measured testing is essential.
Myth: Small amounts of bleach are always harmless
A common belief holds that trace amounts of household bleach flushed down drains pose no risk to a septic system, but that assumption can be misleading.
Repeated small doses can cumulatively harm beneficial bacteria, impairing solids breakdown and treatment.
Frequency, concentration, and system size determine impact; occasional single low-dose exposures differ from regular use.
Conserving bacterial health prevents costly repairs and system failure.
Mistake: Using bleach with strong chemicals that produce toxic gases
When mixed with strong acids, ammonia, or certain cleaners, bleach can release dangerous gases—such as chlorine or chloramine—that pose acute inhalation hazards and can damage plumbing and septic components.
Users must never combine bleach with other household chemicals. Exposure risks include respiratory injury and corrosion of pipes and septic tanks.
Safe practice: isolate bleach use, ventilate areas, and consult product labels to prevent toxic reactions.
Mistake: Overdosing neutralizers without testing
Following the warning about mixing bleach with other chemicals, another common error is overusing neutralizers without testing their concentration or the septic tank’s condition.
Excess neutralizer can disrupt microbial balance, alter pH, and create sludge. Proper protocol requires measuring residual chlorine, calculating required neutralizer dose, and retesting.
When uncertain, consult a septic professional to avoid harming system biology and long-term function.
Quick Reference Cheat Sheet
A compact cheat sheet outlines an immediate actions checklist for containing bleach spills and protecting the drain field.
It also presents a neutralizer dosing quick table for common bleach concentrations and septic tank sizes.
Finally, a clear when-to-call-a-pro checklist signals situations requiring professional intervention.
Immediate actions checklist
Act immediately to limit bleach exposure and protect septic biology: stop all water and bleach use, isolate the source (cap bottles, close valves), and avoid flushing or draining contaminated fixtures.
- Ventilate area and don PPE (gloves, eye protection).
- Contain spills with absorbent materials; prevent runoff.
- Notify household members and suspend appliance use.
- Contact a professional for assessment before introducing neutralizers or restarting systems.
Neutralizer dosing quick table
After immediate containment and professional consultation, a compact dosing table provides concise guidance on how much neutralizer to use based on estimated bleach volume and septic tank size. The table below offers quick reference amounts; adjust only with expert advice and record actions for follow-up.
| Situation | Neutralizer dose |
|---|---|
| Small spill, 500–1,000 L tank | 100 g |
| Large spill, >2,000 L tank | 300 g |
When to call a pro checklist
When should a professional be contacted? A homeowner should engage a licensed septic technician when risks exceed routine neutralization or system performance declines.
Prompt professional assessment prevents damage and health hazards.
- Visible sewage backup or strong odors persist
- Repeated failure after neutralizer dosing
- Rapidly declining drainfield performance
- Suspected chemical contamination beyond bleach
Conclusion
A homeowner who poured bleach into a septic tank should act quickly but calmly: stop any further drainage, ventilate the area, and dilute the chemical while avoiding excessive agitation. After neutralization steps and testing confirm safety, normal use can cautiously resume, though calling a professional remains prudent. Like a telegram from another century, this urgent clarity underscores that small mistakes need swift, informed correction to protect microbial life and long-term system health.