How to Fix a Broken Toilet: Step-by-Step Repairs for Leaks, Clogs & Running Tanks
To fix a broken toilet, start by shutting off the water supply and clearing the area. Determine if the problem is a leak, clog, or a running tank. Check visible seals and the supply line, and listen for any ongoing water flow. For clogs, use a plunger or toilet auger. If you’re dealing with leaks or a running tank, tighten or replace tank bolts, flappers, and fill valves. It’s helpful to keep basic tools and spare parts handy. Follow these step-by-step repairs to restore your toilet’s function and prevent future issues.
What to do immediately when a toilet breaks
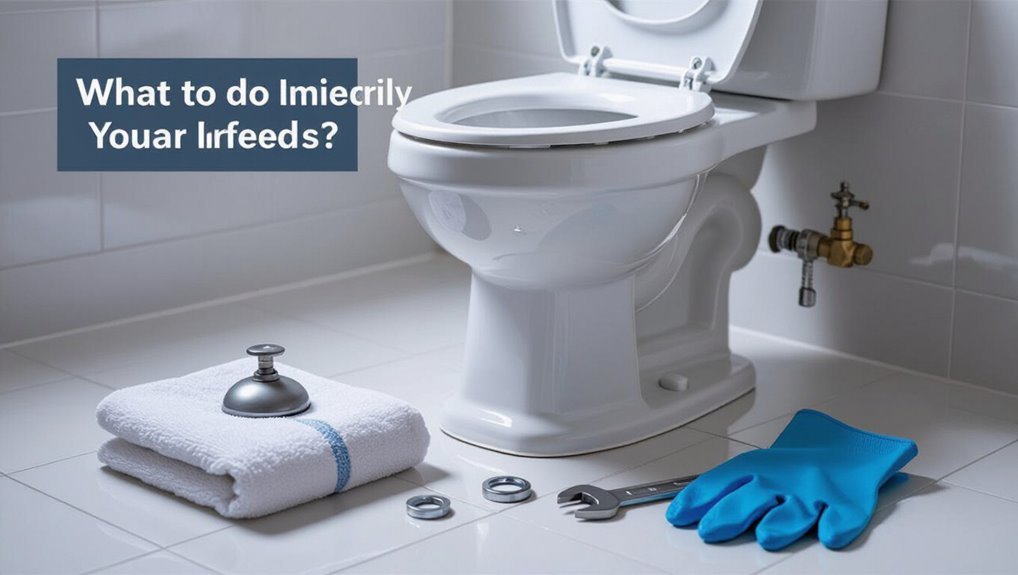
When a toilet breaks, the first actions are to shut off the water at the shutoff valve to stop flooding and to unplug any electrical devices nearby.
Next, place towels or absorbent materials around the base and under nearby fixtures to protect floors and surrounding areas.
If the leak is uncontrollable, sewage is involved, or the cause is unclear, contact a licensed plumber immediately.
How to shut off the water and stop flooding
Shut off the water supply immediately to prevent further flooding by closing the toilet’s shutoff valve—usually located on the wall or floor behind the bowl—or, if that valve is stuck or inaccessible, by turning off the home’s main water shutoff.
Next, flush to empty the tank, hold the handle to stop refilling, and place a bucket under the supply line before loosening connections while following how to fix a broken toilet.
How to protect floors and surrounding areas
If a toilet breaks, immediate steps to protect floors and nearby belongings reduce water damage and contamination risk:
Remove rugs and absorbent items, lift valuables to higher ground, and place waterproof barriers (trash bags or plastic sheeting) around the base.
Use towels to contain runoff and a mop or wet/dry vacuum to remove water.
Ventilate the area and wear gloves while handling contaminated materials.
When to call a plumber immediately
How urgent is the situation? The person assesses danger: major leaks, sewage backflow, gas smell, or structural instability require immediate professional help.
If water cannot be shut off, flooding continues, or DIY attempts worsen problems, contact a licensed plumber now.
For small clogs or slow leaks, schedule a service; for hazards, call emergency plumbing without delay.
Quick diagnostic checklist to identify the problem
A quick checklist helps isolate common issues by observing visible leaks at the base, supply line, tank, and bowl.
It also prompts testing for clogs (slow drain, gurgling, or overflow) and for running tank symptoms or phantom flushes.
Finally, a brief inspection can reveal cracks or structural damage that require repair or replacement.
Signs of leaks: base, supply line, tank, and bowl
Visible water, dampness, stains, or unexplained drops on the floor or surrounding fixtures are primary indicators that a toilet is leaking. Distinguishing whether the leak originates at the base, supply line, tank, or bowl requires focused observation and simple tests.
Check base for pooling or wax seal failure. Inspect supply line fittings for drips. Examine tank bolts and gasket for seepage, and look inside bowl for cracks or hairline leaks.
Signs of clogs: slow drain, gurgling, and overflow behavior
When does a clog reveal itself beyond a single slow flush? Observable signs include persistent slow draining after multiple flushes, air/gurgling noises from the bowl or nearby drains, water level surges toward the rim, and occasional backup into adjacent fixtures.
These symptoms indicate partial blockage in the trap or drain line rather than isolated flushing variability and merit immediate unclogging steps or inspection.
Signs of running tank and phantom flushes
Persistent tank fill sounds or intermittent, unexplained short flushes signal a running tank or phantom flushes that waste water and indicate a fault in the fill or flush mechanisms.
Check for constant trickle into the bowl, periodic refills without user input, higher water bills, and visible pool or drips.
Note tank-level fluctuations, flapper seating issues, and unusual valve noises for targeted repairs.
How to determine if the toilet is cracked or structurally damaged
How can one quickly tell if a toilet is cracked or structurally compromised?
Inspect bowl, tank, base for hairline or visible cracks; run a dye test to spot slow leaks; press tank and bowl gently to detect flexing or movement;
check floor around base for soft spots or water damage; listen for seepage;
note uneven toilet rocking—any positive sign warrants immediate repair or replacement.
Tools and materials you’ll need
A concise list of essential hand tools—adjustable wrench, pliers, screwdriver set, and a plunger—prepares a homeowner for most toilet repairs.
A few spare parts and consumables, such as flapper valves, fill valves, wax rings, and supply-line washers, should be kept on hand for quick fixes.
Guidance on when to buy an extensive repair kit versus individual parts helps prioritize cost and convenience.
Essential tools for DIY toilet repair
Before beginning repairs, gather a compact set of reliable tools and materials to guarantee the job proceeds efficiently: A concise kit speeds diagnosis and prevents interruptions.
Essential items include wrenches, pliers, a plunger and auger for clogs, a flashlight, bucket, shop towels, and safety gloves.
Prioritize quality over quantity; versatile tools reduce trips and simplify common toilet repairs.
- Adjustable wrench
- Plunger/auger
- Pliers
Spare parts and consumables to keep on hand
While tools tackle most tasks, a small stock of common replacement parts and consumables prevents delays and repeat trips to the store.
A prepared homeowner minimizes downtime by keeping essentials for leaks, runs, and minor breaks.
- Flush valve, flappers, and refill valves
- Wax ring, tank-to-bowl bolts, and gaskets
- Toilet-safe sealant, plumber’s tape, and spare bolts
When to buy a repair kit vs. individual parts
When is it better to buy a repair kit rather than individual parts? A repair kit suits common failures (flapper, fill valve, seals) for convenience, matched compatibility, and cost savings.
Opt for individual parts when diagnosing a specific, uncommon failure, sourcing higher-quality components, or replacing only one item.
Consider age, model compatibility, and long-term reliability before choosing kit versus single-part purchase.
Fixing a clogged toilet step-by-step
The section outlines a clear, step-by-step approach to unclogging a toilet, beginning with safe initial methods such as using a plunger and the hot water technique.
It then covers proper use of a toilet auger to reach deeper blockages and explains when enzyme drain cleaners are appropriate versus when harsh chemicals should be avoided.
Finally, it emphasizes simple preventive measures to reduce the likelihood of recurring clogs.
Safe initial methods: plunger and hot water technique
Start by attempting noninvasive remedies that clear most blockages: a plunger and a hot water pour.
Use a flange plunger for an effective seal, place it over the drain, and push-pull vigorously for 15–20 seconds.
If water remains, pour a kettle of hot (not boiling) water from waist height to help dissolve soft obstructions.
Repeat plunging as needed.
Using a toilet auger/snake safely
Reach for a toilet auger when plunging and hot water fail to clear the bowl; this tool reaches deeper into the trap and early pipes to dislodge firm obstructions without removing the toilet.
Insert the protective boot into the bowl, feed the cable slowly, crank clockwise to break clogs, then retract while pumping water.
Sanitize the auger and wash hands afterward.
When to use enzyme drain cleaners and when to avoid chemicals
When is it appropriate to reach for enzyme drain cleaners versus avoiding chemical agents altogether?
Enzyme cleaners suit organic mild clogs, routine maintenance, septic systems and porcelain-safe use; allow time to work.
Avoid caustics for recent mechanical clearings, plastic plumbing, snake-used drains, metal components, severe blockages or when chemical residues could harm pets or septic biology.
Choose based on clog type and system compatibility.
Preventing recurring clogs
Preventing recurring clogs begins with diagnosing common causes—excessive paper use, flushable-wrong items, low-flow toilets, and partial blockages in the trap or venting.
Regular maintenance includes using appropriate paper amounts, avoiding wipes and non-degradables, installing a higher-efficiency flush or pressure-assisted unit if needed, clearing vent stacks, and routine snaking.
Educating users and scheduling inspections reduces repeat blockages and plumbing damage.
Repairing a running tank and flushing issues step-by-step
The section explains how to diagnose common causes of a running tank and weak flush—flapper, fill valve, overflow tube, and lift chain.
It then outlines step-by-step procedures to replace a flapper, adjust or replace the fill valve, and correct float and refill levels.
Finally, it covers repairing or replacing the flush handle and lift chain to restore reliable operation.
Diagnosing the cause: flapper, fill valve, overflow tube, and chain
Begin by observing the tank’s behavior during and after a flush to isolate whether the problem originates with the flapper, fill valve, overflow tube, or chain.
Listen for continuous flow, watch water level and refill action, check whether water leaks from the flapper seat, whether the fill valve shuts off, whether water spills into the overflow tube, and whether the chain binds, slips, or leaves slack.
How to replace a flapper
If inspection suggests the flapper is warped, leaking, or failing to seat properly, replacing it is the next logical step to stop a running tank and restore proper flushes.
Shut off water, drain the tank, detach the old flapper from pegs or chain, fit a compatible replacement, connect chain with slight slack, test several flushes, and trim chain length if needed for reliable seating.
How to adjust or replace the fill valve
Inspect the fill valve assembly to determine whether an adjustment will stop the tank from running or if a replacement is required.
Shut off water, drain the tank, then test the valve by lifting the float arm or pressing the refill tube.
If water flow continues or valve leaks, disconnect supply, remove retaining nut, install matched replacement, reconnect, restore water, and verify proper operation.
How to fix an improperly adjusted float and refill level
Once the fill valve is confirmed functioning or replaced, attention shifts to the float and refill level, common causes of continuous running or weak flushes.
Inspect float for cracks or waterlogging; replace if damaged. Adjust float height to set proper waterline (about 1 inch below overflow).
Check refill tube position to guarantee it directs water into overflow, not submerged. Test and fine-tune.
How to repair or replace the flush handle and lift chain
Begin by shutting off the water supply and flushing the toilet to empty the tank.
Inspect the handle, nut, and lift chain for wear or misalignment.
Tighten or replace the handle assembly if loose; detach chain, adjust length so flap seals fully, or replace chain/clip if corroded.
Reconnect, test multiple flushes, and restore water; verify smooth operation without binding or over-travel.
Stopping and repairing toilet leaks
Leaking toilets require methodical inspection of common failure points, including the tank-to-bowl connection, water supply line and shutoff valve, and the toilet base.
Repair steps often include replacing the tank-to-bowl gasket, swapping the wax ring at the base, tightening or replacing supply components, and evaluating hairline cracks in the bowl or tank for repair or replacement.
The following section outlines diagnostic tips and clear repair procedures for each of these issues.
Repairing leaks at the tank-to-bowl connection
Inspect the junction between the tank and bowl to locate seepage, staining, or dampness that indicates a failing gasket, loose bolts, or cracked tank.
Tighten tank bolts evenly, support the tank to avoid stress, and retest for leaks.
If cracks or warped surfaces are evident, replace the damaged component.
Clean mating surfaces and guarantee bolts have rubber washers to prevent recurrence.
Replacing the tank-to-bowl gasket
Replacing the tank-to-bowl gasket restores a watertight seal between the tank and bowl, stopping persistent drips that often originate where the two parts meet.
To replace it, shut off water, drain and remove the tank, unbolt tank-to-bowl fasteners, remove old gasket, fit new gasket centered over flush valve, reassemble, tighten bolts evenly, reconnect water, and test for leaks.
Fixing a leaking water supply line or shutoff valve
Turn off the shutoff valve and relieve pressure before addressing a water supply line or shutoff valve leak, since most repairs require a dry connection to stop drips or seepage.
Inspect fittings, tubing, and compression nuts for corrosion or loose joints.
Tighten fittings, replace deteriorated flexible supply lines, or swap the shutoff valve.
Use plumber’s tape and test for leaks after restoring water.
Repairing leaks at the toilet base: wax ring replacement
After confirming the supply line and shutoff valve are sound, attention shifts to leaks at the toilet base, which most often indicate a failed wax ring.
The toilet is drained, bolts removed, and the fixture lifted straight up. Old wax is scraped, flange inspected and replaced or shimmed if damaged.
A new wax ring is centered, toilet reset, bolts torqued, and seals tested for leaks.
Detecting and repairing hairline cracks in the bowl or tank
When a faint, hairline crack appears in the bowl or tank, it can slowly undermine the toilet’s integrity and lead to hidden leaks; early detection and prompt repair prevent escalating water damage.
Inspect visually and with tissue for dampness; mark and test by filling slightly.
Small porcelain cracks can be sealed with epoxy or silicone; replace tank or bowl for structural or expanding fractures to guarantee safety.
Replacing major components and full toilet replacement
When repair costs, persistent leaks, or structural damage exceed sensible limits, replacement becomes the practical option.
The guide outlines step-by-step removal and reinstallation procedures (bolts, flange, wax ring), criteria for selecting a replacement toilet (dimensions, trapway, flushing performance), and instructions for using a wax-free seal alternative.
Readers are directed to assess condition, prepare tools and parts, and follow safe, precise installation steps.
When to replace vs. repair the toilet
How can a homeowner decide whether to repair a failing toilet or replace it entirely? The decision hinges on age, recurring problems, cost of replacement parts versus new unit, and efficiency.
Minor issues and recent models favor repair.
Cracked bowls, persistent leaks, severe corrosion, or outdated inefficient toilets justify full replacement.
Consider long-term savings, water usage, and resale value.
How to remove and reinstall a toilet (bolts, flange, wax ring) step-by-step
If a repair decision leads to replacing major components or the entire fixture, removing and reinstalling the toilet is a straightforward process that follows a set sequence:
shut off and empty the tank, disconnect the water line, unbolt the bowl from the flange, lift the bowl, remove the old wax ring and inspect the flange, install a new wax ring (or flange repair as needed), set the bowl back on the flange, torque the bolts evenly, reconnect the water supply, and test for leaks and proper flush operation.
Replace bolts, trim caps, tighten incrementally, and confirm a level, sealed installation before final testing.
Choosing the right toilet: dimensions, trapway, and flushing performance
Why choose a specific toilet model: because dimensions, trapway design, and flush performance determine fit, function, and long-term reliability.
Selection hinges on rough-in, bowl height, and space. Consider trapway size for clog resistance and material for durability.
Prioritize efficient single-flush or dual-flush systems. Match water consumption to local codes and septic needs.
- Rough-in and footprint
- Trapway diameter and shape
- Flush mechanism efficiency
How to install a new wax-free seal alternative
Begin by preparing the toilet for removal: shut off the water, drain the tank and bowl, and disconnect the supply line.
Remove bolts, lift the bowl, and clear the flange.
Fit the wax-free seal per manufacturer orientation, ensuring compression ring and gasket alignment.
Re-seat the toilet, torque bolts evenly, reconnect supply, restore water, and test for leaks and wobble.
Adjust as needed.
Safety, maintenance, and cost-saving tips
A concise maintenance plan helps prevent common failures and extends toilet lifespan, with routine checks for leaks, seals, and flushing performance.
Proper handling of parts and chemicals, plus clear documentation of issues and repairs, protects occupants and preserves warranty or insurance eligibility.
A brief cost comparison of DIY repairs versus professional service guides readers to the most economical and safe choice.
Preventive maintenance schedule for toilets
How often should routine checks be performed to keep a toilet reliable and efficient?
Quarterly inspections catch leaks, test flushing and refill mechanisms, and verify seal integrity.
Annual deep maintenance addresses mineral buildup, replacement of worn parts, and water-efficiency upgrades.
- Quarterly: visual and function checks
- Annual: parts replacement and descaling
- As-needed: after any symptom appears
Safe handling of parts and chemicals
Following regular inspections and scheduled maintenance, attention turns to safe handling of replacement parts and cleaning chemicals to protect both users and the fixture.
Use gloves, eye protection, and proper ventilation.
Store parts and chemicals separately, sealed and labeled.
Follow manufacturer instructions and local disposal rules.
Avoid mixing cleaners; rinse thoroughly after use.
Inspect new parts for defects before installation.
Cost comparison: DIY repairs vs. professional service
Compare costs and risks before deciding whether to tackle toilet repairs personally or hire a professional. A DIY fix can save labor costs but may risk mistakes, longer downtime, or repeated repairs. Professionals charge higher upfront fees, offer guarantees, and speed. Consider skill level, part costs, time value, and potential damage when choosing.
| Option | Typical Cost | Pros/Cons |
|---|---|---|
| DIY | Low | Saves money; risk of errors |
| Pro | Higher | Warranty; faster |
| Hybrid | Moderate | Save time; split tasks |
How to document issues for warranty or insurance claims
Documenting a toilet problem promptly and methodically increases the likelihood of successful warranty or insurance claims.
Photograph damage, leaks, and serial/model numbers; timestamp images and videos.
Keep repair receipts, service reports, and communication logs.
Note dates, symptoms, and attempted fixes.
Preserve original parts if requested.
Submit organized evidence to the manufacturer or insurer, following their claim procedures and deadlines to avoid denial.
Troubleshooting uncommon problems and scenarios
The guide shifts focus to less common but important toilet issues that often resist simple fixes.
Topics include intermittent running after repairs, weak flush pressure and siphon problems, seasonal or freezing-related failures, and sewer gas odors tied to venting.
Each issue is outlined with likely causes and practical diagnostic steps.
Intermittent running after repairs
Although a toilet may seem fixed after a repair, intermittent running can persist and signal issues that only appear under certain conditions.
Causes include a worn flapper seating imperfectly, a misaligned fill valve float, hairline cracks in the overflow tube, or fluctuating supply pressure.
Inspect components during different cycles, replace marginal parts, and test several flushes to confirm the problem is resolved.
Low flush pressure and weak siphon
Diagnose low flush pressure and a weak siphon by separating supply-side problems from bowl-side issues: restricted water flow, partially closed shutoff valves, or low house pressure reduce tank refill speed and volume, while clogged rim jets, a partially blocked siphon jet, or an improperly sized trapway impair the bowl’s ability to form and sustain the siphon.
Inspect and clear jets, verify valve and supply pressure, and test with a full refill.
Seasonal and freezing-related toilet problems
Seasonal shifts introduce a different set of toilet failures tied to cold, humidity, and fluctuating water use patterns.
Pipes, tanks, and seals contract, crack, or freeze; condensation accelerates corrosion and loosens fittings.
Inspect exterior supply lines, insulate exposed pipes, drain outdoor valves before freezes, and replace brittle washers.
Monitor attic or crawlspace insulation and maintain steady indoor temperatures to prevent recurrence.
Dealing with sewer gas smells and venting issues
Address sewer gas odors promptly, as they indicate venting failures or dry/missing traps that can pose health and odor problems.
Inspect traps for water seals, pour water into unused drains, and check toilet flange seals and wax ring integrity.
Verify roof vent clearances and bird or debris blockages.
If odors persist, test with a smoke pencil and consult a plumber to repair vent stacks or replace damaged piping.
Useful reference resources and part identification
The section outlines how to read model numbers and match compatible replacement parts by locating manufacturer stamps and cross-referencing part codes.
It also lists recommended online tutorials, videos, and reputable suppliers for size-specific components.
A concise parts identification guide highlights common brands and the typical names for fill valves, flappers, flush valves, and seals.
How to read model numbers and find compatible parts
When locating replacement parts, a homeowner should first record the toilet’s model number and any stamped codes—usually found inside the tank on the back wall, under the tank lid, or on the bowl’s rim—because those identifiers determine compatible components and simplify searches through manufacturer and third-party databases.
Cross-reference numbers with OEM parts lists, noting manufacture date and variant codes; photograph markings and measure critical dimensions for verification.
Recommended online tutorials, videos, and replacement part suppliers
With model numbers, photos, and measurements in hand, homeowners can efficiently use curated online resources to identify parts and follow step‑by‑step repairs.
Recommended sources include official manufacturer guides, specialist plumbing channels, and reputable parts retailers.
Practical choices:
- Official repair manuals and OEM video tutorials.
- Independent how‑to videos with clear timestamps.
- Trusted suppliers with searchable catalogs and return policies.
Quick parts identification guide with common brand examples
A concise visual checklist helps homeowners match worn components to replacement parts quickly: focus on flush valve type (tower vs. canister), fill valve style (float cup vs. diaphragm), flapper/material, trip lever/handle orientation, and seat/gasket dimensions. A quick brand mapping aids sourcing and compatibility.
| Part | Common Brand | Note |
|---|---|---|
| Fill valve | Fluidmaster | Float cup common |
| Flapper | Kohler | Material varies |
| Flush valve | Toto | Canister vs tower |
Conclusion
When toilets fail, swift, informed action prevents bigger damage: 70% of household plumbing calls stem from toilets, underscoring their outsized impact. Homeowners who follow basic diagnostics, keep key tools, and perform simple repairs—unclogging, adjusting fill valves, or replacing flappers—resolve most issues without a plumber. For persistent problems or major component replacement, professional help minimizes risk. Regular maintenance and prompt attention save time, money, and reduce water waste over the long term.