How to Install a Wall Return Vent: Step-by-Step Guide for DIY Success
How to Install a Wall Return Vent: A Step-by-Step Guide
Installing a wall return vent is essential for improving your HVAC system’s efficiency by pulling air back into circulation. To do this successfully, follow these steps:
- Planning: Identify a stud-free area on the wall and ensure you have access to ductwork.
- Marking and Cutting: Mark the desired location and cut out the drywall.
- Framing: Frame the opening to support the vent.
- Connecting Ducts: Attach and seal the duct or plenum securely.
- Insulating: Insulate the ductwork to prevent energy loss.
- Installing the Grille: Attach the grille to the wall securely.
- Testing Airflow: Check the airflow and adjust dampers as needed.
- Fixing Leaks: Inspect for any leaks and seal them properly.
Basic tools and moderate skills are sufficient for this project. Always adhere to local codes and safety guidelines. For detailed instructions and troubleshooting tips, continue reading.
What a Wall Return Vent Is and Why It Matters
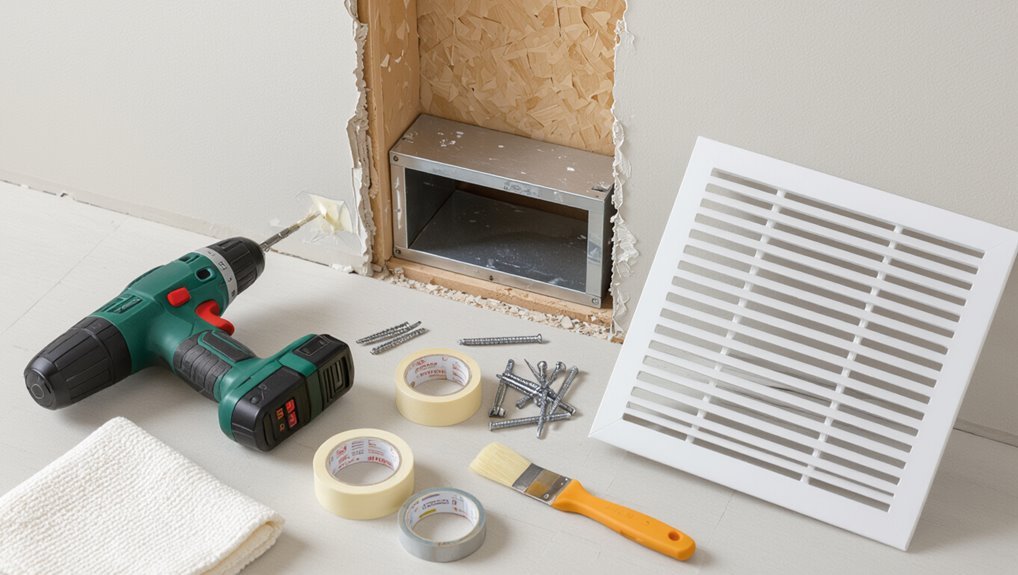
A wall return vent is an intake grille mounted in a wall that channels room air back into an HVAC return duct, helping maintain balanced airflow and system efficiency.
It differs from floor and ceiling returns in placement, airflow patterns, and suitability for specific room layouts and heating/cooling strategies.
Installing a wall return can improve circulation, reduce pressure imbalances, and lower energy use when properly sized and located.
Definition and purpose of a wall return vent
Wall return vents are openings in an interior wall that draw room air back into an HVAC system, completing the circulation loop that supplies conditioned air and maintains balanced pressure.
They collect used air, filter particulates, and help regulate temperature and airflow.
Understanding their definition and purpose is essential before attempting how to install a wall return vent safely and effectively.
Differences between wall returns, floor returns, and ceiling returns
Although all return vents serve the same basic function of pulling room air back into the HVAC system, wall, floor, and ceiling returns differ in airflow patterns, placement constraints, and maintenance needs.
Wall returns draw mid-level air, suit tight spaces, and are easier to access; floor returns capture cooler low air but trap debris; ceiling returns handle warm rising air yet may require ladders for cleaning and inspection.
Benefits of installing a wall return vent in a HVAC system
Having noted how returns differ by placement and airflow, attention shifts to the specific advantages of installing a wall return vent.
Wall returns improve air circulation at occupant level, reduce dust accumulation on floors, simplify filter access and maintenance, and often enable easier routing to ductwork.
They can enhance system efficiency, balance pressure between rooms, and support more consistent temperature control throughout living spaces.
Quick Overview: Steps to Install a Wall Return Vent
The article outlines a high-level sequence for installing a wall return vent: locate and mark the opening, cut and frame the hole, install ducting and the vent box, and finish with sealing and trim.
Typical installation takes two to four hours for a homeowner with basic DIY skills, while professionals can complete it faster.
Estimated costs range from a modest DIY expense for tools and materials ($50–$200) to $150–$500 or more for professional labor and parts.
High-level step-by-step summary
Begin by identifying the ideal location for the return vent. Measure and mark, then cut the opening in the wall.
Install framing and the duct stub, route ductwork to the HVAC system, and secure connections with sealant.
Mount the return grille, attach any filters or access panels, restore drywall and paint as needed.
Test airflow and adjust for proper operation.
Time, skill level, and typical costs
After outlining the basic steps, an overview of time, skill level, and costs helps determine whether a homeowner can tackle the job or should hire a professional.
Typical DIY installation requires moderate skills: measuring, cutting drywall, routing ductwork, and sealing.
Time ranges two to six hours for one return.
Materials and grille cost $30–$150; tools or professional labor add $100–$500 depending on complexity.
Tools and Materials Needed
The section lists the essential tools—such as a drill, jigsaw, screwdrivers, tape measure, and level—needed for a clean installation.
It also specifies required materials and parts, including the vent grille, ducting, mounting plate, and available filter options.
Optional tools and safety equipment, like a stud finder, caulk gun, gloves, and eye protection, are noted for efficiency and protection.
Essential tools list
A concise set of hand and power tools, along with appropriate materials, is required to install a wall return vent safely and accurately.
Essentials focus on cutting, fastening, measuring, and finishing tasks:
- Tape measure, pencil, and level
- Drill/driver with bits and screwdriver set
- Jigsaw or oscillating multitool with blades
- Utility knife, caulk gun, and safety gear (glasses, gloves)
Required materials and parts (vent grille, duct, mounting plate, filter options)
Successful installation depends on selecting compatible materials and parts sized for the wall opening and HVAC system capacity.
Required items include a grille, rigid or flexible duct, and a mounting plate matched to wall thickness; choose filter types for airflow and filtration efficiency.
Consider gasket/foam tape for sealing and appropriate fasteners to secure the assembly.
- Vent grille
- Duct
- Mounting plate
- Filter options
Optional tools and safety equipment
Gathering optional tools and safety gear streamlines the install and reduces risk.
Recommended extras improve efficiency and protect the installer without being mandatory.
Consider adding the following:
- Utility knife and metal snips for precise cuts.
- Cordless drill with hole saw for clean openings.
- Dust mask and safety glasses for particle protection.
- Work gloves and knee pads for comfort and grip.
Pre-Installation Assessment
Before cutting any openings, the installer should confirm the HVAC system’s compatibility and required airflow to guarantee the new return will not unbalance the system.
The ideal wall location must be chosen for unobstructed airflow, clear stud layout, and access for the duct pathway while measuring for the correct grille size.
Finally, any electrical, plumbing, or insulation conflicts behind the wall should be identified and addressed.
Checking HVAC compatibility and airflow requirements
One essential step is to verify that the existing HVAC system can accommodate an added wall return without impairing airflow or equipment performance.
The inspector measures current static pressure, checks blower capacity, and confirms filter and duct sizing.
Calculations estimate required return cfm to avoid overloading the unit.
If deficits appear, recommendations include enlarging ducts, adjusting blower settings, or consulting a licensed HVAC technician.
Locating the ideal wall position for a return (airflow, obstruction, stud layout)
Selecting the precise wall location for a return vent requires balancing airflow efficiency, structural constraints, and obstacle clearance.
The installer assesses typical airflow paths, avoiding dead zones and ensuring unobstructed intake. Walls with accessible cavity space and minimal electrical, plumbing, or insulation conflicts are preferred.
Stud layout is mapped to locate a clear bay; structural elements and aesthetics inform the final placement.
Measuring for grille size and duct pathway
When determining grille size and mapping the duct pathway, the installer measures room volume, passive airflow needs, and the return grille’s face velocity to guarantee adequate intake without excessive noise or pressure drop.
Then they select a grille area that matches required CFM, sketch a straight, short duct route avoiding obstructions and sharp bends, and note needed duct size, fittings, and mounting clearances for efficient airflow.
Verifying electrical, plumbing, and insulation conflicts
After confirming grille size and routing, the installer inspects the planned return path for electrical wiring, plumbing lines, and insulation that could interfere with cutting, mounting, or airflow.
They use stud finders, voltage testers, and inspection cameras to locate hidden services, mark safe zones, and adjust placement.
Any conflicts prompt rerouting, protective boxes, or foam seal adjustments to preserve safety and HVAC performance.
Preparing the Wall and Work Area
The installer begins by accurately marking cut lines and locating studs to avoid structural members and wiring.
Using appropriate tools and techniques, the opening is cut with attention to safety and to preserving or removing insulation, vapor barriers, and fire blocks as required.
Finally, the work focuses on forming a sealed duct pathway through the wall, restoring barriers and sealing penetrations to maintain thermal and fire integrity.
Marking cut lines and stud locations
Measure and transfer the vent opening onto the wall surface, marking both the cut outline and nearby stud locations before any sawing begins.
Confirm level and plumb with a carpenter’s level, then locate studs with a stud finder and pencil their edges.
Note electrical outlets, pipes or insulation behind the drywall.
Label the top and bottom of the opening and double-check measurements for alignment.
Cutting the opening safely (tools and techniques)
With cut lines and stud locations confirmed, work on the opening begins by preparing the wall and surrounding area for safe cutting.
Protective eyewear, dust mask and gloves are donned. Choose a drywall saw or oscillating multi-tool for control; use a jab saw only if precise.
Score paint, cut slowly along lines, remove debris, and inspect edges for clean, square opening before vent installation.
Dealing with insulation, vapor barriers, and fire blocks
Begin by evaluating and clearing the cavity behind the cut opening to identify insulation, vapor barrier placement, and any fire-stopping elements that could interfere with the vent path.
Remove loose insulation carefully, avoid compressing batts, and note vapor barrier integrity.
Preserve or relocate fire blocks per code—seal penetrations with approved fire-resistant materials.
Document conditions before proceeding to duct routing steps.
Creating a sealed duct pathway through the wall
Having documented insulation, vapor barrier placement, and any fire blocks, the installer prepares the wall surface and surrounding work area for a sealed duct pathway.
They cut a neat opening, remove debris, and verify stud locations.
They fit the duct, secure it to framing, apply foam sealant and foil tape at seams, and reinstall vapor barrier layers to maintain airtight continuity.
Installing the Return Duct and Plenum
The installer chooses among rigid, semi-rigid, or flexible wall return ductwork based on space, airflow needs, and ease of routing.
The chosen duct is then connected to the existing HVAC system and, when required, to a return plenum or connection box sized for proper airflow.
All connections and joints are secured and sealed with appropriate clamps, tape, or mastic to prevent leaks and maintain system efficiency.
Types of wall return ductwork (rigid, semi-rigid, flexible)
Ductwork for a wall return typically comes in three forms—rigid, semi-rigid, and flexible—each offering distinct trade-offs in airflow performance, ease of installation, and cost.
- Rigid: best airflow, durable, requires precise cuts.
- Semi-rigid: balance of stiffness and flexibility, easier routing.
- Flexible: easiest to install, higher resistance, prone to sagging.
- Selection depends on space, budget, and performance needs.
Connecting duct to existing HVAC system
Once the return duct type is chosen, attention shifts to tying that run into the existing HVAC system—specifically the return plenum or main trunk.
The installer measures and aligns the new duct to match the plenum collar, trims as needed, and fits adapters or collars for proper connection.
Confirm the duct supports line up and airflow direction is correct before final attachment and inspection.
Securing and sealing duct joints (tape, mastic, clamps)
Begin by preparing each joint surface so fittings meet squarely and there is no gap larger than recommended by the manufacturer.
Apply UL-rated foil tape or HVAC mastic over seams, smoothing to eliminate voids.
Use sheet-metal screws or adjustable clamps for mechanical strength before sealing.
Allow mastic to cure per instructions, inspect for leaks, and retighten clamps as needed to guarantee an airtight connection.
Installing a return plenum or transition box when required
After securing and sealing the duct joints, attention shifts to installing the return plenum or connector box where required by the system layout.
The technician positions the plenum against the wall opening, aligns it with the furnace or air handler inlet, fastens with sheet metal screws, and seals seams with mastic or foil tape.
Confirm airtight connection, proper size match, and accessible service clearance.
Mounting the Return Grille and Filter
Next, attention turns to fastening the return grille assembly: mounting frames or plates are secured to studs to provide a stable anchor.
The filter housing is installed and fitted with the recommended filter type and size for the system.
Finally, the grille is attached and adjusted to sit flush with the wall surface for a neat, airtight finish.
Attaching mounting frames or plates to studs
Position the mounting frames or plates over the framed opening and align them with the stud faces and the duct flange so the grille will sit flush with the wall surface.
Secure frames using appropriate screws into studs at each corner and midpoints, predrilling pilot holes to prevent splitting.
Verify square and level, tighten fasteners evenly, and seal gaps with foam or caulk where required.
Installing filter housing and recommended filter types
Install the filter housing by sliding it into the framed opening until the flange sits flush against the wall.
Then secure it with screws through the predrilled holes into the mounting frame.
Insert a properly sized disposable pleated MERV 8–13 filter or a washable electrostatic alternative, ensuring airflow direction arrow aligns.
Verify filter fits snugly to prevent bypass and label replacement date.
Securing grille and ensuring flush finish with wall surface
Fasten the grille to the filter housing using the supplied screws, aligning its flange so it sits flush against the finished wall surface.
Check for even contact and gaps; apply a thin bead of paintable caulk where necessary to seal minor irregularities.
Tighten screws evenly to prevent warping.
Install the filter, verify airflow direction, then replace the grille and test for secure, vibration-free mounting.
Sealing, Insulating, and Finishing
Next, attention turns to sealing and insulating around the return to prevent air leaks and condensation.
Proper air-sealing techniques and insulated duct wraps reduce energy loss and moisture risk.
Finally, any drywall repairs, trim installation, and paint touch-ups restore the wall’s appearance and protect the work.
Air-sealing techniques to prevent leaks
Begin by identifying and sealing gaps where the return connects to wall framing and ductwork, since airtight connections prevent conditioned air loss and reduce pressure imbalances.
Use high-quality foil tape or mastic on seams, spray foam for irregular voids, and gaskets or compressible sealant at the grille-to-wall interface.
Then insulate around the box to limit thermal bridging before finishing.
After sealing, test with a smoke pencil or blower door to confirm no leaks.
Insulating around ductwork to avoid condensation and energy loss
Insulate ductwork to prevent condensation and reduce heat loss or gain by creating a continuous thermal barrier between conditioned air and surrounding spaces.
Use closed-cell foam, fiberglass with vapor barrier, or preformed duct insulation sized to fit. Seal seams with compatible tape or mastic, protect insulation from physical damage, and maintain access to serviceable joints.
Proper insulation improves efficiency and prevents moisture-related issues.
Patching drywall, finishing trim, and paint touch-ups
With ductwork insulated and seams sealed, attention shifts to restoring the wall and surrounding finishes to a weather-tight, serviceable condition.
Damaged drywall is cut squarely, backed if needed, and taped with joint compound applied in thin coats and sanded smooth.
Trim is refitted or replaced, caulked, and primed.
Final paint touch-ups match existing sheen and feather edges for an invisible repair.
Testing and Balancing Airflow
Once the wall return vent is installed, the system is started and checked for obvious leaks and proper sealing.
Technicians then measure return airflow and static pressure at the grille to verify performance against specifications.
Final balancing is achieved by adjusting dampers and registers until airflow is even and pressure falls within acceptable ranges.
Initial system startup and leak check
Begin the initial system startup by powering the HVAC unit and setting the thermostat to call for the appropriate mode so airflow begins; this allows the technician to verify fan operation, register movement, and baseline system behavior before any adjustments.
Then inspect all duct joints, the new wall return assembly, and seals using visual checks and smoke or pressurization methods, repairing leaks immediately to prevent loss of system efficiency.
Measuring return airflow and static pressure basics
Measure return airflow and static pressure to confirm the return path and system resistance match design assumptions before any balancing adjustments.
Use a vane anemometer or flow hood at the new return grille to record cubic feet per minute.
Measure static pressure with a manometer across the filter and fan.
Compare readings to equipment specifications and design targets, documenting results for troubleshooting and verification.
Adjusting dampers and registers for proper balance
With return airflow and static pressure confirmed, attention shifts to adjusting dampers and registers to achieve the target room-by-room balance.
Technicians incrementally close or open supply dampers, monitor airflow at grilles with a flow hood or anemometer, and fine-tune register vanes for directional control.
Verify comfort, minimize pressure imbalances, and recheck static pressure to guarantee system efficiency and avoid undue strain.
Common Problems and Troubleshooting
After installation, common issues include poor airflow caused by obstructions, undersized ducting, or improper balancing, each requiring specific checks and fixes.
Noise and vibration often stem from loose fasteners, panel resonance, or fan interaction and can be reduced by tightening hardware, adding isolation, or adjusting flow.
Drafts and pressure imbalance are diagnosed by inspecting grille placement, sealing leaks, and measuring room pressure relative to adjacent spaces.
Poor airflow after installation: causes and fixes
When a newly installed wall return vent delivers weak or uneven airflow, the underlying causes are usually mechanical or configuration-related rather than a fault with the vent itself.
Common causes include blocked ductwork, closed or undersized dampers, improper grille orientation, leaks at connections, or inadequate system balancing.
Inspect, clear obstructions, seal joints, adjust dampers, and verify register sizing and system airflow to restore proper performance.
Noise and vibration issues and mitigation
Vibrate, rattle, or hum — noise from a wall return vent often signals loose components, turbulent airflow, or resonance within the duct system rather than a defective grille.
Inspect and tighten screws, secure loose duct joints with foil tape or clamps, add foam or rubber vibration isolators around the grille, smooth sharp shifts to reduce turbulence, and balance fan speed to minimize resonance without affecting system performance.
Drafts, pressure imbalance, and how to diagnose
Several common symptoms—cold or hot drafts near the grille, rooms that feel persistently over- or under-pressurized, or uneven airflow between zones—point to pressure imbalances in a wall return vent system.
Diagnose by checking grille blockage, duct leaks, and filter restriction; measure static pressure if possible.
Balance using register adjustments, sealing leaks, and adding transfer grills or dedicated returns to restore neutral pressure and consistent airflow.
Safety, Code, and Permitting Considerations
Before beginning work, the article recommends verifying local building codes and ventilation requirements to confirm the wall return vent meets airflow, sizing, and placement standards.
It advises hiring a licensed HVAC professional for alterations that affect system balance, ductwork, or gas/electrical components.
It also highlights electrical and fire-safety concerns—proper wiring, clearances, and fire-blocking—to prevent hazards and permit issues.
Building codes and ventilation requirements to check
While installing a wall return vent, compliance with local building codes and ventilation standards is essential to guarantee safety, indoor air quality, and system efficiency.
Verify minimum return grille sizes, required clearances from combustion appliances, duct material and sealing standards, airflow rates (CFM) per room, and firestopping/attenuation requirements.
Obtain permits when mandated and consult code references (IRC, IMC) for jurisdiction-specific rules.
When to hire a licensed HVAC professional
When should a homeowner call a licensed HVAC professional?
A licensed contractor is advised for complex duct modifications, structural wall cutting, permit-required work, or suspected asbestos or mold.
Professionals guarantee code compliance, correct load calculations, airtight connections, and warranty protection.
Hire a pro if the project affects system balance, involves multi-zone controls, or if local regulations mandate certified installation to avoid fines or safety risks.
Electrical and fire-safety concerns to avoid
Address electrical and fire-safety hazards early to prevent shock, short circuits, and fire spread during a wall return vent installation.
Inspect for nearby wiring, outlet boxes, and combustible insulation. Avoid cutting into live circuits; shut power and verify with a tester.
Maintain required clearance from electrical fixtures, seal gaps with fire-rated materials, and follow local codes.
Consult an electrician for uncertain conditions.
Maintenance and Long-Term Care
Routine maintenance keeps a wall return vent functioning efficiently and prolongs system life.
Homeowners should follow a filter replacement schedule using manufacturer-recommended MERV-rated filters, inspect duct seals and grille condition periodically, and repair any loose or damaged components.
Visible signs such as persistent dust accumulation, reduced airflow, rattling, or uneven room temperatures indicate the return may need repair or rework.
Filter replacement schedule and recommended filters
Although wall return vents themselves are simple, maintaining air quality depends on a disciplined filter replacement schedule and the correct filter choice; replacing standard 1-inch fiberglass filters every 30–90 days and pleated filters every 90–180 days is a practical baseline.
Households containing pets, smokers, or allergy sufferers should move to the shorter end of those ranges.
High-MERV or HEPA-compatible filters improve capture of fine particles but may require HVAC compatibility checks; confirm airflow capacity before upgrading.
Inspecting duct seals and grille condition periodically
Beyond filter selection and replacement cadence, the integrity of duct seals and the physical condition of return grilles directly affect airflow efficiency and indoor air quality.
Periodic inspections identify loose seams, gaps, detached foil tape, rust, bent louvers, and accumulated debris.
Tighten or reseal connections with appropriate mastic or foil tape, clean or replace damaged grilles, and document findings for scheduled maintenance.
Signs your return needs repair or rework
Recognize common indicators that a return vent requires repair or rework: reduced airflow at the grille, whistling or rattling noises, visible gaps or detachment at seams, persistent dust buildup around the opening, and uneven room temperatures despite proper thermostat settings.
Additional signs include musty odors, frequent filter clogging, visible mold, and sudden energy bill increases; these warrant inspection, sealing, cleaning, or professional service.
Cost Breakdown and Time Estimates
A concise cost breakdown lists typical DIY expenses by component—grille, ducting, sealant, screws, and any required tools—so readers can estimate materials costs before starting.
A separate comparison of typical labor time versus DIY time highlights where professional installation saves time but adds to expense.
This section gives clear figures and realistic time estimates to aid decision-making.
DIY cost estimate by component
Several key components determine the DIY cost for installing a wall return vent: materials (vent grille, ducting, sealant, screws), tools (saw, drill, level), and optional items (insulation, backdraft damper, paint). labor time estimates vary by skill level—typically 1–3 hours for cutting and framing a single opening, plus 30–60 minutes for duct connection and sealing—while materials commonly range $30–$120 depending on duct length and grille quality.
| Item | Cost | Time |
|---|---|---|
| Grille | $10–$60 | 15–30m |
| Ducting | $10–$40 | 20–40m |
| Extras | $5–$20 | 10–30m |
Typical labor vs DIY time comparison
Having established component-level costs and time estimates, the comparison shifts to how those figures change when hiring a professional versus doing the job oneself.
Professionals typically complete installation in 2–4 hours, charging hourly rates plus travel, while a competent DIYer spends 4–8 hours, often longer for cutting and sealing.
Labor savings are offset by potential tool rental, mistakes, and warranty differences.
Helpful Tips and Best Techniques for DIY Success
Practical tips can help guarantee precise cutouts and accurate stud location, such as using a stud finder, marking lines with a level, and scoring drywall before cutting.
Recommended sealing materials and methods—high-quality HVAC foil tape, HVAC mastic, and foam gaskets—extend system longevity and prevent air leaks.
Efficiency techniques like working in stages, protecting floors, and cleaning debris promptly reduce disruption and speed project completion.
Tricks for cutting accurate openings and locating studs
Measure twice and mark once: accurate openings and correctly located studs are the foundation of a clean, safe wall return vent installation.
Use a stud finder, confirm with a small pilot nail, and trace the grille template level with a spirit level.
Score drywall with a utility knife before sawing to prevent tear-out. Cut slowly, check fit frequently, and adjust as needed for a snug, square opening.
Best sealing materials and methods for longevity
Once the grille fits squarely and the opening is trimmed to size, attention turns to sealing to prevent air leaks, moisture intrusion, and dust buildup.
Use closed-cell foam gasket tape around the frame, high-quality silicone or polyurethane sealant for gaps, and rust-resistant screws with washered anchors.
Verify continuous contact, smooth bead application, and allow full cure before final trim to maximize longevity.
Efficiency tips to minimize disruption and cleanup
A few simple preparations reduce mess and downtime: lay drop cloths beyond the immediate work area, cover nearby vents and furniture with lightweight plastic, and keep a small trash bin and magnetic tray for screws within arm’s reach.
Work systematically: remove dust periodically with a handheld vacuum, label removed parts, use quick-release fasteners where possible, and plan tool staging to shorten trips and speed cleanup.
Example Installation Scenarios
The following examples compare common situations for installing wall returns, including exterior versus interior walls and the unique challenges each presents.
One scenario addresses retrofitting a return in a finished room, focusing on minimal disruption and sealing requirements.
Another covers multi-story homes, outlining placement strategies to balance airflow between levels.
Installing a wall return in an exterior wall vs interior wall
When choosing between installing a wall return in an exterior wall versus an interior wall, the installer must weigh differences in thermal bridging, moisture management, and duct routing that affect performance and labor.
Exterior installations require insulation, sealed penetrations, and vapor control to prevent condensation and heat loss, while interior placements simplify sealing and insulation needs but may demand longer duct runs and creative routing around framing.
Retrofitting a return in a finished room
Having weighed the trade-offs between exterior and interior wall returns, attention shifts to practical examples of retrofitting a return in a finished room.
The process requires locating studs and wiring, selecting a low-profile grille, cutting a neat opening, and installing flexible ducting or a short chase to the main return.
Finish with trim, sealing, and testing airflow for balance and noise control.
Multi-story home considerations and placement strategies
In multi-story homes, strategic placement of return vents must account for vertical airflow patterns, stack effect, and the location of central ducts and mechanical rooms to guarantee balanced circulation between floors.
Consider these placement strategies:
- Place returns on each level near central stairwells to counter stack effect.
- Align returns with main duct trunks.
- Avoid bedrooms’ exterior walls.
- Coordinate with mechanical room airflow and zoning.
Conclusion
Installing a wall return vent completes the DIY journey, tying airflow systems together like the final stitch in a quilt. The installer is reminded that careful assessment, proper tools, and secure sealing yield efficient, quiet performance and long-term reliability. Routine maintenance preserves function and prevents costly repairs. With clear steps, realistic time and cost expectations, and attention to safety, even a novice can achieve professional-feeling results and enjoy improved home comfort for years.