How to Repair Kitec Pipe: Step-by-Step Fixes, Tools Needed, and When to Call a Pro
If you’re dealing with Kitec pipe issues, here’s how to repair it effectively. Kitec pipes, made of aluminum-sandwich PEX with brass fittings, often suffer from corrosion and dezincification. Start by checking for stains, low pressure, or pinholes. You can choose between temporary solutions like clamps or epoxy, or opt for more permanent fixes such as cutting out the damaged section and replacing it with PEX or copper fittings, or using push-fit connectors.
Essential tools for the job include pipe cutters, crimpers, wrenches, and pressure gauges. Always wear safety gear and ensure you use compatible fittings. If you encounter widespread corrosion, need brazing, or face code-sensitive repairs, it’s best to call a licensed plumber. Continue reading for detailed step-by-step instructions, necessary tools, and advice on when to hire a professional.
What Kitec Pipe Is and Why It Fails
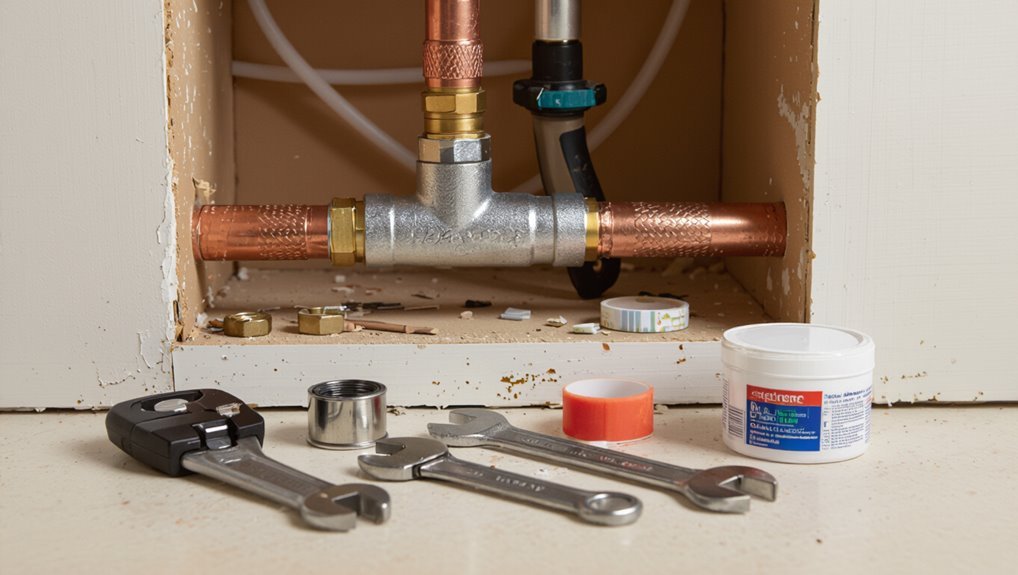
Kitec pipe is a branded plumbing system composed of aluminum-sandwich plastic tubing and brass fittings that was commonly installed in homes and small buildings in the late 1990s and early 2000s.
Failures typically occur from corrosion and dezincification of fittings, deterioration of joints, and breakdown at junctions between dissimilar metals.
Homeowners often notice reduced water pressure, pinhole leaks, metallic-tasting water, or visible staining where Kitec has failed.
Materials and common installation methods
A hybrid plumbing system developed in the late 1990s, the product pairs an aluminum core with cross-linked polyethylene (PEX) inner and outer layers, joined by crimped brass fittings and threaded adapters.
This construction aimed to combine flexibility, corrosion resistance, and ease of installation but introduced galvanic and mechanical vulnerabilities.
Installers used press, crimp, and compression methods. Guidance on how to repair kitec pipe focuses on replacing fittings, using compatible adapters, and ensuring proper support and isolation.
Typical failure modes (corrosion, dezincification, joint failures)
Exhibiting a mix of material-driven and installation-related weaknesses, the system commonly fails through corrosion of the brass fittings, dezincification of susceptible alloys, and mechanical joint failures where crimping or compression was improperly executed or stressed over time.
Electrochemical attack, stray current, and water chemistry accelerate metal loss; softened or porous brass loses structural integrity, while poorly formed joints crack or leak under thermal cycling and pressure.
Signs of Kitec problems homeowners notice
Following those common failure modes, homeowners typically first encounter visible indicators that plumbing is compromised.
Signs include discolored or cloudy water, low pressure, persistent leaks at fittings, bulging or softened pipe sections, and metallic taste or staining on fixtures.
Occasional banging, unexplained spikes in water bills, and mold or mildew near plumbing further suggest Kitec deterioration requiring inspection and possible replacement.
Assessing the Situation: Is Repair or Replacement Needed?
A careful visual inspection for corrosion, blistering, loose fittings, and nearby water damage guides the initial assessment and should be done with power and water shut off and basic protective gear.
Simple leak tests and pressure checks reveal active loss, while records of pipe age, location (exposed versus concealed), and water chemistry indicate long‑term susceptibility.
Together these findings determine whether isolated repairs are viable or whether full replacement is warranted.
How to perform a visual inspection safely
Begin the inspection with a clear assessment of visible conditions: note corrosion, bulging, discoloration, soft spots, or seams that appear split or blistered.
Observe fittings, joints, supports, and nearby insulation for deterioration.
Use proper lighting, gloves, eye protection, and stable footing.
Do not disturb suspect areas; document locations with photos and notes for later evaluation or professional assessment.
How to test for leaks and pressure loss
Determine whether leaks exist and quantify pressure loss before deciding on repair or replacement.
Use a calibrated pressure gauge at system test points, isolate sections with valves, and record static and dynamic pressures.
Apply soapy solution to joints for visible bubbles and monitor for drops over time.
Note intermittent losses, audible leaks, or pressure differentials exceeding manufacturer tolerances for further action.
When Kitec is still serviceable vs. when full replacement is required
Having confirmed leak locations and quantified pressure loss, the next step is to assess whether individual Kitec sections can be repaired or require full replacement.
Repair is viable when damage is localized, fittings and surrounding tubing remain structurally sound, and repairs meet code.
Full replacement is required for widespread corrosion, multiple failures, compromised fittings, or when repair would not restore long-term reliability or code compliance.
How age, location, and water chemistry affect the decision
Because Kitec deterioration progresses differently depending on age, placement, and the chemistry of the water it carries, these factors must be weighed together when deciding between repair and replacement.
Older systems, buried runs, or areas with aggressive water (high chlorine, acidity, hardness) favor replacement.
Accessible, newer sections with mild water issues may suit targeted repairs.
Risk tolerance and long-term costs guide the choice.
Tools and Materials You’ll Need
The guide lists the essential hand and power tools typically required for a Kitec repair, such as pipe cutters, adjustable wrenches, and soldering or crimping equipment.
It then identifies consumables and replacement parts compatible with Kitec systems, including approved fittings, tubing sections, and sealing materials.
Finally, it covers necessary safety gear and leak-detection tools like gloves, eye protection, gas detectors, and pressure-testing equipment.
Essential tools for DIY Kitec repair
A compact kit of reliable tools and quality replacement parts is the foundation for any DIY Kitec repair, since proper equipment reduces mistakes and speeds the job.
Essential tools focus on safe, accurate cuts, secure fittings, and leak testing.
- Pipe cutter and deburring tool
- Adjustable wrench and channel locks
- Compression sleeve driver
- Leak detector spray or pressure gauge
- Flashlight and inspection mirror
Consumables and replacement parts compatible with Kitec
Several specific replacement parts and consumables are required to repair Kitec systems reliably: compatible PEX-Al-PEX fittings or approved connector adapters, the correct-sized compression sleeves and nuts, lead-free solder or appropriate sealants where metal connections remain, and thread sealant tape rated for potable water.
Proper stock prevents mismatches and leaks.
- PEX-Al-PEX couplings
- Adapter fittings
- Compression sleeves/nuts
- Lead-free solder/flux
- PTFE tape for potable water
Safety gear and leak-detection tools
Proper personal protective equipment and precise leak-detection tools are essential before attempting any Kitec repair to minimize injury and guarantee reliable results.
Recommended gear includes safety glasses, chemical-resistant gloves, ear protection, and a respirator for soldering or adhesives.
Essential detection tools: electronic leak detector, pressure gauge, dye kit, infrared thermometer, and inspection flashlight.
Secure a non-sparking wrench set for emergency isolation.
Step-by-Step Temporary Leak Repairs
This section outlines quick-stop options for Kitec leaks, including clamps, silicone wraps, epoxy putty, and pipe repair tape, and explains how to install a compression repair sleeve.
It gives concise, step-by-step guidance for using repair tape and epoxy putty correctly and notes when temporary fixes are acceptable.
Expected longevity for each method is summarized so the reader can weigh risks and plan a permanent repair.
Quick-stop methods: clamps, epoxy, and silicone wraps
When a Kitec pipe develops a small, active leak and an immediate full repair isn’t possible, quick-stop methods such as pipe clamps, epoxy putty, and silicone repair wraps can temporarily halt water flow and limit damage.
Clean and dry the area, apply epoxy putty per directions, wrap silicone repair tape tightly, or position a rubber pad with a hose clamp.
Monitor and replace with permanent repair promptly.
How to install a compression repair sleeve
Begin by shutting off the water supply and relieving pressure in the line.
Then dry and clean the pipe surface around the leak so the compression sleeve can seat properly.
Measure and select a sleeve sized to the pipe diameter.
Slide the sleeve over the leak, center it, tighten the compression nut evenly to manufacturer torque, restore pressure slowly, and inspect for leaks.
How to use pipe repair tape and epoxy putty correctly
To perform a temporary repair on Kitec pipe using pipe repair tape and epoxy putty, first shut off the water and relieve pressure.
Then thoroughly dry and abrade the pipe around the leak to remove corrosion, dirt, and any loose material so repairs will adhere.
Mix epoxy per instructions, apply putty to seal pinholes, and wrap silicone-reinforced tape tightly overlapping.
Cure fully before restoring water.
When temporary fixes are acceptable and their expected longevity
After performing a temporary seal with tape and epoxy, the homeowner should assess whether a short-term repair is appropriate by considering leak severity, location, water pressure, and plans for permanent replacement.
Temporary fixes suit minor pinhole leaks, low-pressure lines, or until parts arrive; expect weeks to a few months of service.
Major damage, fittings, or high pressure require professional permanent replacement promptly.
Permanent Repair Options for Small Sections
For small failed runs, the recommended approach is to cut out the damaged section and replace it with PEX or copper using appropriate connection fittings.
Push-fit connectors such as SharkBite are commonly used on Kitec tubing, though proper preparation and seating are essential for a reliable joint.
All permanent repairs should be completed with correct soldering or crimping techniques where applicable and followed by a full pressure test to confirm integrity.
Cutting out and replacing a short section with PEX or copper
Cutting out and replacing a short section of Kitec requires isolating the affected run, removing the damaged segment, and installing a compatible replacement such as PEX or copper with appropriate connection fittings and secure connections.
The technician measures, deburrs, and fits pipe ends, using soldered copper or crimped/secured PEX fittings rated for potable water.
Pressure-test repaired run and insulate or secure to prevent movement.
Using SharkBite or push-fit connectors on Kitec tubing
Once a damaged section of Kitec has been removed and the ends prepared, a technician can opt to use SharkBite or other push-fit fittings as a permanent repair for short runs.
These fittings mate directly to Kitec after proper deburring and cleaning, providing immediate pressure-ready joints without solder or crimp tools.
Verify compatibility, confirm correct insertion depth, and test thoroughly for leaks under system pressure.
Proper techniques for soldering or crimping transitions
When joining Kitec to copper or PEX for a permanent repair, a technician should follow precise soldering or crimping techniques that guarantee a durable, leak-free connection; this begins with thoroughly cleaning and beveling the Kitec polymer or fitting surfaces, selecting the correct connection adapter approved for Kitec, and confirming appropriate temperature limits and flux compatibility.
Use heat shields, avoid overheating polymer, seat fittings fully, and torque crimps to manufacturer specs.
Pressure testing after a permanent repair
Begin pressure testing only after the repair has cooled, fittings are fully seated, and all connections have been visually inspected for proper installation.
Use a calibrated gauge and introduce water slowly to avoid shock.
Hold test pressure at recommended levels for the pipe material for at least 15–30 minutes, monitor for drops, and inspect joints for leaks.
Release pressure gradually before restoring service.
Replacing Kitec Runs: Full Replacement Process
Replacing an entire Kitec run begins with a clear plan addressing scope, required permits, and applicable code standards.
The discussion should compare suitable replacement materials (PEX, copper, CPVC), outline step-by-step removal and installation for a typical run, and explain how to tie new lines into existing fixtures and manifolds.
It should conclude with final pressure testing, leak checks, and documentation needed for inspector approval.
Planning the replacement: scope, permits, and codes
Evaluating the replacement of Kitec piping starts with a clear, documented scope that identifies affected runs, access points, and required fixtures to be moved or shut off.
Next, verify local permit requirements, inspection schedules, and applicable plumbing codes.
Create a timeline, budget for inspections and labor, and record required documentation for permits and final sign-off to guarantee compliance and avoid costly rework.
Choosing replacement materials (PEX vs. copper vs. CPVC)
Select replacement material based on durability, cost, installation constraints, and code acceptance: The technician compares PEX, copper, and CPVC for longevity, freeze tolerance, joint methods, and local code. Choice balances budget, skill, and projected service life; corrosion risk and connector availability influence selection.
| Material | Strengths | Considerations |
|---|---|---|
| PEX | Flexible, inexpensive | UV sensitive, fittings |
| Copper | Durable, recyclable | Cost, soldering |
| CPVC | Chemical resistant | Brittle, temp limits |
Step-by-step pipe removal and new installation for a typical run
Begin by shutting off the water supply and draining the system to prevent leaks during disassembly; then verify power to any connected equipment (water heaters, pumps) is disconnected.
Cut out Kitec sections, remove fittings, and inspect surrounding structure.
Install chosen replacement pipe along the same route, secure supports, make proper joints, pressure-test the run, and restore water while checking for leaks before final insulation and enclosure.
Integrating new lines with existing fixtures and manifolds
After the replacement run is routed, attention turns to tying the new piping into existing fixtures and manifolds with careful planning to preserve function and prevent leaks.
Install compatible fittings or connection adapters, align runs to avoid strain, and maintain correct slope.
Secure supports, purge debris, and use approved joints and sealants.
Document connection points and note any required shutoffs for future maintenance.
Final testing and documentation for inspectors
Complete final testing and compile documentation to verify the replacement meets code and manufacturer requirements.
The contractor performs pressure and leak tests, verifies material labeling, and confirms proper fittings and support.
Test results, photos, as-installed diagrams, and product data sheets are assembled.
A compliance checklist and signed affidavit are provided for inspector review.
Retain copies for warranties and future maintenance records.
Corrosion and Fitting Issues Unique to Kitec
The section outlines how to identify problematic fittings and changeover points that commonly fail on Kitec systems, emphasizing visual signs and testing methods.
It describes handling dezincified brass and crumbling fittings, including safe removal and appropriate replacement materials.
Finally, it summarizes best practices to prevent future corrosion during repairs, such as proper material selection, dielectric unions, and controlled installation techniques.
Identifying problematic fittings and transition points
Inspecters should focus on fittings and changeover points when evaluating Kitec systems, as these locations are prone to corrosion, dezincification of brass components, and failures where dissimilar metals meet.
Technicians should look for greenish or white deposits, loose or leaking joints, warped plastic inserts, and signs of electrochemical attack.
Prioritize documenting locations, photographing damage, and marking segments for further testing or replacement.
How to handle dezincified brass and crumbling fittings
After documenting and photographing problem fittings and changeover points, attention should shift to addressing dezincified brass and crumbling fittings commonly found in Kitec systems.
Inspect fittings for visible pitting, grainy texture, and loose fragments. Remove and replace compromised components with compatible lead-free alternatives, using proper seals and torque.
Discard brittle remnants; test connections under pressure. Log replacements and monitor for recurrence.
Best practices to prevent future corrosion when repairing
A few targeted measures particularly reduce the risk of renewed corrosion when repairing Kitec systems:
- use only corrosion-resistant, lead-free replacement fittings;
- guarantee dielectric unions or approved isolators separate dissimilar metals;
- apply compatible thread sealants and avoid over-tightening;
- flush and chemically neutralize the line before reconnecting;
- and document water chemistry and material changes for follow-up monitoring.
Inspect joints regularly, control pH and chlorides, and replace compromised components promptly.
Cost Estimates and Timeframes
Typical costs for temporary patches, partial section replacements, and full system replacement vary widely depending on material accessibility and local labor rates.
Timeframes also range from a few hours for isolated repairs to several days for partial work and multiple days to a week or more for complete replacements.
The following sections outline representative price ranges and estimated labor times for common Kitec repair scopes.
Typical costs for temporary fixes vs. partial vs. full replacement
When evaluating repairs, homeowners should expect wide variation in cost and time depending on whether they choose temporary fixes, partial replacement, or full system replacement. Temporary patches: low cost, short-term relief. Partial replacement: moderate cost, targeted reliability. Full replacement: highest cost, long-term assurance.
| Scope | Typical cost |
|---|---|
| Temporary | $50–$500 |
| Partial | $500–$3,000 |
Estimated time required for common repair scopes
Several common repair scopes each carry predictable timeframes that help homeowners plan logistics and downtime.
Minor leak repairs and clamp installations typically take 1–3 hours.
Sectional replacements or reroutes require 4–8 hours depending on access.
Partial system replacements often span 1–2 days.
Full repiping projects usually take 3–7 days, factoring inspection, drying, and fixture reconnections.
When to Call a Professional Plumber
Recognizing when a homeowner should call a licensed plumber hinges on safety and code compliance, such as gas line work, structural access, or local requirements that prohibit DIY repairs.
Insurance, warranty, and liability concerns also dictate professional involvement when claims or documented replacements are necessary.
A qualified plumber experienced with Kitec replacement will provide a written estimate outlining scope, materials, timelines, permits, and warranty terms for comparison.
Safety and code issues that require licensed professionals
Any repair involving pressurized systems, structural changes, or suspected hazardous materials should prompt consultation with a licensed plumber.
Licensed professionals guarantee compliance with local codes, proper permits, and safe handling of lead, asbestos, or degraded materials. They verify pressure integrity, make gas- or water-system tie-ins, and provide documentation for inspections.
DIY attempts risk violations, injury, and costly corrective work.
Situations where insurance or warranty considerations apply
Homeowners should contact a licensed plumber when leaks or repairs could affect insurance claims or void warranties, such as incidents causing significant water damage, repairs under a manufacturer’s warranty, or work on systems covered by homeowner or condo association policies.
A professional documents damage, provides code-compliant repairs, issues invoices and permits, and coordinates with insurers or administrators to preserve coverage and warranty eligibility.
How to vet plumbers experienced with Kitec and replacement work
After contacting professionals to document damage or coordinate with insurers, property owners should also focus on selecting a plumber with specific experience in Kitec systems and full replacement work.
Verify licensing, ask for Kitec-specific projects, check references and photos, confirm insurance and warranty transfer, and require clear timelines and cleanup plans.
- Confirm license and bonding
- Request Kitec experience examples
- Check client references
- Verify insurance/warranty handling
- Demand timeline and site cleanup
What to expect from a professional quote and written estimate
A professional quote should clearly itemize scope, materials, labor, permits, and contingency costs so the property owner can compare bids on an apples-to-apples basis.
The estimate should state timeline, payment schedule, warranty terms, permit responsibilities, and disposal fees.
It should note assumptions, exclusions, and change-order procedures.
Written, signed estimates protect both parties and reduce surprises during Kitec pipe replacement.
Preventive Measures and Long-Term Maintenance
The homeowner should establish regular inspections of repaired or replaced plumbing to detect leaks, pressure changes, or new joint failures.
Adjusting water chemistry and implementing corrosion control—such as pH balancing, corrosion inhibitors, or water softening—can extend system life.
A concise maintenance checklist tailored to properties with Kitec history will help track inspections, treatments, and any future repairs.
How to monitor repaired or replaced plumbing for new issues
Many homeowners can reduce surprise failures by establishing a simple monitoring routine for repaired or replaced Kitec plumbing.
Inspect visible joints, fittings, and access panels monthly for dampness, staining, or corrosion.
Record water pressure, flow changes, and unusual noises.
Test nearby drains and fixtures for leaks after use.
Promptly document and address anomalies; escalate persistent or worsening signs to a licensed plumber.
Water chemistry adjustments and corrosion control
Adjust water chemistry to limit corrosion and extend the service life of repaired or replaced Kitec plumbing by targeting pH, alkalinity, and dissolved oxygen levels, and by controlling chloride and sulfate concentrations.
Use corrosion inhibitors, maintain neutral to slightly alkaline pH, and reduce oxygen via deaeration where practical.
Periodic water testing guides adjustments; consult a water treatment specialist for persistent aggressive water or complex systems.
Maintenance checklist for homes with known Kitec history
Homeowners with known Kitec plumbing should follow a concise, routine maintenance checklist to detect issues early and reduce failure risk.
Regular inspections, documented system maps, and scheduled pressure tests minimize surprises. Replace suspect fittings proactively and monitor water chemistry. Keep records for buyers and insurers.
- Inspect joints and fittings quarterly
- Pressure-test annually
- Flush and check water quality
- Replace suspect components promptly
- Maintain written records
Real-World Examples and Common Mistakes
The article presents brief case studies contrasting successful DIY Kitec repairs with examples that failed and required professional intervention.
It highlights common mistakes—such as improper joint preparation, incorrect clamp selection, and overlooking manufacturer specifications—and explains why these errors lead to leaks or premature failure.
Readers are invited to compare these outcomes to understand which techniques are reliable and which should be avoided.
Short case studies of effective DIY repairs vs. failures
Examining short case studies reveals which DIY approaches to Kitec pipe succeed and which fail, highlighting practical patterns rather than theory.
One homeowner stopped a minor leak with a proper crimped repair and temporary clamp, later scheduling a full replacement.
Another attempted adhesive-only fixes, causing recurrence and water damage.
Successful DIYs used correct tools, conservative scope, and prompt professional follow-up when uncertainty arose.
Common repair mistakes to avoid and why they fail
Spotting common repair mistakes early prevents small leaks from becoming major damage.
Technicians often use improper clamps, mismatched fittings, or sealants unsuitable for Kitec, leading to recurring leaks.
Inadequate pipe cleaning, skipping pressure tests, and over-tightening bends cause failures.
Real-world examples show temporary fixes corrode joints; correct materials, proper testing, and following manufacturer specs prevent repeat breakdowns and liability.
Resources and Codes
The section outlines applicable building codes and where to obtain regional permit information for Kitec-related repairs.
It also references manufacturer notices, recalls, and any documented replacement programs that affect repair options.
Finally, it lists useful links for parts, tools, and professional associations to help homeowners and contractors comply with regulations and source materials.
Relevant building codes and permit resources by region
Where do local rules intersect with the practical steps of repairing Kitec pipe? Inspectors, permits, and code citations vary by jurisdiction; practitioners should consult municipal building departments, state plumbing codes (e.g., IPC, UPC adaptations), and local amendment databases.
Online permit portals, plan-review contacts, and licensed-plumber requirements inform allowed methods. Recordkeeping and inspections guarantee compliance and safe, code-compliant repairs across regions.
Manufacturer notices, recalls, and replacement programs
Many manufacturers issued formal notices, recalls, and buyback or replacement programs for Kitec plumbing components after documented failures and class-action findings.
Homeowners should verify serial numbers, model types, and eligibility dates against manufacturer databases. Programs often covered partial or full replacement, inspection costs, and authorized contractor lists.
Claim procedures, deadlines, and required documentation vary; follow official notices and retain records for warranty or legal purposes.
Helpful links for parts, tools, and professional associations
Several targeted resources help locate Kitec-compatible parts, required tools, and accredited professionals for safe repair or replacement.
Reliable sources include manufacturer archives, plumbing supply catalogs, certified contractor directories, code authority sites, and tool rental networks. Use these links to verify compatibility, tool specs, certification status, and local code compliance before acting.
- Manufacturer technical bulletins
- Certified contractor directories
- Plumbing code authorities
- Specialized parts suppliers
- Tool rental and specifications hubs
Conclusion
The battered Kitec pipe, once a thin ribbon of promise, now reads like an autumn branch ready to fall. Small fixes are leaves pressed back into place; full replacement is the patient replanting of a new sapling. Tools are the gardener’s hands; a pro is the arborist called when rot runs deep. With careful tending and timely action, the plumbing garden can be restored, roots steadied against future storms.