How to Unclog a Storm Drain Fast: Safe DIY Methods That Work
Quickly Unclogging a Storm Drain: Safe DIY Methods
To unclog a storm drain fast, start by wearing gloves, goggles, and boots for safety. Assess the area for any contamination or wildlife before removing the grate. Clear surface debris by hand or with a rake. Then, use a garden hose, pressure nozzle, wet/dry vacuum, or plumber’s snake to tackle deeper blockages. Avoid harsh chemicals, document the location, and be aware of any legal regulations. Once cleared, restore the grate. For detailed techniques, safety checks, and guidance on when to call a professional, continue reading.
How to Unclog a Storm Drain Quickly and Safely
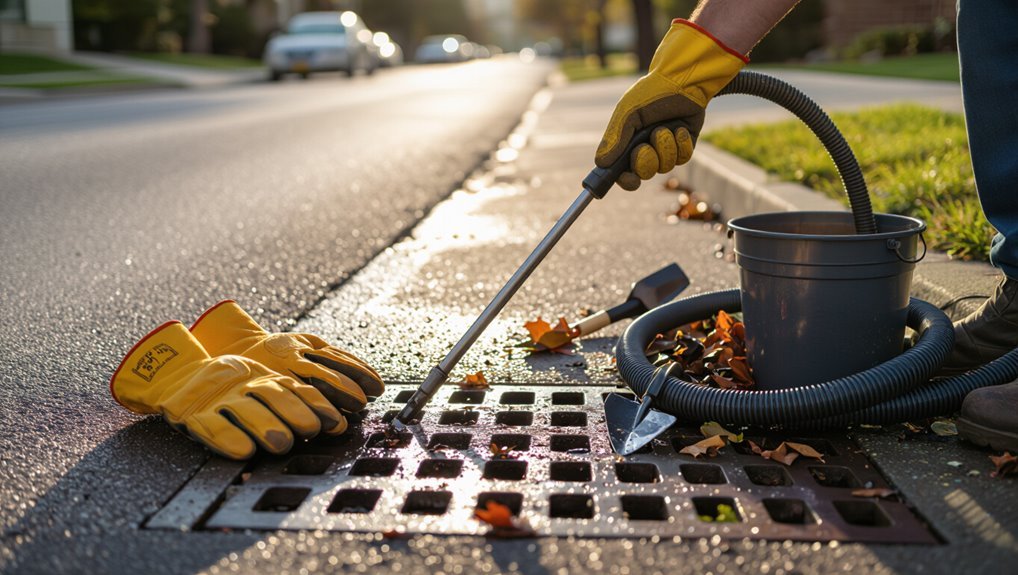
Signs such as standing water, slow drainage after rain, or visible debris indicate when a storm drain requires prompt attention.
The urgency depends on blockage severity and potential flooding risk, which dictates whether a quick DIY clearing is appropriate or professional intervention is safer.
Comparatively, DIY methods can be faster for minor clogs but professionals offer speed and reliability for severe or hazardous obstructions.
When to unclog a storm drain signs and urgency
How can one tell when a storm drain needs attention?
Visible pooling, slow drainage after rain, debris buildup, foul odors, or overflow onto sidewalks signal urgency.
Immediate action reduces flooding and contamination; knowing how to unclog a storm drain helps prioritize response.
If water reaches property or blocks traffic, treat the situation as urgent and address safely with appropriate tools.
How fast DIY methods compare to calling a pro
When time and risk are considered, DIY approaches often clear simple blockages within minutes to a few hours using hand tools, plungers, or a garden hose.
In contrast, complex clogs, deep sediment, or damaged infrastructure typically require a professional whose equipment and experience can resolve issues in hours but may take longer for scheduling and permits.
Homeowners balance cost, safety, and likelihood of success when choosing.
Immediate safety precautions before starting
Before beginning work, the person should confirm appropriate personal protective equipment—gloves, eye protection, waterproof boots, and a mask—are on hand.
They should also scan for hazards such as contaminated water, trapped wildlife, or hidden sharp debris.
Finally, they must verify local laws and municipal requirements for working on public drains to avoid fines or unsafe interference.
Personal protective equipment checklist
Prior to any work on a clogged storm drain, individuals must don appropriate personal protective equipment to guard against physical hazards, contaminated water, and chemical exposure.
A concise checklist guarantees readiness and reduces injury risk.
- Nitrile gloves and waterproof outer gloves
- Safety goggles or face shield
- Steel-toe, slip-resistant boots
- High-visibility vest and hard hat
Hazards to watch for (contaminated water, wildlife, hidden debris)
With personal protective equipment in place, workers should immediately assess hazards that could complicate the job: contaminated water, wary wildlife, and concealed debris.
Inspect water for odor, discoloration, and oil sheen; assume biological and chemical contamination.
Watch for trapped or defensive animals and avoid direct handling.
Probe and illuminate the drain opening to locate sharp objects, entanglements, and unstable covers before any removal.
Legal and municipal rules to check before working on public drains
Because public storm drains fall under municipal jurisdiction, personnel must confirm applicable permits, notifications, and access restrictions before any work begins.
Verify local ordinances, utility markings, and required environmental protections. Notify the public works department and secure written permission if needed.
Check liability, disposal rules for removed debris, and whether licensed contractors are mandated. Document approvals and communications before commencing.
Quick-assessment steps to identify the blockage
A quick assessment begins with a visual and tactile check of the grate and inlet area to spot obvious debris without tools.
If the clog is not apparent, a flashlight, a rigid stick, or a small camera can help locate the obstruction and gauge its size and position.
Finally, probing flow beyond the inlet and observing water movement indicate whether the blockage is local or farther down the downstream line.
How to inspect a storm drain without tools
Before approaching the grate, the inspector should visually scan the surrounding area and listen for abnormal water sounds to gauge flow and likely blockage location.
They should note surface pooling, debris patterns, odors, insect activity, and recent drainage changes.
From the curb, observe grate alignment and visible obstructions.
Record findings, avoid entering the channel, and report hazardous conditions to authorities if present.
Using simple tools to locate the clog (flashlight, stick, camera)
Use a flashlight, a probing stick, and a camera to perform a quick, safe assessment of the clog from the grate.
The observer shines light to reveal debris, inserts a stick to gauge depth and firmness without forcing, and lowers a camera or phone on a secure line to capture visuals.
Note material type, approximate location, and any hazards before proceeding.
Determining whether the clog is local or in the downstream line
How can one tell if the obstruction sits at the grate or farther down the line?
Inspect surface flow: standing water pooling at the grate suggests a local blockage.
Remove visible debris and test flow; if water still backs up, suspect downstream clog.
Check adjacent drains—if they’re clear while this one is full, obstruction is local; if multiple drains back up, problem lies in the main line.
Fast DIY unclogging methods that work
The section outlines practical, fast methods homeowners can use to clear a storm drain, from manual removal with gloves, rakes, and grabbers to pressure flushing with a garden hose or high-pressure nozzle.
It also covers using a plumber’s snake or drain auger safely, employing a wet/dry vacuum to extract water and debris, and preparing simple flushing solutions like hot water with a biodegradable detergent.
Each method includes basic safety tips and step-by-step actions for effective, low-cost clearing.
Manual removal: using gloves, rakes, and grabbers
Clearing debris by hand is often the quickest way to restore flow to a clogged storm drain. Protective gloves, sturdy footwear, and eye protection are essential.
Hands, rakes, and telescoping grabbers remove leaves, sediment, and trash. Work systematically from the grate outward, disposing of waste properly.
- Assess safety
- Remove large debris
- Use tools for deeper reach
- Reinspect flow
Pressure flushing with a garden hose or high-pressure nozzle
Use a garden hose or a high-pressure nozzle to blast accumulated sediment and small debris from the drain and its immediate inlet.
Aim water at varying angles, moving debris toward the grate while avoiding excessive pressure that could damage pipe joints.
Repeat flushing until flow improves, clearing loosened material with a hand net.
Wear eye protection and keep bystanders clear.
Using a plumber’s snake or drain auger safely
After flushing loosens sediment but stubborn blockages remain, a plumber’s snake or hand auger offers targeted mechanical clearing for lines that water pressure can’t free.
Wear gloves and eye protection, feed the cable slowly, rotate to engage debris, and retract frequently to remove material.
Stop if resistance feels solid; excessive force risks pipe damage.
Clean and lubricate the tool after use.
Wet/dry vacuum technique for water and debris extraction
A wet/dry vacuum can rapidly remove standing water and loosened debris from a storm drain by creating strong suction at the grate or access point; the hose is sealed over the opening (using a rubber adapter or improvised gasket) and run on a wet setting to pull out silt, leaves, and small obstructions that pressure or a snake may miss.
| Tool | Purpose |
|---|---|
| Vacuum | Extract water |
| Adapter | Seal hose |
| Brush | Loosen silt |
| Gloves | Protect hands |
Homemade safe flushing solutions (hot water, biodegradable detergent) and how to use them
Although not suitable for every blockage, simple homemade flushing solutions—hot water combined with a small amount of biodegradable detergent—can dissolve grease and loosen organic buildup without harming plants or stormwater systems.
Pour several liters of near-boiling water slowly, follow with a detergent rinse, allow 10–15 minutes to act, then flush with cold water.
Repeat once if needed; avoid chemical cleaners.
Tools and materials to have on hand
A concise kit for unclogging a storm drain should include basic hand tools—gloves, a sturdy rake, a drain hook, and a square-point shovel—for removal of debris.
For tougher blockages, powered options such as a wet/dry shop vacuum or a drain auger can be used selectively and with appropriate safety precautions.
Environmentally safe cleaning agents, like biodegradable enzymatic cleaners, are recommended to break down organic matter without harming downstream waterways.
Essential basic tools
Proper preparation requires a concise kit of tools and supplies tailored to common storm-drain obstructions. A compact set minimizes time and risk while addressing leaves, sediment, and small debris.
Essential basics focus on manual, non-powered items for safe initial clearing and inspection.
- Sturdy work gloves
- Long-handled garden rake
- Drain hook/pick tool
- Heavy-duty bucket
Recommended powered tools and when to use them
Consult powered tools when manual methods cannot remove compacted sediment, large debris, or persistent blockages deep in the pipe. These tools speed work and reduce physical strain but require correct selection and safety precautions.
Use a cordless wet/dry shop vacuum for loose clogs, a drain snake (auger) for deep obstructions, and a pressure washer or hydro jet for heavy, stuck deposits. Operate with PPE and local permit awareness.
Environmentally safe cleaning agents to avoid harm downstream
Choose biodegradable, low-toxicity cleaners that break down quickly and pose minimal risk to aquatic life when runoff reaches storm drains.
Use enzyme-based degreasers, citric-acid cleaners, and diluted vinegar for organic buildup. Avoid bleach, ammonia, and concentrated solvents.
Carry absorbent pads, a hand pump sprayer for controlled application, and gloves.
Rinse sparingly; capture and properly dispose of wash water to prevent downstream contamination.
Step-by-step plan for a fast unclogging session
The checklist-driven sequence begins with preparation and site setup, ensuring safety and access before work starts.
Next, operators remove surface debris, then progress to clearing deeper blockages and flushing the line with the appropriate tools.
The session ends with a final inspection and restoration of the grate to confirm proper flow and site cleanup.
Preparation and site setup
A clear, organized site reduces time and risk during a fast unclogging session; workers should quickly assess access points, identify visible debris, and note any nearby stormwater inlets or utilities.
They establish a safety perimeter, position cones or barriers, don PPE, assemble required tools, and set a communication plan.
A brief hazard check and tool inventory confirm readiness before work begins.
Sequential actions for removing surface debris
With the site secured and tools checked, workers move to clearing visible surface debris to restore flow quickly and safely.
They remove leaves, branches, trash, and sediment by hand or with rakes and grabbers, depositing waste in bags.
Grates are lifted, inspected, and set aside.
Progress is monitored; collected debris is weighed or recorded before transport for proper disposal.
Clearing deeper blockages and flushing the line
Begin by evaluating the grate opening and downstream access to determine the best method for attacking the obstruction. Operators then select appropriate tools—hand augers, drain rods, or a pressure washer—based on blockage type and pipe condition.
Insert the tool, advance gently, break or retrieve debris, then flush with water at moderate pressure. Repeat until flow clears, monitoring for pipe damage and adjusting technique accordingly.
Final inspection and restoration of the grate
Once flow is restored, the operator performs a quick but thorough final inspection and grate restoration to guarantee safety and durability.
The drain and surrounding area are checked for remaining debris, settled sediment, and structural damage. Grate fittings and fasteners are tightened or replaced, edges resealed if needed, and surface cleaned.
Documentation of work and brief functional test conclude the procedure.
Troubleshooting common problems during unclogging
When basic clearing methods fail, the guide outlines targeted responses for stubborn roots or compacted sediment, including mechanical cutting or professional excavation.
It explains alternatives if flushing yields no improvement, such as inspection cameras and sectional removal.
It also covers safe handling and reporting procedures for oil, grease, or other hazardous substances encountered in the drain.
Stubborn roots or compacted sediment what to try next
Tackle stubborn roots or compacted sediment with targeted mechanical and chemical methods designed to break up dense obstructions without damaging the drain.
Use a manual root cutter or auger with carbide blades, applying steady rotation and short pulls.
For mineralized sediment, consider enzyme-based descalers or buffered acid cleaners applied per label.
Inspect frequently and remove loosened material to prevent downstream packing.
When flushing makes no improvement
If mechanical cutting or chemical treatment loosens material but flushing fails to clear the line, the problem likely lies further downstream or involves flow constraints that simple rinsing cannot overcome.
Inspect downstream access points, manholes, and inspection chambers for secondary blockages. Check pipe slope, collapsed sections, or constrictions.
Consider sectional rodding, a camera survey, or calling municipal crews when access or structural repair is required.
Handling oil, grease, or hazardous waste in the drain
Encountering oil, grease, or other hazardous waste in a storm drain requires immediate containment and a shift from routine unclogging to hazardous-material protocols.
Personnel should stop work, cordon the area, and prevent runoff.
Contact local environmental authorities and hazardous-waste responders.
Do not attempt chemical treatments or disposal.
Record observations, sample if instructed, and follow official cleanup directions to guarantee legal compliance and public safety.
When to stop and call a professional
If water continues to back up, emits foul odors, or the blockage appears to involve collapsed piping or large debris, the situation likely requires municipal crews or a licensed contractor.
The homeowner should note visible symptoms, exact location, any nearby infrastructure, and actions already taken before contacting the city or a pro.
Clear, concise descriptions and photos will help the responder assess urgency and necessary equipment.
Signs the clog requires municipal or licensed contractor intervention
When visible water remains pooled around a grate after repeated attempts to clear debris, the clog has likely advanced beyond simple homeowner remedies and warrants municipal or licensed-contractor intervention.
Additional signs include foul odors, sewage backup into basements or nearby drains, structural settling or erosion near the drain, repeated recurrence despite proper maintenance, and evidence of foreign objects or damage requiring heavy equipment or confined-space expertise.
How to describe the problem when calling the city or a pro
A clear, concise description helps the city or contractor assess urgency and bring the right equipment: specify the drain location (street intersection, curb, or nearest address), observed symptoms (standing water depth, odors, sewage backup, visible debris), how long the problem has persisted, any recent storms or nearby construction, and whether the area shows erosion or structural damage.
Include photos, safety hazards, and contact details for follow-up.
Preventive maintenance to keep storm drains clear
A concise preventive maintenance plan keeps storm drains functioning and reduces emergency repairs.
It should outline a seasonal checklist, practical neighborhood actions to limit debris, and durable upgrades such as grates, filters, or landscape changes.
Clear roles and a simple schedule help communities implement and sustain these measures.
Seasonal maintenance checklist
Seasonal maintenance for storm drains consists of a concise series of inspections and actions timed to local climate patterns to prevent blockages and flooding.
It schedules debris removal, verifies grates and frames, checks inlet flow after storms, and plans vegetation control. Routine records guide timing and contractor needs.
- Inspect grates and clear debris
- Test flow after heavy rain
- Trim nearby vegetation
- Log maintenance and repairs
Simple neighborhood measures to reduce debris entering drains
Following the seasonal checklist, neighborhoods can adopt straightforward preventive practices to keep debris out of storm drains and reduce cleaning frequency.
Residents organize regular curbside sweeping, secure yard waste in bins, cover compost piles, and report blockages promptly.
Community volunteers coordinate leaf-collection days and educate neighbors about litter prevention, minimizing contaminants before they reach drains and easing municipal maintenance demands.
Long-term solutions (grates, filters, landscaping adjustments)
When neighborhoods invest in durable hardware and purposeful landscaping, storm drains remain clearer with less frequent intervention.
Installing sturdy grates and removable filters captures leaves and sediment, easing maintenance.
Permeable pavements, rain gardens, and buffer plantings reduce runoff and debris flow.
Scheduled inspections and community cleanup preserve function, lowering clog incidence and protecting local water quality over time.
Environmental and legal considerations
Proper disposal of removed debris and any contaminated runoff is essential to prevent pollution and comply with waste rules.
The article notes that many municipalities have specific regulations and permitting requirements for working on public storm drains.
It also emphasizes techniques to minimize ecological impact during cleaning, such as using containment, avoiding harsh chemicals, and timing work to protect wildlife.
Proper disposal of removed debris and contaminants
Any removed debris and contaminants must be handled and disposed of according to local regulations and best-practice environmental standards to prevent pollution and legal liability.
Collected sediment, leaves, oils, and trash should be segregated, bagged, and transported to authorized disposal or recycling facilities.
Contaminated water and hazardous materials require licensed waste handlers.
Records of disposal and receipts should be kept for accountability and compliance.
Local regulations about working on public storm drains
Local jurisdictions typically regulate work on public storm drains to protect water quality, public safety, and infrastructure; permits, notifications, or approved work plans are often required before any maintenance or remediation is performed. Compliance avoids fines, liability, and environmental harm. Inspect local codes, contact authorities, document approvals, and follow signage.
| Authority | Requirement | Consequence |
|---|---|---|
| City | Permit | Fine |
| County | Notification | Delay |
| State | Plan | Liability |
Minimizing ecological impact while cleaning
After securing permits and notifying the appropriate agencies, professionals and responsible property owners should prioritize methods that protect aquatic life and downstream water quality when cleaning storm drains.
Best practices minimize pollutant discharge, use contained vacuuming or manual removal, and document actions for compliance.
- Contain and capture debris
- Avoid chemical cleaners
- Use silt screens or filters
- Record chain-of-custody and disposal methods
Quick-reference checklist for a fast, safe unclogging job
Gather necessary tools, assess hazards, and follow a concise sequence to clear the drain efficiently and safely.
A compact checklist guarantees speed, safety, and minimal environmental disturbance while documenting actions and contacts for follow-up.
- Wear PPE; cordon area.
- Remove surface debris; inspect grate.
- Use manual auger or jetting cautiously.
- Dispose waste properly; report unresolved blockages.
Conclusion
When tackling a clogged storm drain, the homeowner moves with caution and purpose, weighing quick DIY fixes against safety and legal limits. Simple tools often clear common blockages, but stubborn clogs or hazardous conditions call for professional help. Preventive upkeep keeps water flowing and neighborhoods safe, while mindful disposal protects wildlife and complies with regulations. Like pruning a tree to let light through, timely care preserves drainage and prevents bigger problems.