How to Replace Pipes Under Kitchen Sink: Step-By-Step DIY Guide With Tools & Tips
Replacing pipes under your kitchen sink is a straightforward DIY project that can fix leaks, corrosion, or slow drainage. Start by shutting off the water supply, clearing out the cabinet, and placing a bucket under the P-trap to catch any residual water. You’ll need a few essential tools: adjustable wrenches, channel-lock pliers, a pipe cutter, slip nuts, washers, and plumber’s putty. Begin by removing the tailpiece and P-trap, then dry-fit the new PVC or metal parts. Secure the slip joints and finally, test for leaks. Follow this guide for detailed step-by-step instructions and handy tips.
Overview of Replacing Kitchen Sink Pipes
The overview summarizes when pipe replacement is warranted—persistent leaks, corrosion, slow drainage, or water damage indicate increasing urgency.
It contrasts the cost, time, and skill trade-offs between DIY replacement and hiring a plumber.
Typical projects range from one to four hours, cost from modest parts to several hundred dollars, and vary from easy to moderately challenging depending on fittings and access.
When to replace sink pipes common signs and urgency
When should pipes under a kitchen sink be replaced depends on visible damage, performance issues, and the risk of concealed leaks.
Warning signs include persistent leaks, corrosion, frequent clogs, foul odors, discolored water, or loose fittings.
Urgency rises with active leaks or water damage.
Homeowners seeking how to replace pipes under kitchen sink should prioritize safety and stop water flow before inspection.
Benefits of replacing pipes yourself vs hiring a plumber
After evaluating signs like active leaks or corrosion and shutting off the water, a homeowner faces a choice: replace sink pipes personally or hire a plumber.
DIY offers cost savings, scheduling control, and hands-on learning; it suits those with basic tools and confidence.
Hiring a plumber provides expertise, warranty coverage, code compliance, and faster resolution for complex issues, reducing risk of mistakes and water damage.
Estimated time, cost range, and difficulty level
Estimate time, cost, and difficulty before starting: a straightforward sink trap swap can take 30–90 minutes for someone with basic tools, while replacing supply lines, P-trap, and brief runs of waste piping typically requires 1–3 hours.
Hiring a plumber commonly reduces project time to under an hour. Typical DIY material costs run $20–$120; plumber labor adds $75–$200+.
Difficulty: easy to moderate, depending on corrosion and access.
Tools and Materials Required
Before beginning pipe replacement, the reader should assemble the necessary tools and materials to guarantee a smooth, safe job.
The list below separates must-have items from common alternatives and useful extras so choices match the existing plumbing. Proper selection—particularly between PVC/ABS and metal components—reduces leaks and future maintenance.
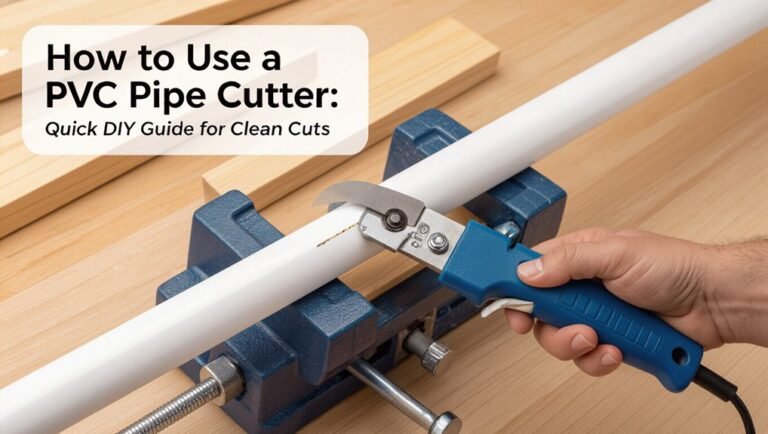
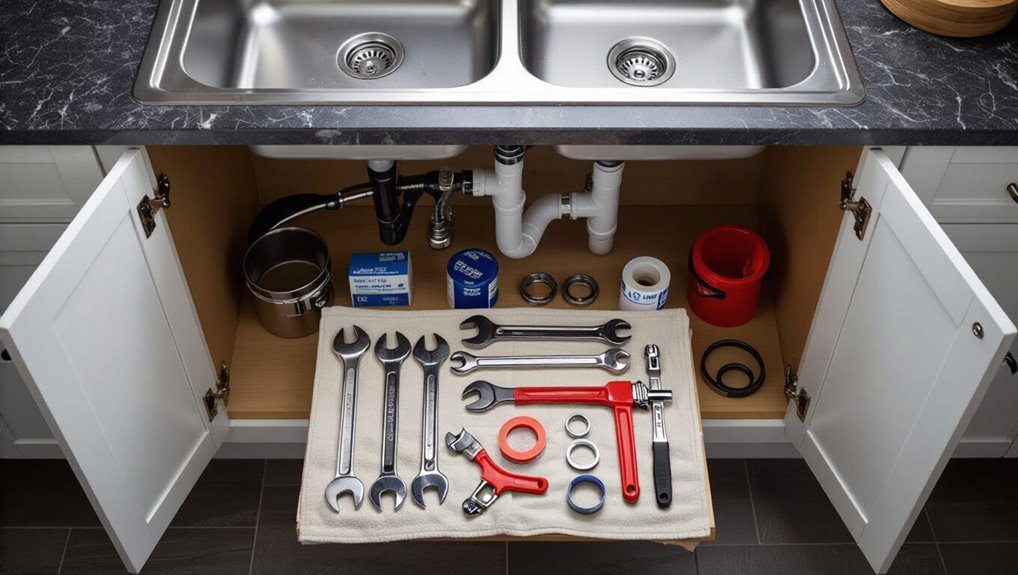
- Essential tools (adjustable wrench, channel-lock pliers, pipe cutter, bucket)
- Replacement parts and materials (tailpiece, P-trap, slip nuts, washers, plumber’s putty, Teflon tape)
- Material choices (PVC/ABS versus metal fittings and their compatibility)
- Optional tools and helpful accessories (flashlight, rag, plumber’s tape measure, strap wrench)
Essential tools
Gathering the right tools and materials guarantees the pipe replacement proceeds efficiently and without unnecessary delays.
Essential tools include an adjustable wrench, slip-joint pliers, pipe wrench, basin wrench, and channel locks for tight spaces. A hacksaw or tubing cutter, plumber’s tape, bucket, rags, and flashlight complete the kit.
Quality tools reduce leaks, speed assembly, and prevent damage during removal and installation.
Replacement parts and materials (tailpiece, P-trap, slip nuts, washers, plumber’s putty, Teflon tape, PVC/ABS vs metal)
With tools assembled, attention turns to the replacement parts and materials that directly determine fit, seal integrity, and longevity.
Select correct tailpiece and P-trap size/material (PVC/ABS for cost and corrosion resistance; metal for durability).
Include matching slip nuts and rubber or nylon washers.
Stock plumber’s putty or silicone for sink drains and Teflon tape for threaded joints to guarantee leak-free connections.
Optional tools and helpful accessories
Consider adding a few optional tools and accessories that streamline the job and improve outcomes:
- a basin wrench for hard-to-reach nuts,
- a small cordless LED work light to illuminate the cabinet interior,
- an oil-based penetrating lubricant for stuck fittings,
- a drain auger or zip-it tool for clearing residual debris,
- a set of plastic slip-joint pliers to avoid marring finishes,
- and a roll of plumber’s tape and extra washers kept within reach for quick adjustments.
A magnetic tray, utility bucket, replacement tailpiece and adhesive labels aid organization, speed, and neat reassembly.
Safety Precautions and Preparations
Before beginning work, the homeowner should shut off the water supply at the stop valves or main and open a faucet to relieve residual pressure.
Surfaces and fixtures beneath the sink should be protected with towels or a waterproof tray to prevent damage to cabinets, flooring, and the disposal unit.
If pipes show severe corrosion, emit a sewer odor, or the job may conflict with local code, a licensed plumber should be contacted.
How to shut off water and relieve pressure
Locate and turn off the correct water supply valves to isolate the sink: typically a pair of shutoff valves under the cabinet, one each for hot and cold, but sometimes a single valve at the house main.
Open the faucet to drain remaining water and relieve pressure.
Place a bucket and towels under pipes.
Verify no flow by briefly turning faucet on; if dripping persists, recheck valves or shut main.
Protecting cabinets, flooring, and disposal unit
Protect the cabinet interior, floor, and disposal unit to prevent water damage, stains, and mechanical harm during pipe replacement.
Line the cabinet base with absorbent towels and a plastic tray.
Place a foam pad or cardboard beneath the disposal to avoid dents.
Use painter’s tape to secure coverings and a small bucket to catch drips.
Keep towels handy for quick cleanup.
When to call a professional (severe corrosion, sewer smell, code issues)
Recognize when the job exceeds typical DIY scope: severe pipe corrosion, persistent sewer odors, or potential code violations indicate professional intervention is needed.
A qualified plumber assesses structural rot, hidden leaks, and backflow risks, guarantees compliance with local codes, and handles hazardous sewer gas.
Hire licensed professionals for complex repairs, municipal permit requirements, or when safety and warranty preservation outweigh DIY benefits.
Identifying Your Current Plumbing Configuration
Before beginning work, the homeowner should note the sink’s drain layout—single or double bowl, presence of a garbage disposal, and any dishwasher connection.
They should also identify pipe materials and fittings, distinguishing PVC, ABS, copper, or metal trap components.
Finally, accurate measurements of pipe lengths, diameters, and fitting sizes should be recorded to guarantee correct replacement parts.
Common sink drain layouts (single-bowl, double-bowl, garbage disposal, dishwasher connection)
Several common sink drain layouts determine how components are arranged and which parts must be disconnected or replaced during a repair.
Single-bowl setups have a single tailpiece and trap.
Double-bowl systems use a tee or crossover assembly.
Garbage disposal units replace the left-side tailpiece and add a discharge elbow.
Dishwasher connections tie into a branch inlet or air gap near the disposal.
How to identify pipe materials and fittings
A quick visual inspection is the first step in identifying the materials and fittings under a kitchen sink. The observer notes pipe color, texture, and thickness: white or cream for PVC, gray for ABS, metal sheen for chrome, brass, or galvanized steel.
Identify fittings—compression nuts, threaded joints, slip-joints, solvent-welds—and presence of rubber gaskets, clamps, or trap assemblies to determine replacement needs.
Measuring for replacement parts
With pipe materials and fittings identified, the next step is to measure the existing configuration to guarantee compatible replacement parts.
Record pipe diameters using calipers or a tape measure, measure lengths between joints, and note thread types and slip versus compression connections.
Sketch the layout, include trap arm length and tailpiece height, and photograph details for reference when purchasing parts.
Step-by-Step Guide: Removing Old Pipes
The workspace is cleared and protected with a bucket and towels before any fittings are loosened.
The P-trap and trap arm are disconnected, followed by removal of the tailpiece and sink flange while noting garbage disposal or dishwasher connections.
All exposed pipes and the trap seal are inspected for corrosion, cracks, or buildup to determine what must be replaced.
Clearing out under-sink area and placing bucket/towels
Clearing the cabinet beneath the sink requires removing stored items and creating a dry work area by placing a shallow bucket and absorbent towels directly under the trap and supply lines.
Remaining debris is swept away, items moved to a safe location, and towels arranged to catch minor drips.
Accessible lighting is positioned, and gloves protect hands.
Verify space for tools before proceeding.
Disconnecting P-trap and trap arm
How should the P-trap and trap arm be disconnected to remove the old plumbing safely and efficiently?
First, place a bucket under the trap.
Loosen slip nuts at trap inlet and outlet with adjustable pliers or by hand if plastic.
Remove trap, empty contents into bucket.
Inspect washers and threads for damage.
Then unscrew trap arm nut at wall connection, pulling arm straight out.
Removing tailpiece and flange
Begin by shutting off the sink’s water supply and placing a bucket beneath the drain to catch residual water; then loosen and remove the tailpiece by unscrewing its slip nut at the sink drain, taking care to support the tailpiece so it does not drop suddenly.
Next, pry up the flange and remove any old plumber’s putty or silicone, inspecting the sink hole for damage before installing replacements.
Handling garbage disposal or dishwasher connections
Disconnecting the garbage disposal and dishwasher lines requires verifying power and water are off, then detaching electrical and inlet/drain connections in a specific order to prevent spills or shocks.
First, unplug or switch off breaker, then cap disposal wiring.
Next, remove dishwasher drain hose clamp and slip joint; loosen knock-out plug if present.
Secure loose hoses and note orientation for reassembly.
Inspecting existing pipes and trap seal
Before removing any fittings, the installer should closely examine the existing drain assembly and trap seal to identify corrosion, hairline cracks, mineral buildup, and improper slopes that could indicate underlying issues.
Note worn washers, loose slip nuts, and deformities in the trap’s curve.
Document findings, photograph damage, and decide whether repair, part replacement, or full assembly replacement is necessary before proceeding.
Step-by-Step Guide: Installing New Pipes
The installer begins by preparing new parts and dry-fitting components to confirm fit and alignment.
Next steps cover installing the sink flange and tailpiece, connecting the P-trap and trap arm with the correct slope, and reconnecting garbage disposal and dishwasher drain lines.
Finally, attention turns to sealing threaded joints and properly using slip nuts and washers to guarantee leak-free connections.
Preparing new parts and dry-fitting components
Gather the new trap, tailpiece, slip nuts, and washers and lay them out near the cabinet opening so each piece is visible and accessible.
Inspect each part for defects, confirm sizes match existing outlets, and trim or file edges if needed.
Assemble components loosely to verify fit and alignment, checking clearances to disposal, drain, and cabinet walls before final installation.
Installing the sink flange and tailpiece
Install the sink flange and tailpiece carefully to create a watertight connection between the basin and the drain assembly.
Apply plumber’s putty or a rubber gasket under the flange, press into the sink hole, then secure from below with the locknut and washer.
Thread the tailpiece into the flange, tighten by hand and wrench snugly, and wipe away excess sealant before testing for leaks.
Connecting the P-trap and trap arm with proper slope
Begin by positioning the P-trap beneath the tailpiece and aligning the trap arm toward the wall drain, ensuring all fittings are hand-tightened before final adjustments.
Verify the trap arm slopes downward toward the drain about 1/4 inch per foot to prevent standing water.
Tighten slip nuts incrementally, check for alignment, then run water and inspect for leaks, re-tightening as needed.
Reconnecting garbage disposal and dishwasher drain lines
Reconnect the garbage disposal and dishwasher drain lines by first confirming both units are powered off and the dishwasher’s air gap (if present) is accessible.
Remove caps from disposal inlet and dishwasher tailpiece, align hose to inlet or air gap, then secure with appropriate clamp.
Verify hose routing avoids kinks and maintains upward loop for anti-siphon.
Restore power and run water to check for leaks.
Sealing threaded joints and using slip nuts/washers correctly
Carefully sealing threaded joints and fitting slip nuts and washers guarantees a watertight drain assembly and prevents future leaks.
Apply plumber’s tape or pipe dope to male threads, hand-tighten then quarter-turn with a wrench.
Ascertain rubber washers face inward and sit flat; replace hardened washers.
Align pipes before final tightening to avoid strain.
Test under pressure and retighten if slow drips appear.
Testing the New Installation
After installation, the water supply is restored and the system is observed for visible leaks.
A dye test and pressure checks are recommended to reveal hidden seepage and confirm joint integrity.
Any minor drips are addressed by tightening fittings, adjusting alignments, or replacing faulty components as needed.
Restoring water supply and checking for leaks
Open the shutoff valves slowly and observe the supply lines as pressure builds, watching for any immediate drips or wet spots at joints, slip nuts, and connection points.
Run both hot and cold taps, cycle handles, and inspect beneath the sink.
Tighten fittings if small leaks appear.
Wipe connections, recheck after a few minutes, and confirm all seals remain dry before restoring stored items.
How to perform a dye test and pressure checks
A simple dye test combined with a pressure check verifies that the new connections are watertight and hold under normal household pressure.
Introduce a few drops of food coloring into the sink, run water and inspect joints for colored seepage.
Then close downstream fixtures, pressurize lines briefly by turning water on, observe for pressure loss and visible leaks for several minutes before finalizing the job.
Tightening, adjusting, and troubleshooting minor drips
With the dye test and pressure check confirming no obvious leaks, attention shifts to tightening, adjusting, and addressing minor drips that can appear once fixtures settle or seals compress.
The installer inspects joints, snugging slip nuts and compression fittings just until seated. Worn washers or misaligned tailpieces are swapped or realigned.
After adjustments, recheck for slow drips and retighten incrementally if needed.
Common Problems and How to Fix Them
The next section outlines common problems encountered after replacing sink pipes and straightforward fixes.
It covers persistent leaks at slip joints, slow drainage or clogging, improper trap seals that allow odors, and techniques for aligning mismatched pipe sizes or materials.
Practical troubleshooting steps and when to call a professional are summarized.
Persistent leaks at slip joints
Diagnose persistent leaks at slip joints by inspecting the nut, washer, and pipe seating for corrosion, cross-threading, or misalignment.
Tighten nuts evenly; replace hardened or deformed washers with correct-size slip-joint washers.
Clean pipe surfaces and realign tubing to seat fully.
Apply plumber’s grease to new washers for sealing.
If threads are damaged, replace the slip-joint nut or entire trap assembly to guarantee a reliable seal.
Slow drainage or clogging after replacement
Investigate slow drainage or recurring clogs after replacing sink pipes by checking for common installation issues that restrict flow: misaligned trap arms, improperly seated trap adapters, crushed or kinked tailpieces, debris left in the drain line, or partial blockages at the P-trap or wall drain.
Clear traps, remove debris, realign fittings, replace damaged sections, and run water to verify restoration of full flow; test for hidden obstructions.
Improper trap seal causing odors
Check for an inadequate trap seal when persistent sewer odors waft from the sink area despite apparent proper assembly.
A faulty seal can result from loose slip nuts, misaligned trap arm, or a cracked P-trap.
Recommend tightening connections, replacing worn washers, or installing a new trap section.
After repairs, run water to confirm the seal and verify odors have cleared.
Aligning mismatched pipe sizes or materials
When replacing sink pipes, mismatched diameters or mixed materials—such as plastic to metal connections—are a common source of leaks, clogs, and code violations.
Resolving them requires matching flow capacities and using proper adapters or connection fittings rated for the materials involved.
Select approved reducers, dielectric unions, or flexible couplings; guarantee seals, clamps, and thread sealant suit both materials.
Test for leaks and comply with local code.
Tips to Ensure Long-Term Reliability
The section outlines recommended materials and corrosion-resistant fittings to maximize service life.
It also summarizes simple maintenance routines that prevent leaks and blockages.
Finally, it covers upgrade options—such as accessible shutoffs and modular fittings—that simplify future repairs.
Recommended materials and corrosion-resistant options
Durable materials and proper corrosion resistance are central to long-term reliability for under-sink plumbing. Choosing the right metal or plastic and appropriate finishes prevents leaks, contamination, and premature failure.
Recommended options include PEX for flexibility and chemical resistance, PVC/CPVC for drain lines, stainless steel (304/316) for fittings, and brass or chrome-plated brass for valves.
Use dielectric unions where dissimilar metals meet.
Maintenance routines to prevent future issues
Regular, simple maintenance routines considerably extend the life of under-sink plumbing and reduce the risk of leaks or contamination.
Routine inspections for drips, loose fittings and corrosion should occur monthly. Tighten connections, replace worn washers, and clear trap blockages.
Flush drains with hot water and a mild, non-corrosive cleaner periodically. Document interventions and address small issues promptly to prevent major repairs.
How to upgrade for easier future access
Consider modifying under-sink plumbing to prioritize future access and reliability by choosing straight-forward layouts, accessible fittings, and quick-release components.
Use flexible supply lines, modular trap assemblies, and shutoff valves positioned for tool-free operation.
Label lines and photograph configurations before closing cabinets.
Install removable panels or magnetic access covers and leave a small service loop.
Regularly inspect connections and replace worn parts proactively to avoid emergencies.
Cost Comparison: DIY vs Hiring a Plumber
A brief cost comparison helps readers decide whether to replace sink pipes themselves or hire a professional. Typical parts costs (pipes, fittings, sealant) are listed alongside common labor rates, and criteria for when professional help is cost-effective are noted. The table below summarizes these points for quick reference.
| Item | DIY Estimate | Hiring a Plumber |
|---|---|---|
| Parts (pipes, fittings, seals) | $15–$75 | $15–$75 (usually same) |
| Labor | $0 (own time) | $80–$200+ per hour |
| Complexity threshold | Simple trap/section replacement | Corrosion, leaks in wall, supply-line issues |
| Cost-effective when | Low part cost, basic skills | Multiple repairs, limited time, code/work permits |
Typical parts cost breakdown
Materials and parts for replacing sink pipes range from inexpensive fittings to pricier specialty items, and their costs heavily influence whether a homeowner should DIY or hire a plumber.
Typical items:
PVC or ABS trap(s) ($5–20),
tailpieces and connectors ($3–15),
slip nuts and washers ($2–10),
p-trap kits ($10–40),
sealants and plumber’s tape ($2–10),
and replacement valves or adapters ($10–60).
Typical labor cost and when professional help is cost-effective
After outlining parts and their price ranges, attention turns to labor costs and when hiring a professional makes financial sense.
Typical plumber rates range $70–$150 per hour; total labor for a simple sink pipe replacement often falls $150–$400.
Hire a pro when complexity, time constraints, warranty needs, or risk of water damage outweigh DIY savings; otherwise DIY is cost-effective.
Quick Reference Checklist
A concise checklist helps guarantee the pipe replacement proceeds safely and efficiently, covering preparatory steps, the removal and installation sequence, and final inspections.
The following quick-reference lists summarize what to verify before starting, the core actions during the job, and the checks to perform afterward. Each item is written for fast scanning during the project.
- Verify water shutoff, gather tools and materials, and protect surrounding cabinet areas.
- Remove old trap and supply lines, cut and fit replacement pipes, and secure connections per the sequence.
- Restore water, test for leaks, and confirm proper drainage and venting.
- Dispose of old parts, document any deviations, and schedule follow-up checks if needed.
Pre-work checklist
Gather essential tools, shut off water, and clear the area before starting to replace pipes under the kitchen sink.
Confirm water is fully off, open faucets to drain lines, and place buckets and towels.
Verify replacement parts match fittings and measure pipe lengths.
Check for electrical outlets, adequate lighting, and ventilation.
Have pipe sealant, replacement washers, and safety gloves ready.
Step-by-step checklist for removal and installation
Begin by laying out tools and parts within easy reach and confirming the shutoff valves remain closed.
This quick-reference checklist then guides technicians through removing the old trap, disconnecting supply lines, prepping and measuring replacement sections, and installing new fittings in a concise, step-by-step sequence to minimize leaks and downtime.
Sequential steps: drain lines, loosen connections, remove trap, clean joints, cut and fit new piping, secure connections, pressure-test, and adjust alignment.
Post-installation checklist
Several quick checks confirm the new under-sink piping functions correctly and remains leak-free.
Inspect all joints and slip nuts for moisture. Run hot and cold water, operate the disposal, and watch drain flow for airlocks or slow drainage.
Check for odors and guarantee P-trap alignment. Re-tighten fittings if needed, verify shutoff valves operate smoothly, and clear tools and debris.
Visual Aids and Diagram Suggestions
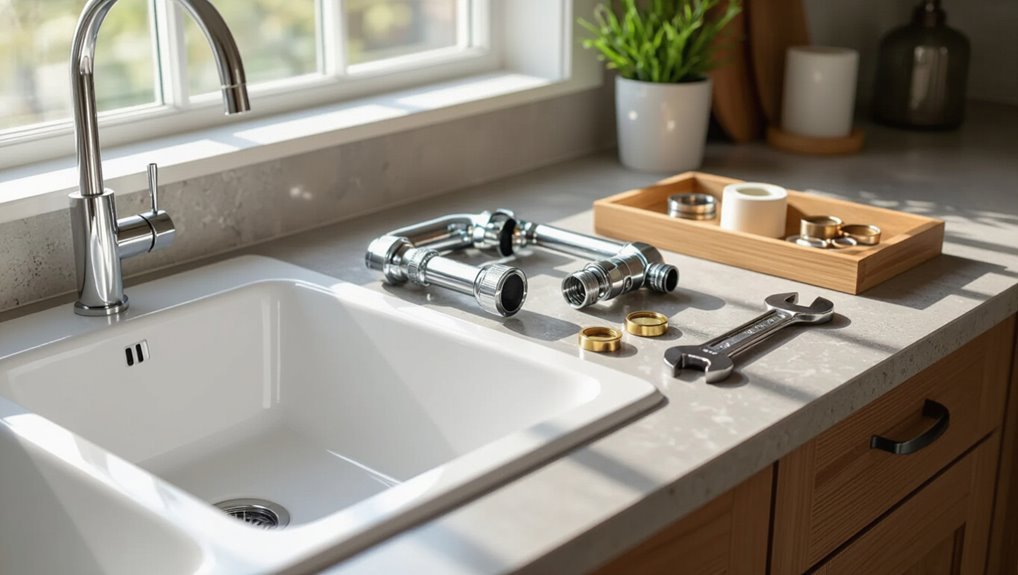
The article should include a clear diagram of a standard P-trap assembly with labeled parts and flow direction.
Complementary images should show common mistakes to avoid, such as loose slip nuts, misaligned joints, and improper trap slope.
Captions should briefly explain each error and its corrective action.
Diagram of standard P-trap assembly
A clear, labeled diagram of a standard P‑trap helps homeowners identify each component—tailpiece, trap bend, trap arm, slip nuts, and washer—and their spatial relationships beneath the sink.
Accompany with arrows showing flow direction, dimensions for typical clearances, and notes on material types (PVC, chrome, brass).
Include callouts for connection points and recommended tools for disassembly to aid accurate replacement.
Image suggestions for common mistakes to avoid
Highlight common pitfalls with clear, focused images that show exactly what not to do: misaligned trap arms, overtightened or missing slip nuts, crushed or improperly seated washers, and incorrect slope toward the drain.
Include close-ups of leaks forming at joints, worn threads on fittings, pipe sagging points, improper use of sealant tape, and obstructed venting.
Caption each image with brief cause and corrective action.
Conclusion
With the new pipes installed and connections sealed, the kitchen returns to its quiet, efficient self—no more dripping symphonies. The guide leaves the reader equipped with essential tools, safety steps, and troubleshooting tips so routine maintenance feels manageable rather than monstrous. Careful measurement, proper fittings, and patience create a durable result that resists leaks for years. When doubts arise, consulting a professional guarantees both safety and lasting performance.