How to Remove a Drain From a Bathroom Sink: Step-By-Step DIY Guide
To remove a bathroom sink drain, start by shutting off the water supply, clearing the area under the sink, and placing a bucket to catch any water. Identify the type of drain you have (pop-up, lift-and-turn, grid, or slip-joint) and remove the stopper mechanism. Next, disconnect the P-trap, loosen the locknut or retaining ring, and carefully extract the drain flange. If the drain is stubborn or corroded, apply penetrating oil, heat, or use cutting tools as needed. After removal, clean the opening, install a new gasket and sealant, reassemble the components, and test for leaks. Further troubleshooting steps may be necessary if issues arise.
How to Remove a Bathroom Sink Drain: Quick Overview
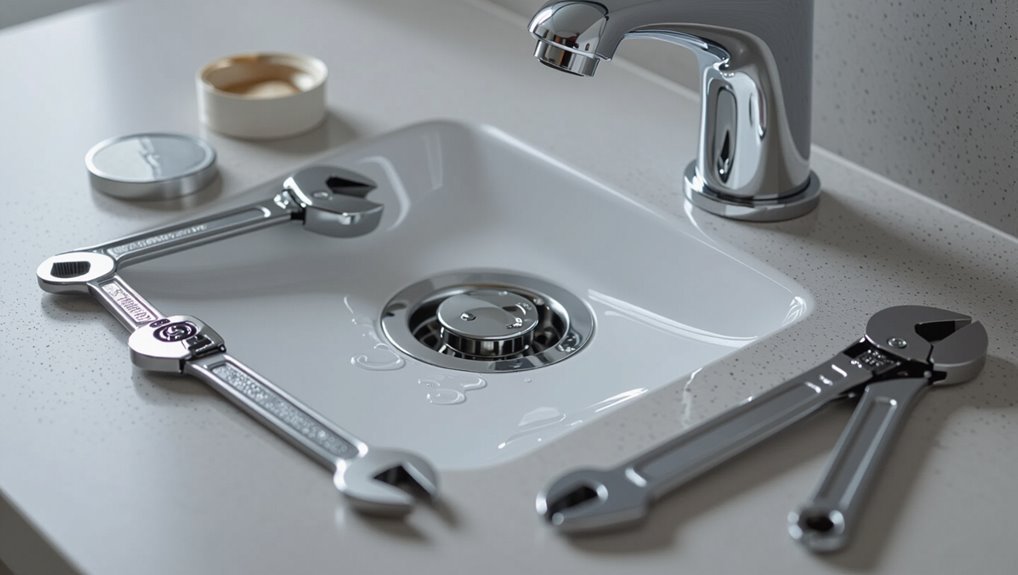
The overview summarizes when a drain should be removed and the desired result of a clean, leak-free assembly or ready-to-replace parts.
It lists essential tools and materials such as a basin wrench, plumber’s putty, new gaskets, and a bucket.
It also highlights safety and prep steps including shutting off water, protecting finishes, and clearing the cabinet workspace.
When to remove a sink drain and expected outcome
Begin by evaluating whether the drain removal is necessary: persistent clogs that resist snaking, visible corrosion or leaks at the tailpiece or flange, planned sink replacement, or damaged seals all justify taking the drain out. Removing a drain (how to remove a drain from a bathroom sink) should restore flow, stop leaks, or allow replacement. Expected outcome: clean pipe, sealed joint, functional sink.
| Reason | Outcome |
|---|---|
| Persistent clog | Restored flow |
| Corrosion/leak | Sealed/replace |
| Replacement | New fit |
Tools and materials needed
With the decision made to remove the drain, gather the right tools and materials before starting to avoid interruptions and accidental mess. Necessary items streamline the job: common wrenches, lubricant, replacement seals, and cleaning supplies.
Preparation reduces time and prevents damage. Recommended checklist:
- Adjustable wrench and pliers
- Penetrating lubricant (e.g., PB Blaster)
- Replacement rubber gasket and plumber’s putty
- Bucket, rags, and scrub brush
Safety precautions and preparatory steps
Before any work starts, assess risks and prepare the workspace: turn off water supply, clear under-sink storage, lay down a bucket and rags to catch drips, and wear gloves and eye protection to guard against chemical residues and sharp edges.
Inspect for leaks, fragile trap connections, and electrical nearby. Ventilate if chemicals were used.
Have pliers, wrench, flashlight, and a clean cloth within reach.
Identify Your Sink Drain Type
Before attempting removal, the reader should identify the drain type—pop-up, lift-and-turn, grid, or slip-joint—as each requires different steps.
They should also check whether the drain is sealed with putty, glued, or threaded for ease of removal.
Clear photos and inspection of visible parts (stopper mechanism, nut under the sink, and flange) help confirm the correct method.
Pop-up drain vs. lift-and-turn vs. grid drain vs. slip-joint drain
Several common drain types — pop-up, lift-and-turn, grid, and slip-joint — can determine how a sink is removed and serviced.
Pop-up drains use a pivot rod and linkage; lift-and-turn have a rotating stopper unscrewed from above.
Grid drains are fixed strainers with no stopper.
Slip-joint drains connect with a removable nut and washer under the tailpiece for easy disassembly.
How to tell if the drain is sealed, glued, or threaded
How can one determine whether a sink drain is sealed, glued, or threaded?
Inspect visible joint edges under the sink: a threaded drain shows spiral threads or a locknut; a glued drain often has a smooth bead of adhesive or PVC connection and usually lacks threads; a sealed (puttied) drain has plumber’s putty or silicone around the flange.
Gentle probing and absence of rotation indicate adhesive or sealant.
Photos and parts to inspect before starting
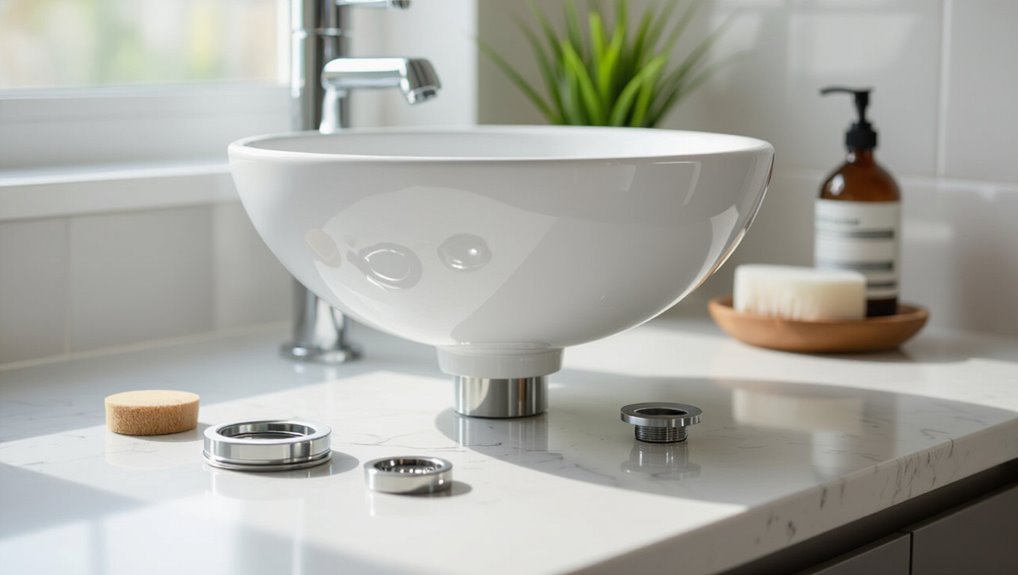
A clear photograph of the sink’s underside and a close-up of the drain flange help identify the drain type and any fastening method present.
Include images of the tailpiece, locknut, rubber gasket, plumber’s putty residue, and any snap or pop-up assembly.
Note visible threads, epoxy or sealant, corrosion, and access clearance.
Label parts and measure nut sizes for tool selection.
Step-by-Step Removal Process
The removal begins with basic preparation: shut off the water, clear the area, and protect the sink and basin to prevent damage.
Next, any pop-up assembly is removed before the P-trap and trap arm are disconnected.
Finally, the locknut or retaining ring is loosened and removed to free the drain.
Step 1 Turn off water and clear the area
Begin by shutting off the water supply to the sink and clearing the workspace.
The person confirms valves under the sink or at the main, then opens faucets to relieve pressure and drain remaining water.
Remove toiletries and towels, lay down a small bucket and absorbent cloth for spills, and guarantee adequate lighting and unobstructed access to the plumbing before proceeding.
Step 2 Protect the sink and basin
Protect the sink and basin before disassembly by covering the surrounding surfaces and isolating the drain area to prevent scratches, chips, or cosmetic damage.
Place towels or foam pads inside the bowl, tape cardboard or a drop cloth around the countertop, and apply painter’s tape to fragile edges.
Keep cleaning agents away and lay a small container beneath to catch loose parts or residual water.
Step 3 Remove the pop-up assembly (if present)
Loosen the pivot rod and linkages to free the pop-up assembly before attempting to remove the drain stopper.
Once disengaged, lift the stopper straight up and out; inspect for buildup. If stuck, apply penetrating lubricant and gently wiggle while pulling.
Remove the pivot rod retaining nut and slide the rod out.
Clean components and set aside in sequence for reassembly or replacement.
Step 4 Disconnect P-trap and trap arm
Shut off the water supply to the sink and place a bucket beneath the trap to catch any residual water.
Using channel-lock pliers or a wrench, loosen the slip nuts on the P-trap and trap arm.
Remove the trap carefully, emptying water into the bucket.
Inspect for corrosion, debris, or damaged washers.
Set components aside in order for reassembly or disposal.
Step 5 Loosen and remove locknut or retaining ring
With the P-trap removed and the sink basin accessible, locate the locknut or retaining ring beneath the sink that secures the drain tailpiece to the drain flange.
Support the tailpiece to prevent twisting, then use an adjustable wrench or channel-lock pliers to turn the locknut counterclockwise.
Remove corroded or plastic rings carefully, noting orientation and any washers for reassembly.
Step 6 Free the drain flange from the sink
After the locknut or retaining ring is removed and the tailpiece is supported, attention turns to freeing the drain flange from the sink deck.
The flange is gently rocked while upward pressure is applied; penetrating solvent or heat may be used sparingly if corrosion or hardened sealant resists.
If stuck, a thin putty knife or strap wrench helps pry without scratching the sink surface.
Step 7 Clean old putty, plumber’s putty, or silicone from sink and drain
Begin by scraping away the bulk of old plumber’s putty or silicone from both the sink deck and the drain flange using a plastic putty knife or scraper.
Apply a commercial sealant remover or denatured alcohol to soften residue, let it sit per instructions, then scrub with a nylon brush and wipe with clean rags.
Verify surfaces are dry and oil-free before reassembly.
Step 8 Inspect and remove remaining sealant or corrosion
Inspect the sink and drain assembly carefully for any remaining sealant, mineral deposits, or corrosion that could compromise a new seal.
Use a plastic scraper and mild solvent to remove soft residues; for mineral buildup, apply vinegar or a descaler and scrub with a nylon brush.
For corrosion, assess severity: light corrosion can be sanded away; replace heavily corroded parts to guarantee a reliable seal.
Alternative Methods for Stubborn or Corroded Drains
For stubborn or corroded drains, technicians often apply penetrating oil and controlled heat to loosen seized fittings.
If that fails, cutting the drain with a reciprocating saw or rotary tool can be effective but requires care to avoid damaging the sink.
A professional plumber should be called when corrosion is extensive, tools risk further harm, or the homeowner lacks the needed experience.
Using penetrating oil and heat safely
Apply penetrating oil and controlled heat as a measured approach when a drain is seized by corrosion or mineral buildup.
Spray penetrating oil, allow recommended dwell time, then apply short bursts of heat with a heat gun or propane torch held several inches away.
Protect surrounding finishes, ventilate the area, wear eye and heat-resistant gloves, and reapply oil if needed before attempting to loosen the drain.
Cutting the drain out with tools (reciprocating saw, rotary tool)
When penetrating oil and heat fail to free a severely corroded or welded-in sink drain, cutting the drain out with power tools becomes a practical alternative. A reciprocating saw or rotary tool with a metal-cutting blade can sever the flange or body; protect surrounding surfaces, wear PPE, and work slowly to avoid damaging the sink or drainpipe.
| Tool | Blade | Use |
|---|---|---|
| Reciprocating | Bi-metal | Fast cuts |
| Rotary | Cut-off | Precision |
| Files | Metal | Deburring |
When to call a professional plumber
How should one decide to call a professional plumber for a stubborn or corroded sink drain?
If bolts, cutting tools, penetrating oil and heat fail, or corrosion risks damaging the sink or pipes, a plumber is advised.
Call when leaks, sewage smell, structural damage, inaccessible fittings, or lack of proper tools and experience exist.
Professionals prevent further damage and guarantee code-compliant repairs.
Reinstallation and Replacement Options
Next, the focus shifts to selecting an appropriate replacement drain and preparing the sink surface to guarantee a proper fit.
The process covers installing a new flange with sealant, reassembling the pop-up and P-trap, and securing all connections.
Finally, the assembly is tested and adjusted to confirm a watertight seal and smooth operation.
Choosing the correct replacement drain
Select a replacement drain that matches the sink’s waste opening, mounting style, and finish to confirm proper fit and function.
Verify tailpiece diameter, threaded connection type (slip vs. threaded), and whether overflow compatibility is required.
Match material and finish for corrosion resistance and aesthetics.
Choose a quality brand with compatible gaskets and a warranty to guarantee long-term reliability and easier installation.
Preparing the sink for a new drain (cleaning and surface prep)
Prepare the sink surface by thoroughly cleaning and drying the area around the waste opening to guarantee a good seal and proper adhesion of gaskets or plumber’s putty.
Remove old putty, adhesive residue, and mineral deposits with a plastic scraper and mild cleaner.
Decontaminate with isopropyl alcohol, rinse, and dry.
Inspect for chips, corrosion, or irregularities that could impair sealing before proceeding.
Installing a new drain flange and sealant
With the sink surface clean, dry, and inspected, the installer can fit the new drain flange and choose an appropriate sealant method—plumber’s putty for most metal flanges or a silicone sealant for porcelain or irregular surfaces.
Center the flange, press firmly to form a watertight seal, remove excess putty or smooth bead, then tighten the locknut beneath to secure the flange without overtightening.
Reassembling the pop-up and P-trap
Reattach the pop-up assembly and P-trap carefully to confirm a leak-free drain system: slide the pop-up rod and clevis back into their brackets, align and tighten the pivot nut until the stopper moves smoothly, then reconnect the tailpiece to the new drain flange and hand-tighten its slip nut. Replace worn seals, choose PVC or metal trap, and verify correct trap alignment.
| Component | Action | Note |
|---|---|---|
| Pop-up rod | Reinsert & secure | Smooth movement |
| Pivot nut | Tighten | Hand-tighten then snug |
| Tailpiece | Connect | Align to flange |
| P-trap | Reattach | Check orientation |
Testing for leaks and final adjustments
Begin by running water and observing every joint and seal for at least five minutes to detect drips or seepage.
If leaks appear, tighten slip nuts or reseat gaskets, then retest.
Check stopper operation and drain speed for slow drainage indicating partial blockage or misalignment.
Trim or realign pipes as needed.
Confirm no odor and verify all fittings remain dry before finishing.
Common Problems and How to Fix Them
The section outlines frequent issues encountered during drain removal and reinstallation, including tight or stripped locknut threads and a damaged sink hole or worn flange.
It also covers persistent leaks after reassembly and the signs of corroded pipes that warrant replacement.
Each problem is paired with concise troubleshooting steps and clear criteria for repair versus replacement.
Tight or stripped locknut threads
Tight or stripped locknut threads can prevent a drain from loosening or securing properly, causing leaks or making removal difficult.
Corroded or cross-threaded nuts may seize; apply penetrating lubricant, tap gently to break corrosion, and use a basin wrench for leverage.
If threads are stripped, replace the locknut and, if necessary, the tailpiece or use a threaded repair kit to restore secure fastening.
Damaged sink hole or worn flange
Inspect the sink hole and flange for cracks, gaps, or worn plating that can let water seep under the sink surface or prevent the drain from seating properly.
If the hole is deformed, file or reglaze ceramic edges; replace a corroded or pitted flange.
Use an appropriate repair ring or epoxy for minor chips, ensuring a flat, clean surface before reinstalling the drain assembly.
Persistent leaks after reassembly
Recheck the reassembled drain when leaks persist to identify common causes and targeted fixes. Inspect seals, tighten fittings, and test in stages. Replace damaged gaskets or apply plumber’s putty. Verify alignment and flat mating surfaces. If leaks continue, isolate P-trap connections.
| Issue | Likely Cause | Fix |
|---|---|---|
| Seal leak | Worn gasket | Replace gasket |
| Joint drip | Loose nut | Tighten nut |
| Flange seep | Misalignment | Reseat flange |
| Slow drip | Residue | Clean surfaces |
Corroded pipes and when to replace them
If leaks persist after reassembly despite tightened fittings and fresh gaskets, the problem may lie deeper in corroded drain or trap pipes that no longer seal reliably.
Inspect metal for pitting, flaking, greenish corrosion, or hairline cracks.
Replace cast iron or galvanized sections showing deterioration; PVC replacements suit many setups.
When structural integrity or thread condition is compromised, replacement prevents recurring leaks and contamination.
Time, Cost, and Difficulty Estimates
Time, cost, and difficulty vary by drain type: pop-up and slip-joint drains often take 15–45 minutes, while sealed or corroded drains can require one to several hours.
Tool and parts expenses typically range from a few dollars for a replacement washer to $30–100 for specialty tools or a new drain assembly.
The task generally requires basic plumbing skills and common pitfalls include overtightening fittings, damaging sink finishes, and neglecting to turn off water or place a bucket under the trap.
Typical time required by drain type
Different drain types typically require varying amounts of time, tools, and skill to remove; simple pop-up assemblies or slip-joint drains often take 15–30 minutes for a DIYer.
In contrast, sealed or welded bathroom drains, vessel sinks, or drains beneath cabinetry can take one to several hours and may necessitate specialized tools or professional help.
Corroded, glued, or inaccessible drains push duration toward longer estimates and increase difficulty.
Expected cost for tools and replacement parts
When budgeting for a drain removal project, homeowners should account for both basic tools and any replacement parts, as costs vary by drain type and condition.
Typical tool costs range $10–50 for wrenches, pliers, plumber’s putty and sealant. Replacement drains and gaskets run $15–80 depending on finish and quality.
Unexpected parts or replacements can raise totals; plan a modest contingency.
Skill level required and common pitfalls to avoid
Although the task is approachable for a handy homeowner with basic plumbing tools, removing a bathroom sink drain typically requires moderate mechanical aptitude, patience, and about 30 minutes to 2 hours depending on access and corrosion.
Novices should expect closer to the upper end and allow extra time for stubborn fittings or unexpected repairs.
Common pitfalls include overtightening, damaged seals, rusted nuts, inadequate lighting, and failing to shut off water.
Maintenance Tips to Prevent Future Removal
Regular cleaning and avoidance of harsh chemicals extend drain life and reduce buildup that necessitates removal.
Proper installation—correct sealant application, tightened fittings, and accessible connections—makes any future disassembly simpler.
Using recommended products, such as compatible plumber’s putty, silicone sealant, and corrosion-resistant hardware, helps maintain long-lasting seals.
Regular cleaning and avoiding harsh chemicals
Maintain the sink’s drain with consistent, gentle cleaning and by avoiding harsh chemical cleaners to extend component life and reduce the need for removal. Use mild soap, a soft brush, and baking soda with vinegar sparingly. Rinse thoroughly and wipe dry to prevent buildup and corrosion.
| Task | Frequency | Benefit |
|---|---|---|
| Soap clean | Weekly | Removes residue |
| Brush | Monthly | Dislodges debris |
| Vinegar use | Quarterly | Breaks mineral deposits |
| Dry wipe | After use | Prevents corrosion |
Proper installation practices to ease future removal
Plan installations with future access in mind to minimize difficulty when the drain must be removed.
Install union fittings, accessible slip nuts, and clearances under the sink.
Use hand-tightened connections with plumber’s tape where appropriate to avoid over-torquing.
Label components and keep a basic toolset nearby.
Document any nonstandard assemblies to simplify later disassembly and repairs.
Recommended products for long-lasting seals
Longevity in sink seals depends as much on product choice as on installation technique.
Recommended durable options resist compression, chemical breakdown, and mold while remaining serviceable during removal.
- Silicone sealant (100% RTV, mildew-resistant)
- EPDM rubber gaskets (temperature and water resistant)
- Plumber’s putty (non-hardening, for removable fittings)
- Thread seal tape (PTFE, for metal pipe threads)
Conclusion
Like a seasoned navigator reading tides before departure, the diligent homeowner now understands drain removal’s currents and shoals. With types identified, steps followed, and stubborn fittings tamed, the sink’s heart can be safely replaced or returned. Whether choosing simple reinstallation or a full upgrade, these practical skills ward off future leaks and surprise repairs. Armed with patience and basic tools, one can meet this small domestic voyage with quiet competence and assurance.