How to Flush a Toilet Without Power: 7 Simple Methods for Emergencies
If you’re facing a power outage and need to flush your toilet, there are several effective methods to do so. You can quickly pour 1–2 gallons of water directly into the bowl to create a flushing vortex. Alternatively, refill the tank with a bucket for a full flush, or use a plunger with a large jug to assist gravity. For prolonged outages, consider using battery-powered pumps, watering cans, or improvised liners. Additionally, maintaining proper sanitation and having an emergency kit can help prevent contamination. This guide provides further insights into the best tools and methods for your situation.
What to do immediately when the toilet has no power
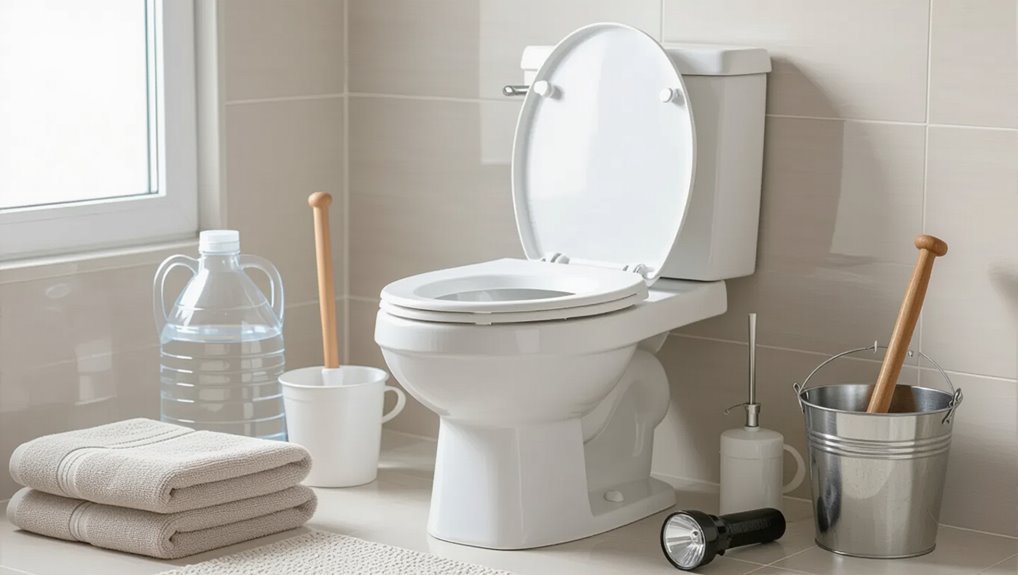
When the toilet loses power, a quick set of safety checks should be performed first, including turning off any electric bidet functions and avoiding contact with exposed wiring.
Next, the scope of the outage should be determined by checking other fixtures and neighbors to see if it is isolated to the toilet or affects the whole building.
Finally, essential supplies — a bucket, a sturdy container for pouring, gloves, and disinfectant — should be gathered before attempting a manual flush.
Quick safety checks before attempting a manual flush
If power fails, a quick set of safety checks should precede any manual flushing to prevent injury, overflow, or damage to the plumbing.
Verify that water supply valves are closed or accessible, check for signs of sewer backup or leaks, guarantee tools or buckets are nearby, and confirm stable footing.
These steps help safely proceed with methods for how to flush a toilet with no power.
How to assess whether it’s a one-toilet or building-wide power outage
How can one quickly determine whether a toilet’s loss of power is isolated or part of a broader outage?
Check nearby lights, appliances, and hallway outlets; ask neighbors or building staff; verify circuit breaker labels and visual tripped breakers; look for elevator or building-wide indicator lights.
If only the toilet’s components lack power while others function, assume a localized fault and avoid resetting shared panels without permission.
Supplies to gather right away
After confirming whether the outage is isolated or building-wide, gather a few basic supplies to restore flushing capability and maintain hygiene.
Collect a bucket or large container, a sturdy cup or small bucket for pouring, potable water (several gallons), disposable gloves, disinfectant wipes or bleach, a plunger, and trash bags.
Include paper towels and a flashlight for safety and cleanup.
Direct manual flushing methods (simple, no tools)
The article outlines simple manual flushing methods that require no tools, such as pouring a bucket of water directly into the bowl.
It also explains how to collect water from a bathtub or sink and transfer it safely without contaminating plumbing fixtures.
Guidance is provided on the approximate volume needed and a steady pouring technique to avoid splashing and guarantee a complete flush.
Pouring bucket of water
Pouring a bucket of water directly into the bowl is the quickest manual flush method: a single, swift pour aimed at the rear of the bowl creates enough force to carry waste down the trap without any tools or electricity.
It requires only a nearby water source and steady aim to avoid splashing.
- Use 1–2 gallons for a standard flush
- Aim at the back rim
- Pour in one smooth motion
- Avoid overfilling the bowl
- Clean bucket after use
Using the bathtub or sink to transfer water safely
Use a bathtub or sink as a convenient water source by filling a container there and carrying it to the toilet for a manual flush.
Make certain of a stable grip, avoid overfilling the container, and clear a path to prevent spills.
Prefer a lightweight bucket or large pitcher.
Rinse the container afterward and store it cleanly for future emergency use.
How much water is needed and pour technique to avoid splashing
After filling a bucket or pitcher at the tub or sink, determine the volume needed: a standard gravity toilet requires roughly 1.6 gallons (about 6 liters) for a full flush, while low-flow models may clear with 1.0 gallon (3.8 liters) or less; for a partial flush of liquid waste, 1–1.5 liters often suffices.
Pour steadily into the bowl’s center, aiming just above the waterline to create a fast, vortex-like rush that carries waste without splashing.
Using common household items to flush (tools and improvised options)
Household items can be repurposed to produce enough water flow or suction to trigger a flush when the tank is inaccessible. A large jug or trash can can provide a gravity-assisted transfer. A plunger can create suction to force water through the trap. A mop bucket or watering can allows for a controlled pour to avoid splashing.
The following section compares these tools and outlines basic techniques and safety tips for each method.
Gravity-assisted transfer with a large jug or trash can
When power is out, a gravity-assisted transfer using a large jug or trash can provides a quick, reliable way to flush a toilet by delivering a concentrated, heavy flow of water into the bowl.
Tapping into the weight and speed of falling water mimics the volume and force of a normal flush without mechanical aid.
- Fill container with clean water
- Pour steadily toward bowl rim
- Aim for center to create swirl
- Use lid to control pour
- Repeat if needed
Using a plunger to create suction-assisted flush
If a gravity pour isn’t available or doesn’t fully clear the bowl, a plunger provides a compact, reliable way to force water through the trap by creating suction and pressure cycles.
Position the cup over the drain, establish a seal, then push and pull briskly for several strokes.
Check bowl level; repeat as needed.
Sanitize the plunger and surrounding area afterward.
Utilizing a mop bucket or watering can for controlled flow
A mop bucket or watering can offers a simple, controllable method to flush a toilet without power by delivering a measured surge of water into the bowl; the key is pouring quickly enough to mimic the volume and force of a normal flush while avoiding overflow.
Use two to four gallons, pour steadily toward the trap, and pause to check bowl level before repeating.
Accessing the toilet tank and manual valve operation
The section explains how to lift the tank lid safely and what to expect inside, including caution about fragile porcelain and loose components.
It then describes using the manual lever or lifting the flapper by hand to initiate a flush.
Finally, it covers controlled ways to release the tank water into the bowl without causing overflow.
How to open the tank safely and what to expect
Begin by locating the toilet tank lid and lifting it straight up to prevent chips or cracks; gloves are recommended to avoid sharp porcelain edges and to keep hands clean.
Remove lid slowly, set aside on a flat surface.
Observe water level, float, fill valve and chain connections.
Expect residual water, possible mineral deposits, and tight fittings; proceed cautiously to avoid damage or spills.
Manual tank lever or flapper manipulation to trigger a flush
Standing beside the open tank, the user can manually trigger a flush by lifting the tank lever, pulling the flapper chain, or momentarily holding the flapper up to release water into the bowl; these actions bypass the fill valve so long as enough water remains in the tank.
The procedure is simple, direct, and requires basic caution:
- Confirm tank water level
- Lift lever smoothly
- Pull chain gently
- Hold flapper briefly
- Release to reseat flapper
Releasing stored tank water without causing overflow
Accessing the tank requires care to release stored water gradually so the bowl fills without overflowing; wear gloves, remove the lid gently, and inspect the water level before touching any valves.
The shutoff and fill valves can be eased by hand to control flow. Lift the flapper slightly or depress the trip lever incrementally, watching bowl response and stopping to prevent spillage or continuous fill.
Portable and battery-powered solutions for longer outages
For longer outages, portable and battery-powered options can maintain sanitation without household power.
Small battery-powered pump units and hand-pumped adapters are described for transferring stored water into the bowl, while portable camping or bucket toilets offer self-contained alternatives.
The discussion compares the space and maintenance needs of stored-water flush solutions versus the convenience and waste-management tradeoffs of portable toilets.
Small battery-powered pump options and how to use them
Consider compact battery-powered pumps as a practical option for flushing toilets during extended outages: these devices draw water from a bucket, rain barrel, or other supply and force it into the toilet bowl or tank to create a usable flush.
Choose 12V or AA-powered centrifugal or diaphragm pumps, check flow rate and head, secure intake strainer, aim nozzle for bowl rim, and test priming and run time before need.
Portable camping toilet or bucket toilet setup
A portable camping or bucket toilet provides a self-contained, low-tech sanitary option when plumbing and power are unavailable, suitable for extended outages or locations without sewer access.
It uses a sealed seat, disposable liners or sawdust/absorbents, and optional chemical treatments; cleanup is simple and odors manageable.
- Choose sturdy bucket and lid
- Use disposable liners
- Add absorbent material
- Seal between uses
- Sanitize regularly
Pros and cons of stored water vs. portable toilets
When planning for extended outages, decision-makers weigh stored water systems against portable and battery-powered toilets based on capacity, maintenance, and convenience.
Stored water supports familiar fixtures and multiple flushes but requires large volume, secure storage, and sanitation vigilance.
Portable and battery units are compact, require less water, and offer mobility, yet they need battery management, waste disposal plans, and may have limited comfort and capacity.
Preventing plumbing issues when flushing without power
When flushing without power, users should take care to prevent clogs and backflow by controlling water volume and avoiding flushing non-biodegradable items.
Attention to signs of rising water, unusual gurgling, or slow drainage can indicate overflow risk and trigger emergency steps like shutting off the supply or using a bucket to remove excess water.
If repeated backups, foul odors, or persistent slow drains occur, professional plumbing help should be sought rather than continuing manual measures.
How to avoid clogs and backflow during manual flushing
Prevent clogs and backflow by controlling water flow and avoiding excessive solids or paper in each manual flush; slow, steady pours and using only enough water to clear the bowl minimize pressure surges that can push waste into traps or the sewer line.
Remove visible solids with a disposable bag, flush smaller amounts repeatedly, and avoid chemical mixes that can damage seals or worsen blockages.
Signs of overflow risk and emergency mitigation steps
If water level rises near the rim, gurgling backs up from drains, or slow emptying follows a manual flush, these are clear signs that an overflow or blockage risk exists and immediate mitigation is needed.
Actions include stopping further flushes, removing excess water with a bucket, using a plunger gently, checking nearby fixtures for backup, and isolating water supply if leakage occurs.
Monitor closely.
When to stop and call a plumber
Although many minor clogs and backup signs can be resolved with basic measures, a homeowner should stop and call a plumber as soon as blockages persist after several careful attempts.
Water continues to rise near the bowl rim, sewage odors are present, or multiple fixtures back up simultaneously.
A professional prevents damage, identifies root causes (main line, venting, or septic issues), and safely restores reliable operation.
Sanitation and hygiene after emergency flushing
After emergency flushing, attention turns to cleaning hands and contaminated surfaces with soap, water, and appropriate disinfectants to prevent illness.
Proper containment and disposal of human waste and gray water outdoors should follow local regulations to protect water sources and avoid contamination.
Essential supplies to have on hand include gloves, bleach or EPA‑registered disinfectant, trash bags, and hand sanitizer.
Best practices for cleaning surfaces and hands
Sanitize all contacted surfaces promptly to reduce pathogen spread following emergency toilet flushing; prioritize high-touch areas such as flush handles, door knobs, sink faucets, and nearby counters.
Use EPA-registered disinfectants or a bleach solution (1/3 cup bleach per gallon water), allow proper contact time, and ventilate.
Wash hands thoroughly with soap and water for at least 20 seconds; use hand sanitizer with ≥60% alcohol if unavailable.
Safe disposal of waste and gray water outdoors
Proper disposal of human waste and gray water outdoors minimizes disease risk and protects water sources and local ecosystems.
Individuals should dig catholes at least 6–8 inches deep and 200 feet from water, trails, and camps.
Greywater from sinks can be dispersed over vegetated areas to filter contaminants.
Bagged waste must be sealed and disposed of per local regulations; avoid surface runoff and standing pools.
Disinfectants and supplies to have on hand
A small kit of disinfectants and basic supplies guarantees effective hygiene after emergency flushing and limits pathogen spread.
It should include household bleach (or EPA-registered disinfectant), alcohol wipes (70%+), disposable gloves, paper towels, sealable plastic bags, and a basic first-aid antiseptic.
Include measured bleach dosing instructions, a small spray bottle, and replacement supplies checked regularly to confirm readiness.
Preparing ahead: emergency toilet kit and checklist
A compact emergency toilet kit should list essentials like a spare bucket or portable toilet, trash bags, disinfectant, toilet paper, and a hand pump or water containers for flushing.
Simple, pre-installed modifications—such as a removable fill valve, a gravity-flush bucket liner, or a manual pump attachment—can make most household toilets operable without electricity.
Clear, practiced instructions and a brief household drill guarantee every member knows how to use the kit and perform emergency flushing safely.
Essential items to include in an emergency toilet kit
When water and electricity are unavailable, an emergency toilet kit guarantees sanitary waste disposal and basic comfort; its contents should cover containment, odor control, cleaning, and personal protection.
Useful items include a portable seat or bucket liner, absorbent gel or cat litter, sealed waste bags, disinfectant wipes and spray, and disposable gloves with hand sanitizer.
- Portable toilet seat or bucket liner
- Absorbent gel/cat litter
- Sealed waste bags
- Disinfectant wipes/spray
- Disposable gloves and sanitizer
Simple modifications to make your toilet usable without power
Having an emergency toilet kit on hand is only part of preparedness; simple, low-cost modifications to a household toilet can make it reliably usable without power.
Install a gravity-fed reservoir or manual-fill bucket with a secure lid, add a removable toilet tank lever or pull-chain conversion, fit non-electric fill valves, and keep spare flapper seals and basic tools accessible for quick, safe manual flushing and repairs.
How to train household members on emergency flushing procedures
Because emergencies can arrive without warning, household members should be taught clear, simple steps for flushing and maintaining the toilet when power is unavailable.
Create a brief checklist, label tools in an emergency kit (bucket, spare water, plunger, gloves), run a short drill, assign roles, post instructions near the bathroom, and review procedures quarterly to guarantee familiarity and kit readiness.
Common mistakes and misconceptions when flushing without power
Many people mistakenly believe repeated manual flush attempts will clear a clog, when in fact they can push obstructions deeper and cause overflow.
Improper use of tools—such as metal plungers, improvised sticks, or excessive force—can crack bowls or damage seals.
Some makeshift methods that seem practical can create contamination or injury risks and should be avoided.
Why flushing repeatedly can worsen clogs
Repeatedly attempting to flush a clogged toilet often forces more water and waste into a partially blocked trap or drain line, increasing pressure and pushing material deeper where it can compact and adhere to the pipe walls.
This can create a harder, more extensive obstruction, spread waste into adjacent sections, and complicate later removal, often requiring stronger tools or professional intervention.
Misused tools that can damage the toilet
Using the wrong tool or improper technique can quickly turn a simple no-power flush into a costly repair.
Metal rods, coat hangers, or rigid objects can crack porcelain, scratch the bowl, or damage seals. Excessive force with plungers or improvised levers can dislodge the trap or break the flush mechanism.
Soft, nonabrasive tools and gentle methods minimize risk and preserve toilet integrity.
When improvised methods are unsafe
Recognize that some improvised flushing methods carry real risks: inserting rigid objects, applying excessive force, or bypassing designed mechanisms can crack porcelain, rupture seals, or create sewage backups.
Avoid using metal tools, chemical mixes, or ad hoc plunging that worsens clogs.
Prefer temporary measures like pouring water safely or using a bucket rinse, and stop immediately if leaks, odors, or structural damage appear.
Scenario-based guidance: best method by situation
Different situations call for different no-power flushing methods, and practical choices depend on location, water access, and scale of outage. The following quick reference compares common scenarios and recommended approaches to help readers pick the most suitable method. Use local conditions and safety considerations when applying any technique.
| Scenario | Recommended method |
|---|---|
| Single toilet outage at home | Manual tank refill or bucket flush |
| Multiple-unit or building outage | Centralized water delivery or portable pump |
| Camping or remote location without water supply | Pack-out waste or portable chemical toilet |
| Short-term outage with water access | Gravity pour from stored water |
Single toilet outage at home
When a single household toilet loses water pressure or the flush mechanism fails during a power outage, evaluating the situation quickly helps determine the simplest remedy: whether a manual flush, bucket pour, or temporary bowl sealing is most appropriate based on tank access, water availability, and user mobility.
Inspect tank access; lift lid to use stored tank water for a manual flush. If unavailable, pour 2–4 gallons swiftly. Seal bowl to limit odors.
Multiple-unit or building outage
In multi-unit buildings, outages affecting entire plumbing stacks require a broader assessment than a single household event.
Management should coordinate stairwell access to roof tanks, main shutoffs, and shared sump systems.
Tenants are advised to conserve water, use communal facilities if maintained, and report backups immediately.
Professional plumbers or building engineers must evaluate pressure, venting, and combined sewage risks before ad hoc flushing.
Camping or remote location without water supply
Assess options based on available supplies, site conditions, and sanitation needs: in arid camps, a small portable camping toilet or a sealed bucket with a tight lid and biodegradable waste bags minimizes contamination; at sites with a natural water source downstream, a gravity-flush technique using a collapsible water container poured sharply into the bowl can simulate a flush; where neither water nor facilities exist, pack-out with double-bagged waste and absorbent material is the safest method to prevent environmental harm.
Camping guidance: choose lightweight, odor-control supplies, designate latrine sites downhill from water, practice Leave No Trace, and carry a portable shovel and sanitation supplies to manage solids and hygiene.
Conclusion
When the familiar hiss of power stops, ordinary urgency meets quiet resourcefulness. One moment, a household fixture rendered idle; the next, simple hands, tools, or a bucket restore order. Techniques range from the immediate — pour, lift, or tug — to the prepared: batteries, kits, practiced routines. Amid inconvenience, small rituals of hygiene and foresight convert disruption into manageable care, revealing how preparedness transforms sudden chaos into orderly, resolute calm.