How to Fabricate Ductwork: Step-by-Step Guide for Beginners and Pros
Ductwork fabrication involves the precise process of measuring, cutting, forming, joining, sealing, insulating, and testing air channels for HVAC systems. This applies to various types of ducts, including rectangular, round, and spiral, made from materials like galvanized steel, aluminum, or flexible options. Key skills required are accurate layout design, sheet-metal handling, safe use of tools, and effective sealing and pressure testing. While beginners can manage simple repairs and short runs, more complex installations that meet building codes should be handled by professionals. Below, you’ll find a detailed step-by-step guide, along with essential tools, templates, and troubleshooting tips to assist you in your ductwork fabrication journey.
Overview of Ductwork Fabrication and When to DIY vs Hire a Pro
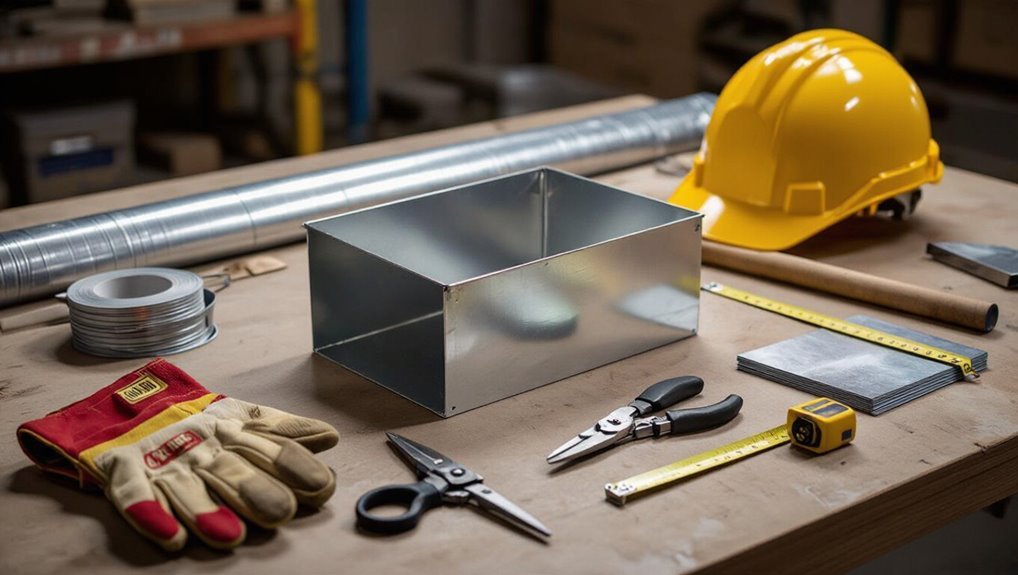
Ductwork fabrication covers measuring, cutting, joining, and sealing air channels to meet airflow and code requirements.
Common configurations include rectangular, round, and spiral ducts made from galvanized steel, aluminum, and flexible materials, each chosen for space, cost, and performance.
Simple repairs and small straight runs suit a competent DIYer, while complex layouts, fire/smoke-rated systems, or code-sensitive installations merit hiring a professional.
What ductwork fabrication involves
Fabricating HVAC duct systems combines sheet-metal cutting, bending, joining, and sealing to create the pathways that deliver conditioned air. It requires measuring, layout, forming, and fitting skills plus knowledge of airflow, material selection, and code requirements.
The process covers pattern development, precise cutting, hemming, seaming, assembly, fastening, and pressure testing. Deciding how to fabricate ductwork balances skill level, tools, safety, and project complexity.
Common types of ducts and materials used
With the basic skills and processes outlined, attention turns to the common duct types and materials that determine fabrication methods and suitability for DIY or professional work.
Sheet metal (galvanized steel, aluminum), spiral and rectangular forms, flexible ducting for tight runs, insulated and acoustic-lined options, and PVC for specialty systems are described.
Material choice influences tools, joints, sealing, and code compliance.
Signs you can fabricate vs when to subcontract
When considering whether to tackle a duct run or call a contractor, assess skill level, tools, scope, and code requirements against project complexity; simple repairs, short straight runs in accessible areas, and installations using flexible or preformed spiral duct often fall within a competent DIYer’s capabilities.
In contrast, extensive layouts, complex shifts, rooftop or high-access work, systems requiring fire dampers or strict leakage/insulation ratings, and any job governed by local permits or warranty-sensitive equipment should prompt subcontracting to a licensed professional.
Evaluate time, safety, testing needs, and insurance exposure; subcontract when precision measurements, balancing, or specialized welding and insulation are required.
Essential Tools, Equipment, and Workspace Setup
A concise inventory of the necessary hand tools—snips, seamers, mallets—and key power machines such as shears, a brake, rollformer, and spot welder establishes the baseline for duct fabrication capability.
Proper safety gear, clear ventilation, and dust/fume controls are required to protect workers and meet code.
An efficient shop layout with dedicated stations and sufficient space for material handling speeds production and reduces errors.
Hand tools checklist (snips, seamers, mallets)
Essential hand tools for ductwork—aviation snips, locking seamers, and mallets—form the foundation of accurate cutting, forming, and joining.
Aviation snips (left, right, straight) enable clean curves and trim. Locking seamers secure and flatten seams for airtight joints. Rawhide or dead-blow mallets shape edges without marring metal.
Include measuring tape, marker, and deburring tool for precise, safe fabrication.
Power tools and machines (shears, brake, rollformer, spot welder)
Equip the shop with powered metalworking machines to increase speed, accuracy, and repeatability in duct fabrication.
Include a power shear for straight, clean cuts; a sheet metal brake for precise bends; a rollformer for producing round and spiral ducts; and a spot welder for quick, strong seam joins.
Select machines sized to material thickness and production volume for efficiency.
Safety gear and ventilation requirements
Wearing appropriate personal protective equipment and maintaining effective ventilation are nonnegotiable in a ductwork shop to prevent injury and control airborne contaminants.
Workers must use safety glasses, hearing protection, cut-resistant gloves, respirators rated for metal dust and fumes, and steel-toed boots.
Local exhaust ventilation, dust collectors, and adequate fresh-air supply minimize airborne particles and welding fumes; regular maintenance guarantees continued effectiveness.
Recommended shop layout and space for efficient workflow
After addressing protective gear and air control, attention turns to the physical arrangement of the shop to support safe, continuous work.
Workflows prioritize clear material flow: intake, cutting, forming, assembly, and storage. Allocate open floor for large ducts, benches at ergonomic height, designated tool stations, and ventilation near welding or soldering.
Ascertain unobstructed aisles, adequate lighting, and secure storage for raw materials and finished pieces.
Materials and Components: Selection and Preparation
The selection of appropriate sheet metal types and gauges sets the foundation for durable, code-compliant ductwork.
Insulation, liners, and vapor barriers must be chosen for thermal performance and moisture control, while fasteners, sealants, adhesives, and gaskets guarantee airtight, long-lasting joints.
Attention to connection pieces, fittings, and accessories completes the material list and affects installability and system performance.
Sheet metal types and gauges for HVAC ducts
Selection of sheet metal for HVAC ducts centers on balancing strength, corrosion resistance, weight, and cost to meet performance and code requirements.
Common materials include galvanized steel for durability, stainless steel for corrosive environments, and aluminum for lightweight runs.
Gauge choice depends on duct size and pressure class—lower gauge numbers indicate thicker metal.
Proper gauge selection prevents vibration, leakage, and excessive flexing.
Insulation, liners, and vapor barriers
Several key components—thermal insulation, internal liners, and vapor barriers—work together to control heat transfer, acoustics, and moisture within duct systems.
Proper selection considers R-value, density, fire rating, and compatibility with airflow.
Liners reduce noise and prevent fiber shedding; vapor barriers stop condensation on cold surfaces.
Materials must be cut, fitted, and secured to maintain continuous coverage and allow for service access.
Fasteners, sealants, adhesives, and gaskets
Following insulation, liners, and vapor barriers, attention shifts to the fasteners, sealants, adhesives, and gaskets that hold the system together and preserve its performance.
Specify corrosion-resistant fasteners, compatible sealants and adhesives rated for temperature and pressure, and gasketing materials matched to flange faces.
Guarantee proper application techniques, cure times, and storage.
Verify compatibility with coatings and insulation to prevent chemical degradation and air leaks.
Transition pieces, fittings, and accessories
Modulation pieces, fittings, and accessories form the connective framework that adapts duct geometry, directs flow, and accommodates system interfaces. Their materials, dimensions, and fabrication tolerances must be chosen to match airflow requirements, structural loads, and environmental exposures.
Selection prioritizes pressure loss minimization, manufacturability, and corrosion resistance; clear marking and testing guarantee fit.
- Opt for smooth changes and radiused elbows
- Match gauges and flange styles
- Preassemble critical junctions for trial fit
Reading Plans, Measurements, and Layout Planning
The fabricator begins by interpreting HVAC drawings and duct schedules to identify system layout, materials, and connection points.
Next, precise calculations determine duct sizes and routing to meet airflow requirements and balance pressure losses.
Finally, panels are marked and nested efficiently on sheet stock to minimize waste and speed fabrication.
Interpreting HVAC drawings and duct schedules
Begin by examining HVAC drawings and duct schedules to establish a clear roadmap for layout and fabrication.
The reader verifies symbols, scale, and legend, matches sheet numbers, and notes equipment locations.
Duct schedules supply sizes, fittings, and material specs; mark changes, offsets, and penetration points.
Confirm dimensions against site conditions and flag discrepancies for coordination before cutting or assembly.
Calculating duct sizes and layout for airflow requirements
Several key measurements and plan readings guide accurate duct sizing and layout for required airflow: the designer extracts room-by-room airflow values from schedules, notes equipment supply and return locations, and records ceiling heights, structural obstructions, and chase locations that affect runs.
Then calculations convert required CFM into duct cross-sections using velocity and friction charts, balancing branch lengths, fittings, and static pressure to guarantee system performance.
Marking and nesting patterns to minimize waste
Lay out sheet metal and components on the shop floor according to the project plan. Then transfer measured patterns directly from scaled drawings to minimize cutting errors and offcuts.
Use nesting software or manual planning to arrange parts tightly, orienting grain and bend allowances. Mark cutting lines clearly, group similar shapes, optimize sheet usage, and record leftovers for future runs to reduce scrap and cost.
Step-by-Step Fabrication Process for Rectangular and Spiral Ducts
The fabrication process begins with accurate sheet metal cutting and precise forming of hems, seams, and flange connections to guarantee airtight joints.
Technicians then assemble rectangular duct sections and fittings while producing spiral/round ducts using rollforming machines for consistent dimensions.
Finally, changes in direction, offsets, and takeoffs are fabricated and fitted to integrate the system and meet design layouts.
Cutting sheet metal accurately
Accurate cutting of sheet metal sets the foundation for well-fitting rectangular and spiral ducts, requiring precise measurements, appropriate tools, and controlled techniques to minimize material waste and guarantee airtight seams.
Workers mark layouts with squares and scribe lines, select snips, shears, or plasma cutters per thickness, clamp securely, cut with steady feeds, deburr edges, and verify dimensions before assembly.
Forming hems, seams, and flange connections
Start by shaping hems, seams, and flanges to create strong, leak-resistant joints that align with the duct layout; this process requires consistent fold radii, correct overlap, and uniform fastener spacing to confirm fit and function.
Use appropriate hemming tools, seaming pliers, and flange break dies.
Verify edge straightness, maintain gasket channels, and mark connection orientation before finishing to guarantee repeatable, secure joins.
Assembling rectangular duct sections and fittings
Assemble rectangular duct sections and fittings by aligning prepared hems, seams, and flanges, then fastening in a systematic sequence to guarantee squareness, airtightness, and ease of handling.
Verify squareness with a framing square, tack fasten corners, complete continuous seams with screws or rivets, apply sealant where specified, install internal stiffeners, and check for uniform gaps.
Label and support sections for installation.
Producing spiral/round ducts with rollforming machines
Producing spiral and round ducts with rollforming machines involves feeding pre-cut strip stock into a powered former that progressively shapes, locks, and seams the metal into a continuous tubular profile.
Operators monitor machine settings, seam engagement, and coil alignment to maintain concentricity, pitch, and wall integrity throughout the run.
After forming, ducts are cut to length, inspected for seam integrity, deburred, and stacked for final handling.
Creating transitions, offsets, and takeoffs
Creating changes, offsets, and takeoffs requires precise measurement, layout, and a sequence of forming and joining steps tailored to rectangular and spiral duct profiles.
The process includes pattern development, cutting, edge preparation, and incremental forming for conversions; bending and notch layout for offsets; and collar or boot fabrication for takeoffs.
Accurate fit checks, seam sealing, and reinforcement guarantee airflow integrity and structural strength.
Joining Methods and Sealing Techniques
Joining rectangular and spiral ducts requires selecting appropriate mechanical connections such as locked seams, rivets, screws, or welding to match material and application.
After assembly, technicians apply mastic, approved tapes, or seam sealants to protect joints and prevent air leakage.
Proper execution of both joining and sealing guarantees airtightness and maintains the system’s thermal integrity.
Common joining methods: locked seams, rivets, screws, and welding
As duct sections are assembled, several reliable methods—locked seams, rivets, screws, and welding—are employed to form durable mechanical connections and prepare joints for sealing; each technique offers distinct advantages in strength, speed, and suitability for specific materials and pressure classes.
Locked seams yield continuous edges for low‑pressure systems. Rivets and screws allow rapid assembly and disassembly, and welding provides rigid, high‑pressure integrity.
Applying mastic, tapes, and seam sealants correctly
After mechanical connections are secured—whether by locked seams, rivets, screws, or welds—the integrity of the duct system depends on proper sealing with mastic, tapes, and seam sealants.
Apply mastic with a brush or caulking gun to gaps and joints, smooth for full coverage, and allow cure.
Use UL-listed foil or cloth tapes for reinforcement.
Inspect seams and reapply where gaps or voids remain.
Ensuring airtightness and thermal integrity
Guarantee airtightness and thermal integrity by selecting joining methods and sealants that match the duct material, pressure class, and operating environment. Proper technique and quality control prevent leakage, condensation, and energy loss.
Use continuous welds, lockseams, or bolted flanges for high-pressure systems. Apply compatible mastics, foil tapes, and gasketing for thermal breaks.
Inspect joints, test to specified leakage class, and document corrective actions.
Insulation, Lining, and Condensation Control
Selecting proper insulation types and R-values is essential to meet thermal performance and code requirements.
The discussion then covers methods for installing internal liners and external insulation to control noise and heat transfer.
Finally, vapor barrier placement and best practices for preventing condensation on duct surfaces are examined.
Choosing appropriate insulation types and R-values
Proper insulation selection balances thermal performance, moisture control, space constraints, and cost by matching insulation type and R-value to the duct’s location, operating temperature, and surrounding environment.
Materials like fiberglass, foam, and elastomeric rubber offer different conductivities and moisture resistance. Higher R-values suit unconditioned or exterior runs; lower R-values suffice indoors.
Consider condensation risk, mechanical protection, fire ratings, and maintenance access.
Installing internal liners and external insulation
Having chosen an appropriate insulation type and R-value for each run, the next step is determining whether to apply internal liners, external insulation, or a combination of both based on airflow characteristics, condensation risk, and maintenance needs.
Internal liners reduce noise and prevent particulate migration; external insulation improves thermal performance and protects the duct.
Secure, sealed attachments and appropriate fasteners guarantee longevity and serviceability.
Vapor barrier installation and condensation prevention
Apply vapor barriers meticulously to prevent moisture ingress and surface condensation on duct insulation, focusing on continuous, sealed laps and penetrations that maintain the system’s thermal integrity.
Technicians should select compatible barrier materials, seal seams with approved tapes or mastics, protect edges and fasteners, and verify adhesion.
Regular inspections and proper vapor retarder selection for ambient conditions reduce mold, corrosion, and energy loss.
Quality Control, Testing, and Compliance
A clear quality control regimen begins with a visual inspection checklist that verifies seam integrity, fasteners, dimensions, and insulation continuity.
Completed assemblies should undergo pressure testing to established leakage criteria, with results recorded against project specifications.
Compliance with applicable codes and industry standards, plus proper labeling, guarantees traceability and regulatory acceptance.
Visual inspection checklist for fabricated ducts
Several critical checkpoints guide the visual inspection of fabricated ducts to guarantee compliance with design, performance, and safety standards.
Inspectors verify material integrity, correct dimensions, seam and joint quality, fastener and weld consistency, flange alignment, and gasket seating.
Surface finish, corrosion protection, and insulation placement are checked.
Labels, access panels, and clearances are confirmed against drawings and code requirements before release for installation.
Pressure testing and leakage criteria
Pressure testing verifies ductwork integrity by subjecting assemblies to controlled internal pressure and measuring leakage against specified criteria.
Technicians isolate systems, apply steady or step pressures, record leakage rates, and compare results to project limits.
Test reports document pressure levels, leakage volumes, locations of failures, and corrective actions.
Retesting follows repairs until leakage meets acceptance criteria and quality records are closed.
Code requirements, industry standards, and labeling
Following verified leak testing and any corrective repairs, compliance with applicable codes, industry standards, and labeling requirements guarantees ductwork meets legal and performance obligations.
Fabricators must follow local building codes, SMACNA, ASHRAE, and manufacturer specifications.
Documentation, material traceability, and visible labels for pressure class, gauge, and fire or smoke ratings are required.
Inspections and certified reports complete project acceptance and ongoing maintenance records.
Common Fabrication Errors and How to Avoid Them
Common fabrication errors often stem from lapses in measurement, seam work, and material handling, each of which can compromise airflow, durability, and installation fit.
Clear procedures and simple checks reduce rework and long-term failures. The following points highlight common mistakes and practical prevention steps:
- Measurement and layout mistakes
- Poor seam work and improper sealing
- Material handling and damage prevention
Measurement and layout mistakes
Accurate measurement and precise layout form the foundation of reliable ductwork fabrication; errors at this stage propagate into misfits, wasted material, and installation delays.
Common mistakes include incorrect dimension transfer, neglecting allowances for fittings, inconsistent reference lines, and improper squaring.
Use calibrated tools, double-check dimensions, mark clearly, and establish consistent datum points to prevent cumulative errors and rework.
Poor seam work and improper sealing
Poorly executed seams and inadequate sealing compromise airflow efficiency and long-term system integrity.
Fabricators often leave gaps, misalign joints, or use insufficient sealant, causing leaks, noise, and energy loss.
Proper folding, consistent seam tension, correct sealant type, and systematic inspection prevent failures.
Use approved tapes or mastics, cure times, and pressure testing to confirm tightness before installation and commissioning.
Material handling and damage prevention
Handle duct materials with care to prevent scratches, dents, and deformation that compromise airflow and fit.
Workers should use padded lifts, edge protectors, and secure stacking to avoid pressure points.
Inspect sheets on delivery for damage, mark defects, and segregate unusable pieces.
Train handlers in proper lifting, use mechanical aids for heavy items, and maintain clean storage to prevent corrosion and contamination.
Time-Saving Tips, Efficiency Hacks, and Cost Management
Efficient ductwork fabrication relies on nesting strategies to minimize scrap, combined with batch production and purpose-built jigs to accelerate repetitive cuts and assemblies.
Careful sourcing of materials and accurate cost estimation further reduce waste and prevent budget overruns.
Together these practices improve throughput while keeping projects on time and within budget.
Nesting strategies to reduce scrap
Implementing effective nesting strategies minimizes scrap and accelerates production by arranging duct blank layouts to maximize material use and reduce cutting time.
Planners analyze part geometries, orient pieces to exploit sheet widths, and group complementary shapes to fill gaps.
Software-driven nesting and manual templates both reduce offcuts.
Regular review of common layouts and feedback from shop floor operators refines patterns and lowers material cost.
Batch fabrication and jig use
Group production using batch fabrication and purpose-built jigs shortens cycle times, reinforces consistency, and lowers per-piece labor costs by standardizing repeatable operations.
Operators set fixtures for common dimensions, reducing setup between runs and minimizing handling.
Modular jigs accommodate variations, guarantee alignment, and speed assembly.
Scheduling mixed-size batches optimizes machine use while maintaining quality control through calibrated references and simple inspection points.
Sourcing materials and estimating project costs
Several proven strategies help cut procurement time and control costs when sourcing ductwork materials: consolidating orders with a few vetted suppliers, specifying common gauges and fittings across projects, and using material lists tied to standardized assemblies.
Accurate takeoffs, vendor quotes with lead times, and bulk pricing comparisons reduce surprises. Include waste allowances, labor rates, and contingency in estimates to produce reliable, competitive bids.
Examples, Typical Projects, and Step-by-Step Walkthroughs
The section presents concrete examples and step-by-step walkthroughs to illustrate common ductwork tasks.
It covers a small residential duct run fabrication walkthrough, a commercial rectangular duct system example, and retrofit solutions for tight spaces.
Each example focuses on sequencing, required tools, and practical tips for predictable outcomes.
Small residential duct run fabrication walkthrough
Begin by outlining a simple residential run: measure the required length and layout from the air handler to each grille, note bends and obstacles, and record required sizes and material types.
This baseline directs the cutting, fitting, and sealing sequence that follows. Cut and assemble straight lengths, form elbows, fit connectors, secure with screws and mastic, insulate exposed sections, test airflow, and adjust balancing dampers.
Commercial rectangular duct system example
A mid-rise office building project illustrates a typical commercial rectangular duct system: long trunk mains run through mechanical rooms and ceiling plenum, branch laterals feed perimeter and core zones, and multiple changes, volume dampers, and access doors are coordinated with structural elements.
Fabrication emphasizes straight runs, reinforced seams, insulated panels, standardized fittings, pressure-rated joints, coordinated supports, and staged installation to align with HVAC equipment schedules and commission sequences.
Retrofit and tight-space solutions
Tight-space retrofit projects demand creative sequencing and compact detailing to integrate new ductwork into existing structures without major demolition.
Examples include attic-to-attic transfers, closet shaft runs, and underfloor plenum adaptations.
Typical steps: site survey, measured templating, prefabricated modular bends, and phased installation.
Walkthroughs emphasize insulation, access panels, sealant application, and testing to guarantee airflow, clearance, and code compliance.
Maintenance, Repair, and Replacement Guidance
Routine inspections should identify leaks, corrosion, or separated seams and guide targeted repairs of damaged sections.
Clear criteria distinguishing refurbishment from full replacement—based on extent of deterioration, airflow loss, and cost-benefit—help prioritize interventions.
Practical tips for sealing joints, maintaining insulation, and scheduling filter and duct cleaning support long-term performance and indoor air quality.
Inspecting and repairing leaks or damaged sections
Begin by systematically inspecting duct runs for visible gaps, crushed seams, sagging joints, disconnected fittings, and signs of air leakage such as dust trails, uneven temperature, or reduced airflow at registers.
Document locations, measure sheet metal damage, and mark leaks.
Small gaps get foil HVAC tape or mastic; replace torn sections, reinforce seams with cleats or screws, and retest airflow and pressure to confirm repairs.
When to refurbish vs replace ductwork
After leaks and damage are identified and temporary or permanent repairs are made, the decision to refurbish or replace ductwork depends on factors including extent of corrosion, number of patched areas, airflow loss, energy costs, indoor air quality, and remaining useful life of the system.
Refurbish when structural integrity remains, sealing and insulation restore performance, and costs are substantially lower; replace when pervasive corrosion, frequent failures, or major inefficiency exist.
Tips for long-term performance and indoor air quality
Maintain regular inspection and timely maintenance to preserve ductwork performance and indoor air quality over the long term.
Schedule filter changes, clean coils and ducts, seal leaks, and recalibrate dampers to prevent energy loss and contamination.
Monitor humidity, control condensation, and use HEPA or MERV-rated filters where appropriate.
Replace damaged sections promptly and document maintenance for performance tracking and regulatory compliance.
Useful Templates, Checklists, and Resource Links
A concise set of templates and links helps fabricators and supervisors apply consistent procedures and confirm compliance.
Included materials should support both shop and field workflows, standard measurements and fitting layouts, and references to accepted industry codes.
The following quick resources are recommended for immediate use and further study:
- Fabrication checklist for shop and field
- Measurement templates and standard fitting dimensions
- Industry standards and further reading
Fabrication checklist for shop and field
Several concise checklists and templates streamline ductwork fabrication tasks for both shop and field teams, guaranteeing consistent quality, safety, and schedule adherence.
The fabrication checklist covers materials verification, cut lists, tooling calibration, joint preparation, welding/sealing standards, fastener types, insulation/liner requirements, QA signoffs, PPE checks, hazard controls, dimensional tolerances, transport packing, and handover documentation to guarantee traceable, repeatable outcomes.
Measurement templates and standard fitting dimensions
Introduce standardized measurement templates and fitting-dimension tables to guarantee repeatable, accurate layout and fabrication across shop and field teams.
Provide printable templates for common fittings (elbows, connections, takeoffs), blank dimension sheets, and cut lists.
Include clear units, tolerances, and bend allowances.
Store digital versions and revision history centrally.
Train staff on consistent template use to reduce errors and speed production.
Industry standards and further reading
When complying with project specifications and improving shop-to-field consistency, refer to recognized industry standards, concise checklists, and vetted templates that codify measurement practices, fitting dimensions, tolerances, and safety requirements; the following resources consolidate authoritative codes (SMACNA, ASHRAE, NFPA), printable templates and cut lists, inspection checklists, and links to manufacturer data and training materials for quick reference and continued staff development.
| Resource | Purpose |
|---|---|
| SMACNA Guides | Fabrication standards |
| ASHRAE | Performance criteria |
| NFPA | Safety codes |
| Manufacturer Manuals | Product specifics |
Conclusion
In the end, the guide makes ductwork seem as simple as breathing: anyone can master seams, bends, and spirals until homes hum like orchestras of airflow. With tools, templates, and patience, even novices become near-mythic fabricators—saving money, time, and heroic headaches. Yet the wise still summon professionals for monstrous systems or tight tolerances. Ultimately, understanding ductwork transforms mundane metal into purposeful art, promising efficiency, comfort, and quiet domestic glory.