How to Install a Bidet Without an Outlet: Easy No-Electric Installation Guide
How to Install a Bidet Without an Outlet: Easy No-Electric Installation Guide
Installing a non-electric bidet is straightforward and requires no outlet. These bidets connect directly to your existing water supply, using a T-valve or handheld sprayer, along with flexible hoses, rubber washers, plumber’s tape, and basic tools. The process involves shutting off the toilet water, detaching the supply hose, installing the T-valve, connecting the hoses, and checking for leaks. You can adjust the water pressure using the bidet control. This guide will walk you through model choices, step-by-step installation, troubleshooting, and maintenance for a seamless setup.
How to Install a Bidet Without an Outlet: Quick Overview
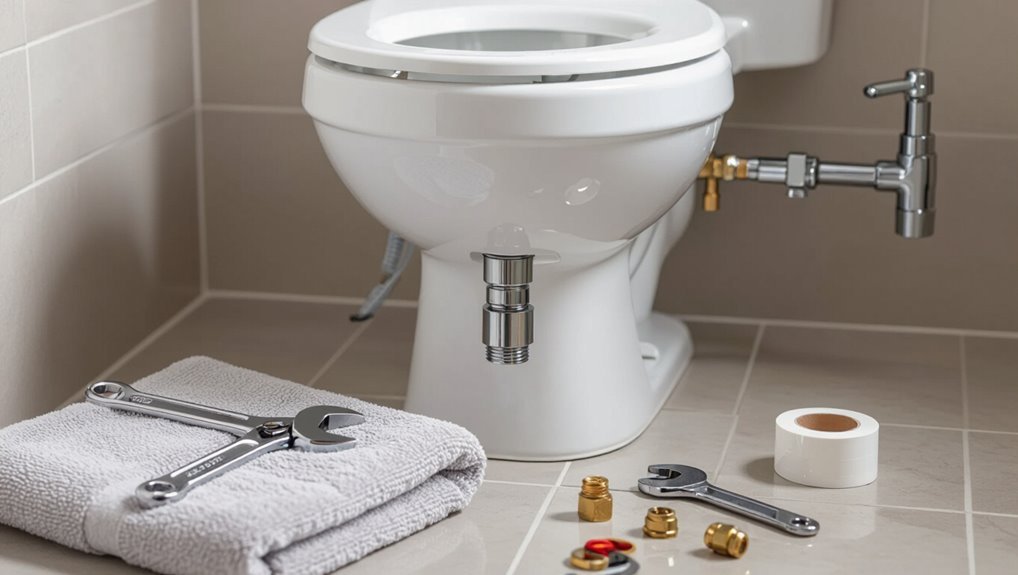
A non-electric bidet can be installed without an outlet, as many models operate purely on water pressure or attach directly to the toilet’s supply line.
These manual units generally require simpler plumbing connections and avoid the need for electrical wiring.
Compared with electric models, they offer lower cost, easier maintenance, and continued operation during power outages.
Direct answer can you install a bidet without electricity?
Can a bidet be installed without electricity? Yes. Non-electric bidet attachments and mechanical hand-held sprayers function using household water pressure, requiring only a T-valve connection to the toilet’s water supply.
For instructions on how to install bidet without outlet, follow manufacturer steps: shut off water, attach T-valve, connect hose, secure bidet, restore water, and check for leaks.
No power outlet needed.
Benefits of a non-electric bidet vs electric models
Although both types clean effectively, non-electric bidets offer straightforward reliability and lower ongoing costs compared with electric models.
They require no power source, reducing installation complexity and eliminating electrical hazards. Maintenance is simpler with fewer mechanical parts, and water pressure controls remain manual and predictable.
Upfront prices tend to be lower, and longevity often surpasses that of electrically dependent units in basic residential settings.
Types of Non-Electric Bidets and Which Fits Your Bathroom
Non-electric bidets span several practical options, from mechanical handheld sprayers (shattaf) and T-valve attachments that tap the existing water line to non-electric seats with adjustable pressure and compact portable or travel models.
Each type carries distinct pros and cons—simplicity and low cost for sprayers, easy retrofit for T-valves, added comfort for pressure-control seats, and convenience for portables.
A brief comparison of features and typical use cases helps determine which solution best fits a given bathroom layout and user preference.
Mechanical handheld bidet sprayers (shattaf) pros and cons
When space is limited and plumbing stays simple, a mechanical handheld bidet sprayer (shattaf) offers a compact, manual cleansing option that requires no electricity or complex installation.
It mounts beside the toilet, taps into the water supply, and operates via a hand trigger for direct control over spray intensity.
Pros: inexpensive, flexible positioning, easy maintenance.
Cons: requires hand aim, potential hose leaks, limited pressure modulation without a valve.
T-valve bidet attachments that use existing water supply
Handheld sprayers share the advantage of operating without power, but for users seeking a more hands-free experience, T-valve bidet attachments offer a different, plumbing-driven solution.
These compact devices install between the toilet’s water supply and tank, diverting flow to a nozzle beneath the seat. They require no electricity, provide adjustable pressure via the shutoff or valve, and fit most standard toilets.
Non-electric bidet seats with water pressure control
Several models of bidet seats rely solely on water pressure for cleansing, offering a balance between simplicity and functionality.
These non-electric seats connect to the existing cold or mixed supply via a T-valve, with integrated mechanical knobs or levers to adjust spray intensity and angle.
Installation requires no outlet, minimal tools, and compatibility checks for seat shape and supply line fittings.
Portable bidets and travel options
Beyond fixed non-electric seats that rely on the toilet’s water supply, portable bidets provide flexible, outlet-free cleansing for travel, small bathrooms, or users who prefer a separate device.
Handheld squeeze bottles, pump-operated sprayers, and battery-free nozzle bottles offer simple, hygienic rinsing. They require no installation, fit luggage or storage, and suit intermittent use or shared facilities without plumbing modification.
Comparison of features and use cases
Choosing the right non-electric bidet depends on factors like bathroom layout, water pressure availability, user mobility, and storage constraints. The guide compares handheld sprayers, bidet seats, attachments, travel units, and portable bottles by ease of install, space needs, water control, user accessibility, and cleaning. Match model to priorities: small spaces favor slim attachments; mobility issues benefit from seats; travelers use portable options.
| Type | Best Use |
|---|---|
| Handheld sprayer | Flexible, compact |
| Bidet seat | Full replacement |
| Attachment | Budget, simple |
| Travel unit | Mobility, trips |
| Portable bottle | Emergency, minimal |
Tools, Parts, and Materials You’ll Need
A concise checklist of plumbing parts—T-valve, bidet hoses, adapters, and rubber washers—forms the core of a non-electric install.
Essential tools include an adjustable wrench, screwdriver, plumber’s (Teflon) tape, and a bucket to catch any water.
Selecting the correct fittings requires matching thread types and sizes to the toilet’s supply line and flange.
Plumbing parts checklist (T-valve, hoses, adapters, washers)
Essential plumbing parts for installing a non-electric bidet include a T-valve to split the toilet’s water supply, a set of flexible supply hoses, appropriate adapters to match differing thread sizes, and rubber or neoprene washers to guarantee watertight seals.
Additional items may include a short braided hose for the bidet inlet and a shutoff-compatible coupling nut; confirm thread standards (1/2″ or 7/8″) before purchase.
Basic tools checklist (adjustable wrench, screwdriver, Teflon tape, bucket)
After confirming the required plumbing parts, attention turns to the basic tools that make the installation practical and leak-free.
An adjustable wrench fits supply nuts and T-valve connections; a flathead or Phillips screwdriver secures seat brackets; Teflon tape seals threaded joints to prevent leaks; and a bucket catches water during disconnection.
Keep a clean rag nearby for drips and quick cleanup.
How to choose the right fittings for your toilet model
When identifying fittings for a specific toilet model, installers should verify connection types, thread sizes, and valve orientations to ascertain compatibility.
Measure inlet and tank bolt spacing, confirm whether the supply line is angled or straight, and check for proprietary connectors.
Choose corrosion-resistant materials (brass or stainless), include appropriate adapters and washers, and make certain shutoff valve capacity matches bidet flow.
Step-by-Step Installation for T-Valve Bidet Attachment
The following steps guide the installer through preparing the toilet and shutting off the water supply, then removing the existing supply hose from the tank.
Next, the T-valve is installed and supply hoses are reattached before securing the bidet hose and nozzle assembly.
Finally, the system is tested for leaks and water pressure is adjusted as needed.
Prepare the toilet and shut off water supply
Begin by turning off the toilet’s water supply and flushing to drain the tank, ensuring minimal residual water before detaching the supply line.
Place towels and a small bucket beneath connections.
Lift the seat and remove any loose items from the tank lid.
Inspect shutoff valve and supply line for leaks or corrosion.
Gather tools: adjustable wrench, pliers, and towels.
Remove the water supply hose from the tank
Carefully loosen the nut connecting the water supply hose to the toilet tank using an adjustable wrench, supporting the hose with the other hand to prevent twisting.
Once loosened, back the nut off by hand, catching residual water with a towel or small pan.
Remove the hose from the fill valve outlet, inspect the hose and tank fitting for wear, and set the hose aside for reattachment.
Install the T-valve and reattach supply hoses
Thread the T-valve onto the toilet’s fill valve outlet by hand until snug, then tighten it a quarter turn with an adjustable wrench to guarantee a secure, leak-free seal.
Reattach the original supply hose to the T-valve’s lower outlet, ensuring the rubber washer is seated.
Tighten by hand, finish with a slight wrench turn, and check for any visible misalignment before restoring water.
Attach the bidet hose and nozzles securely
Connect the bidet hose to the T-valve and secure the nozzle assembly to the toilet following the manufacturer’s orientation points.
Hand-tighten fittings, then use an adjustable wrench to snug connections—avoid over-tightening.
Align nozzles so spray angles match instructions and clips or brackets sit flush.
Recheck mounting bolts and hose routing to prevent kinks, ensuring stable, properly oriented hardware before proceeding.
Test for leaks and adjust water pressure
Begin by turning the toilet shutoff valve back on slowly and then flushing once to refill the tank; this restores water flow to the T-valve and pressurizes the new connections for testing.
Inspect all joints for drips, tightening fittings gently if needed.
Operate the bidet control slowly to verify smooth pressure adjustment and confirm no leaks under full and reduced flow settings.
Final checks and user tips
Several quick final checks verify the bidet functions reliably and safely: inspect all fittings for any slow leaks, confirm the spray angle and pressure settings suit the user, verify the seat and attachment are secure, and make certain the hose routing avoids kinks or contact with sharp edges.
Provide basic user instructions for operation, maintenance schedule, and emergency shutoff location.
Offer adjustment tips for comfort.
Step-by-Step Installation for Handheld Bidet Sprayer
The process begins with shutting off the toilet water and flushing to drain the tank.
Next, a mounting bracket is fitted and a T-valve installed at the supply line, followed by attaching the sprayer hose and verifying spray patterns.
Finally, the sprayer is secured in its holder and stored to prevent kinks or impact damage.
Turn off water and drain the tank
Shut off the toilet’s water supply using the shutoff valve located near the base of the toilet, then flush to empty the tank and hold the lever down to remove remaining water.
Verify no flow at the fill valve and use a sponge or towel to absorb residual water from the tank and bowl.
Keep a bucket and rags ready to catch drips during subsequent work.
Install mounting bracket and T-valve connection
With the tank drained and residual water mopped up, proceed to mount the sprayer bracket and attach the T-valve to the toilet’s fill valve.
Secure the bracket to the tank or bowl using provided hardware or adhesive.
Wrap T-valve threads with plumber’s tape, hand-tighten then wrench snugly.
Reconnect supply line to T-valve, ensuring alignment and no cross-threading before final tightening.
Connect sprayer hose and test spray patterns
Begin by attaching the sprayer hose to the T-valve outlet, ensuring the hose’s rubber washer is seated and threads align to prevent cross-threading.
Tighten hand-firm, then use an adjustable wrench for a quarter-turn.
Turn water on slowly, inspect for leaks, and operate the trigger to cycle pressures.
Test multiple spray patterns and angles, confirming steady flow and valve responsiveness before final use.
Proper storage and mounting to avoid damage
After confirming the hose and trigger function without leaks, attention shifts to storing and mounting the sprayer to prevent kinks, impacts, and wear.
Mount the holder at reachable height, avoiding direct hits from the toilet lid.
Coil the hose loosely to maintain bend radius.
Use wall anchors suitable for the material, rubber-lined clips to protect fittings, and periodic inspections for abrasion or loosening.
Installing a Non-Electric Bidet Seat
The existing toilet seat is removed and the mounting holes inspected before fitting the new bidet seat bracket and securing the seat in place.
The water line is then connected to the bidet seat inlet and spray modes and pressure are adjusted mechanically since no power is required.
Common installation problems—misaligned brackets, loose fittings, or low pressure—are addressed with simple tightening, repositioning, or supply-line checks.
Remove existing toilet seat and inspect mounting holes
Carefully lift the existing seat and lid to access the mounting area and unfasten the bolts that secure them to the bowl.
Remove seat and store hardware.
Wipe the rim and inspect mounting holes for cracks, corrosion, or mineral buildup.
Measure bolt spacing and hole condition to confirm compatibility with the new bidet seat.
Note any damage requiring repair before proceeding.
Fit seat mounting bracket and secure seat
With the mounting holes inspected and any damage noted, the installer aligns the bidet seat’s mounting bracket over the bolt openings, matching the measured spacing.
Bolts are inserted, washers placed, and nuts hand-tightened. Using a screwdriver and wrench, the installer alternately tightens hardware until the bracket is firm but not overtightened.
The bidet seat then slides onto the bracket and locks into position.
Connect water line to bidet seat inlet
Begin by shutting off the toilet’s water supply and flushing to drain the tank so the connection point is dry and pressure-free.
Attach the T-valve to the toilet fill valve outlet, hand-tighten, then secure with a wrench one-quarter to one-half turn.
Connect the supplied flexible hose from the T-valve to the bidet seat inlet, using thread sealant if recommended.
Check for leaks and restore water.
Adjust spray modes and pressure without power
After confirming the water connections are secure and leak-free, attention turns to controlling spray modes and pressure on a non-electric bidet seat.
Users adjust pressure via the mechanical dial or lever on the control panel, selecting gentle to strong flows.
Mode selection uses manual switches or rotating nozzles for posterior, feminine, or oscillating sprays.
Test settings gradually to guarantee comfort and proper alignment.
Troubleshooting common seat installation problems
When issues arise during installation of a non-electric bidet seat, diagnosing them systematically saves time and prevents damage.
Inspect mounting alignment, tighten bolts evenly, and verify hinge engagement.
Check water connections for leaks and correct hose seating.
Confirm seat-to-bowl contact points match the template; adjust brackets if misaligned.
Test manual controls for smooth operation before finalizing installation.
Common Problems, Causes, and Quick Fixes
Common issues after installing a non-electric bidet seat include leaks at fittings, low or no water flow, intermittent spraying, and poor fit on nonstandard toilet bowls.
Diagnosing each problem involves inspecting connections and hoses, checking water supply pressure and filters, testing the spray mechanism, and measuring bowl dimensions.
Quick fixes range from tightening or replacing seals and adapters to cleaning screens, adjusting shutoff valves, and using universal mounting kits for unusual toilet shapes.
Leaks at connections how to diagnose and fix
Inspecting connection points is the first step in diagnosing leaks at a bidet’s fittings; loose fittings, worn seals, cross-threading, or incorrect washer orientation are the usual suspects and can often be fixed without replacing major components.
Tighten fittings gently, replace damaged washers or O-rings, clean threads, realign components to avoid cross-threading, and test under low pressure.
Repeat until dry.
Low water pressure causes and remedies
Check the supply flow and valve positions first: low water pressure at a bidet often stems from partially closed shutoff valves, clogged supply lines or aerators, kinked hoses, or municipal pressure issues.
Resolving it typically involves verifying full valve opening, flushing or replacing inline filters and aerators, straightening or replacing flexible hoses, and confirming household water pressure meets the bidet’s minimum requirements.
If pressure remains low, inspect the T-adapter and toilet fill valve for restrictions.
No spray or intermittent spray troubleshooting steps
Troubleshooting no spray or intermittent spray starts by isolating the symptom—complete lack of spray versus weak or pulsing flow—and then systematically testing components from supply to nozzle.
Common causes include air trapped in the line, a clogged nozzle or filter, a failing solenoid/valve, loose electrical connections on powered models, or intermittent water supply due to a faulty T-adapter or toilet fill valve.
Inspect, flush, clean, tighten, replace.
Fitment issues with unusual toilet shapes solutions
When a bidet must mate with an uncommon toilet profile—elongated, skirted, asymmetrical, or with a raised rim—fitment problems typically arise from mismatched mounting points, obstructed spray paths, or inadequate clearance for the seat hinge and plumbing hardware; solutions prioritize measuring the bowl geometry, choosing adjustable or universal mounting kits, and repositioning or swapping narrow-profile seats and adapters to restore proper alignment without forcing components.
Measure, mock-fit, trim shrouds, use extenders.
Safety, Maintenance, and Sanitation Best Practices
A regular inspection and tightening schedule helps prevent leaks and prolongs component life.
Owners should follow anti-siphon and winterizing steps to avoid backflow and freeze damage.
Routine cleaning of nozzles and hoses, plus timely consultation with a plumber for persistent leaks or valve issues, preserves sanitation and safety.
Regular inspection and tightening schedule
Establishing a regular inspection and tightening schedule prevents leaks, maintains spray accuracy, and extends component life.
Inspect connections, hoses, and mounting bolts monthly for looseness, wear, or mineral buildup. Gently hand-tighten fittings; use appropriate tools for stubborn fasteners without over-torquing.
Replace degraded washers or hoses promptly. Document checks and actions to track trends and address recurring issues before failures occur.
How to winterize or prevent backflow (anti-siphon advice)
If temperatures will dip below freezing or if plumbing may be exposed to pressure reversals, owners should winterize bidet fixtures and install anti-siphon measures to prevent frozen pipes and backflow contamination.
Drain lines, shut off and disconnect water supply, and insulate exposed valves.
Fit a certified vacuum breaker or backflow preventer at the supply connection.
Test devices periodically and replace any compromised components promptly.
Cleaning and sanitizing bidet nozzles and hoses
After winterization and anti-siphon measures are addressed, attention should turn to routine cleaning and sanitizing of bidet nozzles and hoses to maintain hygiene and prevent microbial growth.
Clean detachable nozzles weekly with mild soap or diluted vinegar, rinse thoroughly, and air dry.
Flush hoses periodically, inspect for deposits or wear, and replace any components showing damage or persistent residue to guarantee safe operation.
When to call a plumber
Recognize situations that exceed routine maintenance and warrant a plumber’s expertise—persistent leaks, unusual pressure changes, backflow concerns, or recurring clogs around the bidet connection.
A professional should inspect fittings, valves, and supply lines when water damages appear, odors persist, or DIY fixes fail.
Hire a licensed plumber for code-related issues, faulty shutoffs, or when replacing integrated components to guarantee safety and prevent contamination.
Cost, Time, and Value Considerations
Typical parts for non-electric bidets, such as T-valves, hoses, and seats, generally range from budget-friendly to mid-tier price points depending on materials and features.
Installation time varies by type—simple attachable seats can take under an hour, while fuller retrofit or standalone units may require a few hours and minimal plumbing skills.
Long-term value should weigh upfront cost and installation time against lifetime water use, durability, and potential savings from reduced toilet paper consumption.
Typical costs for parts and non-electric models
When choosing a non-electric bidet, purchasers should expect modest upfront part costs and minimal ongoing expenses; basic T-adapter kits and seat-mount fittings usually range from $15 to $60, while higher-end mechanical seats or pneumatic controls can push the parts total to $100–$200.
| Item | Typical cost |
|---|---|
| T-adapter kit | $15–$30 |
| Seat-mount | $25–$60 |
| Mechanical/pneumatic | $100–$200 |
Estimated time to install each type
After outlining parts and costs, attention shifts to how long installations take for different non-electric bidet styles, since time affects labor costs and homeowner convenience.
Simple attachable bidet seats install in 15–30 minutes.
T-valve spray kits require 20–45 minutes.
Deck- or bidet-basin installations and toilet-replacement seats can take 1–3 hours, depending on plumbing access and skill level.
Long-term value and water-use considerations
Because upfront costs and installation time are only part of the picture, long-term value hinges on durability, maintenance, and how a bidet alters household water use and utility bills.
Low-flow models conserve water, potentially lowering bills despite increased frequency of use.
Durable non-electric units require minimal upkeep, reducing lifetime costs.
Consider replacement parts, warranty length, and anticipated lifespan when evaluating overall value.
Buying Guide: How to Choose the Right No-Electric Bidet
The section outlines key features to evaluate when choosing a no-electric bidet, including durable materials, nozzle types, and adjustable pressure control.
It suggests practical questions buyers should ask—such as compatibility with existing toilets, installation complexity, and maintenance needs—before purchasing.
It also recommends model options across budget tiers to match performance and price preferences.
Key features to look for (material, nozzle type, pressure control)
Durability, hygiene, and ease of use determine whether a non-electric bidet will meet a household’s needs.
Buyers should select corrosion-resistant materials (stainless steel or high-grade plastic), choose adjustable or dual nozzles for targeted cleaning, and prioritize reliable mechanical pressure control or adjustable T-valves for comfortable spray strength.
Removable or self-cleaning nozzles enhance sanitation; simple controls reduce maintenance.
Questions to ask before purchase
Why consider specific questions before buying a non-electric bidet? Buyers should verify toilet compatibility, mounting style, available water pressure, and connection type.
Ask about material durability, nozzle adjustability, and ease of cleaning.
Confirm installation tools required and whether a plumber is needed.
Check warranty terms, return policy, and user reviews to guarantee performance and long-term satisfaction.
Recommended models for different budgets
Although budget ranges vary, clear categories help shoppers match features to price when choosing a no-electric bidet. This section lists reliable models across entry, mid, and premium tiers, highlighting key strengths like ease of installation, nozzle options, and materials. This way, buyers can quickly identify the best fit for their needs and budget.
- Entry: basic mechanical controls, plastic seat
- Budget-friendly: enhanced spray control
- Mid-range: adjustable nozzle positions
- Premium: stainless components, multiple nozzles
- Luxury: elongated seats, higher durability
Real-World Installation Scenarios and Tips
This section compares practical options for tight bathrooms, highlighting compact bidet attachments and space-saving installation methods.
It then addresses renter-friendly approaches that avoid permanent changes, such as non-invasive fittings and quick-release connectors.
Finally, it covers adaptation strategies for older homes with atypical plumbing, including flexible hoses, adapter kits, and when to consult a plumber.
Small bathroom with limited space best options
In cramped bathrooms where every inch counts, choosing a bidet solution hinges on footprint, plumbing access, and user needs. Slim-profile hand-held sprayers, seat-mounted attachments, and compact electric bidet seats designed for narrow toilets often offer the best balance of function and space efficiency.
Prioritize models with minimal lateral overhang, easy hose routing, and quick-release seats for maintenance. Measure clearance before ordering.
Renters: non-permanent installation and landlord-friendly solutions
Many renters prefer non-permanent bidet options that preserve the rental property’s fixtures and require no electrical modifications.
Removable hand-held sprayers, clamp-on seat attachments, and battery-powered or mechanical bidet seats fit this need by avoiding drilling, hardwiring, or irreversible plumbing changes.
Tenants should document existing conditions, choose models with quick-connect fittings, keep original parts for reinstallation, and inform landlords when necessary to avoid disputes.
Older homes with non-standard plumbing adaptation strategies
When older homes present outdated piping, odd valve placements, or nonstandard toilet connections, installers must adapt techniques and parts rather than rely on off-the-shelf kits.
Assess existing fittings, measure clearances, and choose flexible hoses, angled adapters, or universal T-valves.
Consider shutoff relocation, saddle valves, or professional repiping when necessary.
Document changes for future owners and guarantee leak-tested, code-compliant connections.
Quick Troubleshooting Checklist to Keep Handy
A concise, stepwise checklist helps a first-time installer triage common issues like leaks, weak spray, or power problems in a logical order.
The checklist should prioritize safety checks, simple fixes (tighten connections, clear filters), and when to consult the manual.
Guidance must also state clear criteria for repair versus replacement, such as persistent malfunction after basic fixes or visible damage to seals and motors.
Stepwise checklist for first-time issues
If issues arise on first use, follow a concise, step-by-step checklist to identify and resolve common installation problems quickly.
Verify water supply valve is open, confirm hose and T-adapter connections are tight, check seat alignment and mounting bolts, guarantee nozzle moves freely, test spray pressure and temperature, inspect for leaks, tighten fittings as needed, and flush lines before final use.
When to replace parts vs repair
Decide quickly whether to repair or replace by evaluating severity, safety, cost, and part availability: prioritize replacement for cracked plastic housings, corroded metal fittings, malfunctioning solenoids, or any component causing leaks or electrical hazards;
opt for repair or simple part swaps for worn seals, clogged nozzles, loose mountings, or minor hose damage that respond to cleaning, tightening, or inexpensive replacement.
Keep a small toolkit, spare seals, and a parts list.
Step-by-Step Visual Reference and Measurements
The section provides standard dimensions and recommended hose lengths to guarantee proper fit and reach for most toilet configurations.
It also suggests clear photos and simple diagrams highlighting common connection points—supply valve, T-adapter, and bidet inlet—to guide placement and orientation.
Readers are encouraged to compare measurements to their fixtures before purchasing parts.
Standard dimensions and hose length recommendations
A clear set of standard dimensions and recommended hose lengths helps guarantee a bidet installation fits existing plumbing and user ergonomics without last-minute adjustments.
Measurements should reference toilet centerline, seat height, and valve locations.
Typical hose lengths and fittings:
- 12–18 inches: flexible connection to T-valve
- 24–36 inches: extra reach for wall valves
- 6–8 inches: short adapter hoses
- 48 inches: allowance for repositioning
Photo/diagram suggestions for common connection points
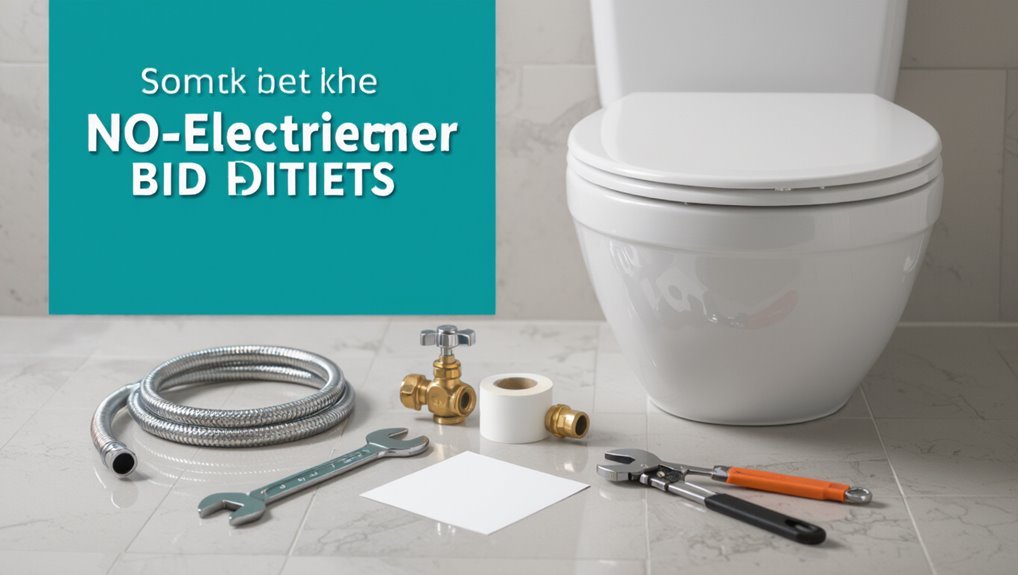
Having established typical hose lengths and placement measurements, the guide now presents suggested photos and diagrams that pinpoint common connection points for bidet installations without an outlet.
Include close-ups of toilet tank supply valves, flexible hose fittings, T-adapter orientation, and shutoff valve locations.
Add scaled side and top views with millimeter dimensions, clear arrows, and labeled part IDs for straightforward, error-free connections.
Conclusion
Installed without an outlet, the bidet feels unexpectedly like a tiny revolution in the bathroom: a neighbor once borrowed a wrench and discovered his own leak fixed, and a misplaced instruction suddenly revealed the ideal washer. Coincidences aside, non-electric bidets—whether T-valve attachments or handheld sprayers—prove simple, adaptable, and satisfying. With basic tools and attention to fittings, most users complete installation quickly and gain cleaner comfort without rewiring or new outlets.