How to Disassemble a Delta Shower Head Safely: Step-by-Step Guide
To safely disassemble a Delta shower head, start by turning off the water supply and relieving any pressure. Wear gloves and eye protection throughout the process. Position a towel or basin under the shower arm to catch any drips, and protect the finishes with a cloth. Use an adjustable or rubber wrench to unscrew the shower head. Carefully remove the faceplate, gasket, flow restrictor, and any O-rings, taking note of their order and condition. Clean or replace any worn parts, then reassemble everything meticulously. Finally, test for leaks to ensure proper function. For detailed steps and troubleshooting tips, refer to the full guide.
What You Need to Know Before You Start: Key Points and Safety Precautions
Before beginning disassembly, a clear explanation of common reasons—such as mineral buildup, worn parts, or cosmetic updates—sets the task’s purpose.
The article will outline essential safety precautions and personal protective equipment, list required tools and materials, and explain how to identify the specific Delta model and finish.
These preparatory steps help guarantee the process is safe, efficient, and preserves the fixture’s finish.
Why disassemble a Delta shower head (common reasons)
Disassembling a Delta shower head is often necessary to restore performance, address leaks, or replace worn parts; typical reasons include mineral buildup clogging spray nozzles, deteriorated O-rings causing drips, malfunctioning flow restrictors, or cosmetic repairs after corrosion or damage.
Technicians or homeowners search how to disassemble a delta shower head to clean, replace seals, inspect internal components, or upgrade nozzles for better flow.
Safety precautions and personal protective equipment
Several simple precautions greatly reduce risk when working on a Delta shower head: shut off the water supply, relieve pressure by running the shower briefly, wear gloves and eye protection to guard against sharp edges and debris, and place a towel or basin to catch small parts.
Additional cautions: avoid forceful twisting, work on a stable surface, keep children away, and disconnect power if the unit has electronic components.
Tools and materials checklist
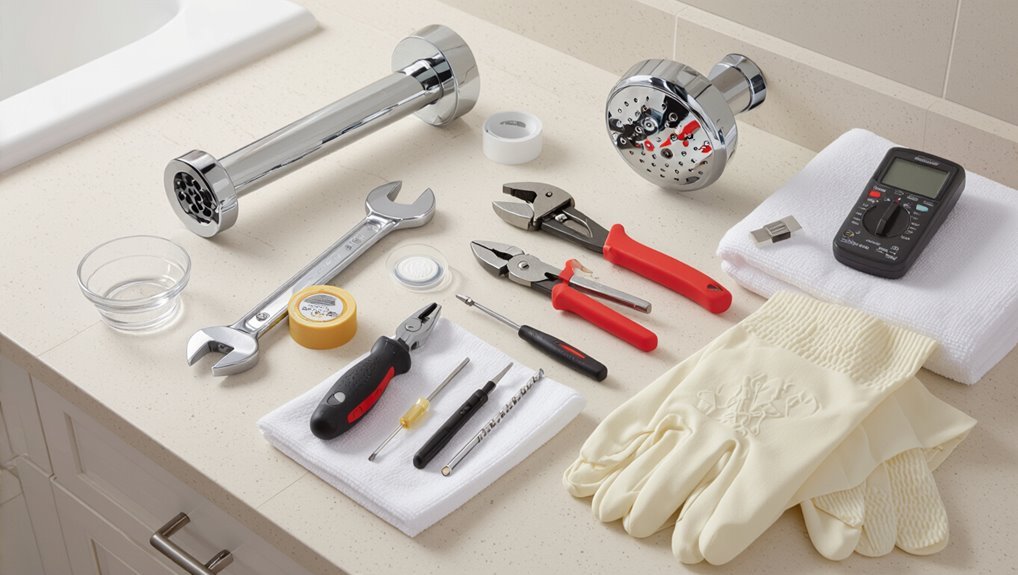
A concise set of tools and materials helps guarantee the job proceeds smoothly and safely: a set of adjustable pliers, a strap or rubber wrench to protect finishes, a flathead and Phillips screwdriver, small needle-nose pliers, a soft cloth or towel, a shallow tray for screws and small parts, plumber’s tape, and a mild descaling solution or vinegar for mineral buildup; optional items include replacement O-rings, silicone grease, and a work light.
- Inventory tools before starting
- Protect finishes and surfaces
- Organize small parts securely
- Prepare cleaning and replacement supplies
How to identify your Delta shower head model and finish
Why confirm the exact Delta model and finish before beginning? Identifying the model and finish guarantees correct replacement parts, compatible tools, and appropriate cleaning methods.
Check the shower head for stamped model numbers, consult purchase records or Delta’s website, photograph distinctive features, and note finish (chrome, brushed nickel, bronze).
Accurate ID reduces risk of damage and simplifies disassembly.
Quick Overview: Step-by-Step Summary
A concise checklist outlines the main steps for removing and disassembling the Delta shower head, from shutting off water to separating components.
It lists the tools required, how to protect finishes, and the order for loosening, removing, and inspecting parts.
This summary prepares the reader for the detailed procedures that follow.
Short checklist of the main steps to remove and disassemble
Several concise steps summarize the safe removal and disassembly of a Delta shower head: shut off water, relieve pressure, disconnect the head from the arm, inspect and remove the retainer or flow restrictor, separate internal components, clean or replace seals, and reassemble with proper thread sealant.
Checklist: gather tools, use protective cloth, note component order, soak parts if needed, inspect threads, replace worn gaskets, test for leaks.
How to Turn Off Water and Prepare the Work Area
Before starting, the homeowner should shut off water at the shower valve if available, or use the main house shutoff when necessary.
They should then relieve residual pressure by running the shower briefly and protect the tub or floor with towels or a drop cloth.
Finally, the shower head’s orientation should be marked to preserve spray settings for accurate reassembly.
Shutting off the water supply at the shower valve vs. main shutoff
Turn off the water at the shower valve when possible to isolate the fixture and limit disruption to the rest of the house; if the valve is inaccessible, use the home’s main shutoff as an alternative.
Confirm closure by testing the tap. Note valve type (stop, gate, ball) for reopening.
Notify occupants before using the main shutoff and keep tools and light nearby for safe access.
Relieving pressure and protecting the tub/floor
Close the isolated shower valve (or the home’s main shutoff if necessary) and open the shower control briefly to relieve trapped pressure; then plug the tub drain and cover the tub and surrounding floor with a waterproof pad or towels to catch any stray water and protect finishes.
Remove loose items, place a small bucket or tray under the shower arm, and keep absorbent rags handy for drips.
Marking orientation to preserve spray settings
A clear reference mark should be made on the shower head and corresponding shower arm or escutcheon to record the current rotation and spray-setting alignment before disassembly.
Use a fine-tip permanent marker or a small piece of masking tape.
Note positions for lever, dial stops, and any detents.
This guarantees original spray settings are restored after cleaning or parts replacement.
Removing the Shower Head from the Shower Arm
Before attempting removal, the connection between shower head and arm should be inspected to determine whether it is threaded or uses a quick-release fitting.
The appropriate wrench and a protective cloth or tape are recommended to avoid scratching the finish while loosening the joint.
If the fitting is stuck or corroded, corrosion-removal techniques and penetrating oil may be required, applied carefully to avoid damage.
Inspecting the connection (threaded vs. quick-release)
Begin by examining how the shower head attaches to the arm: determine whether it uses standard screw threads or a quick-release coupling.
Visualize the joint for visible threads, hex flats, or a release tab. Note presence of O-rings, retaining clips, or decorative collars.
Record which type exists before proceeding so appropriate removal steps and any required replacement parts are identified.
Using the right wrench and protecting the finish
Select a wrench that fits the shower head’s hex flats or the arm’s flats precisely to avoid slippage, and cushion contact points with tape or a rag to protect the finish.
Use an adjustable or box wrench sized to the flats; avoid pliers that deform surfaces.
Apply steady, controlled force, supporting the arm with the other hand to prevent stress on plumbing connections and cosmetic damage.
Dealing with stuck or corroded fittings
When a Delta shower head refuses to budge, treat the connection as a seized fitting rather than forcing it; corrosion, mineral buildup, or years of threadlocker can fuse the head to the arm and require targeted techniques to free it without damaging finishes or plumbing.
Apply penetrating oil, let it soak, then use a protected adjustable wrench and steady counterpressure.
Heat gently with a hairdryer and avoid excessive torque.
Disassembling the Delta Shower Head Components
The section outlines the typical internal parts of a Delta shower head—faceplate, gasket, flow restrictor, swivel ball, cartridge—and notes differences between fixed and handheld models.
It then presents concise step-by-step disassembly instructions for fixed units and for handheld units with hoses.
Finally, it advises on careful handling and organization of small parts and springs to prevent loss or damage.
Typical internal parts: faceplate, gasket, flow restrictor, swivel ball, cartridge
A Delta shower head typically contains a compact assembly of parts—faceplate, gasket, flow restrictor, swivel ball, and cartridge—each with a specific function and order within the housing.
The faceplate directs spray; the gasket seals against leaks; the flow restrictor limits water volume; the swivel ball enables angle adjustment; the cartridge controls mixing and shutoff.
Familiarity aids inspection and replacement.
Step-by-step disassembly for a fixed shower head
Begin by shutting off the water supply and relieving residual pressure to prevent spills or injury; then place a towel or container beneath the shower arm to catch parts and drips.
Unscrew the head from the arm using an adjustable wrench with a protective cloth.
Remove the faceplate, gasket, and flow restrictor.
Inspect and clean components, replace worn seals, reassemble in reverse order, and test for leaks.
Step-by-step disassembly for a handheld shower head and hose
Disconnect the hose from the handheld unit and water supply before proceeding to prevent leaks and simplify access.
Remove the handheld from its bracket, then unscrew the hose from the wand using an adjustable wrench and cloth to protect finishes.
Inspect and remove any O-rings or washers seated in the connections.
Clean threads and internal passages, then set components aside in an organized tray for reassembly.
Handling small parts and springs
Carefully separate the shower head’s small parts on a clean, well-lit surface to prevent loss and simplify reassembly.
Each retained washer, O-ring, clip, and spring should be grouped and labeled. Use shallow trays or magnetic dishes for tiny metal pieces.
Note orientation and order with photos or sketches. Handle springs gently to avoid deformation; replace any worn or corroded components before reassembly.
Cleaning, Inspecting, and Replacing Parts
After disassembly, the components should be cleaned to remove mineral deposits and clogs using appropriate solutions and gentle tools.
Each O-ring, gasket, and seal must be inspected for cracks, flattening, or stiffness and replaced if any wear is found.
Flow restrictors and cartridges should be examined for buildup or damage and replaced following manufacturer guidance when cleaning does not restore proper function.
How to remove and clean mineral deposits and clogs
Several simple steps clear most mineral buildup and restore spray performance:
Remove the faceplate or spray disc, soak or scrub the affected parts with a descaling solution, and flush passages to dislodge remaining debris.
Use a soft brush to clean nozzles, rinse thoroughly, and run water through the body to expel loosened sediment.
Reassemble once parts are clean and dry.
Inspecting O-rings, gaskets, and seals for wear
Inspect the O-rings, gaskets, and seals for cracks, flattening, or material loss that can allow leaks or reduce pressure.
Note hardening, brittleness, or embedded debris. Measure thickness against originals when possible.
Lightly clean with alcohol and lint-free cloth; avoid stretching. Document sizes and positions before removal.
Replace any component showing deformation, cuts, or compromised elasticity to guarantee a watertight seal.
When and how to replace flow restrictors and cartridges
Begin by identifying the symptoms that indicate a clogged or failing flow restrictor or cartridge—reduced spray, uneven flow, sputtering, or persistent mineral buildup.
Then confirm the part type and access method for the specific Delta model.
Remove the head per instructions, extract the restrictor or cartridge with appropriate tools, inspect seals, replace the defective component with correct OEM parts, and reassemble.
Test for proper flow and leaks.
Recommended cleaning solutions and parts
After replacing or confirming the condition of the flow restrictor or cartridge, attention turns to cleaning solutions and replacement parts that will restore performance and prevent rapid re-clogging.
Recommended items include mild vinegar for descaling, a soft brush, silicone lubricant for O-rings, and OEM replacement cartridges.
Proper parts and gentle cleaners extend life and maintain seal integrity.
- Vinegar descaler
- Soft brush
- Silicone lubricant
- OEM cartridges
Troubleshooting Common Problems During Disassembly
Common problems encountered during disassembly include stripped threads or damaged finish, broken plastic components, and persistent leaks after reassembly.
Each issue requires specific inspection techniques and appropriate remedies to prevent further damage.
The following steps outline how to identify the cause and select the correct repair or replacement option.
Stripped threads or damaged finish
Stripped threads or a damaged finish on a Delta shower head complicate disassembly and can worsen if handled improperly.
The technician inspects thread condition and finish before applying tools, uses penetrating oil sparingly, and selects correct-size wrenches or strap protectors to avoid further damage.
If threads are compromised, thread-repair inserts or replacing the connector are recommended to restore secure, leak-free assembly.
Broken plastic components
Several small plastic parts inside a Delta shower head—tabs, clips, flow restrictors, and seals—often crack or shear during disassembly, requiring careful assessment before proceeding.
The technician inspects each component, noting fractures or missing pieces.
Replace brittle or deformed parts with OEM or compatible spares, avoid superglue for load-bearing clips, and document assembly order to guarantee correct reinstallation and proper function.
Persistent leaks after reassembly
Inspect the reassembled Delta shower head systematically when leaks persist, starting with external connections and working inward to seals and internal flow paths.
Verify tightness of pipe tape, ferrules, and swivel joints. Remove and reseat O-rings and cartridges, replacing damaged seals.
Clean debris from valve ports and screen. Test under low pressure before full operation and repeat inspections until leaks stop.
Reassembling and Reinstalling the Shower Head
Reassembly begins with restoring parts in the correct order and tightening fittings to the manufacturer’s torque recommendations to prevent leaks or damage.
Proper application of plumber’s tape or thread sealant on pipe threads is essential for a watertight seal without overuse.
Finally, handheld hoses and swivel joints should be reattached and tested for smooth movement and leaks before finalizing installation.
Reassembly order and torque recommendations
Begin by organizing all cleaned parts in the order they will be reinstalled, laying seals and cartridges where they will be reinserted to prevent mix-ups.
Reassemble components sequentially: internal valve, seals, cartridge, trim, and faceplate.
Hand-tighten fasteners, then apply manufacturer-specified torque values using a calibrated wrench.
Over-tightening can deform seals; under-tightening risks leaks.
Verify smooth operation before finalizing.
Applying plumber’s tape and thread sealant correctly
Apply plumber’s tape and thread sealant precisely to male threads before mating fittings: wrap PTFE tape clockwise in 3–5 overlapping turns, keeping it flat and ending away from the seal line, then smooth with a finger to prevent bunching.
For tapered or damaged threads, a thin, even coat of pipe thread sealant (pipe dope) may be used instead of or in addition to tape per manufacturer guidance, taking care to avoid excess that could migrate into the waterway.
When assembling, hand-start fittings to avoid cross-threading, then snug with a wrench only to manufacturer torque recommendations, checking for alignment and ensuring no sealant obstructs flow paths.
Reattaching handheld hoses and checking swivel joints
Reconnect the handheld hose by hand-threading its swivel nut onto the shower head inlet, ensuring the hose’s male fitting seats squarely against the gasket.
Tighten snugly with a wrench about a quarter turn past hand-tight, avoiding overtightening.
Operate the swivel to confirm smooth motion and full range.
Inspect for leaks under pressure, re-seat or replace seals if necessary, then finalize mounting.
Testing and Final Adjustments
Once the shower is reassembled, water should be turned back on gradually to perform a pressure test.
The fixture is then inspected for leaks and the spray settings adjusted as needed.
Finally, water temperature and flow are fine-tuned to guarantee proper performance and user comfort.
Turning water back on and pressure testing
Carefully restore water to the shower by slowly opening the shutoff valve or main supply to avoid sudden surges; observe the connections and surrounding pipes for any immediate leaks.
Gradually increase flow to normal pressure while watching fittings.
Run hot and cold cycles briefly to verify consistent pressure.
Listen for hissing or rattling indicating trapped air or loose components, then shut off and re-tighten as needed.
Checking for leaks and adjusting spray settings
With water restored and pressure stabilized, inspect all joints, the shower arm, and the head itself for any signs of leaking. A flashlight helps reveal slow weeps at threaded fittings or around the gasket.
Cycle each spray mode, ensuring patterns are complete and consistent. Tighten connections or reseat seals if droplets appear.
Confirm spray adjustments operate smoothly before concluding the reassembly.
Fine-tuning water temperature and flow
Begin by running the shower at full hot and then full cold to establish baseline temperature and flow readings; this helps identify any imbalance, delay, or pressure drop that may indicate valve, cartridge, or supply-line issues.
Record temperatures and note response time.
Adjust the cartridge, pressure-balancing components, or supply shutoffs incrementally, retesting between changes until stable, consistent temperature and desired flow are achieved.
Maintenance Tips to Prevent Future Disassembly
A concise maintenance routine can reduce the need for future disassembly by combining regular cleaning and descaling with attention to water quality.
Installing and replacing appropriate filters, and using recommended descaling methods, prolongs component life.
Keeping a small stock of common replacement parts—such as O-rings, cartridges, and spray faces—enables quick repairs when wear occurs.
Regular cleaning schedule and descaling methods
Although mineral buildup may seem gradual, establishing a regular cleaning schedule prevents heavy scaling and reduces the need for disassembly.
Monthly wipe-downs and light vinegar soaks remove surface deposits.
Quarterly deeper descaling—soaking the faceplate in diluted acetic acid solution or using a manufacturer-approved descaler—clears internal channels.
Rinse thoroughly, inspect nozzles, and reassemble.
Record dates to maintain consistency and catch issues early.
Best practices for water quality and filter use
Several simple upgrades to water quality and inline filtration greatly reduce mineral buildup and extend the time between disassemblies.
Install a sediment pre-filter and a point-of-use carbon or scale-reducing cartridge to capture debris and limit lime deposits.
Maintain filters per manufacturer intervals, monitor output pressure, and flush new cartridges before use.
Periodic water testing identifies hardness levels and informs appropriate treatment choices.
Parts to keep on hand for quick repairs
Improving incoming water quality reduces service calls, but keeping a small stock of spare parts speeds on-site repairs and prevents unnecessary disassembly.
Technicians should store common items for rapid fixes, minimizing downtime and avoiding full teardown.
- Replacement rubber seats and springs
- O-rings and inlet gaskets
- Cartridge assemblies for popular Delta models
- Small adjustable wrench and plumber’s grease
When to Call a Professional
If a shower head leaks persistently after basic cleaning, shows corrosion, or causes low water pressure affecting the whole bathroom, a plumber should be contacted.
Homeowners are advised to document the issue with clear photos of the shower head, valve area, and any mineral buildup or damaged components.
Including the Delta model number, a brief description of recent attempts to fix it, and the home’s water pressure readings will help the technician assess the situation quickly.
Signs the problem requires plumber intervention
Some issues with a Delta shower head are best left to a licensed plumber rather than DIY repair.
Persistent leaks at the valve, sudden water pressure loss, hidden pipe corrosion, mineral buildup inside inaccessible fittings, or damaged shower arm threads signal professional intervention.
If disassembly risks voiding warranty or causing water damage, contact a plumber to diagnose and perform safe, code-compliant repairs.
What information and photos to provide a technician
When calling a technician, gather clear, specific information and a few targeted photos to speed diagnosis and reduce onsite time.
Provide model and serial numbers, purchase date, installation age, symptoms observed, steps already taken, water pressure and temperature behavior, and any noises or leaks.
Include close-ups of the shower head, connection threads, cartridge area, and visible mineral buildup or damage for accurate assessment.
Parts Reference and Where to Buy Replacements
A clear parts list helps identify the components most likely to wear or fail—faceplate, spray disk, flow restrictor, O-rings, ball joint (for adjustable heads), and the cartridge or valve assembly in integrated units. Replacement parts are available from Delta’s website, plumbing supply stores, and major retailers; verify model numbers and bring photos.
| Part | Typical Source |
|---|---|
| O-rings | Delta, hardware |
| Cartridge | Plumbing supply |
Conclusion
The guide closes like a well-oiled valve, leaving the reader with hands soothed by confidence and a mind cleared like a freshly rinsed nozzle. Each careful twist and patient pause becomes a small act of stewardship, turning plumbing puzzles into quiet victories. With safety as compass and clear steps as map, the shower head—once stubborn—now yields for maintenance, promising smoother streams and fewer surprises in the days to come.