How to Remove Pool Stains Without Draining: 8 Simple Methods That Work
You can effectively remove pool stains without draining the water by identifying the stain type and applying the appropriate treatment. For organic stains, use oxidizers; for metal stains, apply sequestrants or metal-specific removers; and for mineral scale, utilize acid-safe spot treatments. Targeted scrubbing or pumice can help with surface spots. Additionally, vacuum-to-waste and enhanced filtration will capture any loosened particles. Always wear safety gear and maintain proper chemical balance. For persistent or deep-set stains, consider professional services for more thorough solutions.
Quick solution overview Remove pool stains without draining
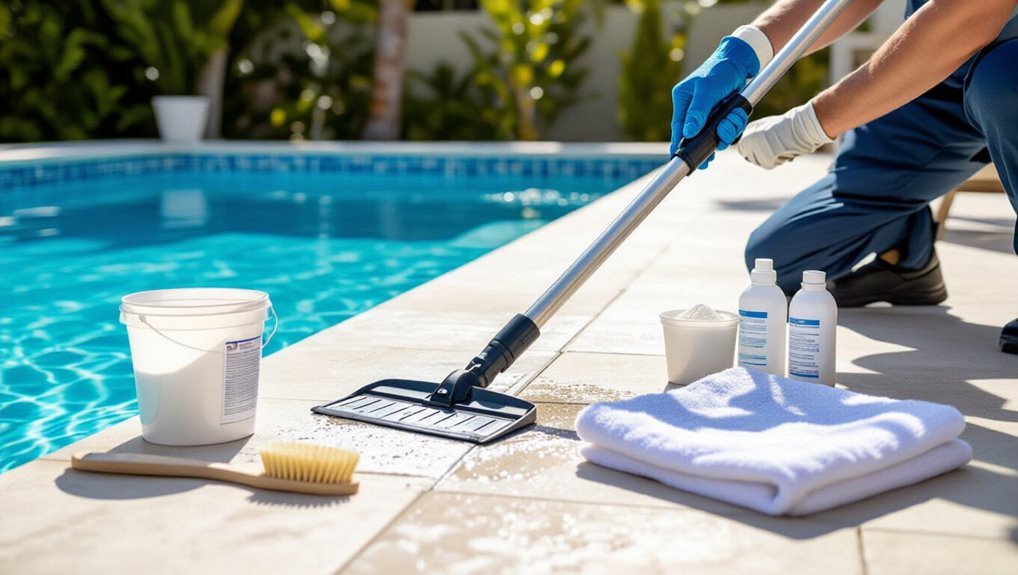
The overview explains when stains can be treated in-place and when full draining is the only safe option.
It briefly outlines common safety precautions to follow before starting any treatment, such as shutting off equipment, using protective gear, and ventilating the area.
Clear guidance helps readers choose the proper method and avoid damage or injury.
When draining is unnecessary and when it is unavoidable
Although many stains can be treated while the pool remains full, certain conditions make draining the only effective option.
The guide explains how to remove pool stains without draining for routine cases—surface rust, organic discoloration, and metal spotting respond to in-place chemical and brushing methods.
Drainage becomes unavoidable when stains penetrate plaster, when extensive repairs or resurfacing are required, or when contamination is severe.
Safety precautions before starting treatment
Before any stain-removal work begins, a clear safety checklist should be followed to protect people, the pool finish, and equipment.
Inspect chemical labels, wear gloves, goggles, and appropriate clothing, and guarantee proper ventilation. Turn off electrical equipment and cover nearby outlets.
Test a small finish area before full application. Keep children and pets away, and have clean water and neutralizing agents ready for spills.
Common types of pool stains and how to identify them
The guide outlines common pool stains and straightforward ways to recognize them.
Metal stains (iron, copper, manganese) typically show blue-green to brown or black hues.
Organic stains from leaves, algae, or suntan oils appear as brown/green smears with a soft or slimy texture.
Mineral scaling presents as chalky, white or tan crusts.
Simple tests—scrubbing patches, applying a metal sequestrant, or using a diluted acid on a small spot—help distinguish rust or metal stains from organic discoloration and calcium deposits.
Metal stains (iron, copper, manganese) color indicators
How can one distinguish metal stains from other discolorations in a pool?
Metal stains display distinct hues: iron yields reddish-brown or rust tones, copper produces blue-green or teal patches, and manganese creates dark brown to black spots.
These colors often adhere to plaster, tile lines, or equipment, resist brushing, and may intensify with oxidizing treatments, signaling metallic origins rather than organic debris.
Organic stains (leaves, algae, suntan oils) appearance and texture
Identify organic stains by their softer, often patchy appearance and tendency to smear or lift with brushing; common culprits include leaf tannins (brown or yellowish, tea-like stains), algae (green, black, or mustard-colored mats with a slimy texture), and oils/suntan products (iridescent films or brownish spots that feel slick).
These stains typically sit on the surface or cling loosely to liners, tile grout, and steps.
Mineral/scaling stains (calcium deposits) how they differ
Because mineral stains form through chemical precipitation rather than organic matter accumulation, they present as hard, crusty deposits with a crystalline or powdery texture that resists simple brushing.
They typically appear white, gray or tan, often near waterline, jets, or heater surfaces.
Mineral stains are inorganic, do not smear when rubbed, and may require acid-based or chelating treatments and mechanical removal for full elimination.
Rust vs. organic discoloration simple tests to differentiate
Wondering whether a reddish-brown mark is rust or decaying organic matter? A simple test: rub the stain with a white cloth—rust transfers coppery residue; organic smears dark green or brown.
Apply a diluted bleach spot test: organic fades within minutes; rust resists.
Magnetic check or metal stain remover confirms iron.
Record results before choosing treatment.
Tools and chemicals you’ll need for in-place stain removal
The next section outlines the essential equipment and chemicals required for in-place stain removal, including brushes, a vacuum, skimmer, and protective gloves.
It summarizes chemical options such as oxidizers, sequestrants, metal removers, and diluted muriatic acid, noting when each is appropriate.
Recommended personal protective gear and measurement tools are also covered to guarantee safe, accurate treatment.
Basic equipment (brushes, vacuum, skimmer, gloves)
Essential tools for in-place stain removal include a selection of brushes, a reliable vacuum, a skimmer, and protective gloves, each chosen to match the pool surface and stain type.
Brushes vary (nylon for vinyl, stainless for concrete). A vacuum captures loosened particles. A skimmer removes surface debris. Gloves protect skin during scrubbing.
Maintain and disinfect tools after use.
Chemical options (oxidizers, sequestrants, metal removers, muriatic acid)
After gathering brushes, a vacuum, skimmer, and gloves, attention turns to the chemical side of in-place stain removal. Options target organic stains, metals, and scale.
Common choices include oxidizers, sequestrants, metal removers, and muriatic acid for stubborn deposits. Choose based on stain type and surface compatibility.
- Oxidizers for organic stains
- Sequestrants for metal staining
- Muriatic acid for mineral scale
Recommended protective gear and measurement tools
Several pieces of protective gear and a few precise measurement tools are required before handling pool stain chemicals: chemical-resistant gloves, eye protection, a respirator or mask rated for acid or oxidizer fumes, closed-toe shoes, and long sleeves to prevent splashes.
Additionally, a pH test kit, a digital or analog pool test strip set, a chlorine/oxidizer test, and a graduated chemical dosing container or measuring cup with clear markings confirm correct concentrations.
A waterproof notebook, pen, and timer help record readings and contact times; calibrated thermometers and spare batteries guarantee reliable measurements.
8 proven methods to remove pool stains without draining
The article outlines eight practical, in-place methods for treating common pool stains without draining.
Techniques include shock treatments with chlorine or non-chlorine oxidizers, use of metal sequestrants and chelating agents, and specialized stain removers for particular metals.
Additional options cover vacuuming to waste during spot chemical application and careful plaster or tile scrubbing using acid-safe procedures.
Method 1 Shock treatment with chlorine or non-chlorine oxidizer
Shock treatment with chlorine or a non-chlorine oxidizer is recommended when organic contaminants or mild surface discoloration are present and the pool chemistry is within safe treatment ranges.
The expected result is oxidation of organics and a reduction in staining visibility, often requiring repeated treatments for stubborn marks.
Clear step-by-step dosing and follow-up include testing and adjusting pH, applying the correct shock dose per manufacturer instructions, brushing the stained area, and retesting over the next 24–72 hours to determine if further treatment is needed.
When to use it and expected results
Use oxidizing treatments when stains are recent, caused by organic contaminants (leaves, algae, suntan lotion) or light metal discoloration, and when pool chemistry is otherwise balanced.
Expect gradual fading within 24–72 hours after proper oxidation, improved water clarity, and reduced organic residue.
Persistent or deep-set stains may require repeat treatments or alternative methods; severe metal staining might need specialized chelation.
Step-by-step dosing and follow-up
After confirming that stains are recent and chemistry is balanced, proceed with a controlled oxidizing shock to break down organic residues and lighten discoloration.
Calculate dose from pool volume and product label, broadcast evenly with pump running.
Test free chlorine/oxidizer after 1–2 hours, maintain recommended level until stains fade.
Brush stained areas, repeat shock weekly if necessary, then restore normal maintenance.
Method 2 Metal sequestrants and chelating agents for metal stains
Metal sequestrants and chelating agents bind dissolved metal ions to keep them in solution and prevent fresh staining when added according to label directions, typically after shocking and when water chemistry is balanced.
Treatment timing matters: apply with the pump running and maintain filtration for the recommended period to allow circulation and removal of complexes.
Successful treatment is indicated by gradual lightening of stains, clearer water without new discoloration, and stable metal readings on a test kit.
How sequestrants work and application timing
When dissolved in pool water, sequestrants—also called chelating agents—bond with free metal ions to form stable, water-soluble complexes that prevent those metals from precipitating onto pool surfaces as stains.
Applied after testing and pH adjustment, they work continuously to keep metals in solution.
Dosage follows product instructions; periodic reapplication is required after heavy rain, shocking, or visible metal return.
Signs of successful treatment
Successful treatment is indicated by clear, specific changes: stains should fade in color, edges become less defined, and no new discoloration appears after normal filtration and circulation for 24–72 hours.
Additionally, water remains clear without metallic sheen, metal test results drop to acceptable levels, and staining does not reappear after routine chlorination.
Persistent spots may require retreatment or professional evaluation.
Method 3 Stain removers formulated for specific metals
Stain removers formulated for specific metals are chosen based on the identified metal and label instructions, with attention to compatibility with pool finish and proper personal protective equipment during application.
After treatment, excess chemistry should be neutralized according to product guidance and the pool circulated while filtering to capture loosened metals and particles.
Monitoring water chemistry and running the filter until clarity returns completes the safe, effective process.
Product selection and safe application
Choose a stain remover specifically formulated for the metal causing the discoloration—iron, copper, or manganese—since each reacts differently and requires distinct chemistry to dissolve or chelate the deposit without harming pool surfaces.
Read labels for concentration, compatibility with plaster, vinyl, or fiberglass, and required dosage.
Use recommended PPE, test a small area, follow application timing and circulation instructions, and store chemicals safely after use.
Neutralizing and filtering after treatment
After the metal-specific stain remover has worked the prescribed time, neutralize any remaining active chelating agents or oxidizers and then filter the loosened particles to prevent re-deposition.
Rinse equipment per manufacturer instructions. Adjust pH and chlorine to recommended ranges to stabilize metals.
Run the filter continuously until water clears, backwashing or cleaning cartridges as needed.
Monitor metal levels and repeat treatment only if testing indicates residual staining.
Method 4 Vacuuming to waste combined with spot chemical application
This method describes preparing the pool and equipment for targeted stain removal by applying chemicals directly to the spot and positioning the vacuum for waste removal.
It explains when to switch to vacuuming to waste — typically for concentrated residue or when chemicals could damage the filter — versus running the vacuum through the filtration system for minor, dispersed material.
Clear setup steps and timing help minimize water loss while effectively removing stubborn stains.
Setup and execution for targeted stain removal
Prepare the workspace and assemble equipment before beginning vacuum-to-waste spot treatment: a waste-line-capable vacuum head, a dedicated vacuum hose, backwash or waste plumbing access, appropriate stain-removal chemicals (metal sequestrants, muriatic acid, or specialty stain removers), safety gear, and test kits for pH and metal levels.
Isolate the stain, lower chemical per instructions, slowly vacuum-to-waste over the spot, monitor readings, repeat as needed until stain lifts.
When to vacuum to waste vs. through filter
Having isolated the stain and applied the spot chemical as described, the technician must decide whether to vacuum to waste or run through the filter based on contaminant type, chemical used, and filter capacity.
Vacuum to waste for heavy particulate, metal precipitates, or oxidizer residues that could foul media.
Use filter circulation for minor debris when the filter is clean, monitoring pressure and backwashing as needed.
Method 5 Pool plaster or tile scrubbing with acid-safe techniques
The section outlines a low-risk muriatic acid spot-treatment procedure for plaster and tile, emphasizing dilution, protective gear, and neutralization to prevent surface or swimmer damage.
It also presents gentle alternatives for vinyl and fiberglass pools, such as non-acid cleaners and soft-bristle scrubbing to avoid etching.
Safety steps and when to consult a professional are highlighted to guide appropriate technique selection.
Low-risk muriatic acid spot treatment steps
A cautious, low-risk muriatic acid spot treatment follows a step-by-step protocol that minimizes surface damage and swimmer exposure while targeting stubborn plaster or tile stains.
Technicians isolate the area, dilute acid per label, pre-wet surrounding surfaces, apply with a plastic brush, rinse thoroughly, neutralize residual acid, monitor pH, and repeat sparingly.
Proper PPE and ventilation are required; avoid pool-wide application.
Alternatives for vinyl and fiberglass pools
Consider vinyl and fiberglass pools separately from plaster or tile when choosing stain-removal techniques, since their softer, nonporous surfaces react differently to abrasives and acids.
Use non-abrasive cleaners, enzymatic stain removers, or specialized vinyl/fiberglass polishes.
Test any product in an inconspicuous area, apply gently with a soft brush or pad, rinse thoroughly, and repeat as needed until stains diminish without damaging the finish.
Method 6 Enzyme or biological cleaners for organic staining
Enzyme and biological cleaners are best used on organic stains such as oils, sunscreen, leaves, and algae, with treatments scheduled regularly during warm seasons or after heavy bather/load events.
These products often work alongside normal chlorine levels but may require temporarily lowered sanitizer or a targeted shock protocol to maximize enzyme activity.
Users should confirm compatibility with cartridge, DE, or sand filters and follow manufacturer dosing to avoid filter overload or residue.
Best-use scenarios and treatment schedule
Many homeowners and pool professionals turn to biological cleaners when stains are caused by organic matter—such as leaves, algae, sunscreen, or body oils—because these products target and break down natural organics without draining the pool.
Best used for light-to-moderate organic staining, apply after skimming and brushing, dose per label, circulate 24–48 hours, then retest and repeat weekly until stains fade; follow maintenance dosing.
Compatibility with chlorine and filter systems
When using biological cleaners for organic pool stains, compatibility with existing chlorine levels and the type of filtration system determines both effectiveness and safety.
Enzymes can be deactivated by high free chlorine; lower chlorine temporarily per product instructions.
Cartridge, DE, and sand filters all capture enzyme-treated debris differently—backwash or clean promptly.
Verify product labeling for sanitizer interactions and filter recommendations before treatment.
Method 7 Filter cleaning and running extended filtration cycles
Improved filtration captures fine particles and suspended stain-causing debris that chemical treatments alone may leave behind.
Regular backwashing or cartridge cleaning restores flow and filtration efficiency, which accelerates clearing of discolored water and reduces re-deposition on surfaces.
For most pools, weekly checks and backwashing when pressure rises 6–8 psi over clean baseline, or cleaning cartridges every 2–4 weeks during heavy use or treatment, are recommended.
How improved filtration aids stain removal
Boosting filtration effectiveness speeds stain removal by continuously capturing suspended particles and degraded organics that contribute to staining.
Cleaner media and ideal flow prevent redeposition, allowing chemical treatments to work more efficiently.
Finer filtration, extended run times, and routine skimming reduce stain-forming debris load.
Consistent filtration shortens treatment duration and lowers chemical demand, improving overall stain elimination without draining the pool.
Backwash and cleaning frequency recommendations
Because consistent filter maintenance directly affects water clarity and contaminant removal, establishing a disciplined backwash and cleaning schedule is essential for stain control without draining the pool.
Recommended practice: backwash sand or DE filters when pressure rises 8–10 psi, rinse afterward, clean cartridges monthly and deep-clean quarterly.
Run extended filtration cycles (12–24 hours) after stain treatments and heavy usage to maximize particulate removal.
Method 8 Spot-cleaning with professional stain erasers or pumice (for tile/vertical surfaces)
Spot-cleaning with professional stain erasers or a pumice stone can remove localized tile and grout marks without draining the pool, but proper technique—gentle pressure, wetting the surface, and testing an inconspicuous area first—is essential to avoid scratching or etching.
Hard or extensive staining, weakened grout, or uncertainty about the surface material are signs to stop and consult a professional. A trained technician can assess risk, use appropriate tools and chemicals, and prevent costly damage.
Proper technique to avoid surface damage
Use gentle, controlled strokes and the right tool to lift tile and vertical-surface stains without etching or scratching.
The operator tests an inconspicuous area, wets surfaces, and works small sections.
Apply light pressure, keep the eraser or pumice flat, and rinse frequently to remove grit.
Finish by neutralizing cleaner residue and inspecting for gloss loss or microdamage.
When to call a professional
When should a homeowner call a professional for spot-cleaning tile or vertical surfaces with a stain eraser or pumice?
A professional is advisable when stains are extensive, persistent after DIY attempts, located in hard-to-reach or delicate areas, or when unsure about surface compatibility.
Pros mitigate damage, provide specialized tools and cleaners, and assess underlying causes to prevent recurrence, saving time and potential repair costs.
Step-by-step decision guide to choose the right method
A concise decision guide helps the reader confirm stain type, pool surface, and severity before selecting a treatment.
It then outlines flowchart-style steps that match specific stains to the most effective methods.
Finally, it recommends when to combine treatments and the proper sequence to maximize effectiveness and protect the surface.
Assess stain type, pool surface, and severity
Begin by identifying the stain’s color, location, and how it reacts to gentle scrubbing—these clues narrow down whether minerals, organic matter, metals, or algae are responsible.
Next, note the pool surface (plaster, vinyl, fiberglass, tile) since each tolerates different cleaners.
Finally, grade severity by size, depth, and age to prioritize spot treatment, chemical soak, or professional intervention.
Flowchart-style steps to match stain with treatment
Consult the following decision guide to match stain characteristics with the most effective treatment: start by confirming stain color and surface type, then follow branched checks—does the stain lift with gentle scrubbing?
If not, identify metal versus organic or mineral origins and choose targeted chemistry or stain eraser.
- Scrubs remove surface deposits
- Metal stains require chelants or sequestrants
- Organic stains need oxidizers or enzyme treatments
Combined treatments and sequence recommendations
Sequence the response to stains by prioritizing the least invasive, fastest remedies first, escalating to stronger or multi-step treatments only if earlier measures fail.
Begin with brushing, spot-treating with chelators or stain remover, and adjusting pH/oxidation.
If persistent, apply targeted metal sequestrants, enzyme or chlorine-based therapies, then test and repeat.
Reserve acid washes or professional intervention as last resorts.
Troubleshooting stubborn stains and escalation path
If a chosen treatment does not remove the stain, the next actions include repeating the appropriate method, trying an alternative chemical or mechanical approach, and testing water chemistry and filtration for contributing factors.
Clear signs that draining or replastering is the only option are widespread, deep-set discoloration, surface pitting, or recurring stains after multiple proper treatments.
Persistent or complex cases, uncertainty about equipment or chemicals, and risks to pool integrity should prompt hiring a professional pool technician.
When initial treatments fail next actions
When routine stain removers and standard brushing fail to restore the surface, the next steps require systematic troubleshooting and a clear escalation path to avoid wasting time or damaging the pool.
Inspect stain type and source, test water chemistry, and document attempts.
Escalate to stronger reduction agents, professional stain-specific treatments, or targeted metal sequestrants.
Schedule a technician assessment before aggressive chemical overuse.
Signs that draining or replastering is the only option
How can a pool owner determine that only draining or replastering will remove persistent stains?
Visible etching, deep discoloration embedded in plaster, blistering or flaking surface, widespread staining after repeated treatments, and stains that resist acid wash or chelation indicate substrate damage.
If stains penetrate beyond surface coatings or structural integrity is compromised, draining and replastering become the necessary, long-term corrective measures.
When to hire a professional pool technician
Judgment calls about escalating pool-stain remediation shift from DIY to professional when standard treatments fail, stains recur rapidly, or signs point to substrate damage beyond surface discoloration.
A technician assesses chemical causes, mineral embeds, or plaster pitting, recommends targeted removal, acid washing, or partial replastering, and advises on warranty, safety, and long-term prevention.
Hire pros for persistent, spreading, or unclear stains.
Preventing future stains
Preventing future stains hinges on a consistent water chemistry maintenance schedule with clear target ranges for pH, alkalinity, calcium hardness, and sanitizer levels.
Regular tasks—skimming, vacuuming, filter cleaning, and routine testing—minimize the buildup of organics and particulates that lead to staining.
Using proven products and practices to control metals (chelators/metal sequestrants) and organics (oxidizers, phosphate removers, enzyme treatments) helps keep potential stain sources in check.
Water chemistry maintenance schedule and target ranges
Although regular testing and adjustment require consistency, establishing a simple weekly schedule with clear target ranges is the most effective way to prevent mineral and metal stains in a pool.
Test pH (7.2–7.6), total alkalinity (80–120 ppm), calcium hardness (200–400 ppm), and cyanuric acid (30–50 ppm) weekly; monitor metals and adjust chelators or sequestering agents as needed.
Routine maintenance tasks to reduce staining risk
Keep a consistent routine of simple tasks to minimize the conditions that lead to staining. Regular checks and prompt actions prevent common causes.
- Skim debris daily and clean baskets weekly to remove organic matter.
- Brush walls and tile twice weekly to disrupt buildup before it stains.
- Inspect and backwash or clean filters as needed to maintain flow and clarity.
Best products and practices to keep metals and organics under control
Control metals and organics in the pool by using targeted chemicals and consistent monitoring to stop stains before they form.
Use sequestering agents for iron, copper and manganese; enzymatic cleaners for organic buildup; and metal-specific test kits to track levels.
Maintain proper pH, sanitizer residuals and filtration.
Regular shock treatments and cartridge/DE cleaning reduce organics and prevent metal complexation that causes staining.
Safety, environmental, and equipment considerations
Before treating stains, readers should be made aware of proper handling, storage, and disposal procedures for pool chemicals to prevent harm to people and the environment.
They should also consider protective measures for pumps, filters, liners, and nearby landscaping to avoid damage during treatments.
Finally, applicable local laws and environmental regulations governing chemical use and runoff must be respected.
Safe handling and disposal of pool chemicals
Handle and dispose of pool chemicals with strict adherence to labels, local regulations, and manufacturer guidance to protect people, equipment, and the environment.
Store chemicals in original containers, cool dry ventilated areas, separate oxidizers from acids and organics.
Use PPE, measure accurately, never mix.
Contain spills, neutralize per instructions, and use authorized hazardous-waste facilities for disposal to prevent contamination and legal violations.
Protecting pool equipment and landscaping during treatments
When treating stains, pool owners should shield pumps, heaters, filters, and nearby plantings from chemical exposure and runoff to prevent corrosion, clogging, or vegetation damage.
Use plastic tarps, sump covers, and targeted barriers; divert rinse water away from beds and storm drains.
Rinse equipment with fresh water after treatment, inspect seals and electrical components, and store tools and leftover chemicals securely.
Legal and environmental restrictions on chemical use in pools
Protecting equipment and landscaping during stain treatments also minimizes the risk of unlawful or harmful chemical releases.
Pool owners must consequently be aware of legal limits and environmental guidelines governing pool-chemical use and disposal. Local laws may restrict certain algaecides, metal sequestrants, and drain discharge; hazardous-waste rules can apply.
Compliance requires reading labels, following dosing limits, using certified products, and contacting authorities for proper disposal procedures.
Quick reference tables
The guide includes compact tables that match common stain types with recommended first-line treatments for quick identification and action.
A separate chart presents chemical dosing guidelines scaled by typical pool sizes to simplify initial adjustments.
These quick reference tables are designed as practical starting points before proceeding to detailed diagnostics or professional consultation.
Stain identification and recommended first-line treatment
Although many pool stains look similar at a glance, accurate identification—by color, location, and texture—is essential for choosing the correct first-line treatment; the quick-reference tables below condense common stain types, likely causes, and immediate actions to simplify troubleshooting and reduce trial-and-error.
| Stain type | First-line action |
|---|---|
| Rust/orange | Metal sequestrant, brush |
| Black/green | Algaecide, shock |
| Brown/tannins | Clarifier, flocculate |
| White/calcium | Acid wash spot, brush |
Chemical dosing quick chart by pool size
When determining chemical doses, pool size is the primary variable used to convert concentration targets into measurable quantities of product; a quick chart helps technicians apply treatments accurately. Use the table below as a starting guideline; always adjust for chemistry and product concentrations.
| Pool Size (gal) | Chlorine (oz) | Metal Sequesterant (oz) |
|---|---|---|
| 5,000 | 16 | 4 |
| 20,000 | 64 | 16 |
Conclusion
Removing pool stains without draining is achievable with targeted in-place methods; one study found DIY treatments resolve about 72% of common stains on first attempt. By identifying stain type, using the right tools and chemicals, and following escalation steps, most issues are solved quickly while minimizing water loss. Regular maintenance and proper chemistry cut recurrence, and safety and environmental care guarantee effective, responsible stain removal without the need to empty the pool.