How to Clean Black Pipe: Step-by-Step Guide for Rust, Grease, and Soot Removal
To effectively clean black pipe, which is commonly used for gas, HVAC, and industrial lines, follow these steps: Begin by isolating the line and wearing appropriate personal protective equipment (PPE). Remove loose deposits with dry brushes, then degrease the surface using a suitable solvent. Scrub, rinse, and mechanically remove any rust before applying a rust converter or inhibitor. Conduct an inspection, pressure-test the line, and repaint or coat as necessary. Always adhere to disposal and ventilation regulations for solvents. For detailed techniques and safety tips, continue to the full guide.
What “black pipe” means and why it gets dirty
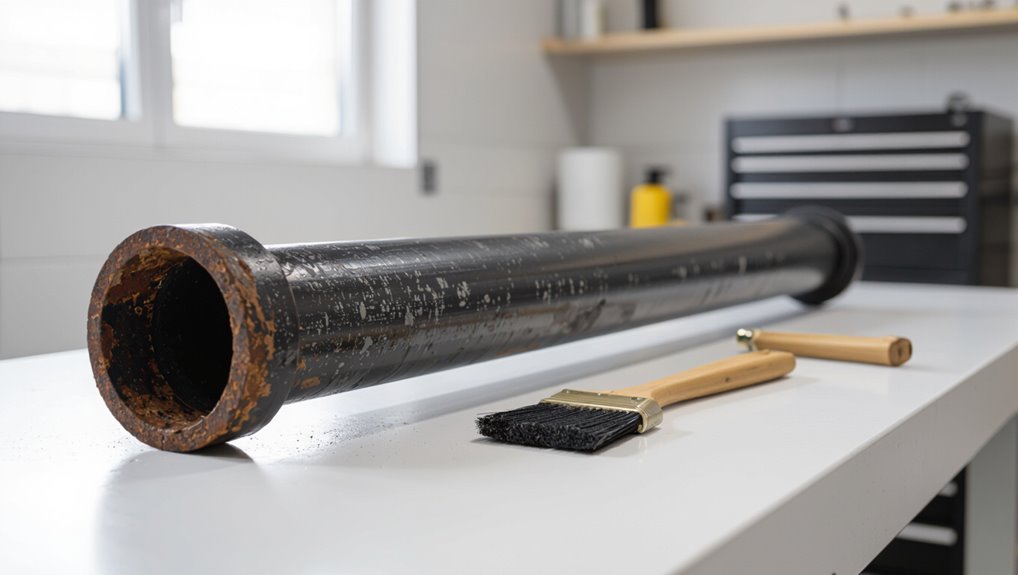
Black pipe refers to uncoated steel tubing commonly used for gas lines, HVAC systems, and various industrial applications.
Over time its bare surface accumulates contaminants such as rust, grease, soot, scale, paint overspray, and pollen.
These deposits can impair flow, create safety hazards, and pose health risks if left unaddressed.
Definition and common uses of black pipe (gas lines, HVAC, industrial)
A type of steel tubing known as black pipe refers to uncoated, threaded mild steel commonly used for transporting natural gas, propane, and in HVAC and industrial applications where rigid, durable piping is required.
It accumulates grime from handling, ambient particulates, and system deposits.
Maintenance guidance—including how to clean black pipe—focuses on safe removal of surface buildup while preserving threads and system integrity.
Typical contaminants: rust, grease, soot, scale, paint, and pollen
Many types of contaminants accumulate on black pipe over time, including rust from oxidation, grease and oil from handling or nearby machinery, soot from combustion sources, mineral scale from water or steam exposure, flaking paint from prior coatings, and airborne pollen or dust.
Surfaces show layered deposits that vary by environment: wet areas favor corrosion and scale, industrial zones attract grease and soot, and outdoor installations collect pollen and paint chips.
Health, safety, and performance impacts of dirty black pipe
Distinguishing black pipe as uncoated steel commonly used for gas, water, and structural runs helps explain why it attracts contaminants: its untreated surface oxidizes, holds oil and soot, and traps particulates from the surrounding environment.
Dirty pipe compromises flow, promotes corrosion, impairs sealing, and increases fire and respiratory risks from flammable residues and airborne particulates, raising maintenance costs and safety liabilities.
Quick summary: Best overall approach to cleaning black pipe
A concise checklist begins with shutting off water, removing loose debris, scrubbing with a wire brush and mild detergent, rinsing, and applying rust inhibitor or pipe-safe lubricant as needed.
For quick jobs, the homeowner can follow these steps with basic tools and safety gear; heavier corrosion, leaks, or compromised fittings warrant a professional plumber.
Prioritizing safety and stopping work if uncertainty arises limits damage and guarantees proper repairs.
Simple step checklist for a fast-safe-clean
Begin by evaluating the pipe’s condition and surrounding work area to confirm safety and identify the level of buildup; this quick checklist then guides a fast, safe, and effective cleaning using the fewest required tools and steps.
Inspect, shut off supply, wear PPE, remove loose debris, apply appropriate cleaner, scrub with wire brush, rinse, dry, inspect for damage, reassemble, and test for leaks.
When to call a professional instead of DIY
When should a homeowner hire a professional rather than attempt black pipe cleaning alone?
A professional is advised for extensive corrosion, hidden leaks, damaged threads, complex boiler or gas systems, persistent soot or chemical contamination, or when confined spaces and safety risks exceed homeowner capability.
They guarantee code compliance, proper sealing, pressure testing, and durable results, reducing risk of injury or costly mistakes.
Safety precautions and required personal protective equipment
Before cleaning black pipe, the worker should assess respiratory risks and guarantee adequate ventilation or respirators as needed.
Gloves, eye protection, and protective clothing must be worn to prevent chemical and mechanical injury.
For fuel lines, lockout/tagout and gas shutoff procedures are mandatory, and solvent use requires strict precautions against fire and explosion.
Respiratory protection and ventilation needs
Wear appropriate respiratory protection and provide adequate ventilation to prevent inhalation of rust, scale, welding fumes, solvent vapors, and cutting dust generated when cleaning black pipe.
Use NIOSH-approved respirators selected for particulate and chemical hazards, replacing cartridges per manufacturer guidance.
Facilitate cross-ventilation or local exhaust ventilation during operations.
Monitor air quality in confined spaces and evacuate if contaminant levels exceed allowable limits.
Gloves, eye protection, and clothing recommendations
Select protective gloves, impact-resistant eye protection, and durable work clothing appropriate to the specific hazards of cleaning black pipe, including sharp edges, hot surfaces, chemical solvents, and airborne particulates.
Use cut-resistant or chemical-resistant gloves per task, sealed safety goggles or faceshields for splash risk, flame-resistant or heavy-duty coveralls for heat and abrasion, and sturdy closed-toe boots.
Replace damaged PPE promptly.
Lockout/tagout and gas shutoff procedures for fuel lines
After ensuring appropriate gloves, eye protection, and clothing are in place, attention shifts to controlling energy sources on systems that carry flammable gases.
Personnel must isolate fuel lines, close valves, and lockout/tagout per facility procedures.
Verify zero energy with gas detectors and bleed lines if required.
Only authorized, trained workers should re-energize systems after documented inspection and tag removal.
Fire and explosion risks with solvent use
Because many common solvents are volatile and flammable, their use introduces a significant risk of fire and explosion that must be managed before cleaning black pipe.
Personnel should eliminate ignition sources, ventilate areas, and use non-sparking tools.
Appropriate PPE includes flame-resistant clothing, chemical-resistant gloves, eye/face protection, and respirators rated for organic vapors.
Store solvents in approved containers and follow disposal regulations.
Tools and materials checklist
A concise list of tools and materials helps guarantee efficient and safe cleaning of black pipe.
Items typically include hand tools (wire and pipe brushes, scrapers, rags), power options (drill brushes, rotary wire wheels, oscillating tools), and chemical cleaners (degreasers, rust removers, solvents).
Also recommended are abrasives and media (sandpaper, Scotch-Brite, emery cloth) and protective materials (drop cloths, containment trays, neutralizers).
Hand tools: wire brushes, pipe brushes, scrapers, rags
Gather the essential hand tools before beginning work on black pipe: wire brushes for removing rust and scale, pipe brushes sized to match the bore for interior cleaning, metal scrapers for stubborn deposits, and lint-free rags for wiping away debris and solvent.
Select brushes with appropriate stiffness, inspect handles for secure grip, keep rags clean, and replace worn tools to maintain effectiveness and avoid damage to the pipe surface.
Power tools: drill brushes, rotary wire wheels, oscillating tools
Equip the workspace with appropriate power tools—drill-mounted brushes, rotary wire wheels, and oscillating-tool attachments—to speed removal of rust, scale, and old coatings from black pipe while matching tool choice to the task for safety and finish quality.
Select correct brush grade and wheel diameter, secure pipe, use guards, control speed, and wear PPE.
Reserve power tools for stubborn deposits and larger jobs.
Chemical cleaners: degreasers, rust removers, solvent options
Select chemical cleaners based on the type of contamination and the pipe’s finish: water-based degreasers for oils and grime, acid or chelating rust removers for scale and iron oxide, and solvents for adhesive or paint residues.
Choose products labeled for ferrous metals, test on an inconspicuous area, follow dilution and dwell-time instructions, neutralize acids after use, and wear appropriate PPE.
Store chemicals safely.
Abrasives and media: sandpaper, Scotch-Brite, emery cloth
After chemical treatments have loosened oils, rust, or coatings, appropriate abrasives and media are used to mechanically remove remaining residues and prepare the pipe surface for finishing or welding.
Select grit progressively: coarse sandpaper or emery cloth for heavy corrosion, medium for smoothing, fine or Scotch-Brite for blending and satin finish.
Use hand or powered tools compatible with pipe diameter and avoid overly aggressive media that gouge metal.
Protective materials: drop cloths, containment trays, neutralizers
A simple setup of drop cloths, containment trays, and neutralizers reduces mess and limits chemical spread when cleaning black pipe.
Use heavy-duty, chemical-resistant drop cloths to protect surfaces and floors.
Place trays beneath work areas to catch debris, runoff, and solvent.
Keep neutralizers (acid or solvent-specific) on hand to safely neutralize spills.
Dispose of contaminated materials per local regulations.
Preparing the work area and pipe for cleaning
Before cleaning begins, the system must be isolated and shut off according to safety procedures to prevent flow and energy hazards.
Affected pipe sections should be drained, depressurized, and temporarily capped or plugged to contain fluids and debris.
Surrounding surfaces must be protected and ventilation arranged to control dust, fumes, and runoff.
Isolating and shutting off systems safely
Several critical steps must be taken to isolate and shut off systems safely before cleaning black pipe.
The technician verifies system diagrams, notifies occupants, and tags out relevant circuits and valves.
Electrical power and fuel sources are secured, lockout-tagout procedures applied, and ventilation guaranteed.
Emergency shutoffs remain accessible.
All actions are documented and confirmed by a second qualified person before work begins.
Draining, depressurizing, and capping pipe sections
Preparation begins with eliminating residual fluid and pressure from the targeted pipe sections to guarantee a safe cleaning environment.
Technicians open drain valves, bleed pockets via vents, and monitor gauges until pressure reads zero. Collected fluids are contained and disposed per regulations.
Once empty, they install blind flanges or threaded plugs, confirm seals, and tag capped sections before proceeding with cleaning tasks.
Protecting surrounding surfaces and ventilation setup
With drained and sealed sections in place, attention turns to shielding adjacent surfaces and establishing ventilation to control dust, fumes, and overspray.
Floors, fixtures, and nearby equipment are covered with drop cloths and tape; openings are sealed.
Local exhaust, fans, or a respirator-rated system are positioned to pull contaminants away.
Lighting is protected, and access is restricted to trained personnel only.
Step-by-step cleaning process for soot and carbon buildup
The article outlines a step-by-step cleaning process for soot and carbon buildup that begins with dry brushing and mechanical removal to dislodge loose deposits.
For stubborn residues, appropriate solvents and controlled wet cleaning methods are applied to dissolve and lift remaining soot.
The procedure concludes with thorough rinsing, complete drying, and verification that soot has been removed before reassembly.
Dry brushing and mechanical removal techniques
Begin by evaluating soot and carbon deposits visually and by touch to determine their extent and firmness before selecting appropriate brushes and tools.
Use stiff nylon or brass brushes for light buildup; wire brushes or rotary attachments suit hardened layers.
Work in short, controlled passes, removing loose debris into a capture cloth or vacuum.
Inspect frequently to avoid surface damage and adjust brush stiffness as needed.
Using solvents and wet cleaning for stubborn soot
Apply solvents and controlled wet methods only after dry brushing has removed loose soot, ensuring surfaces are cool and the area is well-ventilated.
Select a mild solvent or degreaser compatible with the pipe finish. Test a small area, apply with a lint-free cloth or soft brush, agitate gently to dissolve carbon, and absorb residue.
Repeat sparingly until stubborn soot loosens.
Rinsing, drying, and verifying soot removal
Once solvents have loosened stubborn carbon and excess cleaner has been blotted away, attention turns to thorough rinsing, careful drying, and confirmation that soot has been removed.
Rinse with clean water or appropriate solvent until runoff is clear.
Use lint-free cloths and compressed air to dry interior and threads.
Inspect under good light; repeat spot cleaning if any residue or discoloration remains.
Step-by-step cleaning process for grease and oil
For removal of grease and oil, the discussion begins with selecting a degreaser suited to the pipe material and contamination level.
The procedure covers proper application, agitation and dwell times, followed by emulsifying and rinsing techniques to carry oils away.
Persistent stains and reapplication thresholds are addressed to guarantee complete removal without damaging the pipe.
Choosing the right degreaser for the application
Selecting the correct degreaser depends on the type and severity of the oil or grease on the black pipe, the pipe’s material and finish, and environmental or safety constraints.
Assess compatibility with steel and coatings, choose solvent, alkaline, or enzymatic chemistries accordingly, verify flammability and ventilation requirements, prefer biodegradable or low-VOC options where mandated, and confirm manufacturer recommendations and disposal regulations before procurement.
Applying degreaser, agitation, and dwell time best practices
Begin by applying the chosen degreaser evenly to the black pipe surface, ensuring coverage of all oily or greasy areas while avoiding excess runoff.
Agitate with a suitable brush or pad, matching softness to pipe coating, to loosen deposits without scratching.
Allow manufacturer-recommended dwell time, monitoring for solvent evaporation.
Repeat agitation if residues persist, then prepare for safe emulsification and rinsing per next steps.
Emulsifying and rinsing grease safely
After agitation and the recommended dwell time, the next step is to emulsify and rinse residual grease to prevent re-deposition and guarantee a clean surface.
Apply an appropriate emulsifier per label, scrub with a nonabrasive brush to lift oil, then rinse thoroughly with low-pressure water toward a contained drain or absorbent pads.
Inspect for missed areas and allow to dry before proceeding.
Handling persistent oil stains and reapplication strategy
When persistent oil stains remain after initial emulsification and rinsing, the technician evaluates the affected areas to determine if repeat treatment or a stronger product is needed.
Targeted solvent application, low-abrasion agitation, and dwell time adjustments remove residues.
After rinsing, surface drying and inspection confirm success; stubborn spots receive sequential treatments or isolated mechanical cleaning.
Protective coating is reapplied once fully clean and dry.
Step-by-step cleaning process for rust and scale
The procedure begins with evaluating corrosion severity and any structural concerns to determine whether repair or replacement is required.
Next, mechanical methods such as wire brushing, sanding, and grinding remove loose rust and scale before applying a chemical rust remover or converter chosen for the metal and site conditions, followed by proper neutralization.
Finally, the surface is prepared and treated with suitable primers or coatings to prevent recurrence.
Assessing corrosion severity and structural concerns
Inspecting the pipe’s surface and joints provides the essential baseline for determining whether rust and scale can be removed or if replacement is required.
Evaluate pit depth, through-wall corrosion, flaking, and joint integrity. Note deformation, leaks, or compromised threads. Measure wall thickness where possible and document locations.
Prioritize sections with structural loss; consult a professional if integrity is uncertain or load-bearing function is affected.
Mechanical rust removal: wire brushing, sanding, and grinding
Having documented corrosion severity and identified areas requiring attention, mechanical removal of rust and scale proceeds with progressively aggressive tools to restore sound metal.
Begin with stiff wire brushes for loose flakes, then use sanding to smooth pitting and edges.
For heavy scale, employ grinders or rotary wire wheels cautiously.
Clean debris, inspect for residual corrosion, and prepare surfaces for protective coating or further treatment.
Chemical rust removers and rust converters: selection and neutralization
Select chemical rust removers and converters based on metal condition, desired outcome, and safety constraints before applying them.
Choose phosphoric or oxalic acid for light rust, chelating agents for intricate areas, and tannic-based converters to stabilize corrosion into a paintable layer.
Follow manufacturer dilution, dwell times, and ventilation requirements.
Neutralize acids with appropriate alkaline rinses, then thoroughly rinse and dry to halt chemical action.
Surface prep for protection after rust removal
After neutralization and thorough rinsing of chemical treatments, the pipe surface must be prepared for protective coatings by removing remaining rust scale, mill scale, oils, and residues that impede adhesion.
Mechanical methods—wire brushing, abrasive pads, or media blasting—followed by solvent wipe or alkaline degrease guarantee clean metal.
Inspect for pits; feather sharp edges.
Apply primer within recommended flash time to prevent flash rusting.
Cleaning inside long runs and inaccessible sections
For long runs and hard-to-reach sections, practitioners employ tools such as pipe pigs, brushes on rods, and flow-through cleaners to mechanically dislodge deposits.
Supplemental methods include compressed air, targeted water flushes, and circulated chemicals to remove and carry away loosened material.
Video inspection is then used to verify cleanliness and document any remaining obstructions.
Pipe pigs, brushes on rods, and flow-through cleaners
When access to long runs or confined sections of black pipe is limited, mechanical cleaners such as pipe pigs, brush assemblies on rods, and flow-through cleaning tools provide effective internal cleaning.
Pipe pigs scrape and dislodge deposits; flexible brush rods reach bends and threaded joints; flow-through cleaners combine flushing with bristles for continuous debris removal.
Selection depends on pipe diameter, length, and deposit type.
Using compressed air, water flushes, and chemical circulation
Employ compressed air, targeted water flushes, and circulated chemicals to dislodge, suspend, and remove deposits from long or inaccessible sections of black pipe where mechanical tools cannot reach.
Combine controlled air pulses to break loose scale, high-velocity rinses to carry debris, and recirculated cleaners to dissolve grease and soot.
Monitor flow, contain effluent, neutralize chemicals, and follow safety and disposal protocols.
Video inspection and verification methods
Many inspection teams rely on video scopes and remotely operated cameras to verify cleanliness inside long or inaccessible black pipe runs.
Operators record high-resolution footage, pan and zoom to inspect joints, welds, and residue. Digital logs timestamp findings and capture stills for before-and-after comparison.
Lighting, camera resolution, and tether control determine inspection quality; reports guide targeted re-cleaning and acceptance criteria.
Post-cleaning inspection and testing
After cleaning, a systematic visual inspection checks for residual debris, corrosion, scoring, thread damage, and common failure signs such as pitting or joint deformation.
Pressure testing and leak-checking are performed after reassembly to verify integrity under expected service conditions.
Non-destructive testing or professional evaluation should be used when defects are suspected, when high-pressure or safety-critical service is involved, or when visual and pressure tests are inconclusive.
Visual inspection checklist and common failure signs
Once cleaning is complete and the pipe has been allowed to dry, a systematic visual inspection identifies residual debris, coating damage, and early signs of corrosion or leaks that warrant repair or further testing.
Inspect joints, welds, threaded connections, and supports for hairline cracks, pitting, thinning, flaking, or discoloration.
Note blocked drains, foreign material, and compromised sealants; document findings and prioritize repairs.
Pressure testing and leak-checking after reassembly
Begin pressure testing only after reassembly is complete, all seals and fittings are torqued to specification, and the system has been purged of cleaning residues and debris.
Apply manufacturer-recommended test medium and pressure limits, monitor gauges for hold time, and inspect joints with soapy solution or electronic leak detectors.
Document test duration, peak pressure, and any leaks found.
Repair, retest, and certify only when stable.
When to perform non-destructive testing or professional evaluation
Following pressure testing and confirmation that repairs held, determine whether non-destructive testing (NDT) or a professional evaluation is required based on the pipe’s service history, visible condition, and risk profile.
Recommend NDT when corrosion, pitting, wall loss, high-pressure service, or hazardous contents are present.
Techniques include radiography, ultrasonic thickness measurement, magnetic particle, and dye penetrant.
Document findings and follow expert remediation guidance.
Protecting black pipe after cleaning
After cleaning, choices between temporary and long-term protective coatings determine subsequent maintenance needs and durability.
Consideration should be given to rust inhibitors, corrosion-resistant primers, and sealants that bond to cleaned metal and match service conditions.
Repainting should follow manufacturer recommendations for surface prep, primer choice, and curing to guarantee lasting protection.
Temporary vs. long-term protective coatings and paints
Choosing the right coating for cleaned black pipe hinges on whether the protection must be temporary or long-term: temporary coatings provide short-lived corrosion resistance and ease of removal, while long-term paints and coatings offer durable barrier protection but require more surface prep and application control.
Temporary films suit short projects or inspections; durable paints suit permanent installations, balancing cost, environmental exposure, and maintenance frequency.
Rust inhibitors, corrosion-resistant primers, and sealants
When corrosion protection must extend beyond simple cleaning, rust inhibitors, corrosion-resistant primers, and sealants form a layered defense that addresses different stages of degradation: inhibitors neutralize remaining salts and retard electrochemical activity, primers provide adhesion and a chemically resistant barrier, and sealants close pores and seams to prevent moisture intrusion.
Selection depends on environment, compatibility with substrate, application method, and cure time to guarantee durable protection.
Repainting best practices for black pipe
Building on corrosion inhibitors and primers, repainting provides the final protective layer and restores appearance while slowing future degradation.
Surfaces must be dry, clean, and free of loose material. Use high-temperature or anti-corrosive paint compatible with primer.
Apply thin, even coats, allowing full cure between layers. Inspect joints and supports, touching up chips promptly.
Maintain records of coating type and application date.
Maintenance schedule and prevention strategies
Recommended inspection and cleaning intervals should be tailored to the environment, with more frequent checks in greasy, sooty, or corrosive settings and longer intervals in clean, dry locations.
Routine simple checks—visual inspection for buildup, quick wipe-downs, and monitoring for leaks or corrosion—help prevent grease, soot, and rust accumulation.
Environmental controls such as filters and improved ventilation reduce contamination and extend time between cleanings.
Recommended inspection and cleaning intervals by environment
Inspection and cleaning frequency for black pipe should be tailored to the operating environment and the substance conveyed: corrosive or abrasive media and high-moisture, high-dust, or outdoor exposures require more frequent checks than dry, indoor, noncorrosive conditions.
Typically, inspect monthly in harsh settings, quarterly in moderate conditions, and biannually to annually for protected, low-risk systems.
Adjust intervals after incidents or documented deterioration.
Routine simple checks to prevent grease, soot, and rust buildup
After establishing appropriate inspection intervals for different environments, routine simple checks focus on preventing grease, soot, and rust buildup through short, regular actions.
Personnel visually inspect joints, flanges, and exposed runs for deposits or discoloration, wipe accessible surfaces, verify tightness of fittings, and note odor or moisture.
Record findings, schedule targeted cleaning when thresholds are met, and adjust intervals based on observed trends.
Environmental controls to reduce contamination (filters, ventilation)
When controlled air quality and proper filtration are in place, contamination of black pipe surfaces from grease, soot, and airborne particulates is greatly reduced, lowering cleaning frequency and extending component life.
Routine HVAC filter replacement, localized exhaust at emission sources, and positive-pressure rooms minimize ingress.
Scheduled ventilation audits, particle monitoring, and HEPA or electrostatic filters tailored to the environment guarantee consistent protection and predictable maintenance intervals.
Common mistakes and troubleshooting
Common mistakes that strip threads, damage seals, or compromise pipe integrity are outlined so readers can avoid unnecessary repairs.
Guidance is provided for addressing persistent odors or residues, including targeted cleaning steps and when to test for contamination.
A concise repair-versus-replace checklist helps determine whether damaged sections can be salvaged or should be replaced.
Mistakes that damage threads, seals, or pipe integrity
Careless threading, overtightening, improper sealant use, and abrasive cleaning methods frequently cause damage to black pipe threads, seals, and overall integrity; recognizing these errors helps prevent leaks, cross-threading, and weakened joints.
Additional mistakes include using wrong thread tape, applying corrosive cleaners, forcing mismatched fittings, neglecting lubrication, and reusing damaged threads.
Inspect threads, follow torque specs, and replace compromised components promptly.
How to handle persistent odors or residues
Persistent odors or residues in black pipe systems often signal trapped contaminants, biofilm buildup, or incomplete removal of thread sealants and lubricants; diagnosing the source requires systematic inspection, odor characterization, and process-of-elimination testing.
Technicians should flush with hot water, use enzymatic cleaners for organic films, apply solvent wipes for sealant residues, re-inspect joints, and repeat treatments until odors cease.
Repair vs. replace decision guide
When deciding whether to repair or replace a section of black pipe, assess structural integrity, corrosion extent, and the frequency of failures against replacement cost and downtime.
Minor surface rust, isolated pinholes, or a single faulty joint often warrant targeted repairs, while widespread thinning, multiple leaks, or compromised fittings indicate replacement is safer and more cost-effective.
Consider access difficulty, code compliance, and future maintenance when choosing.
Tool and product comparison table
A concise comparison helps readers choose between manual, power, and chemical cleaning methods and matches products to common issues like rust, grease, and soot. The table below summarizes strengths, typical applications, and recommended products for each approach. This side-by-side view clarifies trade-offs and points toward the best option for specific problems.
| Method | Best for | Recommended products |
|---|---|---|
| Manual (wire brush, sandpaper) | Light rust, surface grime | Stainless wire brush, abrasive pads |
| Power (grinder, rotary brush) | Heavy rust, scale | Angle grinder with cup brush, power rotary kit |
| Chemical (rust remover, degreaser) | Deep rust, grease, soot | Phosphoric acid rust remover, citrus degreaser |
Side-by-side: manual vs. power vs. chemical cleaning methods
Compare manual, power, and chemical cleaning methods across key criteria—effectiveness, speed, cost, safety, and suitability for different pipe conditions—to determine the best approach for a specific black pipe cleaning task. The comparison summarizes trade-offs: manual is low-cost and safe but slow; power is fast and effective yet higher risk; chemical is effective for deposits but needs caution and proper ventilation.
| Method | Notes |
|---|---|
| Manual | Low cost, safe, slow |
| Power | Fast, effective, higher risk |
Recommended products for specific problems (rust, grease, soot)
For common black pipe problems—rust, grease, and soot—specific tools and products address each issue more effectively than one-size-fits-all solutions. Recommended choices: rust removers (chelated acids, rust converters), degreasers (alkaline, citrus-based), and soot cleaners (dry brushes, mild solvents). Match product strength to pipe finish and ventilation; always test and use PPE.
| Problem | Recommended Product |
|---|---|
| Rust | Chelated rust remover |
| Grease | Alkaline degreaser |
Real-world scenarios and recommended approaches
Practical cleaning needs vary by context, so recommended approaches prioritize safety, effectiveness, and material preservation.
Consider these focused scenarios and initial actions:
- Residential gas line: verify shutoff, ventilate, and use only approved methods and fittings.
- Furnace flue/soot removal and shop degreasing: inspect for creosote or grease, use proper cleaners and PPE, and avoid open flames.
- Corroded outdoor pipe: assess structural integrity, remove rust, treat with rust converter, and protect with appropriate coatings.
Cleaning black pipe in a residential gas line (safety-first steps)
Before any work begins on a residential gas line, a technician should prioritize safety by fully isolating the system, confirming gas is shut off at the meter, and ventilating the work area to prevent accumulation of fumes.
The technician must use calibrated gas detectors, purge residual gas, wear flame-resistant PPE, avoid ignition sources, and follow local codes.
Testing for leaks and restoring service only after verified safety completes the procedure.
Removing soot from furnace exhaust and flue pipes
When soot builds up in furnace exhaust and flue pipes, it reduces draft, increases fire risk, and impairs appliance efficiency.
Technicians assess the deposit type and access points before selecting a cleaning method. They use brushes, rotary tools, and vacuums with HEPA filtration, inspect joints and baffles, remove loose creosote mechanically, and test draft afterward.
Proper PPE and containment prevent contamination.
Degreasing black pipe in a shop or garage environment
For degreasing black pipe in a shop or garage, technicians choose methods that balance effectiveness, surface protection, and worker safety.
Common approaches include solvent wipes, biodegradable degreasers, and hot soapy water with scrubbing pads. Parts washers or ultrasonic cleaners suit fittings.
Use nitrile gloves, eye protection, ventilation, and proper disposal.
Test cleaners on a small area to avoid coating damage or discoloration.
Restoring corroded outdoor black pipe exposed to weather
Outdoor black pipe exposed to weather requires different restoration steps than shop-degreased stock, because corrosion from moisture, salt, and temperature cycles can penetrate threads and thin the metal.
Assess severity, replace severely pitted sections, and wire-brush or grind loose rust.
Treat with rust converter, apply epoxy primer, and finish with marine-grade paint or galvanic wrap.
Re-seal threads with proper tape or compound.
Quick reference checklists
A concise set of checklists helps guarantee consistency and safety when cleaning black pipe.
Recommended quick references include:
- Pre-cleaning safety and prep checklist
- Step-by-step cleaning checklist for each contaminant
- Post-cleaning inspection and maintenance checklist
These lists serve as an at-a-glance guide to confirm readiness, execute proper cleaning, and verify results.
Pre-cleaning safety and prep checklist
Why inspect the work area before starting? A brief safety and prep checklist minimizes hazards and guarantees efficient cleaning.
Recommended quick items:
- Confirm ventilation, lighting, and clear access.
- Verify isolation of pipe system, pressure release, and lockout.
- Assemble PPE, tools, waste containers, and spill kit.
Document hazards, plan disposal, and brief helpers before beginning.
Step-by-step cleaning checklist for each contaminant
Several concise checklists follow, each tailored to a specific contaminant and formatted for quick on-job reference.
Rust: remove scale, apply rust converter, rinse.
Grease: degrease, scrub with solvent, wipe dry.
Soot: dry-brush, vacuum, solvent wipe.
- Inspect surface
- Select solvent/tool
- Execute steps safely and verify cleanliness
Post-cleaning inspection and maintenance checklist
Following the cleaning steps for rust, grease, and soot, the post-cleaning inspection and maintenance checklist guarantees the pipe remains serviceable and contamination-free.
A concise checklist enables regular verification and timely action.
- Inspect seals, joints, and internal surfaces for residue, pitting, or corrosion.
- Test flow and pressure; document deviations.
- Schedule routine cleaning, lubrication, and corrosion prevention; record dates and findings.
Conclusion
Like a well-tuned engine finally freed from grit, a cleaned black pipe restores both form and function, shedding rust, grease, and soot to reveal steady purpose beneath. With precautions observed and the right tools in hand, stubborn grime yields to methodical care; small mistakes become lessons that refine technique. Regular upkeep keeps corrosion at bay, ensuring the pipe’s long service life—quiet, dependable, and ready when duty calls.