
How to Clean a Tee on a Plumbing Pipe: Step-by-Step Guide for a Leak-Free Repair
To effectively clean a tee joint on a plumbing pipe and ensure a leak-free repair, follow these essential steps:
- Shut Off Water Supply: Begin by turning off the water to the pipe and depressurizing the line.
- Remove Fittings: Take off any caps or fittings and collect any residual water to avoid spills.
- Clean the Joint: Use brushes or scrapers to mechanically remove corrosion and deposits. For mineral buildup, apply mild cleaners or vinegar.
- Neutralize and Rinse: After cleaning, neutralize any cleaners used and rinse the area thoroughly.
- Dry Completely: Ensure the joint is thoroughly dried to prevent future issues.
- Reassemble with Sealant: Use fresh sealant or PTFE tape on the threads when reassembling.
- Test for Leaks: Slowly restore pressure and inspect the joint for leaks.
Following these steps will help maintain the integrity of the tee joint and prevent leaks.
What a Tee Joint Is and Why Cleaning It Matters for Leak-Free Plumbing
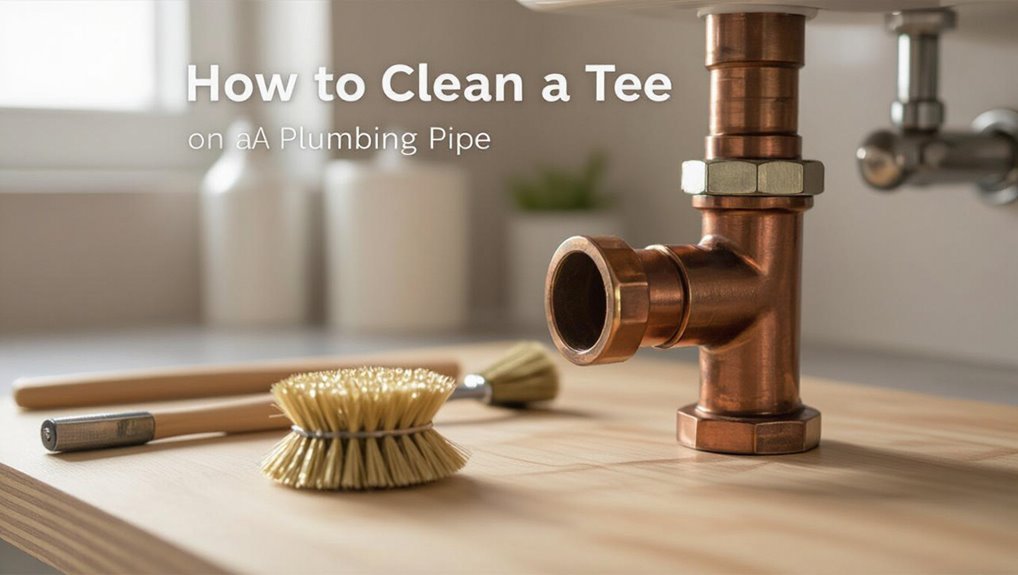
A tee fitting is a three-way connector commonly used to branch water lines or join supply and return runs in residential and commercial plumbing.
Debris buildup, corrosion, and hardened or degraded sealant at the joint can prevent tight seals and lead to slow or sudden leaks.
Visible dripping, mineral deposits, discolored fittings, or reduced flow are clear signs a tee requires cleaning or repair.
Definition and common uses of a tee fitting in plumbing systems
Tee fittings are three-way connectors that join a main pipe to a branch, allowing fluid flow to continue straight while diverting a portion at a perpendicular angle.
Common uses include plumbing branch lines, distributing water, and connecting fixtures.
Proper understanding aids maintenance tasks like how to clean a tee on plumbing pipe, ensuring accessibility, correct sizing, and orientation for reliable, leak-free system performance.
How debris, corrosion, and old sealant cause leaks at tees
Proper sizing and orientation minimize stress on joints, but debris, corrosion, and deteriorated sealant still commonly undermine leak-free performance at tee connections.
Particulate buildup prevents tight seating, abrasives wear mating surfaces, and mineral deposits create gaps.
Corrosion pits weaken metal, promoting cracks and uneven contact.
Old, brittle sealant loses adhesion and elasticity, allowing pressurized water to track along imperfect seals and escape.
Signs that a tee needs cleaning or repair
Several clear indicators signal when a tee joint requires cleaning or repair: visible leaks or drips, dampness or staining around the connection, reduced downstream flow, and unusual noises such as hissing or hammering.
Additional signs include mineral buildup, corrosion at the fitting, soft or flaking pipe material, and persistent odors.
Prompt inspection prevents escalation, water damage, and more extensive replacements.
Tools, Materials, and Safety Precautions Needed
Before starting, a concise list of essential tools (wrenches, pipe cutters, brushes), recommended cleaning agents and sealants, and common replacement parts should be assembled.
The writer also notes required personal protective equipment and key safety steps such as shutting off water and relieving pressure.
Guidance is provided on recognizing limits of DIY work and when to contact a professional.
Essential tools list
A concise kit of tools, materials, and safety items is essential for cleaning a tee on a plumbing pipe: typically a pipe wrench or adjustable wrench, assorted screwdrivers, a stubby brush and pipe-cleaning brush set, plumber’s tape, replacement seals or gaskets, a bucket and rags for containment, and appropriate personal protective equipment (gloves, eye protection, and work clothes).
- Wrenches and screwdrivers
- Brushes and containment
- PPE and seals
Recommended cleaning agents, sealants, and replacement parts
Select cleaning agents and sealants that match the pipe material and the type of buildup present: for metal pipes use mild acidic cleaners (vinegar or commercial descalers) sparingly to remove mineral deposits, enzyme-based cleaners for organic clogs, and neutral pH detergents for general grime;
choose PTFE (plumber’s) tape for threaded joints and non-hardening silicone or NSF-rated pipe joint compounds for compression or flanged connections;
keep on hand common replacement parts such as rubber O-rings, flat gaskets, compression rings (ferrules), and a spare tee fitting of the same material and size to guarantee a quick, leak-free repair.
- Cleaning agents: vinegar, enzyme cleaners, neutral detergent
- Sealants: PTFE tape, non-hardening silicone, NSF-rated compounds
- Parts: O-rings, gaskets, ferrules, spare tee fitting
Personal protective equipment and safety steps before starting
Proper personal protective equipment and clear safety steps are essential when cleaning a tee on a plumbing pipe to prevent chemical exposure, injury from tools, and unintended water damage.
The technician should wear chemical-resistant gloves, eye protection, and a respirator if using solvents.
Shut off water, depressurize lines, ventilate the area, isolate electrical sources, and keep a spill kit and first-aid supplies nearby.
When to call a professional instead of DIY
With safety gear in place and water isolated, the technician must also recognize situations where calling a professional is the safer and more effective choice.
Complex leaks, corroded or bonded fittings, hidden damage, gas line proximity, failed previous repairs, or lack of proper tools warrant a licensed plumber.
Emergency flooding or structural risk requires immediate professional intervention to guarantee code compliance and long-term reliability.
Preparation: Shutting Off Water and Isolating the Tee
Before cleaning a tee, the technician locates the nearest shutoff valves and fully depressurizes the line to prevent leaks or spray.
They then drain the section and lay down absorbent pads or buckets to protect floors and nearby fixtures.
Finally, appropriate access or removal methods are chosen based on material—soldering or cutting for copper, solvent-cement disassembly for PVC, and clamp-and-cut or fitting removal for PEX.
Locating shutoff valves and depressurizing the line
Locate the nearest shutoff valves and relieve pressure in the section of pipe that contains the tee before any cleaning begins.
The technician identifies main and branch valves, closes appropriate isolating valves, then opens a downstream faucet or bleed valve to vent residual pressure.
Confirmation is by pressure gauge or observing stopped flow.
Tagging valves and noting their positions prevents accidental reopening during cleaning.
Draining and protecting surrounding areas
Once the section is isolated and pressure relieved, the technician drains the tee and surrounding piping to remove standing water that could spill during cleaning.
They collect residual water with buckets or a wet/dry vacuum, plug low points, and lay absorbent towels or plastic sheeting to protect floors, walls, and nearby electrical components.
Work area is kept clear for safe access and cleanup.
Removal or access strategies for different pipe materials (copper, PVC, PEX)
Different pipe materials require distinct removal or access techniques when isolating a tee:
Copper joints are typically cut with a tubing cutter or removed by sweating after heating.
PVC fittings are best separated with a saw or PVC cutter, and solvent-welded sections may need replacement.
PEX connections often use crimp, clamp, or push-fit fittings that are released with the appropriate tool or by cutting and replacing a short run.
Properly cap and test.
Step-by-Step Cleaning Procedure for a Tee on a Plumbing Pipe
The cleaning procedure proceeds through a clear sequence of tasks beginning with a thorough inspection of the tee and adjacent pipes.
Next, fittings or branch pieces are removed safely before mechanical methods—scraping, brushing, and descaling—are applied, followed by targeted chemical cleaning and proper neutralization.
Finally, all surfaces are dried and prepared for resealing or soldering to guarantee a reliable joint.
Step 1 Inspecting the tee and surrounding pipes
Before any cleaning begins, a thorough inspection of the tee and adjacent pipes establishes the scope of work:
The technician checks for corrosion, hairline cracks, active leaks, and mineral buildup. Joint integrity, thread condition, and solder or welded seams are noted.
Nearby valves and supports are examined for stress or movement. Photos and measurements document findings for planning and parts procurement.
Step 2 Removing fittings, caps, or branch pieces safely
Carefully remove fittings, caps, and branch pieces in a controlled sequence to prevent damage and contain debris.
The technician isolates water supply, depressurizes the line, and uses appropriate wrenches and pliers. Protective plugs and drip trays collect residual fluid.
Fasteners are loosened progressively to avoid stress. Removed components are labeled, placed on a clean surface, and inspected for reuse or replacement.
Step 3 Mechanical cleaning: scraping, brushing, and descaling
With caps and branch pieces removed and the work area secured, attention shifts to mechanical cleaning of the tee body and branch bore.
The technician scrapes loose corrosion, mineral deposits, and old sealant with appropriate hand tools, follows with wire-brush agitation to reach crevices, and uses descaling implements for persistent buildup.
Debris is removed and inspected to guarantee a clean, bright surface ready for subsequent preparation.
Step 4 Chemical cleaning: using appropriate cleaners and neutralizing
Once the tee has been mechanically cleaned and dried, a targeted chemical cleaning removes residual scale, oils, and sealant residues that brushing could not reach.
The technician selects a compatible cleaner (acidic for mineral scale, solvent for oils), applies briefly, agitates with a brush, then thoroughly rinses.
Neutralize remaining active agents per product instructions and verify no corrosive residue remains before proceeding.
Step 5 Drying and preparing mating surfaces for reseal or solder
Drying the tee and preparing mating surfaces is essential to guarantee a reliable reseal or solder joint.
After neutralization, all components should be thoroughly dried with lint-free cloths and low-pressure air.
Remove corrosion, flux residue, and oils using a brass brush or abrasive pad until bright metal appears.
Mask adjacent fittings to prevent contamination and verify surfaces are clean, dry, and oxide-free before proceeding.
Step 6 Reassembling and applying sealant or solder techniques
Reassemble the tee by aligning cleaned surfaces precisely and securing fittings to hand-tight before applying sealant or preparing for solder.
For threaded joints, apply an appropriate thread sealant or PTFE tape evenly, then tighten to specification.
For sweat joints, flux sparingly, heat evenly, and feed solder into the joint until fully drawn.
Wipe excess flux and allow joints to cool undisturbed before final tightening.
Step 7 Pressure testing and checking for leaks
Begin pressure testing by isolating the repaired tee and gradually reintroducing water or air to the system to the required test pressure, monitoring gauges for stable readings.
Inspect joints visually and by touch for dampness or bubbles (with soapy solution if using air).
Hold pressure for the specified duration, note any drop, tighten or reseal leaks, then depressurize and restore normal flow once confirmed leak-free.
Cleaning and Repair Techniques by Pipe Type
Different pipe materials require specific cleaning and repair approaches tailored to their fittings and joining methods.
Copper tees demand attention to soldering, flux removal, and possible cold-solder alternatives, while PVC, CPVC, and ABS require correct priming, solvent or adhesive prep, and curing times.
PEX installations use crimp or expansion fittings with careful cleaning around barbs, and galvanized steel needs rust remediation and proper thread sealing.
Copper tees soldering, flux removal, and cold-solder alternatives
Soldering a copper tee requires clean metal and correct flux use to guarantee a reliable, leak-free joint. After heating and applying solder, any remaining flux must be thoroughly removed to prevent corrosion.
When open-flame soldering isn’t feasible or allowed, mechanical and cold-solder alternatives can provide effective repairs. After cooling, scrape flux residue, rinse with water, and inspect joints.
Use compression fittings, push-fit connectors, or approved epoxy compounds as flame-free options.
PVC tees solvent cement cleaning and proper priming
Prepare the PVC tee and mating pipe by removing dirt, grease, and old adhesive so solvent cement and primer can form a secure bond.
Sand lightly to remove oxidation and guarantee a snug fit.
Apply approved purple primer evenly, allow brief dwell time, then evenly coat both surfaces with solvent cement.
Assemble quickly, twist 1/4 turn, and hold until set per manufacturer instructions.
CPVC and ABS adhesive prep and curing considerations
Several key steps guarantee reliable CPVC and ABS joints: surfaces must be clean, dry, and free of oil, paint, or scale; any damaged or frayed edges should be trimmed and lightly deburred for a flush fit.
Appropriate primers and adhesives must be selected for each material, applied evenly, assembled within working time, and clamped if needed.
Allow full cure per manufacturer temperature and humidity guidelines before pressure testing.
PEX tees crimp/expansion fittings and cleaning around barb connections
When working with PEX tees—whether using crimp, clamp, or expansion systems—attention to the barb connection and surrounding tubing guarantees a durable seal and prevents leaks.
Clean tubing ends, remove burrs, and inspect barbs for deformation or corrosion. Use appropriate fitting tools, properly sized rings or sleeves, and follow manufacturer torque/depth specs.
Test pressure after assembly and recheck for micro-leaks.
Galvanized steel rust removal and thread sealing practices
After addressing PEX barb connections, attention shifts to older galvanized steel lines, where corrosion and thread deterioration are common problems that require different techniques.
Rust is removed with wire brushes, penetrating oil, and light abrasives; care avoids thinning threads.
After cleaning, apply pipe dope or PTFE tape rated for galvanized steel, reassemble, and pressure-test to confirm a solid, leak-free seal.
Common Problems During Cleaning and How to Fix Them
Common issues encountered during cleaning include stuck fittings that require careful removal, damaged threads or flanges needing repair or replacement, and leaks that persist after resealing.
Technicians are advised to use controlled force, proper penetrating lubricants, and heat where appropriate to free fittings while protecting adjacent seals.
Final checks focus on diagnosing persistent leaks and preventing contamination or blockages during reassembly through thorough cleaning and correct torquing.
Stuck fittings and safe removal techniques
Stuck fittings on a tee are a frequent obstacle during pipe cleaning and require careful techniques to avoid damage or leaks.
Apply penetrating oil, allow dwell time, then use proper-sized wrenches and steady, incremental force. Heat may loosen corrosion on metal joins; protect nearby seals.
If resistance persists, cut and replace the fitting rather than forcing, minimizing stress to the tee and surrounding pipe.
Damaged threads or flanges and repair options
Inspect the tee for stripped threads, cracked flanges, or deformed seating surfaces before proceeding with repairs.
If threads are damaged, options include chasing with a tap, using thread sealant or epoxy, or replacing the tee.
Cracked flanges often require replacement or welding by a qualified technician.
For minor deformation, careful reshaping and proper gasket replacement can restore a seal.
Persistent leaks after resealing and diagnostic steps
When a tee continues to leak after resealing, systematic diagnosis is required to identify whether the failure stems from sealing surface damage, improper application of sealant, incorrect gasket selection, residual debris, or a deeper structural defect.
Inspection should include cleaning and visualizing mating faces, pressure testing isolated sections, verifying gasket/material compatibility, checking torque and thread engagement, and using dye or ultrasonic leak detection.
Replace damaged parts or retry correct sealant technique.
Preventing contamination or blockages during reassembly
Several simple precautions considerably reduce the risk of contaminant ingress or flow obstruction during tee reassembly.
The technician rinses parts with clean water, brushes seats and bores, and blows passages dry with compressed air or a clean cloth.
Protective caps and magnetic trays keep debris off threads.
Before tightening, a final visual and tactile inspection guarantees seals and ports remain clear for reliable flow.
Preventive Maintenance to Keep Tee Joints Leak-Free
A regular inspection schedule helps detect loose fittings, minor corrosion, and early seal deterioration before leaks develop.
Selecting appropriate sealants, tapes, and compatible joint types extends service life and minimizes maintenance needs.
Improving water quality through filtration or softening reduces mineral deposits and corrosive wear that compromise tee joints.
Routine inspection schedule and what to look for
Consistency underpins an effective routine inspection schedule for tee joints on plumbing pipes, prescribing regular checks at intervals based on system use and risk factors.
Inspectors should look for active drips, dampness, corrosion, mineral buildup, loose fittings, thread wear, and seal deterioration.
Record findings, note trends, prioritize high-risk areas, and schedule corrective action promptly to prevent leaks and system damage.
Best sealants, tapes, and joint types for longevity
The most reliable sealants, tapes, and joint types for tee joints balance material compatibility, application method, and service conditions to maximize longevity and prevent leaks.
Use PTFE tape for threaded brass/steel, anaerobic pipe thread sealant for metal threads under pressure, and silicone or NSF-approved thread compounds for plastic fittings.
Prefer soldered, brazed, or properly flared joints where applicable and use compression fittings rated for system pressure.
Water quality improvements to reduce corrosion and deposits
Improving water quality complements choosing the right sealants and joints by reducing the chemical and particulate stresses that cause corrosion and mineral buildup at tee connections.
Regular testing, water softening, pH adjustment, and filtration lower dissolved minerals and aggressive ions.
Corrosion inhibitors and scale control systems further protect metal and plastic fittings.
These measures extend service life, reduce maintenance frequency, and preserve sealing surfaces for leak-free performance.
Cost, Time Estimates, and When Replacement Is Better Than Repair
A brief comparison outlines typical time and cost for a DIY tee cleaning—often an hour or two and minimal materials—versus hiring a professional, which can take less time on site but incurs labor and service fees.
Indicators that full replacement is more economical include recurring leaks, significant corrosion, or damage to adjacent pipe sections that make repeated repairs costly.
Warranty requirements and local plumbing codes can affect whether a repair is permitted or a certified replacement is required, and should be checked before proceeding.
Typical time and cost breakdown for DIY cleaning vs professional service
Typical costs and time commitments for cleaning a tee on a plumbing pipe vary widely depending on method and severity: DIY often takes 1–3 hours and costs $10–$60 for tools and sealants; professional service takes 1–2 hours on-site but incurs $100–$350 labor and diagnosis.
| Option | Typical range |
|---|---|
| DIY | $10–$60, 1–3 hrs |
| Professional | $100–$350, 1–2 hrs |
Signs that replacing the tee or pipe section is more economical
When recurring leaks, extensive corrosion, or multiple failed repairs are present, replacing the tee or the adjoining pipe section often proves more economical than continued patching.
Replacement limits ongoing labor costs, reduces the risk of sudden failures, and restores full flow capacity.
Evaluate replacement when repair costs approach or exceed 50–70% of replacement, when access is easy, or when age and material indicate imminent further failures.
Warranty and code considerations for repairs and replacements
Warranty terms and local plumbing codes both shape the decision between repairing or replacing a tee and adjacent pipe sections. Warranties may void when noncompliant materials or unlicensed labor are used, while codes dictate acceptable methods and can require full replacement in certain situations (e.g., lead, galvanized to copper conversions, or fire-suppression lines).
Cost, time estimates and permit needs should be weighed. Replacement often favors long-term compliance and warranty preservation.
Quick Troubleshooting Checklist After Cleaning
A brief checklist helps confirm the tee was cleaned and repaired correctly by listing immediate tests such as pressure testing, visual inspection for drips, and running water through all connected lines.
If a leak reappears within 24 to 72 hours, recommended steps include tightening or re-seating fittings, drying and re-inspecting the joint, and isolating the section for further testing.
If those measures fail, the checklist advises preparing for replacement or contacting a licensed plumber.
Immediate tests to confirm a successful repair
Begin by visually inspecting the cleaned tee and surrounding joints for any residual debris, misalignment, or gaps that could compromise the seal.
Then restore water slowly, observing for immediate drips.
Check under pressure by running fixtures served by the tee, monitor for moisture for several minutes, feel joints for dampness, and re-tighten fittings if minor seepage appears.
Steps to take if a leak reappears within 24 to 72 hours
If leakage recurs within 24 to 72 hours, follow a focused troubleshooting checklist to isolate cause and prevent further damage:
shut off water, dry and mark leak location, inspect joint for loose fittings, corrosion or remaining debris, re-torque or reseal with appropriate compound, replace damaged gasket or tee if necessary, pressure-test at low flow, document findings, and contact a licensed plumber if leak persists or source remains unclear.
Additional Resources and Reference Materials
Manufacturer guidance for common fittings and sealants should be consulted to confirm compatible materials and torquing or curing instructions.
Relevant code standards and repair manuals can provide detailed procedures and safety requirements for specific installations.
Prospective homeowners are advised to verify a plumber’s professional certifications, such as journeyman or journeyperson licensing and trade association credentials, when seeking assistance.
Manufacturer guidance for common fittings and sealants
When consulting guidance for fittings and sealants, technicians should prioritize the specific instructions provided by the part or sealant maker, since compatibility, curing times, and torque or application requirements vary by material and design.
Manufacturer documents typically specify:
- Approved materials and mating surfaces.
- Application thickness, cure times, and temperature limits.
- Fastening torques, installation sequences, and maintenance intervals.
Links to code standards and detailed repair manuals
Authoritative links to code standards and detailed repair manuals serve as essential references for technicians seeking to verify compliance and follow proven procedures.
Concise, reputable sources reduce guesswork during tee cleaning and sealing.
Recommended resources:
- National and local plumbing codes (HTML or PDF editions).
- Manufacturer repair manuals for specific fittings.
- Industry best-practice guides and illustrated procedure sheets.
Recommended professional certification to look for in a plumber
Although not strictly required for every minor job, verified professional certifications signal that a plumber has met standardized training and competency benchmarks relevant to tee cleaning and pipe work.
Recommended credentials include:
- Journeyman or Master Plumber license for local code knowledge.
- EPA Lead-Safe certification for older systems.
- Certified Plumbing Technician or manufacturer-specific training for advanced fittings and materials.
Conclusion
Like a small bridge restored after a storm, a clean tee joins hidden paths so water flows true. With the right tools, care, and routine checks, a simple scrub and seal can keep leaks from becoming floods. Timely cleaning tailored to pipe type preserves strength, saves money, and extends service life. When corrosion or damage runs deep, replacement stands ready as the honest remedy—protecting homes and peace of mind alike.
