How to Remove Toilet Bolt Caps Quickly: A Step-by-Step Guide
To remove toilet bolt caps quickly, start by determining if they are snap-on or threaded. Clear any debris around the base for better access. Gather a flathead screwdriver, pliers, a utility knife, lubricant, and gloves.
For snap-on caps, gently pry them near the rim or twist to pop them off. For threaded caps, wrap tape around the pliers’ jaws for protection and turn counterclockwise. If the caps are stuck, apply penetrating oil, wait a few minutes, and then try using a strap wrench or heat if necessary. After removal, clean the area and inspect the bolts to prevent damage. Further steps are available for stubborn cases and replacements.
Quick overview: Removing toilet bolt caps safely and efficiently
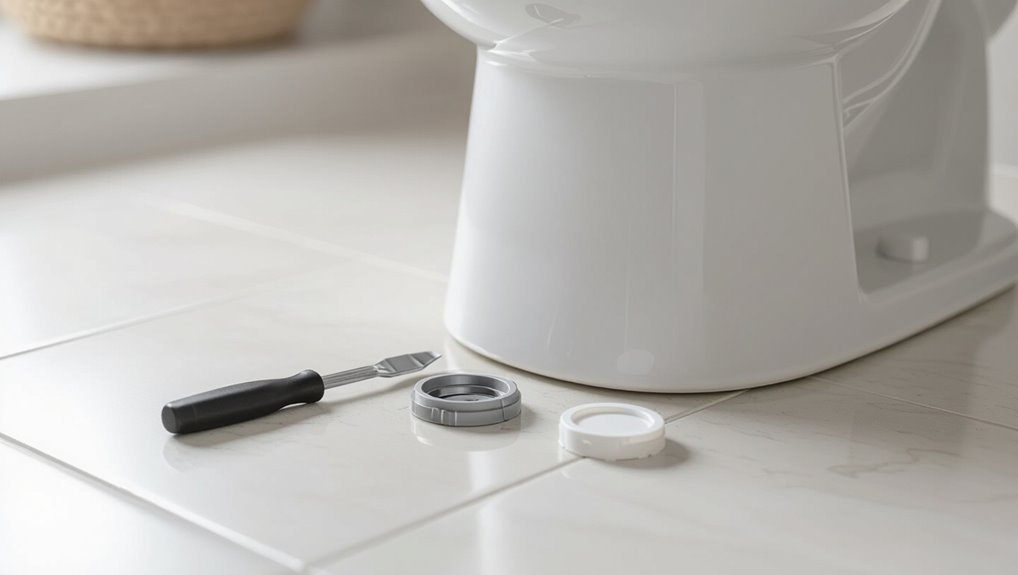
Toilet bolt caps are small plastic covers that protect and conceal the bolts securing a toilet to the floor, and removal is often needed for repairs or replacement.
For a quick, safe removal, use a flathead screwdriver or a nut driver to pry or unscrew the cap while protecting porcelain with a cloth.
This single-step approach—grip, pry or turn, and lift—minimizes time and reduces risk of damage.
What toilet bolt caps are and why you might need to remove them
A small plastic or metal cover shields the toilet closet bolts at the base of the fixture, concealing fasteners that secure the bowl to the floor. Removal may be needed for repair, replacement, cleaning, or inspection; knowing how to remove toilet bolt caps prevents damage and speeds maintenance.
| Purpose | Benefit |
|---|---|
| Repair | Access bolts |
| Cleaning | Hygiene |
| Replacement | Renew parts |
One-line quick method for speed: tools and a single-step approach
Grab a flathead screwdriver or a butter knife and pry up the plastic bolt cap from the edge, then pull it off by hand—this single, quick motion is all that’s needed for most standard caps when tiles or grime aren’t obstructing access.
If caps resist, gently rock the tool to loosen, clean debris, then repeat; wear gloves and protect porcelain to prevent scratches.
Tools and materials you’ll need
A concise list of tools and materials helps guarantee the bolt caps are removed quickly and without damage.
Essential items include a flat screwdriver, pliers, and a cloth; optional aids such as an oil lubricant or trim tool can simplify stubborn caps.
Protective gloves and a towel or mat will guard hands and the floor during the job.
Essential tools for quick removal
Begin by laying out the few basic tools that make removing toilet bolt caps quick and safe: a flathead screwdriver, needle-nose pliers, a utility knife (for cutting brittle plastic), and a small flashlight to see under the rim.
- Flathead screwdriver
- Needle-nose pliers
- Utility knife
- Small flashlight
These essentials enable controlled prying, gripping, trimming, and inspection for efficient removal.
Optional tools that make the job easier
Optional tools can streamline removal and reduce risk of damage: a small putty knife for gentle wedging, a silicone-safe lubricant spray to loosen stubborn caps, a pair of rubber-jawed pliers to prevent scratching, and masking tape to protect porcelain edges while prying.
- Putty knife for controlled leverage
- Silicone lubricant for seized caps
- Rubber-jawed pliers to grip without marring
- Masking tape as a porcelain buffer
Safety gear and surface protection
Wear gloves and eye protection, and prepare a clean, padded workspace before attempting to remove toilet bolt caps.
Protective eyewear prevents debris injury; nitrile or work gloves improve grip and shield hands.
Lay down a soft towel or foam pad to protect porcelain and catch small parts.
Consider knee pads and adequate lighting.
Dispose of contaminated materials responsibly.
Inspecting your toilet bolt caps before starting
Before attempting removal, the technician examines the bolt caps to determine their type and material—plastic, metal, snap-on, or threaded.
They check for corrosion, paint buildup, or concealed fasteners that could complicate removal.
If significant rust, damage, or hidden hardware is found, work stops and preparations for additional repairs or replacement are made.
Identifying cap types and materials
A quick visual and tactile inspection will reveal whether the toilet bolt caps are plastic snap-ons, screw-on metal covers, or integrated parts of the flange assembly; noting material, shape, and any corrosion helps determine the proper removal method and tools.
Document cap diameter, seam or thread presence, flexibility, and finish. Identify decorative caps versus functional fasteners and any nonstandard or brittle materials that may crack during removal.
Spotting corrosion, paint, or hidden fasteners
Inspect the bolt caps for signs of corrosion, paint buildup, or hidden fasteners that could complicate removal.
Corrosion may fuse caps to bolts; flaky metal, rust stains, or pitting indicate seizure.
Paint bridging cap edges can conceal seams.
Look for set screws, clips, or adhesive residues.
Noting these conditions informs tool choice and technique, reducing the risk of damage during removal.
When to stop and prepare for additional repairs
Pause if any of the following signs appear: cracked or severely corroded caps, wobbling bolts, stripped fasteners, cracked porcelain around the base, or evidence of a leaking flange. One should halt removal, assess damage, gather parts or call a plumber if unsure. Immediate repairs prevent leaks and breakage; document conditions and avoid forcing components.
| Issue | Action |
|---|---|
| Cracked cap | Replace cap |
| Wobble | Tighten/replace bolt |
| Stripped | Use extractor |
| Porcelain crack | Stop work |
| Leak evidence | Call plumber |
Step-by-step fast method to remove standard snap-on bolt caps
This section outlines a quick, practical routine for removing standard snap-on toilet bolt caps.
It begins with clearing the area and protecting surfaces, then recommends loosening grime and any seal using lubricant, heat, or a penetrating spray before levering the cap with a flat-blade screwdriver or pry tool.
If the cap is flexible, a twist-and-pop motion is an alternative, followed by cleaning the area and inspecting the exposed bolts.
Step 1: Clear surrounding area and apply protection
Before starting, clear a workspace around the toilet by removing rugs, toiletries, and any loose items that could obstruct access.
Then place a towel or small drop cloth around the base to catch debris and protect flooring.
Wear nitrile or latex gloves to keep hands clean.
Use safety glasses if working in tight, dusty spaces.
Guarantee good lighting and a stable step stool if needed.
Step 2: Loosen grime and break seal (lubricant, heat, or penetrating spray)
With the area prepared and protected, attention shifts to loosening the grime and breaking the seal around the snap-on bolt caps.
Apply a penetrating spray or a few drops of lubricant, letting it soak per product instructions.
For stubborn residue, warm the cap with a hairdryer briefly to soften deposits.
Wipe away softened grime with a cloth or small brush before attempting removal.
Step 3: Pry technique using a flat-blade screwdriver or pry tool
Leverage a flat-blade screwdriver or a thin pry tool to gently pop off standard snap-on toilet bolt caps: insert the tip under the cap edge, apply steady upward pressure near the rim rather than the center to avoid cracking, and work around the cap in short, controlled pries until it lifts free.
| Tool | Angle | Motion |
|---|---|---|
| Screwdriver | Shallow | Pry |
| Trim tool | Low | Lift |
| Plastic pry | Edge | Repeat |
Step 4: Twist-and-pop method when caps are flexible
If the pry method fails or the cap feels pliable rather than brittle, the twist-and-pop technique offers a faster, less forceful option.
Grasp the cap firmly between thumb and forefinger, rotate it 45–90 degrees to break the snap tabs, then pull straight up.
Repeat for the opposite cap if present. Use minimal force to avoid tearing or pushing debris into the bolt area.
Step 5: Clean post-removal and inspect bolts
After removing the caps, wipe the bolt posts and surrounding flange with a clean rag to remove grime and sealant residue.
Inspect threads and nuts for corrosion or stripped areas.
Remove remaining sealant with a plastic scraper or mild solvent if needed.
Apply a light coating of plumber’s grease or anti-seize to threads, then replace caps or fit new ones, ensuring a snug, even seat.
Removing threaded or screwed-on caps
Threaded or screwed-on caps require tools and a steady hand to avoid chipping the porcelain. Pliers or an adjustable wrench are usually sufficient if protected with tape or a rag, while locking pliers or a strap wrench can be chosen for stubborn fittings to prevent surface damage.
For seized or rusted caps, apply penetrating oil, allow time to work, and use incremental force or heat if necessary to free the fastener.
Using pliers or adjustable wrench without damaging porcelain
Grip the cap firmly with padded pliers or an adjustable wrench set to a snug, non-slip jaw width to prevent slippage and concentrated pressure on the porcelain.
Turn slowly counterclockwise, applying steady even force. If resistance occurs, back off and reposition.
Protect porcelain with tape or a cloth between tool and cap.
Stop if cracking or chipping begins and reassess technique.
When to use locking pliers or strap wrench
Reach for locking pliers when caps are securely threaded or have stripped edges that resist hand twisting.
Choose a strap wrench for smooth plastic or chrome covers where surface damage must be avoided.
Locking pliers clamp firmly for controlled torque on threaded or knurled caps; a strap wrench distributes pressure evenly, preventing scratches and crushing.
Match tool grip to cap material and size for safe removal.
Handling seized or rusted caps
When caps have seized from rust or mineral buildup, begin by loosening surrounding corrosion with penetrating oil applied to the cap base and threads, allowing 10–15 minutes for the solvent to work.
Use a strap wrench or adjustable pliers with protective tape to prevent crushing. If stuck, apply heat briefly with a hair dryer, reapply oil, then turn steadily; cut away brittle plastic if removal fails.
Removing caps that are painted or caulked over
When bolt caps are painted or sealed with caulk, careful scoring of the paint and cutting of the bead will free the cap without prying.
A heat gun can soften paint and caulk quickly but risks damaging finishes and vinyl; solvents work slower and require ventilation but reduce heat exposure.
Work with sharp tools, test methods on an inconspicuous area first, and protect surrounding porcelain and flooring to prevent chips or stains.
Scoring paint and cutting caulk safely
Carefully score paint lines and cut through caulk around toilet bolt caps to reveal edges without damaging the porcelain or surrounding sealant. Use a utility knife with steady pressure, replace blades often, and work slowly. Clean residue with mild solvent and a soft cloth. Test a small area first to ensure no glaze harm.
| Calm | Caution | Relief |
|---|---|---|
| Gentle | Sharp | Free |
| Steady | Precise | Satisfied |
| Small | Safe | Finished |
| Care | Skill | Ease |
Using heat gun vs. solvent’ pros and cons
Decide between a heat gun and a solvent based on the condition of the caps and surrounding materials: a heat gun softens paint and caulk quickly for gentle prying but risks glaze damage, burns, or softened plastic distortion.
On the other hand, solvents dissolve coatings without heat but can attack sealants, finish, or produce harmful fumes. The choice should balance effectiveness, porcelain safety, and ventilation.
Use low heat, test solvent compatibility, and work incrementally.
Preventing damage to surrounding finish
Protect the surrounding finish by evaluating how paint or caulk adheres to the bolt caps before attempting removal; identify paint layers, the type and extent of caulking, and any nearby glazing or metal trim that could be scorched or dissolved.
Use thin utility blades, plastic scrapers, and low-heat methods; soften caulk with solvent applied sparingly.
Protect adjacent surfaces with painter’s tape and clean residue gently to avoid scratches.
Dealing with stubborn or corroded bolts
When caps resist simple prying, a technician may apply penetrating oil and allow sufficient soak time to loosen corrosion before attempting removal.
If the cap remains stuck, cutting or carefully drilling it out can free the fastener without damaging the porcelain.
Persistent corrosion or significant thread damage indicates the bolt should be replaced rather than salvaged.
Soaking with penetrating oil and wait times
Apply penetrating oil liberally to the bolts and their exposed threads, ensuring the spray reaches any visible rust or buildup; allow it to soak so the solvent can break down corrosion and lubricate seized parts.
Wait at least 10–15 minutes, then attempt gentle turning.
For heavily corroded bolts, reapply and wait up to several hours or overnight before retrying to avoid damaging components.
Cutting or drilling out a stubborn cap
If a bolt cap remains seized after soaking and repeated attempts at loosening, cutting or drilling it out becomes necessary; this approach sacrifices the cap but preserves the bolt and flange when done carefully.
Use a rotary tool or small drill bit, clamp nearby components, work slowly, and clear metal shavings frequently.
- Score cap edge first
- Use appropriate pilot bit
- Protect surrounding porcelain
- Test bolt integrity afterwards
When to replace the bolt instead of salvaging it
After cutting or drilling out a seized cap, an assessment of the bolt itself determines whether repair or replacement is appropriate.
If threads are stripped, heavily corroded, bent, or weakened at the shank or nut, replacement is recommended.
Minor surface rust or intact threads may be cleaned and reused with anti-seize.
Prioritize structural integrity and leak prevention when deciding to replace.
Replacing caps and securing the toilet after removal
After removing the old bolt caps, the writer recommends selecting replacement caps and bolts that match the toilet’s mounting pattern and resist corrosion.
Attention to proper torque and alignment is emphasized to guarantee a watertight seal and prevent flange damage.
Finally, consideration is given to cosmetic finishing—snap-on caps, decorative covers, or trim plates—to conceal hardware and complete the installation.
Choosing the right replacement caps and bolts
Selecting the correct replacement caps and bolts requires matching size, material, and style to the existing flange and toilet base to secure a leak-free fit.
Choose corrosion-resistant bolts, low-profile caps, and appropriate length and thread. Ascertain compatibility with nylon or brass options and confirm cap snap-fit or screw style.
- Measure bolt diameter and length
- Pick corrosion-resistant material
- Match cap style to trim
- Verify flange compatibility
Proper torque and alignment to avoid leaks
Make certain the toilet is seated squarely and the bolts are tightened evenly to the manufacturer’s recommended torque so the flange, wax ring, and bowl form a uniform, leak-free seal.
Torque in small, alternating increments, checking for level and lateral movement. Over-tightening can crack porcelain; under-tightening permits leaks.
Use a torque wrench or calibrated driver and retest after initial flushes.
Cosmetic finishing: caps, covers, and concealment options
While the mechanical seal and torque guarantee functional integrity, the final appearance and protection of the fasteners are achieved through properly chosen caps, covers, and concealment methods; replacing damaged or missing bolt caps and securing decorative covers restores a finished look and prevents dirt accumulation or accidental contact. Select durable materials, match finishes, and ascertain snug fit for longevity.
| Option | Benefit |
|---|---|
| Plastic caps | Affordable, easy replace |
| Chrome caps | Durable, aesthetic |
| Hinged covers | Accessible maintenance |
| Concealment trim | Seamless look |
| Adhesive pads | Prevent rattling |
Common mistakes and how to avoid them
Common errors during toilet bolt cap removal include chipping the porcelain or base, rounding off bolt heads, and breaking fasteners.
Each mistake has simple preventative steps, such as using proper tools, applying steady force, and protecting the fixture.
Attention to technique during removal and moderate torque when reassembling prevent most damage.
Damaging porcelain or toilet base
Avoiding damage to the porcelain or toilet base requires careful technique and the right tools; improper prying, overtightening, or using metal tools without protection are frequent causes of chips, cracks, and scratches.
Use padded pry bars or wrapped screwdrivers, apply steady gentle force, and work slowly.
Support the fixture, clear debris, and inspect frequently to stop minor defects before they worsen.
Stripping bolt heads or breaking fasteners
Stripping bolt heads or snapping fasteners happens quickly when improper tools, excessive torque, or corrosion are involved, leaving a repair that’s harder and more expensive. Use proper sockets, penetrating oil, steady pressure, and back-up pliers. Apply heat cautiously and tap heads to loosen rust without forceful jerks.
| Image | Mental note |
|---|---|
| Rusted head | Use oil |
| Rounded edge | Switch tool |
| Tight grip | Stabilize |
| Brittle shank | Replace |
| Patience | Prevent damage |
Over-tightening during reassembly
After stressing the risks of damaged heads and broken fasteners, attention turns to mistakes made when putting the toilet back together—particularly over-tightening.
Excessive torque can crack porcelain, warp flanges, or shear bolts. Use a torque-limited wrench or snug fittings by hand, then quarter-turn increments.
Follow manufacturer specs, replace damaged components, and inspect seals for compression to guarantee a secure, leak-free installation without stress.
Time-saving tips and best practices for a quick job
A concise prep checklist, including the right wrench, replacement caps, and a rag, helps streamline the job and prevent interruptions.
Employing multi-tool techniques and two-handed approaches can speed removal while maintaining control and avoiding stripped heads.
If bolts are corroded, seized, or the flange is damaged, calling a professional saves time and prevents costly mistakes.
Prep checklist to speed up the process
Gather essential tools and create a clear workspace before attempting to remove toilet bolt caps to minimize delays and mistakes.
A concise prep checklist speeds work: inspect cap type, protect floors with a cloth, have adjustable pliers and screwdriver ready, and keep replacement hardware nearby.
Confirm lighting and ventilation. Follow safety basics and sequence tasks to avoid backtracking.
- Inspect cap type
- Protect floor
- Ready tools
- Keep spares
Multi-tool techniques and two-handed approaches
With tools and spares in place from the prep checklist, multi-tool techniques and two-handed methods speed removal of toilet bolt caps by combining grip, leverage, and control.
One hand stabilizes the cap while the other operates a wrench, pliers, or flathead pry. Use a locking plier plus small prybar for stubborn caps, work steadily, and swap tools quickly to avoid stripping or damaging fixtures.
When to call a professional
Recognize when a task exceeds basic DIY scope: if bolts are corroded, caps crack under light pressure, flange damage is suspected, or water lines and seals are involved, a professional should be called.
Experienced plumbers save time, prevent further damage, and guarantee code-compliant repairs.
Hire a pro when uncertain, when specialized tools or parts are required, or when leaks or wobble persist after basic removal attempts.
Troubleshooting checklist for unusual problems
Occasionally, caps may crumble or smear adhesive-like residue that requires careful scraping and solvent use.
Hidden anchors or non-standard hardware can demand alternative tools or removal methods.
After caps are removed, checks for leaks or a wobbly bowl help determine whether flange bolts, washers, or the wax ring need attention.
Caps that crumble or leave residue
When toilet bolt caps crumble or leave sticky residue, they signal age, material breakdown, or chemical damage that can complicate removal and create sanitation concerns.
Use gloves and a mask, scrape softened fragments with a plastic putty knife, dissolve tacky residue with isopropyl alcohol or a mild citrus solvent, rinse, and repeat.
Inspect bolts for corrosion and replace caps with UV-resistant plastic.
Hidden anchors or non-standard hardware
Check for atypical fastenings or concealed anchors before assuming standard cap removal methods will work.
Inspect around the base and under flange for clips, rivets, epoxy, or one-piece bolts. Use a flashlight and small mirror.
Match tools to hardware: snap-ring pliers, nut splitters, or heat for softened adhesive.
If unsure, document the configuration and consult a plumber to avoid damage.
Post-removal leak or wobble diagnostics
Inspect the toilet base and surrounding fittings immediately after cap removal to identify leaks or wobble causes.
Check flange integrity, wax ring condition, and bolt tightness. Look for water stains, hairline cracks, or loose washers.
Test lateral movement by gently rocking the bowl.
If leaks or instability persist, note exact symptoms, shut off water, and consult a plumber or replace damaged components.
Quick maintenance tips to prevent future removal difficulties
A brief maintenance routine can prevent seized or corroded bolt caps by recommending protective coatings and corrosion-resistant materials.
Seasonal checks with light lubrication at the threads and cap interfaces keep parts moving freely without attracting grime.
Guidance on preferred materials—stainless steel bolts, UV-resistant plastic caps, and silicone-based lubricants—supports long-term durability.
Protecting bolt caps from corrosion
When exposed to moisture and cleaning chemicals, toilet bolt caps can corrode and seize, so preventive steps keep them serviceable and easy to remove.
Apply a thin coat of silicone or plumber’s grease to threads before replacing caps, use corrosion-resistant plastic or stainless replacements, guarantee area drains and dries after cleaning, and avoid harsh bleach contact to extend cap life and prevent stubborn buildup.
Seasonal checks and light lubrication
Perform seasonal checks and apply a light lubricant to keep toilet bolt caps functional and easy to remove.
Inspect caps every few months for grime, mineral buildup, or hairline cracks.
Wipe clean with a mild cleaner, dry thoroughly, and apply a small amount of silicone or PTFE-based lubricant to threads and seam edges.
Recheck for residue and remove excess to avoid attracting dirt.
Recommended materials for long-term durability
Building on routine inspections and light lubrication, selecting durable materials for caps and fasteners reduces the frequency of interventions and eases future removal.
- Stainless steel bolts resist corrosion and maintain threading integrity.
- Nylon or UV-stable plastic caps prevent cracking and won’t seize.
- Silicone O-rings offer long-lasting seal protection against moisture.
- Brass nuts combine strength with corrosion resistance for reliable fastening.
Conclusion
Like a locksmith coaxing a secret from a stubborn chest, the final twist frees the bolt caps and reveals a tidier throne. With nimble tools and patient hands, small obstacles yield to simple technique, leaving work that looks effortless. Routine checks and gentle care keep future battles brief; the quick, steady approach turns a fiddly chore into a tidy ritual, restoring order beneath the porcelain crown and promising smoother days ahead.