How to Stop Condensation on Toilet Cistern: Simple Fixes That Work
To stop condensation on your toilet cistern, improve ventilation, reduce humidity, and insulate the cistern. Effective methods include installing an extractor fan or keeping a window open, shortening shower durations, and using a dehumidifier. Insulate the cistern with neoprene or closed-cell foam jackets and self-adhesive lagging. Additionally, conduct quick checks by drying the cistern, inspecting seals, and fixing any leaks. Implementing these strategies will significantly reduce moisture. For more detailed guidance, additional tips are available below.
Why Your Toilet Cistern Gets Condensation
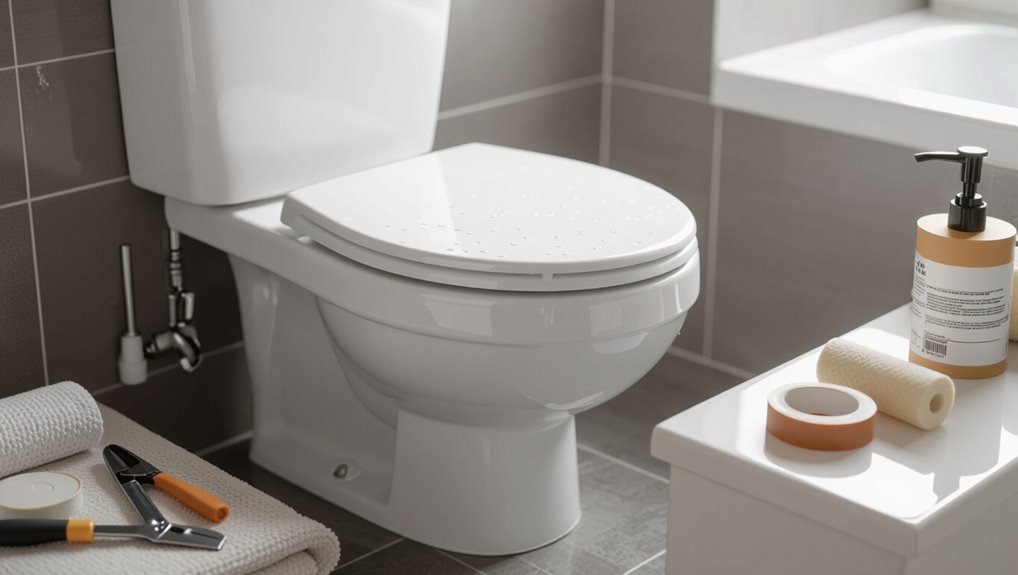
Condensation forms when warm, humid air contacts the cool surface of a cistern, causing moisture to collect as droplets.
Household factors such as poor ventilation, high indoor humidity from showers or drying clothes, and a cold water supply increase the likelihood of cistern sweating.
Visible beading on the tank, pooled water beneath it without damp patches on fittings, and moisture that appears only in humid conditions indicate condensation rather than a leak.
How condensation forms on cold surfaces
When warm, humid air contacts a colder surface like a toilet cistern, the air cools and its capacity to hold water vapor drops. Excess vapor then condenses into liquid droplets on the surface.
Condensation occurs when surface temperature falls below the air’s dew point. Addressing temperature differential and humidity—central to how to stop condensation on toilet cistern—prevents droplet formation.
Common household conditions that increase cistern sweating
Several everyday factors in a home raise the likelihood of cistern sweating by either increasing humidity or lowering the cistern’s surface temperature.
Warm showers, poor ventilation, clothes drying indoors, and running humidifiers elevate room moisture.
Cold mains water, uninsulated pipes, and shaded or poorly heated bathrooms keep the cistern colder than surrounding air.
Seasonal temperature swings and crowded bathrooms also contribute.
Signs that condensation is a humidity issue, not a leak
A telltale sign that water on a cistern is from humidity rather than a leak is uniform beading or a thin, even film of moisture across the tank surface rather than isolated drips or puddles.
Additional indicators include moisture appearing after hot showers, no water pooling beneath fittings, dryness around seals, and condensation diminishing when ventilation or heating reduces humidity—consistent patterns point to sweating, not plumbing failure.
Quick Fixes You Can Do Right Now
Immediate actions can reduce cistern condensation by lowering bathroom humidity, such as running a dehumidifier or shortening hot showers.
Improving ventilation with extractor fans or opening windows helps remove moist air quickly.
For a direct barrier, quick-install insulation wraps or fitted covers can be applied to the cistern in minutes.
Lowering bathroom humidity quickly
Start by increasing air movement and removing steam sources to lower bathroom humidity quickly.
Encourage shorter, cooler showers and cover boiling kettles elsewhere.
Wipe surfaces and squeegee wet walls and mirrors immediately.
Run a dehumidifier or portable moisture absorber for short bursts.
Leave the door ajar after use to equalize humidity.
Check and repair leaks promptly to prevent persistent dampness.
Increasing ventilation with fans and windows
Several simple adjustments to fans and windows can rapidly reduce bathroom humidity and curb cistern condensation.
Confirm the extractor fan runs during and for 10–15 minutes after showers; check it vents outdoors and clean the grille.
Open a window briefly to create cross‑ventilation when privacy allows.
Combine timed fan use with occasional window airing to lower moisture levels and prevent cistern sweating.
Simple insulation wraps and covers you can install in minutes
When condensation appears despite improved ventilation, quick-fitting insulation wraps and foam covers offer an immediate, low-cost barrier between cold cistern surfaces and warm, humid air.
Prefabricated neoprene or foam jackets slip over tanks; adhesive-backed foam strips seal edges. Installation requires no tools, cuts, or plumbing changes.
They reduce surface cooling, limit dripping, and prolong paint and hardware life while remaining removable for maintenance.
Best Materials and Products to Prevent Cistern Condensation
A comparison of insulation jackets, cistern liners and DIY options helps identify the best fit for preventing cistern condensation.
Foam, neoprene and fabric materials each offer different levels of thermal resistance, durability and ease of installation.
Guidance on when to use a homemade wrap versus a ready-made product frames the recommendation.
Insulation jackets and cistern liners what to buy
Although condensation prevention can be approached in multiple ways, selecting the right cistern insulation jacket or liner is primarily about material, fit, and durability.
Recommended choices include purpose-made neoprene or closed-cell PVC jackets, branded liners sized to common cisterns, and kits with adhesive seams or elasticated edges.
Prioritize waterproof, mould-resistant finishes, compatibility with internal fittings, and clear sizing charts for a snug, long-lasting installation.
Foam, neoprene, and fabric options compared
Because cistern condensation stems from cold surfaces meeting warm, humid air, selecting the right barrier—foam, neoprene, or fabric—hinges on thermal resistance, moisture resistance, and fit. Foam: lightweight, good insulation but less moisture-proof. Neoprene: excellent thermal and water resistance, snug fit. Fabric: breathable, cheaper, needs waterproof backing for best results.
| Material | Key trait |
|---|---|
| Foam | Lightweight insulation |
| Neoprene | Waterproof, durable |
When to choose a DIY solution vs. a ready-made product
Many homeowners weigh cost, skill level, and long-term effectiveness when deciding between a DIY cistern-insulation fix and a ready-made product.
DIY suits basic foam or neoprene wrap, low cost, and quick repairs but demands care for neat sealing.
Ready-made kits offer tailored fit, warranty, and cleaner aesthetics, justifying higher expense and ease for less confident users or complex cistern shapes.
Step-by-Step Guide to Insulate a Toilet Cistern
A concise list of tools and materials is provided to guarantee the job is completed safely and efficiently.
The cistern surface should be cleaned, dried, and checked for leaks before any insulation is fitted.
Step-by-step instructions cover fitting an insulation jacket, with an alternative method describing self-adhesive foam or pipe-lagging for narrower access or quick fixes.
Tools and materials needed
Gathering the right tools and materials guarantees the cistern insulation process is efficient and durable.
Required items include foam insulation panel or kit sized to the cistern, waterproof adhesive or double-sided tape, sharp utility knife, measuring tape, marker, and fine-grit sandpaper.
Optional items: insulation tape, silicone sealant, nitrile gloves, and a disposable cloth for handling adhesive residue.
Preparing the cistern surface safely
With tools and materials assembled, attention turns to preparing the cistern surface for insulation.
The person drains and isolates the cistern, removes loose debris, and dries the exterior thoroughly. They lightly sand any rough spots, wipe with a mild detergent solution, then rinse and dry.
They check for leaks or damage and guarantee fittings remain accessible before proceeding to insulation.
Installing an insulation jacket (detailed steps)
Several simple actions complete the installation of an insulation jacket around the cistern: align the jacket, secure fastenings, trim any excess, and verify a snug fit without obstructing fixtures.
Then lift the lid, fit internal foam pieces if supplied, close the lid to check clearance, fasten external straps or adhesive tabs, seal seams, and test the flush to guarantee no interference.
Alternative: applying self-adhesive foam or pipe lagging
Apply a self-adhesive foam strip or cut-to-fit pipe lagging along the cistern’s exterior to create a thermal barrier that reduces condensation.
Measure panels, cut to size, and clean the surface. Peel backing and press foam firmly, sealing joints with waterproof tape.
Trim excess and avoid blocking fittings or overflow outlets. Inspect periodically for adhesion and replace damaged sections to maintain effectiveness.
Reducing Bathroom Moisture Long-Term
Long-term reduction of bathroom moisture depends on effective ventilation, with extractor fans placed near the shower, fitted with timers or humidity sensors to guarantee consistent air exchange.
Maintaining a modest, steady heat level helps keep surfaces above the dew point and reduces condensation.
Adjusting shower habits—shorter, cooler showers and prompt towel or surface drying—complements ventilation and heating for lasting results.
Improving ventilation: extractor fans, timers, and positioning
Install and correctly position an extractor fan to remove humid air at the source and prevent condensation on the cistern.
Choose a fan sized for the bathroom, ducted externally, and mounted near the shower or bath.
Use a timer or humidity sensor to run the fan after use.
Make sure vents are unobstructed and maintain the unit regularly to sustain airflow and reduce moisture buildup.
Heating strategies to balance temperature and humidity
After ensuring adequate extraction, controlling bathroom temperature becomes the next tool for preventing cistern condensation.
Gentle, consistent heating reduces surface cooling and lowers relative humidity near the cistern. Options include low-output electric heaters, thermostatic radiators, or timed heating schedules to avoid large temperature swings.
Insulating the cistern and maintaining moderate warmth prevents dew point crossings without excessive energy use.
Managing showering habits and drying routines
Adjust showering habits and establish efficient drying routines to reduce the amount of moisture introduced and retained in the bathroom.
Shorter, cooler showers and staggered bathing reduce steam.
Wipe wet surfaces, squeegee tiles and glass, and launder bath mats promptly.
Open windows briefly after showering or run an extractor until dry.
Consistent routines lower ambient humidity and cut cistern condensation risk.
When Condensation Is a Symptom of a Bigger Problem
Condensation on a cistern can sometimes be mistaken for leaks or slow seepage, so it is important to distinguish surface moisture from actual plumbing failure.
Persistent dampness also raises the risk of mold growth; discoloration, musty odors, or spreading patches warrant prompt attention.
If signs point beyond routine condensation—recurrent pooling, visible water damage, or extensive mold—a plumber or HVAC specialist should be called to diagnose and repair underlying issues.
Distinguishing condensation from leaks and seepage
Several indicators can help distinguish harmless surface condensation from a more serious leak or seepage: persistent pooling, discoloration, musty odors, or water tracking down walls or floor.
Condensation typically forms thin, ephemeral beads that evaporate. Leaks produce steady drips, increasing puddles, warped paint, or soft drywall.
Timing, location, and recurrence after drying help determine if plumbing or structural repair is needed.
Mold growth risks and signs to watch for
Recognize that persistent moisture on a toilet cistern can create conditions favorable to mold, which may spread to grout, caulk, drywall, and hidden cavities if left unchecked.
Indicators include black or green staining, musty odors, peeling paint, and allergy-like symptoms among occupants.
Early detection prevents structural damage and health risks; inspect seams, behind cisterns, and under cabinets regularly, and remediate promptly when found.
When to call a plumber or HVAC specialist
When should a professional be contacted about persistent moisture on a toilet cistern?
Persistent sweating despite insulation, recurrent mold, leaking supply lines, continuous tank refills, or unusually cold water suggest underlying plumbing or HVAC faults.
A plumber can inspect leaks, valves, and condensation from plumbing, while an HVAC specialist addresses ventilation, ducting, or excessive humidity.
Prompt professional assessment prevents structural damage and health risks.
Cost, Maintenance, and Longevity of Fixes
Typical costs vary widely between low-cost DIY measures like foam insulation and anti-sweat paints and higher-priced professional repairs or fitted jackets.
Expected lifespans differ by material—foam and tape may need replacement every few years, while molded jackets and professional insulation can last a decade or more.
Simple maintenance steps, such as checking seals, airing the room, and reapplying or replacing worn insulation, will help prevent condensation from returning.
Typical costs for DIY vs professional solutions
Although many DIY fixes require only modest outlay, the overall cost, maintenance burden, and expected lifespan vary considerably between DIY approaches and professional interventions. DIY materials (insulation tape, kits) cost low, need occasional upkeep, and last moderately. Professional insulation or replacement costs more, offers longer worry-free service, and often includes guarantees.
| Option | Typical cost/notes |
|---|---|
| DIY tape | Low, short-term |
| DIY kit | Moderate, moderate life |
| Pro insulation | High, long life |
| Full replacement | Highest, warranty |
How long different insulation options last
Longevity of cistern insulation depends largely on material choice and installation quality.
Closed-cell foam panels often last 10–25 years with minimal degradation; neoprene or rubber sleeves endure 5–15 years.
Spray foam can be permanent if undisturbed but may yellow or shrink over decades.
Insulating wraps and tapes typically require replacement every 3–8 years.
Warranty and local humidity influence actual service life.
Maintenance tips to keep condensation from returning
Maintain a regular checklist to keep toilet cistern condensation from returning: inspect insulation for compression or gaps every 6–12 months, check seals and pipe connections for leaks, and verify bathroom ventilation is operating (fan clean and timer set) to control ambient humidity.
Periodically replace degraded insulation, tighten fittings, and reseal joints. Budget modest annual maintenance; professional inspection every few years preserves longevity and cost-effectiveness.
Quick Checklist: Steps to Stop Cistern Sweating Today
A concise checklist helps prioritize actions to stop a sweating cistern immediately and prevent recurrence over time. The list below separates what can be done right away, what to expect from short-term fixes, and which measures provide lasting protection.
Following these steps guides practical decisions and efficient use of resources.
- Immediate actions: wipe down the cistern, improve ventilation, and reduce bathroom humidity with a fan or dehumidifier.
- Short-term fixes (week to month): fit a cistern insulating jacket, seal any cold-water pipe exposure, and check for leaks.
- Long-term solutions (months to years): upgrade plumbing insulation, remodel for better airflow, or replace the cistern with a thermally insulated model.
Immediate actions
Start by cutting off the water supply and drying the cistern exterior and surrounding surfaces with a towel to prevent immediate dripping and mold growth.
Inspect for obvious leaks, tighten loose fittings, and replace visibly cracked seals.
Increase room ventilation by opening a window or running an extractor fan.
Place a waterproof mat beneath the cistern and remove any soaked items to limit further moisture damage.
Short-term fixes (week to month)
Apply practical, temporary measures that reduce temperature difference, improve airflow, and block surface moisture while longer-term repairs are planned.
Install an insulating cistern jacket or foam panels, fit a small timed bathroom fan or portable dehumidifier, raise room temperature slightly, and seal gaps around the cistern.
Wipe surfaces daily and monitor for persistent leaks; document progress to inform future permanent fixes.
Long-term solutions (months to years)
When short-term measures prove insufficient, pursue durable fixes that address root causes—insulate or replace cold cisterns, improve bathroom ventilation permanently, eliminate leaks and thermal bridges, and adjust plumbing or room layout to reduce temperature differentials over time.
Plan upgrades: install insulated or modern low‑flow tanks, add continuous extractor fans with timers, correct insulation gaps, reroute cold supply lines, and schedule professional inspections to prevent recurrence.
Real-Life Examples and Common Mistakes to Avoid
Several brief case examples illustrate fixes that stopped cistern sweating, from adding insulation to correcting cold-water overflow.
The section also highlights common DIY mistakes—such as using inadequate adhesive or blocking venting—that can worsen condensation.
Practical troubleshooting tips are provided for situations where sweating persists despite initial repairs.
Case examples of effective fixes
Illustrative case examples show how simple, targeted interventions eliminate cistern condensation: one household resolved persistent sweating by installing an insulated cistern liner and balancing the bathroom ventilation.
Another eliminated intermittent dripping by lowering the cold-water inlet pressure and adding a thermostatic mixing valve.
Meanwhile, a rental property avoided repeat issues by fitting a self-adhesive foam wrap and educating tenants about shower ventilation.
Follow-up inspections confirmed success.
Common DIY errors that make condensation worse
DIY attempts to fix cistern condensation sometimes backfire, turning a minor sweat into persistent leaks or mold.
Common errors include sealing vents, overinsulating with tape or foam causing trapped moisture, using incompatible sealants that degrade plastic, and installing bulky covers that obstruct fittings.
Homeowners also skip leveling or tighten fittings unevenly, which stresses joints and creates slow leaks that worsen humidity and staining.
Troubleshooting tips if sweating continues
Start by documenting when and where the cistern sweats to narrow causes: note time of day, bathroom humidity, recent plumbing work, and whether condensation appears only on the outside tank or also around joints and the bowl.
If sweating persists, check insulation, ventilation, and thermostat settings; inspect for leaks or faulty fill valves.
Seek professional assessment before replacing parts unnecessarily.
Conclusion
In the end, the cistern’s unwanted perspiration is portrayed as a humble tragedy solved by common sense: a towel, a layer of foam, or the faint dignity of better ventilation. The bathroom, once a stage for dripping indignity, becomes predictably dry and unremarkable. Ironically, what seemed like plumbing destiny yielded to simple choices, proving that heroic intervention was never required—only a little attention, a few pounds spent, and the patience to stop blaming the toilet.