How to Fix a Flush Tank When Water Won’t Fill: Quick DIY Steps to Repair a Toilet Fill Problem
If your toilet’s flush tank won’t fill, follow these quick DIY steps to troubleshoot and repair the issue. First, shut off the water supply, flush the toilet to drain the tank, and clean up any residual water. Next, inspect the shutoff valve, supply line, fill valve, float, flapper, and overflow tube for clogs or damage. Fully open the shutoff valve, clean or replace the fill valve if necessary, adjust or replace the float, and install a new flapper or washer as needed. Additionally, check the supply-line pressure and remove any mineral buildup. Finally, test for leaks and ensure the water level is correct. For detailed guidance on replacements and troubleshooting, continue reading.
What to do first when the toilet tank won’t fill
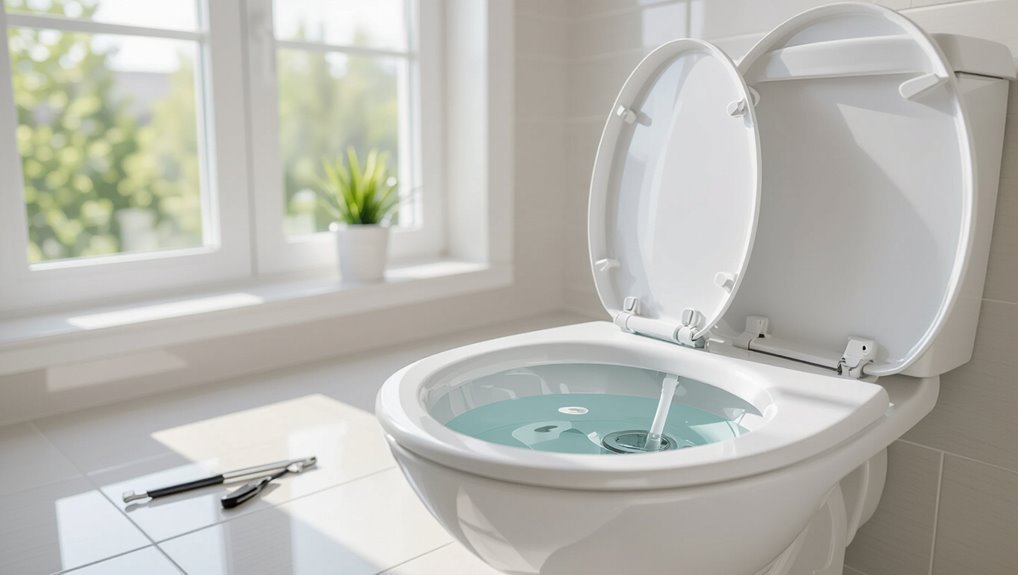
Before attempting repairs, a brief safety and preparation checklist should be followed to prevent injury and water damage.
The first practical steps are shutting off the toilet’s water supply valve and draining the tank by flushing and sponge-drying any remaining water.
Gather basic tools and replacement parts—adjustable wrench, pliers, sponge, replacement flapper and fill valve—so the repair can proceed without delay.
Quick safety and preparation checklist
When the toilet tank won’t fill, start by cutting off the water supply to prevent overflow and minimize mess; locate the shutoff valve at the base of the toilet and turn it clockwise until it stops.
Next, wear gloves and eye protection, clear the area, gather basic tools (wrench, pliers, towel), and keep a bucket nearby.
Note: review how to repair flush tank water not coming.
How to shut off the water supply and drain the tank
Shut off the toilet’s water supply by turning the shutoff valve at the base of the fixture clockwise until it stops; this isolates the tank and prevents additional filling.
Flush to empty most water, then hold the handle down to drain remaining water.
Use a sponge or towel to remove residual moisture and a small container for collected water.
Verify the valve is fully closed before proceeding.
Tools and parts to have on hand
A small toolkit and a few common replacement parts make diagnosing a tank that won’t fill faster and less frustrating.
Recommended items: adjustable wrench, pliers, screwdriver set, bucket, sponge and flashlight. Spare fill valve, float assembly, flapper, refill tube and rubber washers prevent delays.
A small tape measure and replacement nuts/bolts assist fit checks. Keep parts organized for quick access during repair.
Fast diagnostic steps to identify the cause
A quick assessment starts with confirming the water supply to the toilet and then inspecting the fill valve and float for proper operation.
Next, the flapper, overflow tube, and flush valve should be checked for wear or misalignment while noting water level and any visible leaks.
If multiple components fail, recurring leaks occur, or the issue involves the supply line or tank cracks, a plumber should be called.
Check the water supply to the toilet
Before inspecting internal parts, confirm the water supply to the toilet is active and delivering adequate flow; a quick check of the shutoff valve, supply line, and visible leaks narrows the likely causes.
Verify the shutoff is fully open, inspect the braided or copper line for kinks or damage, and look for dampness at connections.
Test flow by briefly opening the valve.
Inspect the fill valve and float mechanism
To diagnose common fill-valve and float problems quickly, inspect the tank with the lid removed and the water turned on so components can be observed during a cycle.
Observe whether the float rises freely, binds, or leaks.
Check the fill valve for steady flow, sputtering, or failure to shut off.
Tighten fittings, clear debris, or replace the valve/float if malfunctioning.
Examine the flapper, overflow tube, and flush valve
Inspect the flapper, overflow tube, and flush valve visually and during a flush to quickly pinpoint leaks, misalignments, or wear.
Check that the flapper seats fully and its chain has proper slack.
Confirm the overflow tube height matches tank specifications and isn’t cracked.
Verify the flush valve rim and seal for deterioration or mineral buildup that prevents a watertight closure.
Look for visible leaks and water level issues
Check the tank and surrounding floor for obvious leaks and note whether the water level sits above or below the marked fill line.
Inspect tank bolts, base gasket, and supply line connections for drips or corrosion.
Observe for continuous overflow into the bowl and dampness around the tank.
Record any irregular water height, stains, or pooled water to guide targeted repairs.
When to call a plumber: signs of complex problems
When recurring symptoms persist despite basic fixes—such as continuous running, repeated refill failures, or unexplained drops in bowl water—calling a plumber is warranted; quick diagnostics should confirm whether the issue is simple (loose flapper, misadjusted float) or indicates a complex fault (cracked tank, corroded valve seat, hidden supply-line leak, or sewer-line backflow) that requires professional tools and experience.
Recommended signs: persistent noise, fluctuating pressure, slow refill, damp floor, foul odors.
Step-by-step repairs for common causes
The following steps address the most common repairs: opening or replacing a closed or partially closed shutoff valve, cleaning or replacing a clogged fill valve, and adjusting or replacing a faulty float (ballcock or float cup).
It also covers replacing a worn flapper or chain and repairing a cracked or misaligned overflow tube.
Each procedure is presented in concise, sequential instructions for safe and effective fixes.
Fixing a closed or partially closed shutoff valve
Begin by isolating the shutoff valve feeding the tank and visually confirming whether its handle is fully open, partially turned, or stuck; this determines whether a simple turn will restore flow or further intervention is needed.
If stuck, apply penetrating oil, wait, then try again with an adjustable wrench.
Replace a seized or leaking valve assembly and retest supply, checking for leaks at connections.
Cleaning or replacing a clogged fill valve
Inspect the fill valve assembly to determine whether mineral deposits, debris, or a worn internal seal are restricting flow; identifying the cause guides whether cleaning, part replacement, or a full valve swap is required.
Turn off water, drain tank, remove cap and screen, flush debris, and soak parts in vinegar if mineral buildup exists.
Replace seals or the entire valve if damage or persistent clogging remains.
Adjusting or replacing a faulty float (ballcock or float cup)
Adjusting or replacing a faulty float—whether a traditional ballcock or a modern float cup—restores proper water level control and stops common issues like continuous running or weak flushes.
Inspect for cracks, waterlogged floats, or misaligned arms.
Adjust height via the screw or clip, or shut water, drain tank, remove and install a matched replacement.
Test fill and fine-tune for correct shutoff.
Replacing a worn flapper or chain
Replacing a worn flapper or a stretched chain is a common, quick fix that restores a toilet’s sealing and flushing action.
Inspect the flapper for deterioration and the chain for slack or corrosion.
Turn off water, drain the tank, detach old flapper and chain, install matched replacement, reattach chain with slight slack, restore water, and test for proper seal and reliable flush.
Repairing a cracked or misaligned overflow tube
While a faulty flapper or chain often explains leak and fill problems, a cracked or misaligned overflow tube can produce continuous running or improper fill levels and requires a different approach.
Inspect the tube for hairline cracks and correct alignment.
Replace cracked tubes with a compatible replacement or secure misaligned ones by loosening the fill assembly, repositioning the tube, then retightening and testing for proper shutoff.
Addressing low water pressure in the supply line
Low water pressure in the supply line can cause slow or incomplete tank refills and usually stems from a few common, fixable issues.
Inspect shutoff valve—fully open and free of corrosion.
Check supply hose for kinks or mineral buildup; clean or replace as needed.
Test household pressure at other fixtures.
If low throughout, contact municipal supplier or install a pressure-boosting pump or pressure regulator adjustment.
How to replace the fill valve: detailed how-to
The section outlines how to replace a fill valve, beginning with selecting a compatible replacement based on tank type and water supply.
It then describes removing the old valve, installing and adjusting the new unit, and securing connections.
Finally, it covers testing the fill level and checking for leaks to confirm proper operation.
Choosing the right replacement fill valve
Several factors determine the correct replacement fill valve: tank type (single- or dual-flush), mounting style (side- or bottom-fed), water supply pressure, and the available vertical clearance inside the tank.
Additional considerations include adjustable height, refill rate compatibility with bowl design, material durability (corrosion-resistant plastics or brass), seal quality, and ease of future adjustments.
Match manufacturer specifications and local plumbing codes.
Step-by-step removal of the old fill valve
Begin by shutting off the water supply at the shutoff valve and flushing the toilet to drain as much water from the tank as possible; any remaining water should be absorbed with a sponge or towel.
Disconnect the refill tube and water supply line, remove the tank-to-valve retaining nut underneath, lift out the old fill valve, and clean the tank opening and gasket seating before installing the replacement.
Installing and adjusting the new fill valve
With the old fill valve removed and the tank opening cleaned, installation of the new valve proceeds by seating its gasket in the tank hole and lowering the assembly until it sits flush.
Tighten the locknut beneath the tank hand-tight plus a quarter turn.
Reattach the refill tube to the overflow, connect the water supply, and set the valve height per manufacturer instructions before final securing.
Testing for proper fill level and leaks
After the new fill valve is installed and the water supply is restored, test procedures verify the tank’s fill level and check for leaks before reassembling the tank lid.
Observe fill to the marked waterline, adjust float if needed, and confirm the fill stops shortly after reaching that level.
Inspect connections, tank base, and supply line for drips.
Perform multiple flushes and recheck.
Small fixes that often solve the problem
Many flush tank issues are resolved with minor adjustments and cleaning.
Removing mineral buildup and debris from jets and valves restores proper flow, while slight float adjustments correct the water level.
Re-seating the flapper and setting appropriate chain slack prevents leaks and incomplete flushes.
Cleaning mineral buildup and debris from jets and valves
Cleaning mineral deposits and clearing debris from the flush jets and valves often restores proper tank function without parts replacement.
The procedure involves turning off water, draining the tank, inspecting jet holes and valve seats, scraping or soaking with vinegar or a descaler, and flushing residual particles.
Reassemble, restore water, and test multiple flushes to confirm restored flow and reliable fill cycles.
Simple float adjustments to raise water level
If mineral clearing and debris removal restore flow but the tank still runs low, adjusting the float is a quick, low‑effort fix that often raises the water level to the proper mark.
Inspect the float type (ballcock or cup), then bend the arm slightly or turn the adjustment screw to raise the float.
Test fills, repeat small adjustments until water reaches the manufacturer’s fill line.
Re-seating the flapper and adjusting chain slack
Re-seating the flapper and correcting chain slack are common, quick fixes for a running or weak-flushing tank: a misaligned flapper can prevent a proper seal, and an overly loose or tight chain interferes with full lift or timely closure.
Inspect the flapper for wear, clean the seat, reposition or replace it, and set chain slack so the flapper seals yet lifts fully when flushed.
Parts, tools, and estimated costs
A concise inventory of what is needed and what it may cost helps frame repair decisions.
Common items include:
- Replacement parts (flappers, fill valves, flush valves, seals)
- Basic tools (adjustable wrench, screwdriver, pliers, sponge)
- Model variations (universal vs. brand-specific kits)
- Cost estimates (parts: $5–$60; pro service: $75–$200)
This prepares the reader to compare parts compatibility, required tools, and expected expenses.
Common replacement parts and model variations
Identify the specific parts, tools, and typical costs before beginning any repair to guarantee correct ordering and efficient work.
Common replacement parts vary by valve type and brand; prices range from $5 to $60. Typical items include:
- Fill valve (float/diaphragm) — $10–$40
- Flapper or seal — $5–$20
- Overflow tube — $5–$15
- Tank-to-bowl gasket — $5–$25
Basic tools needed for DIY repairs
After listing common replacement parts and their price ranges, the next step is assembling the basic toolkit needed to install them.
A compact set enables quick DIY fixes without specialized gear.
- Adjustable wrench — for supply nut and tank bolts.
- Screwdrivers (flat and Phillips) — for clips and screws.
- Pliers — for clamps and stubborn fittings.
- Utility knife — for seals and tape.
Typical cost ranges for parts and professional service
Costs vary widely depending on part quality and whether a homeowner hires a pro or does the work themselves. Typical replacement parts cost $5–$40 (flapper, fill valve, seals). DIY tools often already on hand; expect $0–$20 extra. Professional service ranges $80–$200 for diagnostics and labor.
| Item | Typical Cost |
|---|---|
| Parts | $5–$40 |
| Pro service | $80–$200 |
Troubleshooting uncommon or recurring issues
Uncommon or recurring tank problems often stem from subtler causes that require systematic checks.
The discussion covers intermittent or slow filling after repairs, mineral buildup and corrosion from hard water, compatibility issues with older or non-standard parts, and hidden supply line faults.
Each issue will be paired with diagnostic steps and targeted fixes.
Intermittent filling or slow fill after repairs
Several factors can cause intermittent or slow tank refilling after repairs, and diagnosing the exact cause requires systematic checks of the fill valve, supply line, shutoff valve, and float mechanism.
Inspect for partial obstructions, kinked or collapsed supply tubing, improperly seated valve diaphragms, and misadjusted floats.
Verify shutoff valve fully opens and replace the fill valve if flow remains inconsistent after cleaning and adjustments.
Problems caused by hard water and corrosion
Mineral buildup and corrosion in flush tanks can silently degrade performance, leading to clogged jets, slow fills, leaky seals, and erratic flush behavior.
Deposits impair float movement, restrict fill-valve flow, and prevent flapper seating. Metal parts pit and seize, causing leaks.
Regular descaling, replacing corroded components, and installing a water-softening or filtration solution prevent recurrence and restore reliable tank operation.
Issues from older toilet models and non-standard parts
Hard water and corrosion can exacerbate problems unique to older toilet models and assemblies that use non-standard parts, making diagnosis more difficult.
Replacement parts may be obsolete or dimensionally different, causing leaks, poor fill performance, or intermittent failures.
Compatibility checks, careful measurements, and sourcing OEM or adaptable aftermarket components help restore function.
When uncertain, consult vintage-spec resources or a professional.
Diagnosing hidden supply line problems
Begin by isolating the supply line to determine whether the problem originates in the visible plumbing or within hidden sections such as behind walls, under floors, or inside the valve assembly.
Inspect accessible fittings, test pressure at the shutoff, and listen for leaks.
Use a pressure gauge, line tracer, or borescope to locate obstructions, crushed tubing, or concealed corrosion.
Call a pro if inaccessible.
Preventive maintenance to avoid future fill problems
A simple preventive plan begins with a regular inspection schedule and a few basic tasks such as cleaning the fill valve and checking seals.
Routine descaling and use of compatible cleaners will minimize mineral buildup and extend the life of parts.
When wear or repeated problems persist, replacing individual components or upgrading the entire toilet should be considered.
Regular inspection schedule and simple maintenance tasks
Consistency guarantees reliable performance: establishing a simple, regular inspection schedule and performing a few basic maintenance tasks can prevent most fill-valve and overflow issues in a flush tank.
Inspect connections, float operation, and refill tube monthly. Test the shutoff valve and listen for leaks.
Tighten loose fittings, replace worn washers, and clear debris from the valve seat as needed to maintain dependable operation.
How to minimize mineral buildup and prolong part life
Monthly inspections and basic tightening address many immediate issues, but preventing mineral buildup and extending component life requires a few targeted practices.
Flush valves, fill valves, and float assemblies should be wiped monthly with vinegar-soaked cloths to dissolve deposits.
Install a small in-line filter and use a diluted vinegar soak quarterly for removable parts.
Replace rubber seals at first sign of stiffness or cracking.
When to upgrade components or the whole toilet
When recurring leaks, slow refill times, persistent mineral buildup despite cleaning, or repeated parts failures occur, it indicates that targeted repairs may no longer suffice and component upgrades—or replacing the entire toilet—should be considered to prevent future fill problems.
Evaluate age, parts availability, water efficiency, and cost of frequent repairs; upgrade the fill valve, flush valve, or install a modern low-flow toilet to reduce future issues.
Final testing and verification after repair
The technician checks for silent leaks and phantom flushing by inspecting the tank and monitoring the water meter or using dye tablets to reveal slow losses.
They confirm the water level and flush performance with a test flush and by measuring refill height against the manufacturer’s recommendation.
Over the next 24 to 48 hours they monitor for any repeat symptoms, changes in water usage, or abnormal sounds to guarantee the repair holds.
How to check for silent leaks and phantom flushing
How can one confirm that a repaired flush tank no longer leaks or cycles unexpectedly? One method uses food coloring: add dye to the tank, wait 15–30 minutes without flushing, then inspect the bowl for color.
Also listen for intermittent refill sounds over an hour and check the refill tube and flapper seating. Record any water level drop or audible cycling for further adjustment.
Confirming correct water level and flush performance
Begin by bringing the tank to its normal operating state and observing both water level and flush action under typical conditions.
Verify the water reaches the marked fill line without overflowing.
Trigger multiple full flushes to confirm strong siphon and complete bowl clearance.
Inspect refill timing, valve seating, and absence of surges or gurgles.
Note any irregularities and re-adjust float or refill valve as needed.
What to monitor in the first 24 to 48 hours after repair
After confirming proper water level and consistent flush performance, attention shifts to monitoring the repaired tank closely for the next 24 to 48 hours.
Check for leaks around connections, listen for slow refills or phantom running, and verify float and fill-valve stability after several cycles.
Reinspect seal integrity and tank-to-bowl bolts.
Note any irregular sounds or gradual level drops and address promptly.
Conclusion
The tank, stubborn as a closed fist, finally yields; the quiet click of water is a small victory bell. One who tended the valves moves away like a gardener from a mended fountain, hands still smelling of metal and resolve. Pipes that once whispered drought now hum steady, a ribbon of silver returning to its loop. In that restored cycle, everyday order reasserts itself—simple repairs stitching leaks into continuity, ordinary care turning fault into flow.