How to Clean Rinnai Tankless Water Heater: Step-by-Step Descaling & Maintenance Guide
To effectively clean a Rinnai tankless water heater, descaling is essential to remove mineral buildup and maintain efficiency. Start by shutting off the gas and power, then isolate the water lines. Use a pump to circulate a diluted descaling solution for 45–60 minutes, followed by a thorough flush with clean water. Additionally, clean the inlet screen and condensate trap, inspect seals, and check for leaks and error codes. Refer to local hardness schedules and manufacturer guidelines for detailed steps and safety precautions.
What descaling a Rinnai tankless water heater means and why it matters
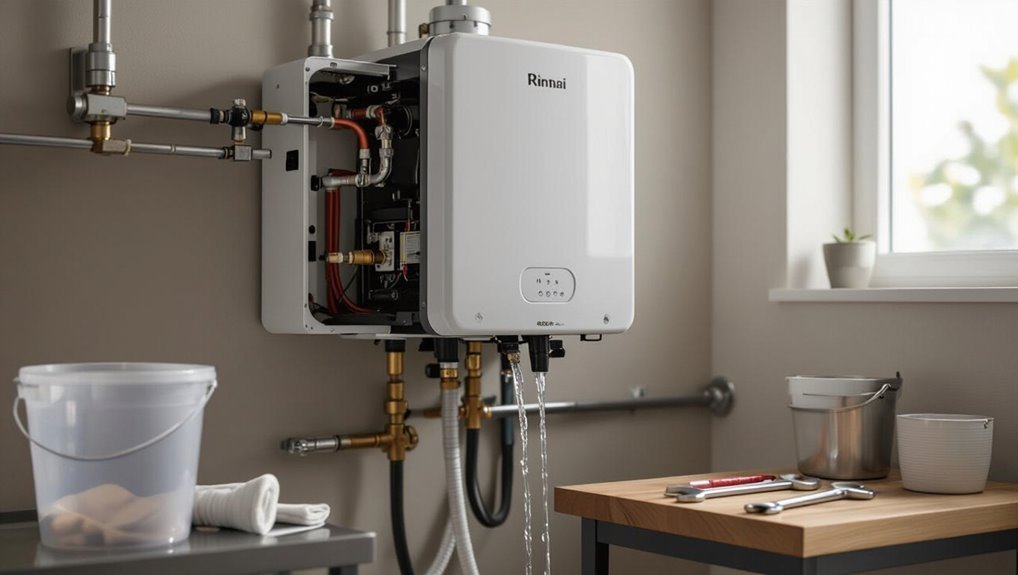
Descaling a Rinnai tankless water heater refers to removing mineral scale—primarily calcium and magnesium deposits—that accumulates on heat exchanger surfaces when hard water passes through the unit.
If not removed regularly, scale reduces heat transfer efficiency, increases energy use, shortens component life, and can lead to unsafe operating conditions or premature failure.
Recommended descaling frequency depends on local water hardness and usage: soft water may need annual service, moderate hardness every 6–12 months, and very hard water or heavy use every 3–6 months.
How scale forms in tankless water heaters
Scale forms in tankless water heaters when hard water—rich in dissolved minerals like calcium and magnesium—heats and leaves mineral deposits on heat exchanger surfaces.
Over time these deposits accumulate, narrowing passages, insulating metal, and reducing heat transfer.
Regular descaling, covered in guides on how to clean rinnai tankless water heater, removes buildup, restores performance, and prevents premature component wear.
Routine maintenance mitigates mineral accumulation.
Risks of not descaling regularly (efficiency, lifespan, safety)
When mineral buildup is allowed to accumulate on a Rinnai tankless water heater’s heat exchanger and internal passages, performance and safety consequences follow.
Reduced heat transfer raises fuel consumption and lowers flow rates. Persistent scale causes overheating, premature component failure, and costly repairs or replacement.
Ignored buildup can also trigger safety cutoffs, corrosion, and potential leaks, compromising reliability and increasing long‑term ownership costs.
Recommended descaling frequency by water hardness and usage
Proper maintenance scheduling depends on local water hardness and household demand; more minerals or higher flow needs shorten the interval between service cycles.
For soft water, descale every 18–36 months; for moderately hard water, every 12 months; for hard water, every 6 months or consider a water softener.
High-use households or commercial settings may require quarterly service to preserve efficiency and prevent damage.
Tools, materials, and safety gear needed
A concise checklist of parts and tools—including a pump, hoses, bucket, wrenches, and replacement filters—prepares the task.
The choice of descaling agent (white vinegar versus a commercial descaler) and appropriate concentrations or contact times should be noted.
Personal protective equipment such as gloves and eye protection, plus basic safety precautions like shutting off power and water, are essential.
Parts and tools checklist
Before beginning the service, assemble the necessary parts, tools, and safety gear so the task proceeds efficiently and without surprise.
Required items are listed for quick verification before starting the descaling and routine maintenance. Check each item and confirm compatibility with the Rinnai model.
- Adjustable wrench and pliers
- Garden hose and bucket
- Pump kit with hoses and fittings
- Protective gloves and safety goggles
Chemicals and alternatives: vinegar vs. commercial descaler
With the tools and protective gear organized, attention turns to the chemical options for descaling: distilled white vinegar or a commercial descaler.
Vinegar is affordable, biodegradable, and effective for light to moderate scale; it requires longer soak times.
Commercial descalers work faster, target heavy mineral buildup, and may include inhibitors to protect components.
Choose based on scale severity, manufacturer recommendations, and water hardness.
Personal protective equipment and safety precautions
Safety gear and clear procedures reduce injury and equipment damage during descaling.
The technician should wear chemical-resistant gloves, safety goggles, and a respirator if using concentrated descalers. Long sleeves and closed-toe shoes protect skin; ear protection may be needed in noisy areas.
A spill kit, neutralizer, and fire extinguisher should be on hand. Guarantee proper ventilation and follow manufacturer shutdown steps.
Preparing your Rinnai unit for maintenance
Before beginning service, the technician shuts off the gas, disconnects electrical power, and closes the cold-water supply to prevent flow into the unit.
The technician then locates and verifies the service and isolation valves plus the pressure relief valve to confirm they operate correctly and are accessible.
A quick pre-maintenance inspection checks for leaks, corrosion, loose fittings, and error codes before descaling commences.
How to shut off gas, electricity, and water supply safely
Begin by isolating the Rinnai tankless unit from all energy and water sources to prevent accidental activation or damage during maintenance.
Turn off the gas at the appliance shutoff or meter, switch electrical power off at the breaker, and close the main cold-water supply valve feeding the unit.
Depressurize remaining lines by opening a nearby hot faucet until flow ceases.
Locating service valves, isolation valves, and pressure relief valve
One set of valves typically resides at the unit’s water connections and a second set near the service ports; locating the service valves, isolation (shutoff) valves, and the temperature and pressure relief (T&P) valve is essential before any maintenance.
Identify each valve by labeling, note lever or wheel orientation, verify accessibility, and confirm clear drainage path for T&P discharge to prevent spills during servicing.
Pre-maintenance inspection: what to check before descaling
Why check the unit thoroughly before descaling? A concise inspection prevents damage and guarantees safety.
Verify power/gas are off, water supply isolation valves function, and the pressure relief valve moves freely.
Confirm no visible leaks, corrosion, or loose fittings.
Check inlet filter and condensate drain for blockages.
Note error codes and record model/serial for correct replacement parts.
Step-by-step descaling procedure for Rinnai tankless heaters
The procedure begins with setting up a pump, hoses, and bucket and bypassing the unit to isolate the cold and hot lines.
A measured descaling solution is circulated through the heat exchanger for a prescribed duration, with visible signs of scale removal and recommended repeat cycles if needed.
Finally, the system is thoroughly flushed with clean water and the normal plumbing and power connections are restored.
Setting up the pump, hoses, and bucket
Begin by arranging the pump, inlet and outlet hoses, and a clean five-gallon bucket near the Rinnai unit so all connections are within easy reach.
Position the pump on a stable surface at bucket level. Confirm hose diameter and quick-connect fittings match unit service ports.
Coil extra hose to prevent kinks. Keep the bucket empty until the pump and hoses are secured and leak-free.
How to bypass the heater and isolate the cold/hot lines
Once the pump, hoses, and bucket are confirmed leak-free and positioned, attention moves to isolating the heater and routing water through the service bypass.
Close the cold and hot supply valves to the unit. Open the heater’s service valves and connect pump hoses to the bypass ports.
Verify isolation by checking that house faucets are off and the bypass flows exclusively through the pump.
Mixing solution and running the circulation process
Mix a descaling solution according to the manufacturer’s ratio—typically one part white vinegar or commercial descaler to three or four parts water—into the service bucket, ensuring the total volume matches the pump and hose capacity so the heater receives continuous circulation.
Attach hoses, secure clamps, power the pump, and open service valves to circulate solution through the heater and return to the bucket, monitoring for leaks.
Flushing duration, signs of effective descaling, and repeating cycles
Circulate the descaling solution for the length of time recommended by Rinnai—typically 45 to 60 minutes per cycle—to allow the cleaner to dissolve mineral buildup without overstressing components.
Shorter runs may be sufficient in mildly scaled systems, while heavily scaled units can require multiple cycles of the same duration.
Effective descaling is indicated by clearer discharge, reduced flow restrictions and stabilized operating temperatures; repeat cycles until these signs persist.
Rinsing the system and restoring normal operation
Begin by shutting off the descaling pump and closing the heater’s service valves.
Open the inlet and outlet purge valves to flush with clean water, running until rinse water is clear and neutral pH.
Close purge valves, remove hoses, and reopen service valves.
Restore gas and power, then run hot water at fixtures to verify normal flow, temperature, and absence of leaks.
Descaling the condensate trap, inlet screen, and filters
Next, attention turns to the inlet water filter, debris screen, and condensate trap to guarantee unrestricted flow and proper drainage.
The inlet screen and filter are removed, rinsed of sediment, and inspected for damage, while the condensate trap and drain lines are cleared of scale and residue.
After cleaning, all components are reinstalled with new or checked seals and tested for leaks and correct operation.
Removing and cleaning the inlet water filter and debris screen
To access and clean the inlet water filter and debris screen, the technician first isolates the unit from water and power, relieves pressure, then removes the front cover and locates the filter housing and condensate trap; this guarantees safe, effective descaling and removal of trapped sediment before reassembly.
The technician unscrews the housing, extracts the mesh screen, rinses it under running water, brushes stubborn grit, inspects O-rings, and reinstalls securely.
Cleaning the condensate trap and drain lines
With the inlet screen and filter reinstalled, attention shifts to the condensate trap and drain lines, where scale and sediment can obstruct flow and cause corrosion or error codes.
The condensate trap should be removed, rinsed, and soaked in a vinegar solution to dissolve deposits.
Flush drain lines with clean water, inspect for clogs or damage, and replace any corroded components.
Reinstalling components and checking seals
Carefully reinstall the descaled condensate trap, inlet screen, and filters, ensuring each component seats evenly and aligns with its mating surfaces before tightening fasteners.
Inspect O-rings and gaskets for nicks or deformation; replace if compressed or brittle. Hand-tighten then torque to specification.
Restore covers and reconnect utilities.
Run a brief system test, observing for leaks, unusual noises, and proper flow; recheck seals if any issue appears.
Post-maintenance checks and system restart
After reassembling the unit and restoring water and power, the technician purges air from the lines and inspects all connections for leaks.
They confirm proper ignition and flame, scan the display for error codes, and verify steady hot water flow at multiple fixtures.
Finally, maintenance counters are reset and the service actions are recorded for future reference.
How to purge air and check for leaks
Open the service valves and slowly restore water supply while observing the system to purge trapped air; audible sputtering or intermittent flow indicates air being expelled.
After steady flow returns, inspect all unions, fittings, isolation valves, and drain connections for dampness.
Tighten or reseal any weeps.
Run water through a nearby tap while watching for pressure drops or visible leaks, and recheck after several minutes.
Verifying flame, error codes, and proper hot water flow
Restart the unit and observe its startup sequence to confirm proper operation.
The technician checks for a steady blue flame through the inspection port, watches the control panel for any error codes, and notes ignition behavior.
Open a hot faucet to verify consistent temperature and flow, ensuring no sputtering or pressure drops.
Log any anomalies for further diagnosis or service.
Resetting maintenance counters and recording service actions
Once maintenance tasks are complete, the technician resets the unit’s service counters and documents all actions, measurements, and any parts replaced to maintain an accurate service history.
They record date, technician name, flow rates, pressure readings, error codes cleared, and chemicals used.
The technician notes recommended follow-up intervals, attaches receipts or test prints, and updates digital logs for owner access and warranty compliance.
Troubleshooting common descaling problems
If error codes appear during or after descaling, the operator should consult the manual for code-specific guidance and isolate power and water before attempting resets.
Stubborn scale that does not dislodge may require stronger descaling agents or professional service to avoid component damage.
Any new leaks discovered after maintenance demand immediate shutdown, inspection of connections and seals, and prompt repair or replacement of affected parts.
What to do if the unit shows error codes during or after descaling
What should be done when a Rinnai tankless unit displays error codes during or after descaling? The technician should pause, note codes, and follow the manual.
Basic steps resolve many faults:
- Power-cycle unit and confirm pump/valve connections.
- Recheck descaling lines for airlocks or leaks.
- Flush with clean water to remove residual solution.
- Consult error-code chart; contact Rinnai support if unresolved.
When scale won’t dislodge: stronger solutions and professional service
Persisting mineral buildup that resists standard descaling requires escalating the approach while protecting the heat exchanger and internal components.
Increase soak time, use manufacturer-approved stronger descalers, and employ gentle mechanical agitation (soft brush or swab) only where safe.
If deposits remain, discontinue attempts and contact an authorized Rinnai technician for chemical treatment, component inspection, or controlled ultrasonic cleaning to prevent damage and preserve warranty.
Leak detection after maintenance and corrective steps
Inspect the unit and surrounding connections immediately after descaling, since small leaks often appear once seals and fittings are disturbed.
Technicians should dry joints, run water and visual checks, and use tissue to pinpoint seepage.
Tighten loose fittings, replace damaged O-rings or gaskets, and reapply thread sealant where needed.
If leaks persist, shut off water and contact certified service for repair.
When to call a professional technician
Homeowners should weigh safety and warranty implications before attempting DIY descaling, since improper procedures can void coverage or create hazards.
Immediate professional service is recommended for persistent error codes, gas or water leaks, strange odors, or inability to restore normal function.
A technician will assess system condition, perform safe chemical and mechanical descaling, and provide documentation and recommendations for future maintenance.
Safety and warranty considerations for DIY descaling
Several factors determine whether a homeowner should proceed with DIY descaling or call a professional technician: the unit’s warranty terms, the complexity of the required procedure, local codes, and the individual’s comfort with plumbing and electrical work.
Homeowners should verify manufacturer warranty conditions, follow prescribed service intervals, and avoid actions that void coverage.
When unsure about risks, hire a certified technician to preserve safety and warranty compliance.
Signs that require immediate professional service
After reviewing warranty limits and personal skill, recognition of certain symptoms should prompt immediate contact with a certified technician.
Persistent error codes, gas smell, pilot/light failures, repeated overheating, water leaks from internal components, sharp pressure fluctuations, or complete loss of hot water despite power and gas supply indicate serious faults.
Attempting repairs beyond basic maintenance risks damage and voiding warranty; call a pro.
What to expect from a professional descaling visit
When mineral buildup or persistent performance issues exceed basic maintenance, a professional descaling visit typically begins with a diagnostic check of error codes, water flow, and inlet/outlet temperatures to confirm limescale as the root cause.
Then the technician proceeds with:
- Isolation and safe shutdown
- Chemical pump circulation and flushing
- Inspection of heat exchanger and components
- Reassembly, leak test, and performance verification
Extending the life of your Rinnai tankless water heater
To extend the service life of a Rinnai tankless water heater, consider water treatment options such as water softeners or scale inhibitors to reduce mineral buildup.
Between full descaling procedures, perform simple periodic maintenance tasks like flushing filters and checking inlet screens.
A maintenance schedule tailored to local water hardness—more frequent checks in hard-water areas—helps prevent premature wear.
Water treatment options: water softeners and scale inhibitors
Because mineral buildup is the leading cause of reduced efficiency and premature failure in tankless units, selecting appropriate water treatment—typically a water softener, a scale inhibitor, or a combination—becomes essential for extending a Rinnai heater’s service life.
Water softeners remove hardness minerals; template or electronic scale inhibitors alter deposition.
Choose based on water hardness, flow requirements, maintenance capacity, and manufacturer recommendations.
Simple periodic maintenance tasks between descales
Perform routine visual checks and modest upkeep between descales to keep a Rinnai tankless water heater operating efficiently and to spot problems early.
Inspect external venting, condensate lines and fittings for obstructions or leaks. Clean inlet screens and external filters, verify proper combustion air flow, tighten accessible connections, and test error codes via the unit display.
Document findings and address minor issues promptly.
Recommended maintenance schedule based on water hardness
Water hardness directly determines how often a Rinnai tankless water heater requires descaling and related maintenance.
For soft water (<3 grains/gallon), inspect annually and descale every 24–36 months.
For moderate hardness (3–7 gpg), inspect semiannually and descale every 12–18 months.
For hard water (>7 gpg), inspect quarterly and descale every 6–12 months; consider a water softener for longevity.
Comparison of descaling methods and products
A concise comparison of common descaling options helps owners choose between household and commercial products based on cost, effectiveness, and safety. The following table summarizes key pros and cons for vinegar, citric acid, and commercial descalers to inform that choice. Practical recommendations should follow based on system condition and user comfort with chemicals.
| Method/Product | Quick Summary |
|---|---|
| Vinegar — low cost, mild effectiveness; safe for many but slower | |
| Citric acid — moderate cost, good at removing scale; gentler than strong acids | |
Pros and cons of vinegar, citric acid, and commercial descalers
Choosing the right descaling agent involves balancing effectiveness, safety, cost, and convenience for a Rinnai tankless water heater.
Vinegar: accessible and safe but slower, may require larger volumes and can leave odors.
Citric acid: faster, food-grade, low odor, requires measured concentration.
Commercial descalers: formulated for speed and residues, often pricier and may contain harsher chemicals needing cautious handling.
Cost, effectiveness, and safety comparison
Having weighed vinegar, citric acid, and commercial descalers for their pros and cons, the next consideration is a head-to-head comparison of cost, effectiveness, and safety to guide selection for a Rinnai tankless unit.
Vinegar: cheapest, moderate effectiveness, safe with dilution but slower.
Citric acid: low cost, strong descaling, safer for metals.
Commercial: higher cost, fastest, formulated inhibitors; follow label for safety.
Checklist for a complete DIY descaling session
Before beginning the descaling process, gather the necessary tools, safety gear, and replacement parts so the job proceeds efficiently and without surprises.
A concise checklist guarantees safety, prevents delays, and protects the unit.
Essential items include:
- Protective gloves, goggles, and respirator
- Descaling pump, hoses, and bucket
- Manufacturer-approved descaler and fresh water
- Replacement inlet/outlet filters and O-rings
Conclusion
Regular descaling keeps a Rinnai tankless water heater running like a well-trained athlete—smooth, efficient, and reliable. Completing the steps outlined prevents scale buildup, protects components such as the heat exchanger and condensate trap, and reduces energy waste. For stubborn deposits or unfamiliar issues, a licensed technician should be consulted. Routine maintenance, proper water treatment, and periodic inspections extend service life and help avoid catastrophic failures, ensuring consistent hot water performance.