How to Install an Anode Rod in a Water Heater: Step-by-Step DIY Guide for Beginners
To replace a water heater anode rod and prevent tank corrosion, follow these steps: First, shut off the power and water supply. Next, drain enough water to access the rod. Use a socket or breaker bar to remove the old rod, ensuring you match the new rod type and thread. Apply thread sealant, tighten it to the manufacturer’s specifications, then refill the tank and check for leaks before restoring power. Regular inspections and maintenance can extend your tank’s lifespan. For troubleshooting and advanced options, refer to additional guidance.
What an Anode Rod Is and Why It Matters for Your Water Heater
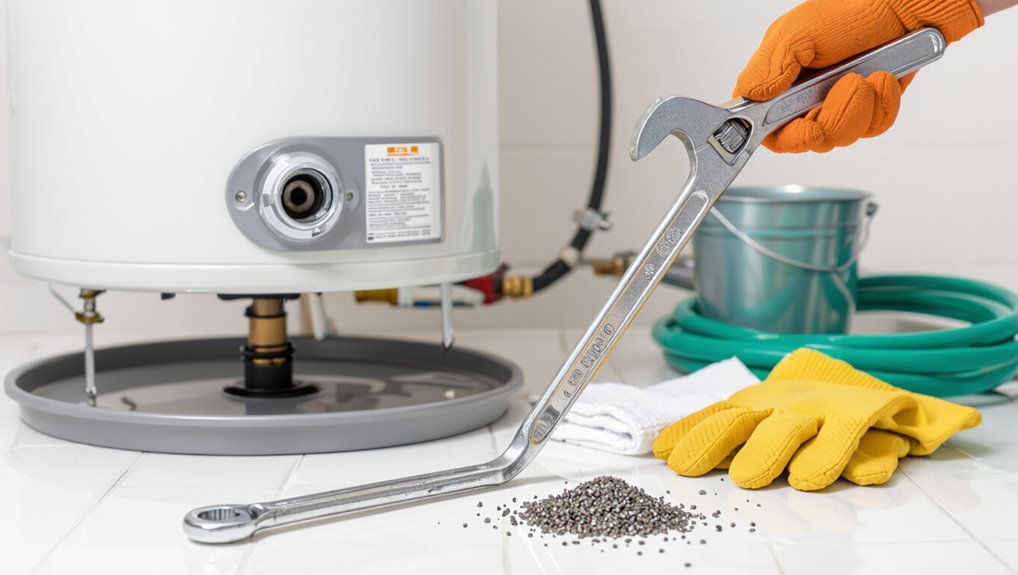
An anode rod is a sacrificial metal component installed in a water heater to attract corrosive elements and protect the tank lining from rust.
Common types include magnesium, aluminum, zinc, and powered anodes, each offering different corrosion resistance and suitability for water chemistry.
Signs that the anode needs replacement include rotten-egg odor, discolored or rusty water, visible rod deterioration, or accelerated tank corrosion.
Purpose of the anode rod in corrosion protection
Protects the tank and extends its life by corroding in place of the water heater’s metal components, the anode rod serves as a sacrificial metal that attracts corrosive ions.
It creates a predictable corrosion path, preserving the tank’s steel and fittings. Understanding this purpose is essential when learning how to install anode rod in water heater and when planning inspections or replacements.
Types of anode rods (magnesium, aluminum, zinc, powered)
Choices among magnesium, aluminum, zinc, and powered anode rods determine how a water heater resists corrosion and what maintenance it will require.
Magnesium offers strong protection and better performance in soft water.
Aluminum is cost-effective but less ideal for potable taste.
Zinc combats sulfur odors.
Powered anodes use impressed current for long life and minimal sacrificial consumption, requiring electrical connection and monitoring.
Signs a water heater needs a new anode rod
How can a homeowner tell when the anode rod needs replacement?
Visible corrosion, heavy rust-colored water, metallic or sulfurous odors, and frequent tank leaks indicate depletion.
Reduced hot water quality, flaky sediment in faucets, and rapid deterioration of sacrificial rod material during inspection signal replacement is necessary.
Regular checks every 1–3 years prevent tank corrosion and extend heater lifespan.
How to Determine the Right Anode Rod for Your Water Heater
Selecting the correct anode rod begins with checking the water heater manufacturer’s specifications for compatible lengths, diameters, and thread types.
The choice between a sacrificial magnesium/aluminum rod and a powered anode depends on water chemistry and corrosion risk, while proper sizing guarantees a secure fit and effective protection.
Before purchasing, one should verify required dimensions and gather necessary tools and replacement parts such as wrenches, sealant, and a new gasket.
Checking manufacturer specifications and tank compatibility
Before choosing an anode rod, the owner should consult the water heater’s manual and the manufacturer’s specifications to confirm compatible rod types, lengths, and connection styles.
These documents also note warranty requirements and any materials to avoid. Manufacturers may specify preferred alloys (magnesium, aluminum, or zinc blends) and installation positions, and will indicate whether aftermarket rods are permitted.
Verify surface coatings and tank lining compatibility before purchase.
Length, diameter, and thread type considerations
After confirming compatible materials and manufacturer requirements, attention turns to the anode rod’s physical dimensions: length, diameter, and thread type determine fit and effectiveness.
Measure tank depth for full-length or segmented rods; verify diameter for clearance through openings.
Match thread type (usually 3/4″ NPT or proprietary fittings) to avoid leaks.
Incorrect sizing risks poor protection and installation difficulty.
Choosing between sacrificial and powered anode rods
Why choose a sacrificial anode over a powered one, or vice versa?
The sacrificial zinc/aluminum/magnesium rod corrodes to protect the tank, simple and low-cost.
Powered (impressed current) systems use a small electrical unit to prevent corrosion, offering longer protection and less maintenance but higher upfront cost and installation complexity.
Selection depends on water chemistry, budget, and maintenance willingness.
Tools and replacement parts checklist
A concise checklist helps guarantee the anode replacement proceeds smoothly: basic hand tools (adjustable wrench or socket set sized for the anode hex head, T-handle or breaker bar for stubborn rods), thread sealant or plumber’s tape rated for potable water, a torque wrench if specified by the manufacturer, and safety gear (gloves and eye protection).
- Replacement anode (correct length/type)
- Socket or hex driver
- Thread sealant/tape
- Bucket, rags, flashlight
Safety Precautions Before You Start
Before beginning, the technician verifies all power and gas to the water heater are safely shut off according to manufacturer instructions.
They then close the water supply and relieve tank pressure to prevent scalding or leaks.
Finally, appropriate personal protective equipment is donned and the work area is cleared and well-lit to reduce hazards.
Turning off power and gas safely
Several key steps must be taken to cut power and gas to the water heater safely.
First, switch off the circuit breaker serving the heater; verify power is off with a non-contact voltage tester.
For gas units, turn the gas control knob to “off” or shut the dedicated gas valve.
Allow time for pilot extinguishment and ventilate the area before proceeding.
Shutting off water supply and relieving pressure
Shut off the cold-water supply valve feeding the heater and open a hot-water tap nearby to relieve residual pressure in the tank and plumbing.
Close any upstream isolation valves and confirm inflow has stopped.
Open the heater’s pressure-relief valve briefly if accessible to fully depressurize.
Drain a few gallons via the drain valve to lower water level before removing the anode rod, preventing spills and reducing internal pressure.
Personal protective equipment and work area setup
With the water flow stopped and pressure relieved, attention turns to personal protective equipment and arranging the work area.
The installer wears safety glasses, gloves, and closed-toe shoes. A flashlight, bucket, and towels are positioned to contain spills. Tools are organized on a stable surface.
Electrical sources are identified and avoided. Adequate ventilation and clear access to exits are guaranteed.
Step-by-Step Guide to Removing the Old Anode Rod
The guide explains how to locate the anode rod on both electric and gas water heaters and when tank draining or partial draining is required.
It then describes the proper tools and techniques for loosening the rod and outlines methods for addressing a stuck or heavily corroded anode.
Practical tips and safety reminders accompany each step.
Locating the anode rod on electric vs. gas water heaters
Locating the anode rod differs visibly between electric and gas water heaters: on most electric models it sits under a hex-head plug centered on the tank’s top, while on gas models it is usually accessed through a similar plug on the tank’s top or occasionally through a side opening near the upper third of the tank.
Visual inspection identifies plugs, labels, and access covers; consult the manual for model-specific locations.
Draining or partially draining the tank if necessary
Before removing the anode rod, partially drain the tank to lower the water level below the rod’s opening and release pressure; this prevents spills and makes extraction safer and easier.
Close cold-water supply, attach a hose to the drain valve, open a nearby hot faucet to vent, and open the drain valve slowly.
Drain only as much as needed to expose the rod.
Loosening the anode rod with correct tools and techniques
With the water level lowered and pressure relieved, attention shifts to freeing the anode rod itself.
A suitably sized socket wrench or breaker bar and a long extension is selected. The technician positions the tool squarely on the hex head, applies steady torque, and uses controlled, even force to avoid rounding.
Periodic repositioning and inspection guarantee proper engagement until the rod begins to turn.
Dealing with a stuck or corroded anode rod
When the anode rod resists rotation or shows heavy corrosion, the technician proceeds methodically to free it, prioritizing safety and minimizing damage to the tank.
They apply penetrating oil, allow soak time, tap gently to break corrosion, and use a breaker bar or pipe for leverage.
If still stuck, heat around the head or cut and extract the remains, then inspect the tank for damage.
Step-by-Step Guide to Installing the New Anode Rod
The new anode rod should be prepared with an appropriate thread sealant and positioned for proper insertion.
The installer must follow manufacturer torque specifications to avoid damage, then refill the tank while bleeding air from the system.
Once full, power or gas is restored and the unit is inspected for leaks before returning to service.
Preparing the new anode rod and applying thread sealant
Before inserting the new anode rod, the installer inspects it for straightness, integrity of the hex head, and any machining debris. Then, the installer selects an appropriate thread sealant.
The installer cleans threads with a wire brush, removes dust, and tests fitment. Teflon tape or pipe dope rated for potable hot water is applied evenly to male threads, avoiding buildup on the first thread.
Proper insertion and torque guidelines
Begin insertion by aligning the anode rod with the tank opening and feeding it straight in to prevent binding or damage to the threads.
Advance it evenly until fully seated. Use a torque wrench or breaker bar, tightening to the manufacturer’s specified torque—typically 20–30 ft·lb for common residential tanks.
Avoid over-tightening; confirm a snug, leak-free fit without distorting the rod or tank fitting.
Re-filling the tank and removing air from the system
Once the anode rod is properly seated and torqued, attention shifts to refilling the tank and purging trapped air to restore normal operation.
Close the drain, open the cold-water supply slowly, and listen for steady flow into the tank.
Open a hot-water fixture until water runs without sputtering to bleed remaining air.
Check for leaks at the anode connection and fittings during refill.
Restoring power or gas and testing for leaks
Restore electrical or gas service only after confirming the tank is full and all fittings are tight; then reapply power or relight the pilot according to the manufacturer’s instructions.
Observe the tank and connections for several minutes, checking for drips or dampness. Tighten any weeping fittings, drain and reseat seals if needed.
Monitor pressure and temperature settings, ensuring normal operation before leaving the unit unattended.
Post-Installation Checks and Maintenance
After installation, the technician inspects connections for leaks and verifies the water heater reaches the correct temperature.
They record the installation date and anode type on the unit or in maintenance logs for future reference.
Regular inspections and recommended replacement intervals are noted to guarantee continued corrosion protection.
Inspecting for leaks and verifying water temperature
Begin by visually inspecting all fittings, the anode rod access point, pressure relief valve, and nearby pipe joints for signs of moisture, drips, or corrosion; small leaks often appear as mineral deposits or damp spots rather than obvious streams.
Then open a hot faucet, measure outlet temperature with a thermometer, compare to thermostat setting, and recheck for leaks under operating pressure.
Recording installation date and anode type for future reference
Why note the installation date and anode type? Recording both provides a clear service history and identifies the material (magnesium, aluminum, or zinc) used.
This aids future troubleshooting, warranty claims, and matching replacements. Keep the date, brand, model number, and purchase source in a durable log attached to the heater and in digital form for easy access by homeowners or technicians.
Recommended inspection and replacement intervals
A routine schedule for inspecting and replacing anode rods helps prevent premature tank corrosion and maintains heater efficiency.
Inspect every 12 months in typical water conditions; every 6 months if water is aggressive or soft.
Replace when rod is less than 50% or heavily pitted, or after 3–5 years for zinc/aluminum or 5–7 years for magnesium depending on usage and water quality.
Common Problems and How to Fix Them
Common installation and post-installation issues can include stripped threads, cross-threading, or other damaged fittings that compromise the seal.
Persistent corrosion or rusty water after replacement signals either an undersized or failing rod or underlying tank problems.
Rapid anode degradation warrants inspection of water chemistry and consideration of a different anode material or a whole-house treatment.
Stripped threads, cross-threading, or damaged fittings
Stripped threads, cross-threading, and damaged fittings frequently occur when anode rods are removed or installed without proper alignment, torque control, or the right tools.
Inspect threads and fittings; if minor, chase with appropriate tap/die or clean with a wire brush and thread sealant.
Replace severely damaged fittings or the tank’s sacrificial port.
Use correct tools, lubes, and steady alignment to prevent recurrence.
Persistent corrosion or rusty water after replacement
Even after addressing thread damage and ensuring proper installation, rust-colored water or ongoing corrosion can persist if underlying causes are missed.
Inspect tank interior for existing rust, check sacrificial/anode type compatibility, verify grounding straps and electrical connections, and flush sediment thoroughly.
Test water chemistry (pH, hardness, chloride).
If corrosion sources remain, consult a plumber to evaluate tank condition and mitigation options.
What to do if the anode rod keeps degrading quickly
If an anode rod deteriorates unusually fast, it signals an aggressive corrosion environment or an incompatible rod type rather than a manufacturing defect.
Inspect water chemistry (pH, chloride, hardness), check stray electrical currents and grounding, and confirm rod material (magnesium, aluminum, zinc) suitability.
Consider switching rod type, installing a dielectric union or impressed current cathodic protection, and consult a plumber for persistent rapid depletion.
When to Hire a Professional Instead of DIY
If corrosion, persistent leaks, unusual noises, or visible tank damage are present, a plumber or certified technician should be contacted rather than attempting a DIY repair.
Additionally, when the anode rod is difficult to access, requires specialized tools, or the water heater is under warranty, professional service is advisable.
The decision can also hinge on cost: DIY parts are cheaper but professional replacement protects against mistakes and includes labor costs and potential warranty coverage.
Warning signs that require a plumber or technician
Recognize that some issues with anode rod replacement exceed typical homeowner skills and require a licensed plumber or technician.
Immediate professional attention is advised for leaking tanks, severe corrosion, fused or broken fittings, gas line or burner access, electrical component faults, or inaccessible rods due to sediment.
Also seek help when water contamination, persistent odors, or pressure-relief valve failures occur.
Safety and warranty concerns justify calling a pro.
Cost comparison: DIY vs professional replacement
While replacing an anode rod can save money for a competent homeowner with basic tools, the overall cost comparison must weigh parts, time, and potential risks against professional labor and warranty protection. DIY limits labor fees but increases liability; professionals add cost yet guarantee warranty and safety. Consider complexity, tank access, and confidence when deciding.
| Factor | DIY | Professional |
|---|---|---|
| Cost | Low parts | Higher labor |
| Time | Variable | Faster |
| Risk | Higher | Lower |
| Warranty | May void | Protected |
| Complexity | Must assess | Handles all |
Tips to Extend Water Heater Life and Improve Corrosion Resistance
The article next outlines practical measures to extend a water heater’s service life and reduce corrosion risk, including water quality treatments and sacrificial anode strategies.
It compares powered anode conversions with traditional sacrificial rods, summarizing key advantages and drawbacks.
A concise routine maintenance checklist is provided to help owners prioritize inspections and replacements.
Water quality treatments and sacrificial anode strategies
Mitigating corrosion in a water heater requires both treating incoming water and strategically managing sacrificial anodes to slow tank degradation.
Water softening, pH adjustment, and sediment filtration reduce corrosive factors.
Regular inspection and timely replacement of magnesium or aluminum anodes tailored to water chemistry prolong life.
Consider using dual anodes or adjusting maintenance intervals based on chloride levels and water hardness for peak protection.
Using powered anode conversions and pros/cons
Several homeowners and technicians increasingly opt for powered anode conversions to replace traditional sacrificial rods, using impressed-current devices that arrest corrosion by supplying a small, steady electrical charge to the tank’s interior.
Benefits include longer effective protection, reduced material replacement, and suitability for high-mineral water.
Drawbacks include higher upfront cost, electrical connection requirements, potential legal or warranty issues, and occasional controller maintenance.
Routine maintenance checklist
After considering powered anode conversions and their trade-offs, a clear maintenance regimen helps maximize any corrosion-protection strategy’s effectiveness.
Inspect annually: visual tank check, anode condition, and leak points. Flush sediment every 6–12 months. Test pressure relief valve yearly. Replace anode when depleted.
Recommended checklist:
- Visual inspection
- Anode measurement
- Tank flush
- Valve test
Quick Troubleshooting Reference
A concise checklist highlights common installation problems such as loose fittings, cross-threading, or insufficient sealing.
It also outlines immediate steps for leaks—shutting off the water supply and draining the tank—and for electrical concerns—cutting power at the breaker and contacting a qualified electrician.
This quick reference helps prioritize actions and determine when professional service is required.
Short checklist for common installation issues
Begin by confirming basic conditions: the tank is depressurized and drained, the replacement rod matches the heater model and thread type, and necessary tools and sealant are on hand.
Check thread alignment, apply correct sealant or tape, tighten to specified torque, avoid cross-threading, verify full seating, inspect for leaks after refill, guarantee venting restored, and retest temperature/pressure controls for normal operation.
Emergency steps for leaks or electrical concerns
If a leak or electrical issue appears during or after anode rod replacement, stop work immediately and follow a concise emergency checklist.
Shut water supply and drain a few gallons to reduce pressure.
Cut power at the breaker.
Contain visible water with towels.
Call a licensed plumber or electrician for inspection and repair; document the scene for reference.
- Turn off water
- Drain pressure
- Kill power
- Call professional
Conclusion
After dutifully replacing the sacrificial anode to save a tank from its own slow demise, the homeowner retires to admire a job that is simultaneously heroic and profoundly unromantic. The corroding metal will not notice gratitude, yet a few inches of magnesium will cheerfully vanish so the tank endures. In other words, by welcoming controlled decay, the DIYer achieves victory over corrosion—then swears they’ll never enjoy plumbing this much again.