How to Change Bathtub Faucet Handles: A Step-by-Step DIY Guide
Changing bathtub faucet handles is a simple DIY project that usually takes between 30 to 90 minutes. To get started, turn off the water supply and drain the lines. Then, remove the trim and loosen any set screws or escutcheons to access the cartridges or stems. Take off the old handles and worn O-rings, replace them with new cartridges or handles, and reinstall the trim. Finally, restore the water supply and test the faucet for any leaks. For detailed steps, necessary tools, and troubleshooting tips, continue reading.
What to Expect When Changing Bathtub Faucet Handles
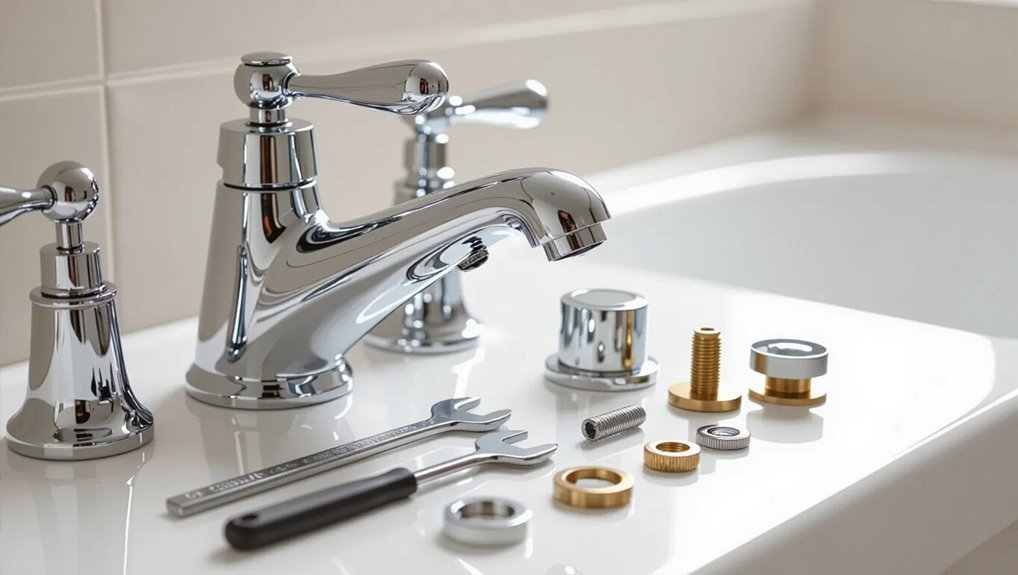
The section outlines the basic steps and a typical time frame for replacing bathtub faucet handles, from removal to installation.
It lists common tools and materials such as screwdrivers, Allen wrenches, replacement cartridges or handles, and plumber’s grease.
It also highlights essential safety measures, including shutting off the water supply and taking precautions to avoid damaging trim or plumbing.
Quick overview of the process and time required
Although skill level and faucet type affect the work, changing bathtub faucet handles is typically a short, straightforward task for a home DIYer.
The basic steps—shutting water, removing trim, swapping handles, testing—follow a predictable sequence. Most replacements take 30–90 minutes depending on access and corrosion.
Simple jobs finish in under an hour; tougher ones may require extra time for stuck parts.
Common tools and materials you’ll need
Several basic tools and a few common materials are usually sufficient to replace bathtub faucet handles.
Necessary items include a screwdriver set (flat and Phillips), Allen keys, adjustable wrench or pliers, and a hex or socket set for specific escutcheon screws.
Materials: replacement handles, new trim screws, plumber’s grease, and optional silicone or plumber’s tape for minor sealing and smooth operation.
Safety precautions and water shutoff procedures
Begin by turning off the water supply to the tub and draining any remaining water from the lines to prevent unexpected sprays or spills during handle removal.
Wear safety glasses and gloves to protect against debris and sharp edges.
Make certain electrical devices are kept dry.
Use proper lighting and stable footing.
Verify shutoff by testing faucet before proceeding with handle disassembly.
Identifying Your Faucet Type and Handle Style
First, the type of faucet—single-handle or double-handle—determines basic replacement needs and installation steps.
Next, identification of the internal valve style (cartridge, ball, ceramic disc, or compression) guides part selection and repair technique.
Finally, locating the manufacturer and model number, often stamped on the valve body or behind trim, guarantees compatible replacement parts.
Single-handle vs. double-handle faucets
Identifying whether a bathtub faucet uses a single handle or two separate handles is the first practical step in planning a handle replacement.
Single-handle units control temperature and flow with one lever or knob, often mounted centrally.
Double-handle setups separate hot and cold controls, usually mirrored on either side of the spout.
Each style dictates different replacement parts and mounting considerations.
Cartridge, ball, ceramic disc, and compression valve differences
Several common internal mechanisms—cartridge, ball, ceramic disc, and compression valves—define how a faucet regulates water flow and temperature, and recognizing which one is installed guides correct handle replacement.
- Cartridge: smooth operation, single or double handle, removable cartridge.
- Ball: single-handle, spherical mixing mechanism, requires specific cams.
- Ceramic disc: durable, two ceramic plates, long-lasting.
- Compression: older, separate hot/cold stems, washer-driven.
How to determine manufacturer and model for replacement parts
Why check the manufacturer and model before buying parts? Identifying the brand and model guarantees compatibility and avoids returns.
Inspect the escutcheon, handle markings, and cartridge shape; measure stem diameter and port spacing.
Photograph unique features and serial numbers. Consult receipts, manuals, or manufacturer websites.
When uncertain, take parts to a hardware store for comparison.
Preparing for the Job
Before beginning work, the homeowner should shut off the water supply and open the faucet to relieve any remaining pressure.
They should protect the tub and nearby surfaces with towels or a drop cloth to prevent scratches and water damage.
All removed parts should be laid out in order and reference photos taken to aid correct reassembly.
How to shut off water and relieve pressure
Locate and shut off the water supply to the tub—typically the individual shutoff valves behind an access panel or the home’s main shutoff if individual valves are absent—then open the faucet to drain remaining water and relieve trapped pressure.
Close both hot and cold handles, lift the diverter if present, and run the faucet until flow stops.
Check for residual drips and place a bucket under any leaks.
Protecting tub and surrounding surfaces
Several protective layers should be put down to prevent scratches, dents, and water damage to the tub and surrounding surfaces.
Use a soft towel or foam pad directly on the tub, then cover with a durable drop cloth. Secure edges with painter’s tape to keep debris contained.
Protect nearby counters and fixtures with cardboard or plastic sheeting to catch tools and parts.
Laying out parts and taking reference photos
Gather the removed handles, screws, escutcheons, and any small trim pieces on a clean, flat surface in the order they were removed to make reassembly straightforward.
Photograph each component group and the exposed valve assemblies from multiple angles, including close-ups of worn parts and mounting orientations.
Label photos and parts plainly, store screws in labeled containers, and note any irregularities for reference during installation.
Step-by-Step: Removing Old Bathtub Faucet Handles
The technician begins by locating and loosening the handle set screw and removing the trim plate to expose internal components.
Decorative caps and handles are lifted off carefully to avoid scratching finished surfaces, then escutcheons are unscrewed and set aside.
Once cartridges or valve stems are accessible, they are removed and inspected for corrosion, wear, or other damage before proceeding.
Accessing the handle set screw and trim plate
Begin by turning off the water supply and testing the handle to confirm no pressure remains; this guarantees a safe, dry workspace before any hardware is disturbed.
Locate the set screw—often under a small access on the handle base or hidden beneath a decorative plug. Use the correct hex or flat driver to loosen it.
Remove the trim plate fasteners, noting screw types and positions for reassembly.
Removing decorative caps and handles safely
Carefully pry off any decorative caps with a plastic putty knife or cloth-covered flathead to avoid scratching the finish, exposing the handle’s set screw or retaining pin;
once visible, loosen the screw with the correct Allen key or screwdriver while supporting the handle to prevent it from dropping.
Withdraw the handle straight off the splined or keyed stem, keeping small parts contained and noting orientation for reinstallation.
Taking off escutcheons, cartridges, and valve stems
Once the handle is removed, access to the escutcheon and valve assembly becomes straightforward: the escutcheon plate is unscrewed or pried off gently to expose the cartridge or stem.
Retain screws and trim. For cartridge faucets, remove retaining clips or nuts then pull the cartridge straight out.
For stem-style valves, unthread and extract the stem. Keep parts organized for reassembly.
Inspecting internal parts for wear or damage
With the escutcheon and cartridge or stem removed and parts laid out, the next step is a close inspection of internal components for wear or damage.
Examine O-rings, seals, seats, springs, and retaining clips for cracks, flattening, corrosion, or mineral buildup.
Check cartridge body and valve bore for scoring or pitting.
Note parts needing replacement and photograph arrangement for reassembly.
Selecting and Installing Replacement Handles
Choosing replacement handles begins with verifying compatibility and finish to match the existing valve and bathroom decor.
The installation typically requires fitting new cartridges or valve components, replacing stems, screws, and seals as needed, and securing trim, escutcheons, and handle assemblies to manufacturer specifications.
Proper alignment and torque guarantee a leak-free, functional result.
Choosing compatible replacement handles and finishes
Several factors determine whether a replacement handle will fit and look right: valve type, spindle size and shape, mounting method, and finish compatibility.
Measure existing parts, note single- or double-handle systems, and match splines or set-screw orientations.
Choose a finish that resists corrosion and complements fixtures; confirm manufacturer cross-references and warranty coverage.
Keep hardware and trim dimensions consistent for proper operation and appearance.
Installing new cartridges or valve components
After verifying compatibility of valve type, spindle, and finish, attention turns to installing the replacement cartridge or valve internals that make the handle operate.
The old cartridge is removed, seals and O-rings inspected and replaced as needed.
Insert the new cartridge aligned to indexing tabs, secure retaining clips or nuts, and test valve operation and water flow before reassembling trim and handles.
Securing trim, escutcheons, and handle assemblies
Begin by matching the replacement handles and trim to the existing escutcheon dimensions, valve spindle type, and finish so parts fit without forcing or gaps.
Center escutcheons, slide them flush against the wall, and secure with supplied screws or mounting clips.
Align handle splines to the spindle, tighten set screws, and confirm smooth operation and even spacing before restoring water and testing for leaks.
Replacing stems, screws, and seals correctly
Select replacement stems, screws, and seals by matching their dimensions, valve type, and material to the existing components to guarantee proper function and longevity.
Inspect old parts for wear, note thread pitch and seat design, then source OEM or exact-match aftermarket replacements.
Install stems with appropriate plumber’s grease, torque screws to specification, and fit new seals evenly.
Test for leaks and smooth operation.
Reassembling and Testing the Faucet
Once the new handles are secured, the water supply is restored and the faucet is inspected for leaks at the cartridge and connections.
Handle tension and alignment are adjusted to guarantee smooth operation and proper stop positions.
If problems persist, common troubleshooting steps address misalignment, loose fittings, or cartridge seating issues.
Restoring water supply and checking for leaks
After reassembling the handle components and tightening all fasteners to the manufacturer’s torque specifications, the water supply valves should be opened gradually while observing the faucet and surrounding connections for any signs of leakage.
Water flow is tested by operating handles for hot and cold separately, inspecting under the tub and behind escutcheons.
Any drip requires immediate shutoff and retightening or gasket replacement.
Adjusting handle tension and alignment
With the water restored and connections confirmed watertight, attention shifts to fine-tuning the handle tension and alignment to secure smooth operation and proper aesthetics.
The installer tests rotation and stops, adjusts packing or set screws for desired resistance, centers handles relative to escutcheons, and tightens retaining nuts evenly.
Final checks secure simultaneous full-range movement and consistent visual alignment before finishing.
Troubleshooting common installation issues
Begin reassembly by verifying each component is correctly seated and torqued to specification before turning the water back on.
After restoring flow, observe for leaks, handle play, or temperature crossover.
Tighten loose fittings, reseat cartridges or O‑rings, and replace damaged seals.
Confirm smooth operation and correct hot/cold orientation.
If issues persist, shut water, document symptoms, and consult a plumber.
Common Problems and How to Fix Them
After reassembly, several issues may still appear and should be checked systematically.
Leaking handles require inspection of cartridge seating and packing, while stiffness often indicates worn stems or the need for a plumber-grade silicone lubricant.
The homeowner should distinguish a dripping spout (valve or cartridge problem) from a handle leak (seal or bonnet issue) before proceeding with targeted repairs.
Leaking handles after replacement and diagnostic steps
Investigate leaking handles promptly to prevent water damage and restore proper function; leaks after replacement typically stem from misaligned cartridges, improperly seated seals, loose retaining nuts, or damaged O-rings.
Diagnose by isolating water, removing handle to inspect parts, checking seal seating and cartridge alignment, tightening retaining hardware to spec, and replacing worn O-rings or seals.
Test under pressure for remaining leaks.
Stiff or hard-to-turn handles and lubrication tips
A few compact steps used to locate and fix leaks also reveal causes of stiff or hard-to-turn handles, since corrosion, mineral buildup, worn O-rings, or dried lubricant often appear when the cartridge and seals are inspected.
Clean mineral deposits with vinegar or a descaler, replace damaged O-rings, and apply plumber’s silicone grease to moving parts.
Reassemble and test for smooth operation.
Dripping spout vs. handle leak differentiation
How can one tell whether a leak is coming from the spout or the handle?
Observe leak origin with dry surfaces, then activate water slightly. If water emerges from the spout while handles are off, the cartridge or spout seal likely fails.
If water appears around the handle base, packing, O-rings, or cartridge seats are suspect.
Isolate source, replace faulty seals or cartridge accordingly.
Maintenance Tips to Extend Handle Lifespan
Routine cleaning with nonabrasive products preserves finishes and prevents mineral buildup.
Regular replacement of seals and cartridges reduces leaks and wear before handles fail.
A professional plumber should be contacted for persistent leaks, complex cartridge work, or when unsure about parts compatibility.
Routine cleaning without damaging finish
Preserve the finish by using gentle, nonabrasive cleaning methods and products formulated for the fixture’s material.
Regularly wipe with a soft microfiber cloth and mild soap, rinsing thoroughly. Avoid bleach, abrasive pads, and acidic cleaners.
Dry after cleaning to prevent mineral spots. For stubborn deposits, soak a cloth in diluted vinegar briefly, then rinse and dry to protect plating and sealants.
Preventive replacement of seals and cartridges
Inspect seals and cartridges periodically and replace them before failure to prevent leaks, stiffness, or mineral-induced wear that shorten handle life.
Schedule inspections every six to twelve months, clean components, and match replacement parts to the faucet model.
Use appropriate lubricant and new O-rings or ceramic cartridges as needed.
Prompt preventive swaps preserve smooth operation, reduce emergency repairs, and extend handle lifespan.
When to call a professional plumber
Call a professional when signs of complex failure, safety risks, or uncertainty arise—such as persistent leaks after seal replacement, sudden drops in water pressure, unusual noises in the valve body, difficulty aligning temperature, or visible corrosion around internal components—because these issues often indicate worn cartridges, damaged valve seats, or plumbing-system problems beyond basic maintenance.
A licensed plumber can diagnose, repair, or replace affected valves, ensuring code compliance and preventing water damage.
Tools, Parts, and Cost Guide
A concise list of essential tools — such as screwdrivers, an adjustable wrench, hex keys, and plumber’s grease — helps guarantee the job proceeds smoothly.
Common replacement parts (handles, cartridges, seats and springs, and trim kits) are identified along with typical price ranges to set expectations.
Guidance on where to buy parts and how to confirm model compatibility rounds out the practical cost-and-parts overview.
Essential tools checklist
Before beginning work on bathtub faucet handles, assemble a compact kit of reliable tools and replacement parts to prevent interruptions and guarantee proper fit.
A focused checklist minimizes mistakes and speeds the job.
- Phillips and flathead screwdrivers
- Adjustable wrench and basin wrench
- Hex/Allen key set and needle-nose pliers
- Plumber’s grease, rag, and tape to protect finishes
Typical replacement parts and average costs
Typical replacement parts for bathtub faucet handles include cartridges or valve stems, O-rings and seat washers, handle screws and decorative caps, escutcheon plates, and sometimes new handles or trim kits; prices vary widely by brand and material, generally ranging from $5–$30 for O-rings and washers, $15–$60 for replacement cartridges or stems, $10–$50 for escutcheons and trim pieces, and $15–$100+ for finished handles or complete kits.
| Part | Typical Cost | Notes |
|---|---|---|
| O-rings/washers | $5–$30 | Common wear parts |
| Cartridge/stem | $15–$60 | Controls flow/temperature |
| Escutcheon/trim | $10–$50 | Covers valve area |
| Handles/kits | $15–$100+ | Style and finish vary |
Where to buy parts and how to verify compatibility
When sourcing replacement parts, homeowners should prioritize reputable retailers—local plumbing supply stores, big-box home centers, and specialized online vendors—because availability, return policies, and part expertise vary.
Verify compatibility by matching model numbers, measurements, valve types, and finish codes; request photos or schematics when unsure.
- Match model number
- Measure stem and spacing
- Confirm valve type
- Check finish code
Step-by-Step Visual Reference
The article provides photo and diagram suggestions for each major step to guide visual learners through the handle replacement process.
It recommends clear, well-lit shots showing screw locations, cartridge alignment, and finished assembly for use alongside captions.
Tips for photographing parts include using a plain background, including a ruler or coin for scale, and capturing any model or part numbers close-up.
Photo or diagram suggestions for each major step
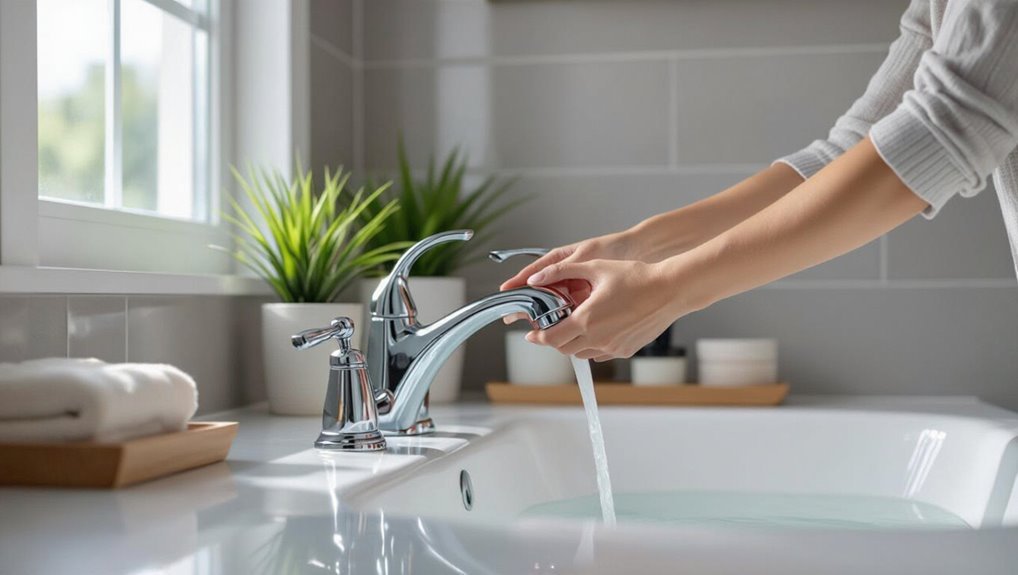
Begin by pairing each written step with a clear visual: a close-up photo or labeled diagram that highlights the specific part and tool involved.
Include before-and-after shots, exploded diagrams showing fastener order, and annotated images for hidden clips or seals.
Capture hand placement, wrench orientation, and clearance constraints.
Use consistent angles, scale references, and concise captions for each major step.
How to take helpful photos for parts identification
Start by framing each component clearly: capture a straight-on close-up of the faucet assembly, handle, escutcheon, and visible fasteners at eye level to show shape, size, and wear.
Include wide shots showing the fixture in context, and detail shots of markings, threads, and hidden screws.
Use good lighting, a ruler for scale, and note orientation with arrows or brief captions.
Troubleshooting Reference Chart
A concise troubleshooting reference chart lists common symptoms, their probable causes, and quick fixes for faucet-handle issues.
It helps identify whether a problem stems from worn cartridges, loose screws, mineral buildup, or misaligned stems.
The chart directs readers to the appropriate repair step or part replacement.
Symptoms, probable causes, and quick fixes
Many common faucet issues can be diagnosed quickly by matching observed symptoms to likely causes and simple fixes; the chart below condenses that process into easy-to-scan entries so users can identify problems—such as leaking, stiff handles, or low flow—and apply the most appropriate quick remedy without unnecessary disassembly.
| Symptom | Probable Cause | Quick Fix |
|---|---|---|
| Leak | Worn cartridge/seal | Replace seal/cartridge |
| Stiff handle | Mineral buildup | Clean/lubricate |
| Low flow | Clogged aerator | Remove/clean aerator |
Conclusion
Changing bathtub faucet handles can transform a bathroom with modest effort; meticulous measurement and steady hands contrast with quick cosmetic payoff. While the job demands patience—identifying types, shutting off water, and aligning splines—successful installation rewards with smoother operation and fewer leaks. The careful methodical work sits opposite the immediate visual refresh, reminding readers that simple mechanical fixes combine practical upkeep and instant style upgrades, yielding lasting function and refreshed appearance for surprisingly little cost.