How to Clean Chrome Faucets: Step-by-Step Guide to Remove Spots, Lime, and Tarnish
To effectively clean chrome faucets and remove spots, lime, and tarnish, follow these straightforward steps. First, inspect the faucet for any damage or leaks. Rinse it with lukewarm water and wipe it down using a microfiber cloth. For water spots and lime scale, apply a 1:1 vinegar-and-water solution, let it sit briefly, and then gently scrub with a soft-bristle brush or nonabrasive pad. If you encounter stubborn stains, use a baking soda paste, rinse thoroughly, and finish by buffing with a soft cloth and light chrome polish. For additional tips on tackling tougher stains and maintaining your faucets, continue reading.
What Removes Spots, Lime, and Tarnish from Chrome Faucets Quickly
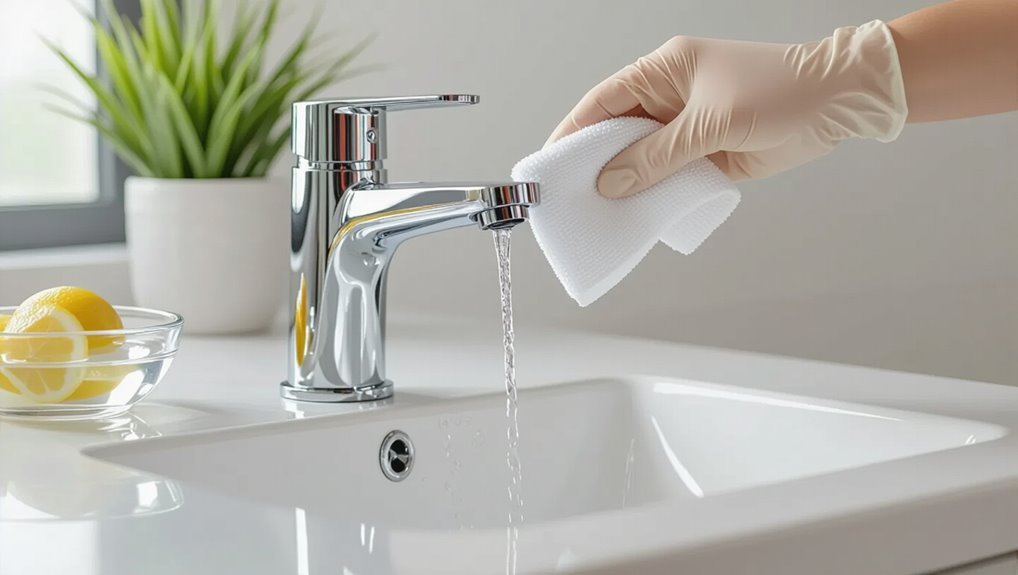
Chrome resists many stains but shows mineral buildup and tarnish where water and soap concentrate, often appearing as white lime deposits or dull spots.
Effective removal hinges on matching gentle acidic cleaners or mild abrasives to the specific residue to avoid damaging the finish.
A quick checklist of supplies—soft cloths, a toothbrush, white vinegar or a commercial descaler, baking soda, and a nonabrasive polish—ensures a fast, safe cleaning.
How chrome reacts to common stains and mineral buildup
Wipes and mild cleaners remove fresh water spots easily, but prolonged exposure to hard-water minerals and acidic residues accelerates dulling and pitting of chrome finishes.
Chrome resists corrosion but develops mineral rings, white lime deposits, and organic staining that cling to surfaces.
Understanding how to clean chrome faucets helps target deposits with nonabrasive, pH-balanced agents to restore shine without stripping protective plating.
Quick checklist: Tools and supplies you need for a fast clean
A short curated kit makes tackling spots, lime, and tarnish quick and predictable: microfiber cloths, soft-bristle toothbrush, white vinegar, lemon, baking soda, mild dish soap, spray bottle, rubber gloves, and a nonabrasive chrome polish.
Optional: cotton swabs for crevices and a plastic scraper for stubborn deposits.
These items remove mineral buildup without scratching, enabling efficient, repeatable maintenance.
Safety Considerations and Surface Compatibility
The section outlines which cleaners are safe for chrome and which should be avoided to prevent pitting or dulling.
It also covers protecting adjacent finishes and seals from corrosive or staining products.
Finally, it explains necessary personal protective equipment and ventilation to reduce exposure risks.
Which cleaners are safe for chrome vs which to avoid
Many common household cleaners can damage chrome finishes, so it is important to choose products that clean without scratching, dulling, or removing protective coatings.
Safe options include mild dish soap, diluted vinegar, baking soda paste, and nonabrasive commercial chrome cleaners.
Avoid bleach, ammonia, acid-based lime removers, abrasive powders, and steel wool, which can corrode, pit, or strip chrome plating.
Protecting nearby finishes and seals
While cleaning chrome faucets, care must be taken to protect surrounding surfaces and seals from cleaners that can discolor, degrade, or strip finishes.
Wipe adjacent countertops, tile grout, and painted areas with damp cloths before applying cleaners.
Mask rubber gaskets, silicone caulk, and decorative hardware with painter’s tape or plastic.
Rinse spills immediately and test cleaners on an inconspicuous spot first.
Personal protective equipment and ventilation
When working with cleaners or polishers for chrome faucets, appropriate personal protective equipment and good ventilation are essential to prevent inhalation, skin irritation, or eye injury.
Wear chemical-resistant gloves, eye protection, and consider a mask for strong fumes. Make sure windows open or use exhaust fans.
Avoid mixing chemicals.
Verify product compatibility with surrounding materials to prevent accidental damage or discoloration.
Step-by-Step Deep Clean for Chrome Faucets
A clear, ordered procedure guides a thorough deep clean of chrome faucets, beginning with a pre-clean inspection and preparation of the surrounding area.
The method progresses from removing loose grime with a basic rinse and wipe to treating water spots and light mineral film.
For persistent issues, targeted steps address lime scale, hard-water buildup, and stubborn tarnish or discoloration.
Pre-clean inspection and preparing the area
Before any cleaning begins, one should inspect the chrome faucet and immediate surroundings to identify damage, active leaks, mineral buildup, and delicate finishes that require special care.
Turn off water supply if needed, protect nearby surfaces with towels or drop cloths, gather appropriate tools and cleaners, remove loose items from the sink area, and note any components requiring professional repair or replacement before proceeding.
Removing loose grime and daily dirt (basic rinse and wipe)
Although the faucet has already been inspected and the area prepped, the next step is to remove loose grime and everyday residue with a simple rinse-and-wipe routine.
Use lukewarm water to rinse surfaces, then wipe immediately with a soft microfiber cloth. For crevices, employ a soft-bristled toothbrush.
Dry thoroughly to prevent drips. Repeat weekly to maintain shine and prevent buildup.
Eliminating water spots and light mineral film
Once loose grime has been rinsed and wiped away, attention shifts to water spots and light mineral film that dull chrome finishes.
A solution of equal parts white vinegar and water applied with a soft cloth removes spots; let sit briefly, then rub gently in circular motions.
Rinse thoroughly with clean water and buff dry with a microfiber cloth to restore shine and prevent streaks.
Dissolving lime scale and hard-water buildup
Tackle stubborn lime scale and hard-water buildup with a focused deep-clean routine that uses mild acids and nonabrasive tools to dissolve deposits without damaging chrome.
Apply white vinegar or a 1:1 vinegar-water solution to affected areas, let sit briefly, then scrub gently with a soft-bristled brush or microfiber.
Rinse thoroughly, dry, and repeat localized treatment until mineral buildup is gone.
Removing tarnish and stubborn discoloration
After mineral deposits are removed, attention shifts to tarnish and stubborn discoloration that can dull chrome’s finish. These stains often stem from chemical residues, prolonged oxidation, or embedded grime.
To remove them, apply a mild abrasive polish or paste (baking soda and water), rub gently with a soft cloth, rinse thoroughly, then buff with a microfiber cloth.
Repeat only as needed to avoid abrasion.
Cleaning tight areas: aerators, joints, and base crevices
Focus shifts to the faucet’s tight spots—aerators, joints, and base crevices—where mineral buildup and grime concentrate and routine wiping can’t reach.
Professionals remove the aerator, soak it in vinegar, and scrub screens with a soft brush. Small brushes and cotton swabs loosen deposits in joints and base seams.
Rinse parts, reassemble carefully, and inspect for remaining residue before proceeding.
Final rinse, dry, and polish for a streak-free shine
Complete the cleaning cycle with a controlled final rinse, then remove all moisture and buff the chrome to a mirror finish.
Use warm water to flush residues, then blot with a lint-free microfiber cloth.
Follow with gentle circular polishing strokes, reversing direction for stubborn streaks.
Inspect under varied light, address missed spots, and apply a thin layer of carnauba or chrome-specific sealant to maintain the streak-free shine.
Proven Homemade and Store-Bought Cleaning Solutions
This section compares proven homemade cleaners—such as vinegar, baking soda, lemon, and salt mixtures—with recommended commercial products and safe usage guidelines.
It also explains when mild abrasives are appropriate versus when non-abrasive options should be chosen to protect chrome finishes.
Practical tips for application and rinsing are provided to guarantee effective cleaning without damage.
Effective DIY recipes with vinegar, baking soda, lemon, and salt
Home cooks and DIYers often rely on common pantry items—white vinegar, baking soda, lemon, and salt—for removing water spots, soap scum, and mineral buildup from chrome faucets.
When used in tested combinations and proper dilutions, these ingredients provide effective, inexpensive, and gentle alternatives to many commercial cleaners.
- Vinegar soak for mineral deposits
- Baking soda paste for gentle scrubbing
- Lemon juice with salt for spot treatment
- Vinegar+baking soda fizz for clogged aerators
Recommended commercial cleaners and how to use them safely
After outlining effective pantry-based methods, attention turns to proven commercial cleaners that can tackle tougher grime, speed up cleaning, or provide protective finishes.
Choose pH-neutral chrome cleaners, lime-scale removers, non-abrasive polish creams, or disinfectant sprays.
Always read labels, test inconspicuously, use gloves and ventilation, follow contact times, and rinse thoroughly to prevent residue or damage.
- pH-neutral chrome cleaner
- Lime-scale remover
- Non-abrasive polish cream
- Disinfectant spray
When to use mild abrasives vs non-abrasive options
When chrome shows light surface scuffs, dullness, or mineral haze, non-abrasive cleaners and polishes are appropriate because they remove grime and restore shine without risking the finish;
conversely, mild abrasives—used sparingly—are reserved for more stubborn marks like baked-on deposits or fine scratches that non-abrasives cannot lift.
Test any abrasive on an inconspicuous area, use soft cloths, rinse thoroughly, and dry to prevent water spots.
Tools and Materials: What to Buy and Why
Choosing the right tools and materials affects both cleaning effectiveness and the finish of chrome faucets.
Recommendations cover soft cloths and non-abrasive pads for general care, stiffer brushes or abrasive pads for stubborn deposits, and specialty picks or small brushes for aerators and narrow gaps.
Priority is given to eco-friendly, non-toxic cleaners and reusable tools to protect chrome and reduce environmental impact.
Brushes, cloths, and pads: soft vs abrasive options
Select cleaning implements based on finish sensitivity and soil type: soft microfiber cloths and foam pads for light dirt and polishing, nylon-bristle brushes for grout lines and aerators, and non-scratch scrubbing pads for stuck-on mineral deposits.
- Microfiber cloths: lint-free, gentle polish
- Foam pads: even application, low abrasion
- Nylon brushes: detail cleaning without scratching
- Non-scratch pads: remove mineral buildup safely
Specialty tools for aerators and narrow gaps
Reach into tight spaces with purpose-built tools that make cleaning aerators and narrow gaps efficient without risking damage to chrome finishes.
Use nylon pipe-cleaning brushes, flexible micro-brushes, thin-bore bottle brushes, and soft-bristled interdental brushes for precision.
Magnetic or rubber-tipped picks dislodge debris behind escutcheons. A small syringe or bulb syringe flushes loosened deposits.
Select nonmetallic tools to avoid scratching chrome.
Eco-friendly and non-toxic product recommendations
After recommending nonmetallic precision tools for aerators and tight gaps, attention turns to eco-friendly, non-toxic cleaning agents that protect chrome and indoor air.
Suggested items include white vinegar, baking soda, Castile soap, lemon juice, and biodegradable mild dish detergent. Microfiber cloths and soft-bristle brushes complement them.
Avoid ammonia, bleach, and abrasive powders to preserve finish and reduce harmful fumes indoors.
Preventing Future Spots, Lime, and Tarnish
To minimize spots, lime buildup, and tarnish on chrome faucets, a brief daily wipe and a weekly gentle clean are recommended to remove mineral residue before it hardens.
Installing water-softening or filtration systems can greatly reduce calcium and magnesium deposits at the source.
For added protection, applying appropriate protective coatings or waxes can slow tarnish—each option has trade-offs in durability and maintenance that should be considered.
Simple daily and weekly maintenance routine
A few minutes each day and a short weekly rinse keep chrome faucets free of spots, lime, and tarnish.
After use, wipe fixtures with a soft microfiber cloth to remove water droplets.
Once weekly, rinse with warm water and mild dish soap, gently scrub crevices with a soft brush, then dry thoroughly.
Inspect seals and aerators for buildup and address promptly.
Water-softening and filtration options to reduce mineral deposits
Installing water-softening or filtration systems greatly reduces the minerals that cause spots, lime, and tarnish on chrome faucets by removing calcium, magnesium, and iron before they reach fixtures.
Choose whole-house ion-exchange softeners for thorough hardness control, salt-free conditioners for low-maintenance scaling reduction, or point-of-use filters for targeted iron and particulate removal.
Regular maintenance and periodic testing guarantee continued effectiveness and longer faucet life.
Protective coatings and waxes: pros, cons, and application tips
Beyond reducing incoming minerals, applying surface treatments offers a different line of defense by creating a barrier between water and chrome finishes.
Sealants and carnauba or synthetic waxes repel water and slow spotting.
Pros: easier cleaning, extended shine.
Cons: periodic reapplication, possible buildup, incompatibility with some cleaners.
Application: clean, dry surface; apply thin coat; buff and reapply every few months.
Troubleshooting Common Problems
When routine cleaning fails to remove a stubborn white crust, assess whether mineral buildup requires a stronger descaler or mechanical removal.
If the chrome appears scratched or dulled after cleaning, check whether an abrasive cleaner or rough cloth caused surface damage and consider polish or professional refinishing.
Deep corrosion or pitting that penetrates the plating indicates structural failure and often warrants replacing the fixture.
Stubborn white crust that won’t dissolve
Scrape gently with a plastic scraper or old toothbrush to assess how firmly the white crust adheres to the chrome; hard, flaky deposits are calcium and lime scale, while a smooth, waxy film is more likely mineral residue or soap buildup.
For scale, apply white vinegar or a 1:1 vinegar–water soak, let sit, then scrub and rinse.
Repeat for persistent spots.
Scratches or dulled chrome after cleaning
Inspect the chrome closely after cleaning to identify scratches, cloudy areas, or loss of shine and determine whether they stem from abrasive cleaners, rough scrubbing, or chemical damage.
Minor surface scratches can be buffed with a non-abrasive polish and microfiber cloth; deeper scratches may require professional refinishing.
Avoid harsh pads and corrosive products; test restoratives in an inconspicuous spot first.
Corrosion or pitting: signs and when to replace the fixture
If corrosion or pitting appears as small, rough depressions or flaking on the chrome surface, it indicates the protective plating has been breached and underlying metal is reacting to moisture or chemicals.
Severe or spreading pitting weakens structure, causes leaks, and resists cleaning.
Minor spots may be monitored or temporarily treated; replace the fixture when corrosion penetrates plating, affects function, or aesthetic restoration is impossible.
Comparison of Cleaning Methods and Expected Results
Different cleaning approaches are compared by speed, safety, effectiveness, and cost to help readers choose an appropriate method. The table below summarizes typical outcomes for common options so expectations are clear. Readers can then match a method to their priorities.
| Method | Typical outcome |
|---|---|
| Vinegar solution | Affordable, safe for chrome, effective on mineral deposits |
| Commercial cleaner | Fast and strong, may require ventilation and care |
| Baking soda paste | Gentle, low-cost, good for mild stains |
| Microfiber & soap | Very safe, quick for routine cleaning, less effective on heavy buildup |
Speed, safety, effectiveness, and cost of each method
When choosing a cleaning method for chrome faucets, homeowners should weigh speed, safety, effectiveness, and cost together, since each approach involves trade-offs:
Commercial cleaners act fast and often remove heavy scale but pose chemical risks and higher expense;
vinegar and baking soda are cheap, safe, moderately effective but slower;
microfiber and polishing deliver quick, safe shine for light tarnish yet require more effort for stubborn deposits.
Quick Maintenance Schedules and Checklists
A simple maintenance schedule helps preserve the shine and function of chrome faucets without extra effort. Clear daily, weekly, monthly, and annual tasks make routine care quick and reliable.
The following checklist summarizes essential actions to keep faucets looking and performing their best.
- Daily: Wipe down with a soft cloth to remove water spots and soap residue.
- Weekly: Use a mild cleaner or vinegar solution for gentle polishing and spot treatment.
- Monthly: Inspect aerators and remove mineral buildup; check for minor leaks.
- Annual: Perform a deeper inspection, replace worn seals or cartridges, and descale as needed.
Daily, weekly, monthly, and annual tasks for chrome faucet care
Establishing a simple schedule helps preserve a chrome faucet’s finish and function.
Daily: wipe dry after use.
Weekly: clean with mild soap and soft cloth; remove water spots.
Monthly: descale aerator and check for leaks; polish with chrome-safe product.
Annually: inspect seals and cartridge; replace worn parts and deep-clean hard-to-reach areas to prevent buildup and corrosion.
Before-and-After Care Routine for Professional Results
A concise before-and-after care routine enhances the longevity and appearance of newly installed or repaired chrome faucets.
Immediately after installation, surfaces should be wiped with a soft, damp cloth and checked for seal integrity and mineral traces.
For humid or hard-water regions, recommended seasonal steps include descaling with a mild vinegar solution and applying a protective rinse to limit buildup.
Steps to take immediately after installation or repair
Flush the system and inspect all connections immediately after installation or repair to prevent debris buildup and detect leaks before they worsen.
Next, operate each valve and handle to confirm smooth movement and proper alignment.
Wipe chrome surfaces with a microfiber cloth to remove fingerprints and residue.
Record installation details and any observed issues for warranty and future maintenance.
Seasonal considerations for humid or hard-water areas
Prepare for seasonal shifts by tailoring care to humidity and mineral content, since both accelerate spotting, corrosion, and gasket degradation on chrome faucets.
In humid seasons, increase ventilation, wipe surfaces daily, and use silica gel near plumbing.
For hard-water periods, apply a weekly descaling routine with mild acid solutions, rinse thoroughly, and replace washers more often.
Document observations and adjust frequency accordingly.
Conclusion
Regular cleaning preserves chrome faucets’ shine and function: a 5–10 minute weekly wipe and monthly deep clean prevent buildup and corrosion. One striking statistic underscores this: hard-water deposits affect over 85% of U.S. households, greatly increasing lime accumulation on fixtures. Consistent use of the safe methods described—mild acids, nonabrasive pads, and proper rinsing—yields professional results, extends fixture life, and reduces the need for harsh restoratives or premature replacements.