
How to Replace Outdoor Faucets: Step-by-Step Guide for Beginners
To replace an outdoor faucet, start by shutting off the water supply and draining the line. Confirm the shutoff valve is closed and relieve any pressure. Identify the connection type—threaded, sweat, or soldered. Gather the necessary tools, including wrenches, PTFE tape, pipe dope, and a suitable replacement faucet (consider frost-free or anti-siphon models). Remove the old faucet, clean or cut the pipe as needed, and install the new faucet securely. Finally, test it slowly for leaks. Follow the detailed step-by-step guide for further assistance and troubleshooting.
Overview of Replacing an Outdoor Faucet
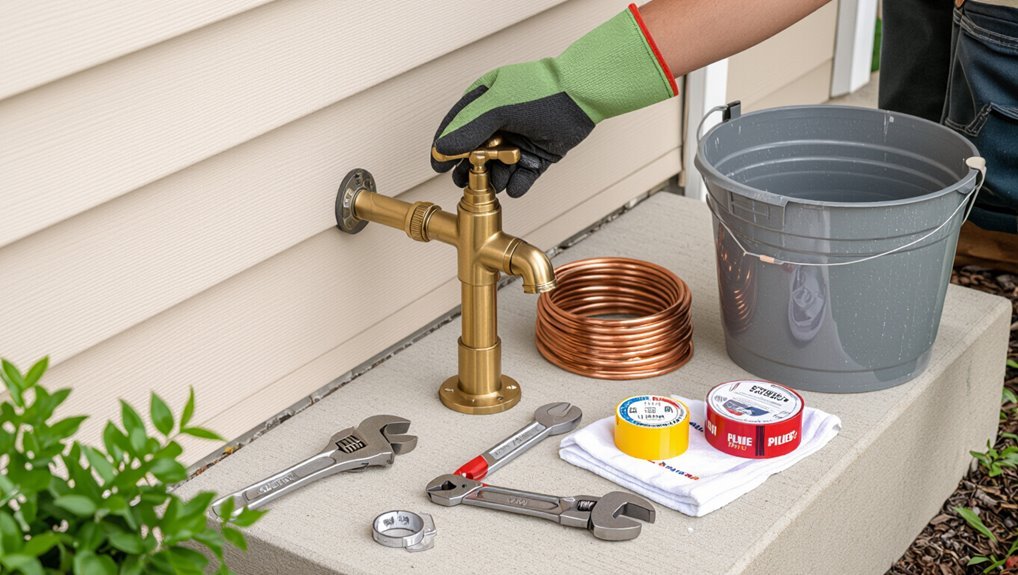
Replacing an outdoor faucet typically involves shutting off water, removing the old valve, preparing the pipe or wall penetration, and installing a new spigot with proper seals.
The choice to replace rather than repair depends on leak severity, corrosion, functional failure, or recurring problems that make repair unreliable.
Basic tools and materials include wrenches, pipe dope or tape, replacement faucet and fittings, and any soldering or sealants required for the pipe type.
What replacing an outdoor faucet involves
Begin by shutting off the water supply and draining the line to prevent spills.
Then proceed to remove the existing spigot and assess the connection type—threaded, sweat, or soldered—to determine the correct replacement and tools.
Replacing involves removing fittings, cleaning or cutting pipe, selecting a matching faucet, installing with proper seals or solder, and testing for leaks.
How to replace outdoor faucets.
When to replace vs. repair an outdoor faucet
When should a homeowner opt for a full replacement instead of a repair? A full replacement is advisable for persistent leaks after multiple repairs, severe corrosion, broken valve stems, frozen-cracked bodies, or outdated units lacking compatible parts.
Replacement also suits recurring failures that indicate systemic wear. Minor leaks, worn washers, or loose fittings can usually be repaired without replacing the entire faucet.
Tools and materials overview
A concise kit of the right tools and materials makes replacing an outdoor faucet efficient and safe.
The technician assembles essentials before starting to minimize interruptions. Necessary items include replacement spigot, sealing components, and basic plumbing tools.
Checklist:
- Replacement faucet, pipe fittings, thread sealant
- Adjustable wrench, pipe cutter, pliers
- Teflon tape, silicone caulk, buckets and rags
Safety and Preparation Before You Start
Before beginning, the water supply should be shut off and outdoor lines drained to prevent flooding and ice damage.
The homeowner must identify pipe materials (copper, PEX, PVC, or galvanized), locate shutoff valves, and review any winterization needs that could affect the repair.
Appropriate personal protective equipment and a cleared, well-lit workspace should be prepared prior to starting.
Shutting off the water supply and draining lines
Shut off the main supply valve and confirm the outdoor faucet is closed to stop water flow into the line.
Open the outdoor spigot and any nearby indoor faucets to relieve pressure.
Locate and open the lowest drain or bleed valve to evacuate remaining water from the branch.
Allow time for complete drainage before loosening fittings to prevent leaks and ice hazards.
Identifying pipe type and materials (copper, PEX, PVC, galvanized)
With the water off and lines drained, attention turns to identifying the pipe material feeding the outdoor faucet.
Inspect visible pipe color, fittings and texture: copper is reddish and soldered, PEX is flexible plastic often colored red/blue, PVC is rigid white plastic with solvent-welded joints, and galvanized steel is metallic, threaded, and may show corrosion.
Match fittings before purchasing parts.
Locating shutoff valves and assessing winterization needs
A homeowner should locate the nearest shutoff valves and evaluate the property’s winterization status before touching the outdoor faucet assembly.
Identify interior main and branch shutoffs controlling the outdoor line.
Verify whether the faucet is on a frost-free line or requires drain/bleed procedures.
Note insulation, heated spaces, and any freeze damage.
Plan shutoff, draining, and temporary heat measures accordingly.
Personal protective equipment and workspace setup
Gather appropriate personal protective equipment and arrange the work area before beginning any outdoor faucet work.
The technician dons gloves, safety glasses, and kneepads, ensuring clothing resists grime.
The workspace is cleared, level, and well-lit, with tools laid out and water containment ready.
Follow a compact checklist:
- Gloves, glasses, kneepads
- Clear, well-lit area
- Tools, bucket, towels nearby
Choosing the Right Replacement Faucet
Selecting the correct replacement faucet requires evaluating the common types—sillcocks, frost‑free models, and hose bibs with vacuum breakers—and matching the unit to the existing connection and thread size.
Material and finish influence longevity in outdoor conditions, and homeowners should weigh the benefits of upgrading to frost‑free or anti‑siphon designs against the extra cost.
A brief cost versus quality comparison helps prioritize features that matter most for climate and use.
Types of outdoor faucets and hose bibs (sillcock, frost-free, vacuum breaker)
When choosing a replacement, homeowners should understand the main types of outdoor faucets—sillcocks, frost‑free faucets, and hose bibs with vacuum breakers—because each is designed for different climate and safety needs.
Sillcocks are simple exterior valves.
Frost‑free models prevent freezing by locating the shutoff inside.
Vacuum‑breaker hose bibs protect potable water from backflow during hose use, required in many codes.
How to measure and match thread size and connection type
Measure the existing faucet’s exposed threads and inlet connection to guarantee the replacement matches both diameter and thread form.
Use calipers or a thread gauge to determine male or female threads, pitch, and diameter (inches or metric).
Identify connection type—threaded, sweat, compression—and note any adapters.
Confirm matching pipe standard (NPT, BSP) before purchasing the replacement.
Material and finish considerations for durability
Durability hinges largely on material and finish: brass and stainless steel resist corrosion and wear better than zinc or plastic, while finishes like chrome, nickel, and powder-coated bronze add a protective layer against weathering and UV exposure.
Choose solid brass for longevity, stainless for salt-air environments, and consider sacrificial anodes or protective coatings when metal contact risks galvanic corrosion in mixed-metal installations.
When to upgrade to frost-free or anti-siphon models
Why upgrade to a frost-free or anti-siphon outdoor faucet?
Homeowners should choose frost-free models in cold climates to prevent pipe freezing and costly repairs.
Anti-siphon faucets are recommended where backflow risk exists, protecting potable water.
Upgrade when existing valves leak, when landscaping or usage increases demand, or after recurring winter damage.
Proper selection reduces maintenance and health hazards.
Cost and quality comparison
When selecting a replacement outdoor faucet, homeowners should weigh initial cost against material quality and long-term performance; brass and stainless-steel bodies cost more up front but resist corrosion and last far longer than zinc or plastic alternatives.
| Feature | Notes |
|---|---|
| Brass/Stainless | Higher cost, long lifespan |
| Zinc/Plastic | Low cost, shorter life |
| Valves/Seals | Replaceable parts affect value |
Step-by-Step Removal of the Old Outdoor Faucet
Before beginning, the water line is drained and the work section isolated to prevent leaks and pressure.
Techniques for freeing stuck or corroded fittings are outlined, followed by cutting methods appropriate to the pipe material—solder removal, tubing cutter use, or a hacksaw for tougher sections.
The procedure concludes with removing remnants and cleaning pipe ends to guarantee a proper seal for the new faucet.
Draining and isolating the section to work on
Shut off the water supply and relieve pressure in the line before beginning work: close the main or zone shutoff feeding the outdoor faucet, open a nearby hose bib or interior faucet to drain residual water, and if the system has a frost-free sillcock, open its handle to clear the stem.
Verify no flow, cap or plug adjacent lines, and isolate valves to prevent backflow while removing the faucet.
Techniques for loosening stuck or corroded fittings
Tackle seized or corroded fittings methodically to avoid damaging the pipe or fixture: assess the connection type and condition, apply penetrating oil to threads and let it soak, then use the correct-size wrench with steady, controlled force—adding heat with a torch or using an impact-style tool only if corrosion resists—while supporting the pipe to prevent undue stress.
Tap fittings gently, back and forth, then reapply oil and retry.
Cutting methods for different pipe materials (solder cutting, tubing cutter, hacksaw)
After freeing a stuck fitting, attention shifts to removing the faucet and cutting the supply pipe to the correct length for the replacement.
For soldered copper, score and heat the joint, then cut and remove the fitting.
Use a tubing cutter for clean cuts on copper and PEX; rotate progressively.
For steel or larger pipes, employ a fine-tooth hacksaw, supporting the pipe and deburring the cut before fitting the new valve.
Removing remnants and cleaning pipe ends
Remove any remaining fragments of the old faucet and prepare the pipe ends for the new valve by clearing corrosion, solder, or sealant and ensuring a smooth, true surface for sealing.
File burrs, de-scale with a wire brush, and ream pipe interiors.
Wipe clean with solvent and a rag, inspect for damage or thin walls, and measure depth for proper valve insertion before installation.
Step-by-Step Installation of the New Outdoor Faucet
The installation process begins with preparing the connection—deburring copper, applying flux for solder joints, or cleaning threaded ends for sealants.
For copper lines, the faucet is sweat-soldered, while threaded fittings use PTFE tape and pipe dope to guarantee a watertight joint.
PEX and CPVC require the appropriate adapters and crimp or press fittings.
Finally, the sillcock is mounted through the wall and the exterior penetration is properly sealed to prevent leaks and heat loss.
Preparation of connection (deburring, fluxing for solder, cleaning for threaded)
Prepare each connection with care to secure a leak-free joint: deburr cut pipe ends to remove sharp edges and metal shavings, apply appropriate flux evenly when soldering, and thoroughly clean threads and mating surfaces before using pipe dope or tape on threaded fittings.
Inspect for burrs or corrosion, remove contaminants with a wire brush or cloth, and verify parts fit snugly and align properly prior to assembly.
Installing on copper: sweat/solder method
Begin by shutting off the water supply and draining the line.
Then position the faucet so its inlet aligns squarely with the cleaned copper pipe.
Apply flux to the joint, assemble fitting fully, heat evenly with a torch until flux sizzles.
Feed solder into the seam until a complete fillet forms.
Cool, wipe, and test for leaks before restoring water.
Installing on threaded fittings: using PTFE tape and pipe dope
Wrap the male threads of the supply pipe with PTFE tape and coat them lightly with pipe dope before threading the new faucet to guarantee a reliable, leak-resistant seal.
Align threads carefully, hand-start to avoid cross-threading, then tighten with a wrench until snug.
Wipe excess compound, open water slowly, check for leaks, and retighten slightly if minor seepage appears.
Installing on PEX or CPVC: using adapters and crimp/press fittings
When connecting a new outdoor faucet to PEX or CPVC, the installer must shift from plastic tubing to the metal faucet using the correct adapter and a secure crimp or press connection; choosing the proper adapter (PEX-to-male-thread, CPVC-to-male-thread, or a solderless sweat adapter for shift pieces) and the matching crimp/press fitting size guarantees a leak-proof joint.
Cut square, deburr, insert fully, then crimp or press per manufacturer torque.
Mounting sillcock through wall and sealing exterior penetration
Position the sillcock so its threaded inlet aligns squarely with the prepared wall penetration, ensuring the spout points slightly downward to shed water. This alignment prevents stress on the supply connection and helps the exterior seal perform correctly.
Tighten the packing nut or flange against the wall, apply exterior-grade silicone or polyurethane sealant around the escutcheon, and fasten mounting screws into solid backing for a watertight, stable installation.
Re-pressurizing and checking for leaks
Open the main shutoff slowly and restore water pressure to the new sillcock while observing the connection points.
Watch for immediate drips at solder joints, compression fittings, and hose bib threads.
Tighten fittings slightly if minor seepage appears; relieve pressure before adjusting.
Run water fully, check wall penetration for dampness, and inspect under eaves.
Confirm no leaks after ten minutes of steady flow.
Testing, Adjustments, and Final Checks
Once installed, the faucet is subjected to pressure testing and a careful visual inspection to detect any leaks.
The installer confirms proper shut-off and checks flow rate at varying valve positions.
Finally, winterization and freeze-prevention measures are applied and brief maintenance tips are reviewed to prolong the faucet’s service life.
Pressure testing and visual leak inspection
Begin by restoring water supply slowly and observing system pressure to guarantee steady flow without sudden spikes.
Watch joints, packing, and hose bib for drips under steady pressure. Use a clean dry cloth to detect fine leaks and a tissue for hairline seepage.
Monitor pressure gauge for ten minutes; note any drops. Tighten fittings or replace seals if leakage appears.
Checking for proper shut-off and flow
After confirming there are no visible leaks and system pressure holds steady, the next step is to verify that the shut-off closes fully and the faucet delivers correct flow.
Operate the valve slowly, observe for drip or seep when closed, then open fully to confirm steady, even discharge without sputtering.
Adjust packing or tightening if persistence of minor leakage or irregular flow is detected.
Winterization and freeze-prevention steps
Prepare the faucet and connected lines for cold weather by systematically testing shut-offs, draining remaining water, and verifying insulation integrity.
Inspect hose bibb vacuum breakers, remove hoses, and open spigots slightly to allow residual drainage.
Tighten or replace damaged insulation and add foam covers or heat tape where needed.
Perform a final check for leaks and confirm interior shutoff valves fully close.
Maintenance tips to extend faucet life
Several simple tests and routine adjustments can greatly extend an outdoor faucet’s service life.
Inspect for leaks, test shutoff tightness, and verify drainage after use. Perform small adjustments and replace worn washers or packing. Check insulation and hose connections seasonally.
Follow this checklist:
- Inspect seals and tighten packing.
- Test operation and clear blockages.
- Replace worn parts promptly and recheck.
Common Problems and How to Fix Them
Common issues after replacing an outdoor faucet include leaks at the handle or spout, persistent dripping, corroded pipes or fittings, and reduced or irregular water flow from partial blockages.
Each problem has straightforward troubleshooting steps—tightening or replacing seals for leaks, checking valve seats and washers for drips, evaluating corrosion to decide whether repair or a professional replacement is needed, and removing debris or flushing lines for flow issues.
The following guidance explains causes, quick fixes, and when to call a plumber.
Leaks at the handle or spout
Leaks at the handle or spout typically indicate worn seals, corroded valve seats, or loose packing nuts. Addressing them promptly prevents water waste and further damage.
The inspector should tighten packing nuts, replace O-rings or seat washers, and clean or replace corroded valve seats.
After repairs, test under normal pressure; replace the faucet body if leaks persist despite proper seal and seat replacement.
Dripping after replacement causes and solutions
Investigate persistent dripping after a faucet replacement as an indicator of installation issues, defective parts, or water pressure irregularities.
Check tightened connections, properly seated washers or cartridges, and correct stem alignment.
Replace damaged seals or cartridges with exact-fit parts.
Verify shutoff valve function and test water pressure.
If dripping continues after these steps, reassess part compatibility before considering professional help.
Corroded pipes or fittings and when to call a pro
If persistent dripping persisted after confirming installation and part compatibility, corrosion in pipes or fittings may be the underlying cause.
Visible rust, pitting, or greenish deposits indicate metal degradation.
Small surface corrosion can be cleaned or sections replaced by a competent DIYer, but extensive deterioration, hidden joint damage, or cast‑iron/galvanized systems warrant a licensed plumber to prevent leaks, contamination, or structural failure.
Improper water flow or partial blockage
Reduced or uneven water flow at an outdoor faucet often signals a partial blockage or flow restriction within the spout, valve assembly, or supply line.
The technician or homeowner should inspect aerators/screens, flush the line, and remove mineral buildup or debris.
If cleaning fails, disassemble the valve or replace the cartridge.
Persistent restriction may indicate hidden pipe damage requiring professional diagnostics and repair.
Cost, Time, and When to Hire a Professional
Typical DIY replacement of an outdoor faucet often takes one to three hours and costs between $20 and $150 for parts, while labor and complex fittings can raise expenses.
Homeowners should call a plumber if they encounter corroded pipes, frozen or damaged supply lines, inaccessible shutoffs, or uncertainty about soldering or code compliance.
When hiring a contractor, ask about licensing, insurance, estimated timeline, itemized costs, and warranty coverage on both parts and labor.
Typical DIY time and cost breakdown
Estimating time and cost for replacing an outdoor faucet depends on factors like valve type, pipe accessibility, and whether the line requires soldering or thread sealant; a straightforward swap of a frost-free spigot on exposed piping often takes 30–90 minutes and costs $20–75 in parts, while jobs involving buried lines, corrosion, or brazing can take several hours and raise materials to $100–300.
| Task | Time | Parts Cost |
|---|---|---|
| Simple replace | 30–90 min | $20–75 |
| Soldered joint | 1–3 hrs | $30–120 |
| Buried line | 2–6 hrs | $50–200 |
| Corroded pipe | 2–5 hrs | $75–300 |
Signs the job is beyond DIY and requires a plumber
Recognize when an outdoor faucet replacement exceeds homeowner skills by watching for complicating factors: extensive corrosion, hidden or frozen supply lines, evidence of past DIY fixes that used improper materials, failed solder joints, mixed-metal connections causing galvanic corrosion, or signs of a larger leak inside walls or foundations.
If corrosion, inaccessible piping, odor of mold, complex valve replacement, or required permits appear, hire a licensed plumber to avoid costly mistakes.
Questions to ask a contractor and warranty considerations
How much will the job actually cost, and what guarantees accompany the work? A homeowner should request clear estimates, timelines, and warranty terms.
Ask about license, insurance, parts warranty, and labor guarantees. Get commitments in writing.
- Request itemized quote and completion date.
- Confirm contractor license, insurance, and references.
- Clarify warranty length and covered repairs.
Helpful Accessories and Upgrades
Practical accessories can improve safety and longevity when replacing outdoor faucets.
Anti-siphon vacuum breakers and other backflow prevention devices protect potable water, while insulated covers and frost‑proof faucet options reduce freeze damage.
Quick‑connect hose fittings and dedicated shutoff valves speed use and simplify winterization.
Anti-siphon vacuum breakers and backflow prevention
One essential upgrade for outdoor faucets is the installation of an anti-siphon vacuum breaker, a simple mechanical device that prevents contaminated water from being drawn back into the household supply when pressure drops.
It installs between spigot and hose, allows flow only outward, and meets many local plumbing codes.
Regular inspection and replacement guarantee reliable backflow prevention and safe potable water protection.
Insulated faucet covers and frost-proof solutions
Several inexpensive insulated faucet covers and a few frost‑proof faucet options protect outdoor spigots from freezing and extend their service life.
Covers slip on easily, provide thermal insulation, and require seasonal removal. Frost‑proof faucets locate the shutoff inside the heated wall and use extended stems to prevent ice damage.
Selection depends on climate, wall access, and budget; proper installation guarantees reliable winter protection.
Quick-connect hose fittings and shutoff valves
Install quick-connect hose fittings and shutoff valves to streamline outdoor water use and simplify winterization. These accessories allow rapid attachment and removal of hoses, reducing wear on faucet threads.
Integrated or inline shutoff valves isolate outdoor lines for repairs or freezing weather without indoor disruption. Choose durable, brass or stainless components and guarantee proper seals to prevent leaks and maintain reliable seasonal operation.
Quick Troubleshooting Checklist
A concise troubleshooting checklist helps guarantee faucet reliability before and after replacement.
It should cover a pre-install inspection of shutoffs, fittings, and pipe condition, followed by a post-install verification of seals, pressure, and drainage.
Include clear emergency steps for sudden leaks or bursts, such as shutting off the water, isolating the broken section, and calling a plumber.
Pre-install checklist
Before beginning the replacement, the homeowner should run a focused pre-install checklist to confirm shutoff, drainage, and parts readiness: verify water is off at the correct valve, open nearby faucets to drain lines, inspect the existing spigot and wall for damage, measure pipe size and thread type, gather matching replacement faucet, seals, pipe joint compound, wrench set, and protective eyewear.
Post-install checklist
With the replacement completed and water restored at the shutoff, the homeowner should run a concise post-install checklist to confirm the faucet functions and to catch common issues early.
Inspect for visible leaks at connections and packing nut, test handle operation for smooth open/close, verify steady full flow and proper shutoff, check hose bib thread alignment, and guarantee insulation or winterization measures are intact.
Emergency steps for sudden leaks or bursts
Shut off the nearest supply valve immediately and, if necessary, the main house water to stop damage; then clear the area of people and valuables and place buckets or towels to catch remaining water.
- Document leak location and severity; photograph for records.
- Tighten fittings or cap the line temporarily; use hose clamp or rubber patch.
- Call a plumber if flow persists or pipes are damaged; avoid electrical hazards.
Conclusion
Replacing an outdoor faucet can be empowering and practical; about 60% of homeowners tackle simple plumbing tasks themselves, revealing a widespread DIY confidence. This guide underscores that careful preparation and correct parts often prevent leaks and frustration. For many, successfully swapping a spigot brings lasting savings and peace of mind, while recognizing complex corrosion or frozen pipes still warrant a professional’s help to guarantee safety and reliable outdoor water access.
