
How to Clean PVC Pipe Inside: Step-by-Step Guide for a Thorough, Safe Flush
To effectively clean the inside of a PVC pipe, start by isolating the section and ensuring you wear gloves and eye protection. This process involves removing any debris through accessible cleanouts, then using soft brushes or an auger to loosen buildup. For mineral or organic deposits, apply a PVC-safe cleaner or a mild vinegar solution, agitate the area, and flush with high flow until clear. Don’t forget to neutralize and rinse thoroughly, inspecting joints as you go and repeating the process for stubborn areas. For a comprehensive understanding, refer to detailed procedures, tool recommendations, and essential safety tips.
Overview of Cleaning PVC Pipe Interiors
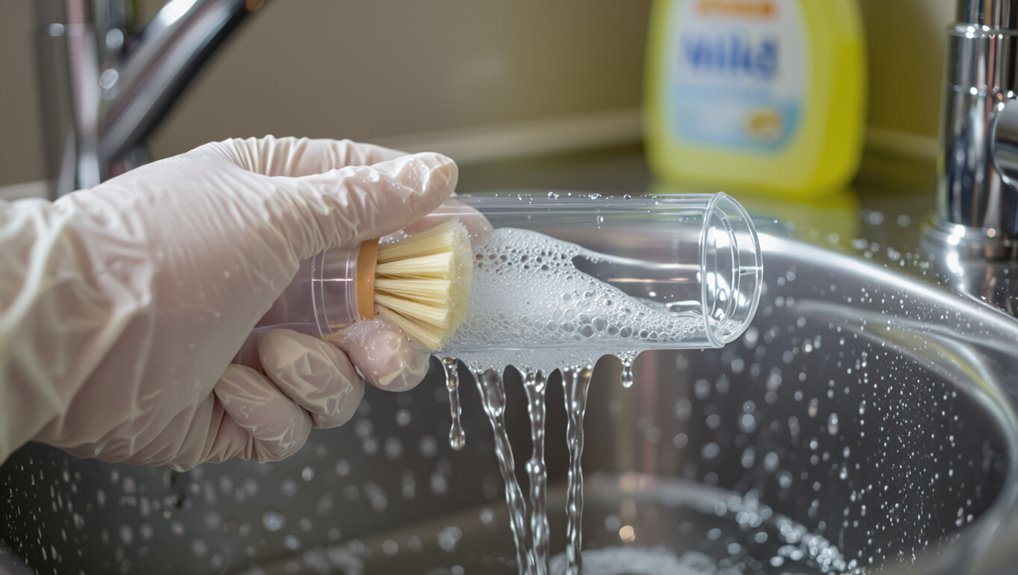
Maintaining clean interiors of PVC pipe is important for preserving plumbing performance and ensuring safe water quality.
Buildup from mineral deposits, biofilm, and sediment commonly restricts flow and can harbor contaminants.
Proper cleaning requires attention to basic safety measures and use of appropriate protective gear to prevent chemical or physical injury.
Why internal PVC pipe cleaning matters for plumbing and water quality
Because sediments, biofilms, and mineral deposits accumulate over time, cleaning the interior of PVC pipes is essential to preserve flow efficiency, prevent blockages, and reduce contaminants that can degrade water quality.
Routine maintenance clarifies water taste, limits microbial growth, and extends pipe lifespan.
Clear guidance on how to clean PVC pipe inside supports safe, targeted flushing and reduces costly repairs.
Common causes of buildup inside PVC pipes
Following the benefits of internal cleaning for flow and water quality, attention turns to the typical sources of buildup that necessitate those measures.
Mineral scaling from hard water, biofilm and bacterial growth, sediment and particulate accumulation, grease and soap residue, chemical precipitates from reactions, and rust flakes from metal fittings each contribute to reduced diameter, flow restriction, odors, and contamination, prompting targeted cleaning.
Safety precautions and protective gear needed
A basic safety regimen protects workers and prevents damage when cleaning PVC pipe interiors.
Technicians should wear chemical-resistant gloves, eye protection, a respirator for fumes, and coveralls.
Lockout/tagout and ventilation reduce hazards.
Use non-sparking tools, avoid open flames near solvents, and confirm waste disposal complies with regulations.
Inspect PPE before use and follow manufacturer instructions for cleaning agents and equipment.
Quick method Fast flush for minor buildup
The quick flush method requires only a few basic tools and materials—gloves, a bucket or hose, a mild detergent or vinegar solution, and a brush or nozzle adapter—to clear light interior buildup.
Procedures are straightforward: isolate the section, apply the cleaning solution, flush at high flow until residue is gone, then inspect and repeat if needed.
This approach is appropriate for recent or soft deposits and should be skipped for heavy scale, root intrusion, or chemical corrosion.
Tools and materials for a quick flush
Several basic items suffice for a quick flush: a garden hose with a high-flow nozzle, a bucket, rubber gloves, a pipe brush or flexible cleaning rod, and a mild detergent or vinegar solution.
Additional useful materials include towels and safety glasses.
Recommended compact kit:
- Adjustable nozzle
- Soft-bristled pipe brush
- Measuring cup for solution
- Protective gloves and eyewear
Step-by-step fast flush procedure
Begin by isolating the section of PVC to be flushed and assembling the prepared kit so only clean water and the mild cleaning solution contact the pipe; this guarantees an efficient, contained process and reduces the risk of contaminating downstream fixtures.
Open inlet, introduce solution gently, agitate with a soft brush if accessible, let sit 5–10 minutes, flush thoroughly with clean water until clear, then reseal and inspect for residue.
When a quick flush is sufficient
After completing the fast flush procedure, determine whether residue is light and localized. A quick flush suffices when buildup is minor, recent, and not causing flow restriction or odors.
Proceed with a single high-volume rinse, inspect visually and by flow test, and monitor for recurrence.
If discoloration, persistent odor, slowed drainage, or repeated deposits appear, escalate to targeted cleaning or mechanical removal.
Deep cleaning process Thorough inside cleaning
For thorough inside cleaning, the writer outlines the specific tools, chemicals, and equipment required and explains how to prepare the work area and isolate the pipe section.
Mechanical techniques—such as brushes, snakes, and hydro tools—are described alongside chemical options with clear dilution and safety instructions.
Guidance is provided on safely combining mechanical and chemical methods to maximize effectiveness while minimizing risks.
Tools, chemicals, and equipment for deep cleaning
Proper deep cleaning of PVC pipe requires a compact set of tools and carefully chosen chemicals:
- Soft-bristle pipe brush and flexible rods for scouring interior surfaces
- Non-abrasive PVC-safe cleaner or diluted enzymatic solution to dissolve biofilm
- Portable wet/dry vacuum or pump for flushing and extraction
- Nitrile gloves, safety goggles, and chemical-resistant container for mixing and disposal
Preparing the work area and isolating the pipe section
Before any cleaning begins, the work area should be secured, well-lit, and free of obstructions to allow safe access to the PVC run and clear egress for tools and waste.
The operator isolates the target section by shutting valves, capping adjacent branches, and depressurizing lines.
Surfaces are protected, drains alerted, and electrical hazards mitigated.
Signage and ventilation are established before proceeding.
Mechanical cleaning techniques (brushes, snakes, hydro tools)
Begin mechanical cleaning by selecting the appropriate tool for the deposit and pipe diameter: rotating brushes remove soft biofilm and mineral scales, keyed snakes clear localized blockages and roots, and compact hydro-jetters flush stubborn sediments and encrustations.
Operators work methodically from access points, advancing and retracting tools to scrape and dislodge debris. Then, flush remaining particles with controlled flow and inspect results with a camera.
Chemical cleaning options and safe dilution/use instructions
Choose chemical agents based on deposit type and PVC compatibility: mild acidic cleaners (citric or diluted phosphoric) dissolve mineral scale, enzymatic or oxidizing cleaners target organic biofilm, and buffered alkaline formulations remove grease.
Follow manufacturer dilution ratios, test small sections, rinse thoroughly with plenty of water, neutralize acids with baking soda solution if required, and guarantee adequate ventilation and proper PPE to prevent PVC damage and operator harm.
Combining mechanical and chemical methods safely
Integrate mechanical agitation and targeted chemicals to achieve thorough interior PVC cleaning while minimizing material stress and operator risk.
Use soft-bristled brushes, rotating snakes, or low-pressure hydro tools alongside mild surfactants or enzymatic cleaners.
Sequence actions to limit contact time, avoid abrasive tools with harsh solvents, wear PPE, ventilate, and monitor for leaks or degradation.
Document procedures and test a small section first.
Flushing, neutralizing, and rinsing after cleaning
Flush residual cleaning agents and loosened debris thoroughly to prevent chemical carryover, blockages, or long-term PVC exposure.
After mechanical scrubbing and chemical treatment, introduce copious potable water flow, then apply an appropriate neutralizer (per product instructions) to deactivate residues.
Continue rinsing until test strips read neutral pH and runoff is clear.
Inspect visually and by flow test before reassembly and return to service.
Cleaning specific PVC pipe systems and scenarios
Different PVC installations present distinct cleaning needs and constraints that affect methods and materials.
Residential drains, cold-water supply lines, outdoor irrigation and sprinkler systems, sewer/septic-connected pipes, and long-run or buried mains each require tailored procedures to protect function and safety.
The following sections outline specific risks, recommended cleaners, and practical steps for each scenario.
Residential drain and waste PVC pipes
Cleaning residential drain and waste PVC systems requires attention to common clog sources—hair, grease, soap scum, and mineral buildup—and to the pipe layout, vents, and trap access points to guarantee effective removal without damaging fittings or seals.
Inspect traps and cleanouts, use mechanical augers or enzyme cleaners for organic blockages, flush with hot water, avoid harsh chemicals that degrade joints, and test venting for proper flow.
PVC water supply lines (cold-water systems)
Many homeowners encounter sediment, scale, and occasional biological growth in cold-water PVC supply lines, requiring targeted methods that preserve pipe integrity and potable-water safety.
Cleaning focuses on flushing with potable-quality water, mechanically removing loose deposits with soft brushes or swabs, and using approved, food-grade cleaners or diluted chlorine for disinfection.
After treatment, thorough rinsing and water-quality testing confirm safety before regular use resumes.
Outdoor irrigation and PVC sprinkler lines
Outdoor irrigation and sprinkler PVC presents distinct challenges from indoor cold-water supply lines because exposure to soil, organic debris, algae, and seasonal freeze–thaw cycles produces different types of buildup and damage.
Cleaning requires flushing, mechanical scrubbing of accessible sections, removing biofilm and root intrusions, and inspecting joints for leaks or frost cracks.
Use gentle detergents, approved biocides sparingly, and winterize to prevent recurrence.
PVC sewer and septic-connected lines
Addressing PVC sewer and septic-connected lines requires procedures tailored to waste transport systems, where solids, grease, biofilm, and corrosive gases create distinct deposits and risks.
Technicians inspect access points, use mechanical rodding or hydro-jetting rated for PVC, and apply enzymatic or bacterial treatments to reduce biofilm.
Safety protocols, odor control, and proper waste disposal prevent contamination and protect downstream systems.
Long-run or underground PVC mains
Long stretches of underground PVC mains demand cleaning approaches that account for limited access, extended run-lengths, variable soil conditions, and potential groundwater interaction.
Specialized equipment—camera inspection, hydrojetting with flow control, and sectional flushing—reduces disruption.
Isolate sections with valves, verify downstream discharge permits, and monitor turbidity.
Prioritize safety: locate utilities, use confined-space protocols when accessing manholes, and document before-and-after inspections.
Identifying problems and knowing when to replace or repair
The guide shifts to recognizing when cleaning is insufficient and a more permanent fix is required.
It outlines how to assess visible damage such as cracks, warping, chemical attack, and other signs that indicate replacement rather than cleaning.
It also explains scenarios warranting a professional plumber, including structural failures, persistent leaks, or uncertainty about chemical compatibility.
Signs cleaning won’t fix the issue
When routine buildup or minor blockages persist despite cleaning, it indicates underlying damage or system issues that require repair or replacement.
Additional signs include recurring leaks, severe corrosion or pitting observable at joints, persistent odors after flushing, discolored or cloudy outflow, reduced flow despite clear paths, and frequent pressure fluctuations.
These warrant professional inspection and likely component replacement rather than repeated cleaning.
Assessing pipe damage, cracks, and chemical incompatibility
Persistent problems after cleaning often indicate more than surface buildup and warrant a careful inspection of the pipe itself for structural and chemical issues.
Inspect for hairline cracks, joint separation, bulging, discoloration, or softening.
Check for brittle sections from UV or solvent exposure and residues indicating chemical incompatibility.
Document findings, isolate damaged runs, and plan targeted repairs or replacement of compromised PVC segments.
When to call a professional plumber
How can a homeowner determine whether a DIY fix suffices or professional help is necessary?
Visible fractures, persistent leaks, repeated clogs despite proper cleaning, chemical damage, or compromised joints indicate professional assessment.
A plumber evaluates structural integrity, recommends repair versus replacement, and guarantees code-compliant materials and fittings.
For aging systems or supply-line concerns, prompt professional intervention prevents escalation and water damage.
Preventing future buildup inside PVC pipes
To prevent future buildup inside PVC pipes, a regular maintenance schedule should be established with clear intervals for inspection and cleaning.
Operational best practices—such as avoiding pouring grease or harsh chemicals down drains and regulating water temperature and flow—help reduce deposit formation.
Use of approved enzyme cleaners, descalers, and inline strainers can further protect pipes and minimize clogging.
Routine maintenance schedule recommendations
Establishing a regular maintenance schedule helps prevent mineral deposits, biofilm, and debris from accumulating inside PVC piping and extends system lifespan.
Inspections every 3–6 months, with visual checks and flow assessments, catch early issues.
Quarterly flushing with appropriate cleaners and annual deeper inspections or camera surveys for longer runs are recommended.
Record findings, actions, and dates to guide adjustments based on usage and water quality.
Best practices for system use to reduce deposits
Optimize system use by minimizing conditions that promote scale, biofilm, and sediment accumulation inside PVC pipes.
Adjust flow rates to prevent stagnation, maintain consistent temperatures to limit mineral precipitation, and flush lines after prolonged idle periods.
Install and monitor upstream filters or strainers, avoid introducing organic load spikes, and schedule brief high-velocity purges to dislodge early deposits before they harden.
Recommended products and treatments to prevent clogs
Recommend a targeted mix of mechanical filters, chemical inhibitors, and routine dosing schedules to keep PVC pipes clear and extend system life.
Suggested measures include selecting food-safe scale inhibitors, enzyme-based biofilm treatments, and corrosion-compatible descalers while scheduling periodic flushing.
Combine with routine inspections and flow monitoring to verify effectiveness.
- Food-safe scale inhibitor
- Enzyme biofilm cleaner
- Mild descaler compatible with PVC
- Scheduled dosing and inspection
Troubleshooting common cleaning challenges
When cleaning does not restore performance, common problems require targeted responses.
Stubborn mineral scale, grease and biological slimes, lingering odors or discoloration, and persistent flow restrictions each demand different treatments and inspection methods.
The following section outlines practical diagnostics and remedies for these specific challenges.
Dealing with stubborn mineral scale
Hard mineral scale—built up from hard water deposits like calcium and magnesium—can cling to PVC inner walls and resist routine scrubbing or flushing.
Use diluted acetic acid (white vinegar) or commercially formulated descalers rated safe for PVC, apply with soak cycles, then flush thoroughly.
Mechanical agitation with a soft brush or nylon tube cleaner helps.
Rinse completely and inspect; repeat if residues persist.
Removing grease and biological slimes
Grease and biological slimes—made up of oils, organic residues, biofilm-forming bacteria, and fungi—require different approaches than mineral scale because they respond to surfactants, enzymatic breakdown, and oxidizing agents rather than acids.
Use biodegradable degreasers or enzyme cleaners, allow contact time to penetrate biofilm, agitate mechanically with brushes or jets, then flush thoroughly.
Repeat if residues persist; avoid harsh solvents that damage PVC.
Addressing odor and discoloration after cleaning
Address lingering odors and stubborn discoloration by identifying their sources—residual organic matter, trapped moisture, chemical residues, or surface oxidation—and selecting targeted treatments such as extended rinsing, odor-neutralizing agents, mild oxidizers, or gentle abrasion; confirm compatibility with PVC and test in an inconspicuous area before full application to prevent damage.
Follow with thorough drying, repeat localized treatments as needed, and document successful methods for future maintenance.
Resolving flow issues that persist post-cleaning
When flow problems persist after cleaning, the issue often lies beyond surface deposits and requires systematic troubleshooting to identify residual blockages, misaligned fittings, or damaged sections that restrict passage.
Inspect visually and with a snake or camera, test joints for leaks or misalignment, measure pressure and flow rates, replace or re-seat suspect fittings, and cut out crushed or corroded segments to restore unobstructed flow.
Safety, environmental, and material compatibility considerations
When cleaning PVC pipe, attention must be paid to chemical compatibility—strong solvents and certain bleaching agents can damage PVC, while milder cleaners and manufacturer-recommended alternatives minimize risk.
Proper disposal of rinse water and any chemical wastes is essential to prevent environmental contamination and should follow local regulations.
Appropriate personal protective equipment and adequate ventilation help protect workers from fumes and skin exposure during cleaning.
Chemicals to avoid with PVC and safe alternatives
Several common solvents and strong oxidizers can degrade PVC, causing softening, crazing, or structural failure; consequently, users should avoid exposure to acetone, methylene chloride, concentrated acids and bases, and aromatic hydrocarbons.
Recommended safer options and practices include:
- Mild detergent solutions for general cleaning
- Isopropyl alcohol for light residue removal
- Dilute sodium hypochlorite for biological fouling (low concentration)
- Mechanical flushing and brushing when possible
Proper disposal of rinse water and chemical wastes
Dispose rinse water and chemical residues responsibly to protect people, PVC systems, and the environment: contaminated wash water from PVC cleaning can contain dissolved solvents, disinfectants, or particulates that may harm wastewater systems, aquatic life, or downstream users if released untreated.
Collect and segregate wastes, neutralize or dilute per product instructions, label containers, and arrange hazardous-waste disposal or approved sewer disposal following local regulations.
PPE and ventilation best practices
Proper personal protective equipment (PPE) and adequate ventilation are essential to minimize inhalation, skin contact, and material degradation when cleaning PVC.
Selecting gloves, eye protection, respiratory gear, and ventilation strategies should match the specific cleaning agents and work environment.
Use chemical-resistant gloves, splash goggles, and NIOSH-approved respirators for solvents.
Ascertain cross-ventilation, fume extraction, and monitor air; avoid confined-space work without permits.
Tools and product comparison
A brief comparison of manual versus powered cleaning tools highlights trade-offs in control, speed, and potential for surface damage.
Likewise, evaluating common cleaning chemicals for PVC—such as mild detergents, alcohols, and specialized PVC cleaners—clarifies effectiveness and compatibility.
The following section compares tool types and chemical options to guide appropriate choices for specific cleaning tasks.
Manual vs powered cleaning tools
Many homeowners and professionals weigh the choice between manual and powered cleaning tools based on job scale, access, and material sensitivity. Manual tools offer control, low cost, and gentler action for delicate PVC; powered tools increase speed and reach but risk abrasion or heat. Selection depends on clog type, pipe layout, and operator skill.
| Tool | Strength | Risk |
|---|---|---|
| Hand snake | Control | Limited reach |
| Brush | Gentle | Labor |
| Drill auger | Speed | Abrasion |
| Hydro jet | Power | Overpressure |
| Air blaster | Reach | Heat |
Comparison of common cleaning chemicals for PVC
Beyond tool choice, chemical cleaners often play a complementary role in clearing PVC pipes, especially for organic clogs or mineral buildup that mechanical methods struggle to remove. Choices weigh effectiveness, safety, and PVC compatibility: enzymatic cleaners are gentle but slow; bleach disinfects but can damage seals; acid descalers remove scale but require caution.
| Cleaner Type | Notes |
|---|---|
| Enzymatic | Safe, slow |
| Bleach | Disinfects, corrosive |
| Acid descaler | Effective on scale |
| Solvent-based | Fast, risky on PVC |
Step-by-step checklist for a full PVC pipe interior cleaning
The article presents a concise, ordered checklist for thoroughly cleaning the interior of PVC pipe.
It separates the process into three practical stages: a pre-cleaning checklist to prepare tools and isolate the system, a cleaning execution checklist for safe and effective removal of deposits, and a post-cleaning verification and maintenance checklist to confirm cleanliness and prevent recurrence.
Each stage lists clear, actionable steps that can be followed sequentially.
Pre-cleaning checklist
Before any cleaning begins, a concise checklist verifies safety, readiness, and efficient workflow:
- Confirm water and power shutoffs; label valves and switches.
- Gather PPE: gloves, eye protection, mask; ascertain fit.
- Assemble tools and approved cleaners; verify chemical compatibility with PVC.
- Inspect access points and fittings; note damage, leaks, or required repairs before interior cleaning.
Cleaning execution checklist
Begin by isolating the section to be cleaned, verifying shutoffs and lockouts, and posting clear work-area signage; then proceed through the following ordered steps to guarantee a thorough, safe interior cleaning of PVC piping.
The technician follows a concise sequence:
- Flush with potable water to remove loose debris
- Apply approved cleaner and dwell per label
- Mechanically dislodge stubborn buildup with brushes
- Final rinse until effluent is clear and pH neutral
Post-cleaning verification and maintenance checklist
Several quick inspections guarantee the cleaned PVC pipe is fit for service: verify flow and pressure, confirm effluent clarity and neutral pH, inspect seals and joints for leaks, and document findings.
- Measure flow rate and static/working pressure
- Check water clarity and pH with test strips
- Visually inspect joints, fittings, and access points
- Record results, corrective actions, and next maintenance date
Conclusion
In sum, routine interior cleaning of PVC pipe preserves flow, prevents odor and contamination, and extends service life through methods from a quick flush to deep chemical or mechanical cleaning. Technicians should weigh system type, buildup severity, and safety—remembering that sometimes replacement is wiser than endless repair. Even a Renaissance-era bucket of soapy water metaphorically underscores that simple measures often restore function before more complex interventions are needed.
