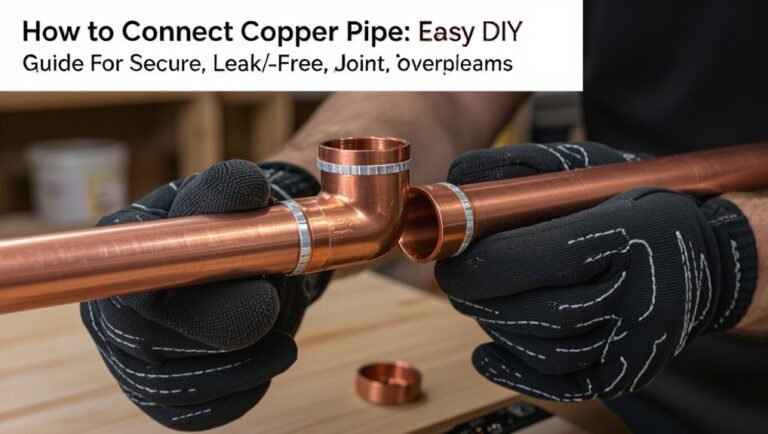
How to Pipe a Shower Valve: Step-by-Step Plumbing Guide for DIYers
Piping a shower valve involves connecting hot and cold water supplies to the valve, securing it at the proper depth, and linking it to the showerhead or tub. Use compatible materials like copper, PEX, or CPVC, and ensure all fittings match your connection methods. Always pressure-test for leaks before closing the wall. While basic plumbing skills like cutting and joining are essential, complex relocations or code issues should be handled by a professional. This guide will provide you with step-by-step techniques and common troubleshooting tips to help you successfully pipe your shower valve.
Overview of Piping a Shower Valve and When to DIY
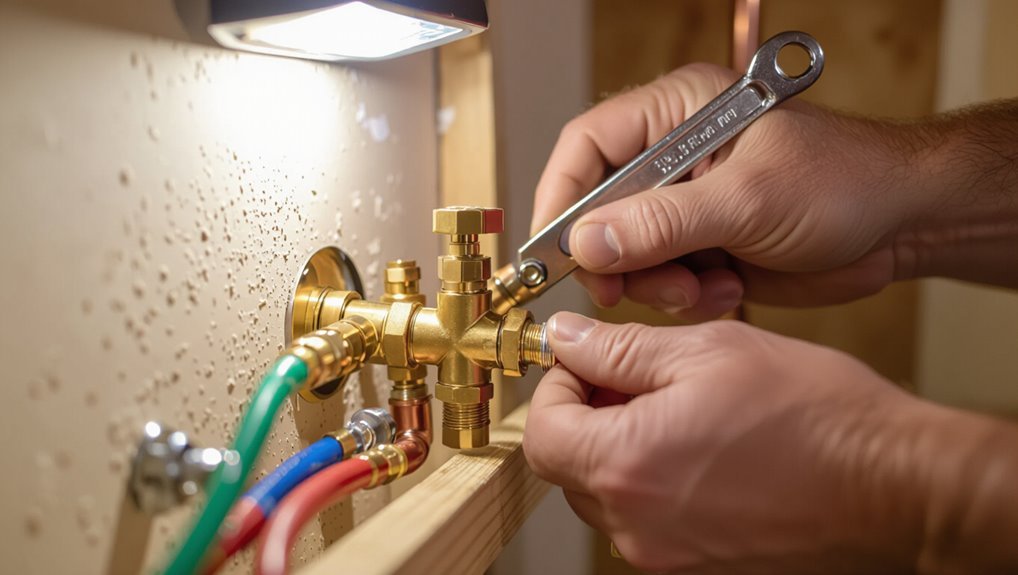
Piping a shower valve involves routing hot and cold supply lines, fitting the valve body, and connecting the shower outlet. This typically occurs during bathroom remodels, repairs, or new installations.
The decision to attempt the work as a homeowner depends on comfort with soldering or push-fit fittings, understanding of local codes, and the complexity of the job. Simple supply swaps may be DIYable, while relocations or troubleshooting leaks often warrant a licensed plumber.
Basic skills required include measuring and cutting pipe, making secure joints, and isolating water, along with familiarity with pressure, flow, and common valve types.
What piping a shower valve means and common scenarios
Installing a shower valve involves connecting the hot and cold water supply lines to the valve body and routing the mixed water to the showerhead or tub spout.
The work can vary from simple replacements to full relocations or system upgrades.
The phrase how to pipe a shower valve covers replacing cartridges, swapping valve types, changing trim, moving rough‑ins, and upgrading materials for pressure or code compliance.
When to attempt DIY versus calling a pro
When scope, skill, and local code align, a homeowner can confidently tackle a shower valve job; however, complex tasks such as relocating the rough‑in, working with unknown or lead plumbing, modifying concealed framing, or adapting systems to meet code typically require a licensed plumber.
Choose DIY for straightforward replacements, accessible access, simple materials, and permitted permits; hire a pro for risk, inspection, or warranty concerns.
Required skills and basic plumbing concepts
Evaluating the required skills begins with understanding basic plumbing concepts—water pressure, flow direction, pipe sizing, and common joint types—so a homeowner can gauge whether a shower valve project fits their abilities.
Required skills include measuring and cutting pipe, soldering or crimping fittings, leak testing, and basic valve installation.
Safety, local code familiarity, and ability to troubleshoot pressure or temperature issues are essential.
Tools, Materials, and Safety Preparations
Before beginning work on a shower valve, the technician reviews an essential tools checklist and assembles the correct materials and replacement parts for the specific valve type.
Required personal protective equipment and basic job-site safety measures are confirmed, and the water supply is shut off with system pressure safely relieved.
These preparations minimize errors and reduce the risk of injury or water damage during the installation.
Essential tools checklist
A concise kit of tools, materials, and safety gear is essential for installing a shower valve efficiently and safely.
The checklist covers cutting, joining, measuring, and protection items to prevent mistakes and injuries.
- Pipe cutter, adjustable wrench, basin wrench
- Soldering torch or PEX crimp tool, flux, fittings
- Safety goggles, gloves, leak detector
Materials and parts needed for different valve types
Several valve types—compression, sweat (soldered), threaded, and PEX-compatible—require distinct materials and fittings to guarantee a reliable shower installation.
Materials include brass or chrome-plated valves, appropriate fittings (compression nuts, sweat couplers, NPT adapters, PEX crimps), compatible pipe (copper, CPVC, PEX), flux/solder or thread sealant, and escutcheons.
- Match valve to pipe type.
- Use compatible fittings.
- Include seals and mounting hardware.
Personal protective equipment and job-site safety
Donning proper personal protective equipment and establishing clear job-site safety protocols reduces injury risk and protects surrounding finishes during shower valve work.
The worker should wear safety glasses, gloves, knee pads, and hearing protection when cutting or soldering. Use respirators for fumes, non-slip footwear, and protect nearby surfaces with drop cloths.
Keep a first-aid kit and clear egress paths.
How to shut off water and relieve system pressure
Shut off the water and relieve pressure before any valve work to prevent flooding and injury: locate and close the home’s main shutoff valve or the local fixture isolation valves, then open the nearest faucets and the shower control to drain residual water from the lines.
Verify flow cessation at the worksite, catch remaining water with a bucket or towels, and depressurize by loosening a downstream fitting briefly.
Identifying Your Shower Valve Type and Rough-In Requirements
Before beginning any piping work, the homeowner should identify the valve type—pressure‑balanced, thermostatic, diverter, or single‑handle—to guarantee proper function and safety.
They must also measure rough‑in depth and center‑to‑center spacing to match the plumbing rough‑in to the valve body.
Finally, compatibility with trim kits and shower fixtures should be verified so the chosen valve accepts the desired handles, escutcheon, and diverter components.
Common valve types (pressure-balanced, thermostatic, diverter, single-handle)
Recognizing the four common shower valve types—pressure-balanced, thermostatic, diverter, and single-handle—is essential for matching rough-in requirements and ensuring proper installation.
Each type controls temperature and flow differently, affecting piping layout, trim compatibility, and safety features. Choose based on desired control, scald protection, and number of outlets.
Key considerations:
- Safety and temperature control
- Outlet configuration
- Trim and compatibility
Measuring rough-in depth and center-to-center spacing
When preparing to rough in a shower valve, precise measurement of the valve’s rough-in depth and the center-to-center spacing for inlets and outlets determines whether the trim will fit and the connections will align with the finished wall.
Measure from finished wall surface to valve mounting plane, note manufacturer spec depth.
Measure horizontal spacing between hot, cold and outlet ports.
Record dimensions before cutting studs or chasing walls.
Checking compatibility with trim kits and shower fixtures
Although valve rough-in dimensions guide installation, verifying that the valve body matches the planned trim kit and shower fixtures is essential to avoid costly rework.
Confirm cartridge type, handle orientation, escutcheon fit, and outlet locations against the trim manufacturer’s specifications.
Check adapter requirements, finish compatibility, and tub/shower diverter integration.
Document model numbers and measure final trim clearances before closing walls.
Plumbing Options and Connection Methods
The article compares common supply materials—copper with soldered joints, PEX with crimp or expansion fittings, and CPVC with solvent-weld connections—highlighting how each joins to a shower valve.
It summarizes the pros and cons for durability, ease of installation, repairability, and code considerations.
Guidance is offered on selecting compatible fittings and adapters to match valve ports and local plumbing standards.
Copper soldering vs. PEX crimp/expansion vs. CPVC solvent weld
Compare three common methods for connecting a shower valve—copper soldering, PEX crimp/expansion, and CPVC solvent welding—by evaluating durability, ease of installation, cost, and suitability for existing systems. Each method suits different skills, tools, and retrofit scenarios; choice hinges on access, thermal concerns, and local code.
| Method | Visualize application |
|---|---|
| Copper soldering | Rigid joints, torch |
| PEX crimp/expansion | Flexible tubing, rings |
| CPVC solvent weld | Plastic fittings, primer and cement |
Pros and cons of each connection method
Each connection method offers distinct trade-offs in durability, installation complexity, cost, and compatibility with existing plumbing.
Copper soldering is durable and heat-resistant but requires skill and flame.
PEX crimp/expansion is flexible, faster, and DIY-friendly, yet vulnerable to UV and some fittings.
CPVC solvent weld is inexpensive and easy to join but less heat-tolerant and can become brittle over time.
Choosing the right fittings and adapters
Selecting fittings and adapters hinges on matching material, size, and connection type to the existing plumbing and valve specifications.
Choose brass, copper, CPVC, or PEX fittings compatible with pressure ratings and local code. Prefer sweat, press, or compression joints for reliability; use connector adapters where dissimilar materials meet.
Verify thread types (NPT vs BSP) and seal methods to prevent leaks and guarantee serviceability.
Step-by-Step Guide: Installing and Piping a Shower Valve
The following section outlines a concise, sequential approach for installing and piping a shower valve.
It covers preparing access and opening the wall, mounting and securing the valve body to studs, and laying out supply lines with marked cuts.
It then addresses making hot and cold supply connections using different methods and routing the shower outlet and diverter lines.
Step 1 Preparing access and opening the wall
Begin by confirming the plumbing layout and shutting off the water supply at the main or local shutoff to prevent leaks during work.
Remove trim, tile, or drywall only as needed to expose piping and stud bays.
Score and cut access openings centered on the valve location, protect surrounding finishes, and clear insulation or obstructions for unobstructed reach and inspection.
Step 2 Mounting the valve body and securing to studs
Position the valve body at the planned rough-in height and align its mounting ears so the outlet orientations match the shower fixtures; then clamp or brace it to the studs to hold it square and plumb while piping work proceeds.
Verify depth for finished wall thickness, use screws or mounting plates through studs, and double-check level and secure attachment to prevent movement during soldering or pressure testing.
Step 3 Laying out supply lines and marking cuts
With the valve body secured and confirmed square and plumb, attention shifts to laying out the hot, cold, and mixed water supply runs.
Measure centerlines to fixtures, account for fittings and offsets, and mark pipe routes on studs and backer board.
Mark precise cut locations, noting required stub lengths from valve ports.
Verify clearances for trim and access before cutting.
Step 4 Making hot and cold supply connections (method variations)
Connect the hot and cold supply lines to the valve using the chosen method—sweat, threaded, push-fit, or compression—ensuring each connection matches the valve inlet type and local code requirements.
For sweat, flux and solder joints; for threaded, apply tape or compound and tighten; for push-fit, fully seat pipe; for compression, seat ferrule and tighten nut.
Test for leaks and secure lines.
Step 5 Routing shower outlet and diverter lines
After verifying the hot and cold supply connections are secure and leak-free, the installer routes the outlet and diverter lines from the valve to the showerhead, tub spout, and any body sprays.
Lines are measured, cut, and supported to maintain proper slope and alignment.
Connections use specified fittings and solder, crimp, or threaded joints.
Access panels and clearance for trim are confirmed.
Step 6 Pressure testing the rough-in connections
Begin pressure testing the rough-in by isolating the valve and attaching a calibrated test gauge to the system at a convenient test point.
Pressurize to the specified system pressure (typically 50–60 psi), monitor for at least 15 minutes, and watch for pressure drop.
Inspect all joints and fittings visually and with soapy water.
Repair any leaks, then repeat the test until stable.
Step 7 Adjusting rough-in depth and final valve positioning
Set the valve assembly to its final depth and orientation so the trim will seat correctly and the finished wall will be flush.
Verify cartridge face sits at manufacturer-specified distance from finished wall. Lock mounting brackets or shims to prevent movement.
Confirm inlet/outlet alignment and handle clearance. Recheck supply stops and label hot/cold.
Guarantee secure support for final trimming and fixture attachment.
Step 8 Closing the wall, waterproofing, and tiling preparations
With the valve secured and depth verified, the wall may be closed and the shower area prepared for waterproofing and tile.
Patch or install cement backer board, confirm valve box access aligns with trim location, and seal seams with waterproof tape and thinset.
Apply a liquid or sheet membrane per manufacturer instructions, allow curing, and mark tile layout and waterproofed substrate for installation.
Step 9 Installing trim, cartridge, and final faucet components
Finish the plumbing by installing the valve cartridge, trim plate, and handle assembly according to the manufacturer’s sequence and torque specifications.
Inspect seals, O-rings, and stem alignment before seating the cartridge.
Secure the trim plate with supplied screws, ensuring a flush fit and even gasket compression.
Attach the handle and set screws, confirming smooth operation and correct orientation without tightening beyond recommended torque.
Step 10 Final leak check and temperature calibration
Start by pressurizing the system and exercising the valve to reveal any leaks and confirm proper flow paths.
Then carry out temperature calibration per the manufacturer’s procedure to verify safe hot-water limits.
Inspect all joints, trim, and escutcheons for drips.
Adjust the pressure balance or thermostatic stop as needed.
Recheck temperatures at the outlet with a thermometer and document final settings.
Common Problems and How to Fix Them
Common issues during shower valve installation include leaks at joints, inadequate or fluctuating water pressure, and operational noises such as hammering or vibration.
Typical troubleshooting covers tightening or replacing fittings, checking supply balance and pressure regulators, and adding shock absorbers or securing loose piping.
Attention must also be paid to cross-connections and backflow prevention to protect potable water.
Leaks at joints and troubleshooting steps
Leaks at joints are among the most frequent issues encountered when piping a shower valve and typically indicate problems with sealing, alignment, or material wear.
Inspect connections for visible gaps, corrosion, or loose fittings. Tighten fittings, reapply proper thread sealant or solder joints, and replace damaged sections or O-rings.
Pressure-test the assembly and monitor for recurrence before finishing wall repairs.
Poor water pressure or unbalanced temperatures
Several factors can cause poor water pressure or uneven temperatures at a shower valve, including clogged supply lines, undersized piping, faulty pressure-balancing or thermostatic cartridges, and inconsistent hot- and cold-water supply pressures.
Diagnosis involves measuring inlet pressures and flow, inspecting aerators and screens, and checking cartridge condition.
Remedies include cleaning or replacing clogged lines, upsizing piping where feasible, and installing or replacing balancing/thermostatic cartridges to restore stable flow and temperature.
Valve noise, hammering, and vibration solutions
Addressing valve noise, hammering, and vibration begins with identifying the sound source and operating conditions that produce it.
Tighten loose mounting straps, secure piping with proper clamps, and add cushioning or rubber gaskets.
Install a water hammer arrestor near the valve and check cartridge components for worn springs or seats.
Replace damaged parts, purge air from lines, and verify correct water pressure to prevent recurrence.
Cross-connection and backflow concerns
Prevent contamination by identifying and eliminating cross-connections and backflow risks in the shower plumbing system.
Inspect for illegal ties between potable and nonpotable lines, guarantee check valves and air gaps are installed per code, and replace failed backflow preventers.
Test assemblies after work, maintain pressure differentials, and consult local regulations.
Prompt correction prevents contamination, fines, and health hazards.
Code, Permits, and Best Practices
Before beginning work, the installer should confirm local plumbing codes for materials, pipe sizing, and connection methods.
They must also determine whether a permit and inspection are required for valve replacement or relocation.
Attention to water-efficiency standards and anti-scald devices guarantees compliance and user safety.
Typical local code requirements to verify
Several jurisdictions require specific checks and approvals when piping a shower valve, including applicable plumbing codes, permit issuance, inspection timing, and certified fixture and material specifications.
Verify local code on water supply sizing, backflow prevention, anti-scald devices, drain/waste/venting, seismic/bracing requirements, accessible clearances, and approved soldering/flux or solderless connections.
Confirm accepted materials, certification marks, and installation standards before starting work.
When a permit or inspection is required
Many municipalities require a permit and inspection for shower valve work whenever plumbing alterations affect water supply, drainage, or gas lines, as well as for new installations or relocations of fixtures.
Homeowners should check local building department rules, submit plans if required, and schedule rough and final inspections.
Failure to obtain permits can lead to fines, insurance denial, or required redo of noncompliant work.
Water efficiency and anti-scald considerations
Consideration of water efficiency and anti-scald protection is essential when plumbing a shower valve, both to meet code requirements and to guarantee occupant safety.
Select low-flow showerheads and pressure-balancing or thermostatic mixing valves to limit consumption and prevent sudden temperature shifts.
Verify local fixture flow limits, install a temperature stop or scald guard, and document compliance for inspection and future maintenance.
Time, Cost Estimates, and Material Sizing
Typical project timelines vary by scope, from a quick valve swap in a few hours to full rough-in work over several days.
A clear cost breakdown should separate materials, specialty tools, and labor rates to set realistic budgets.
Pipe and fitting sizes must be chosen based on fixture flow requirements and code minimums to guarantee peak performance.
Typical project timelines for different scenarios
How long will the job take and what will it cost depends on scope, access, and material choices.
A simple valve swap in an accessible wall: 2–4 hours.
Replacing valve with new rough‑in in finished bathroom: 1–2 days.
Relocating valve or rerouting supply lines: 2–4 days.
Complex remodels involving studs, tile, or permits: 1–2 weeks.
Contingencies add 10–30%.
Cost breakdown by materials, tools, and labor
A clear cost breakdown separates materials, tools, and labor into distinct line items so homeowners and pros can compare options and plan budgets accurately. Itemize valve, fittings, pipe, sealant, and mounting hardware; list tool purchases or rentals; and estimate labor hours or contractor rates for repairs or full installs.
| Category | Typical Cost |
|---|---|
| Valve | $50–$300 |
| Pipe & fittings | $20–$150 |
| Tools/rental | $0–$80 |
| Labor | $60–$120/hr |
How to size pipe and fittings for optimal flow
Several key factors determine proper pipe and fitting sizes for ideal shower flow, including fixture demand, supply line capacity, and allowable pressure loss.
Calculate fixture unit equivalents, match main feed size to combined demand, and limit velocity to reduce noise and erosion.
Account for fitting equivalent lengths, altitude, and pressure regulator settings.
Choose materials and diameters that meet code and minimize future alterations.
Tips to Ensure a Durable, Leak-Free Installation
The author outlines proven techniques for soldering, crimping, and solvent welding to create strong joints and prevent leaks.
Attention is paid to locating and installing access panels to avoid future service difficulties.
A concise maintenance checklist is provided, with guidance on inspection intervals and clear criteria for replacing worn components.
Best practices for soldering, crimping, and solvent welding
Start by selecting the appropriate joining method for the pipe material and site constraints, then follow technique-specific steps to guarantee strong, leak-free joints.
For soldering: clean, flux, fit, heat evenly, apply solder, cool naturally.
For crimping: use correct fittings, rings, and calibrated tool; verify compressions.
For solvent welding: dry, chamfer, apply primer where required, then solvent cement and hold until set.
Preventing future access problems and installing access panels
Plan access before finishing walls: place removable panels or access doors directly over valves and unions to allow inspection, maintenance, and future repairs without demolition.
Use rigid framing and mark locations on plans. Install panels flush with finished surfaces, seal edges to prevent moisture entry, and guarantee screws remain accessible.
Label behind panels and verify clearance for tools and replacement parts to avoid obstructed servicing.
Maintenance checklist and when to replace parts
Although routine checks are simple, a consistent maintenance checklist is essential to detect leaks early, preserve cartridge and seat life, and prevent costly repairs.
Inspect for drips, corrosion, loose fittings, and mineral buildup quarterly.
Replace cartridges at first signs of leaking or stiffness; replace seals and seats every 3–5 years or sooner if deteriorated.
Document inspections and repairs for warranty and resale.
Example Project Scenarios and Step Variations
The author outlines three common project scenarios to illustrate how steps and priorities change with context.
First is replacing a valve in an existing tile shower, which emphasizes access and repair techniques.
Second covers rough‑in for new construction and converting a tub/shower valve to a shower‑only setup, each requiring different plumbing layouts and trim considerations.
Replacing a valve in an existing tile shower
Replacing a valve in an existing tile shower requires careful preparation to avoid damaging surrounding tile and plumbing. Assess access options, turn off water, and gather trim removal tools and replacement parts before cutting into the wall.
Create minimal access via grout or backerboard removal, expose the valve, document pipe layout, remove and replace valve with proper fittings and supports, pressure test, patch access, and restore tile and trim.
Rough-in for a new shower in new construction
After describing valve replacement in an existing tile shower, attention turns to planning the rough-in for a new shower in new construction, where access and layout can be coordinated from the start.
Framing, stud cavity depth, and valve height are set before drywall. Supply lines, drain slope, and shutoff placement follow plan dimensions.
Pressure testing precedes enclosure finish work.
Converting tub/shower valve to shower-only setup
Convert a combined tub/shower valve to a shower-only setup by removing the tub spout feed, sealing or capping the diverter, and reconfiguring the outlet to supply only the showerhead; this typically involves evaluating the existing valve type, confirming compatible trim and escutcheon options, and planning for either a permanent cap or redirected piping depending on whether the tub will be reinstated in the future.
Technician verifies water shutoff, drains lines, caps or reroutes tub outlet, tests for leaks, and installs shower-only trim.
Quick Reference Checklists
A concise pre-installation checklist summarizes required tools, materials, and site preparations to guarantee the valve fits and connections are accessible.
A focused post-installation testing checklist verifies pressure integrity, proper function of hot and cold controls, and absence of leaks.
Together these quick reference checklists help streamline the job and reduce rework.
Pre-installation checklist
Before any tools are picked up, a concise pre-installation checklist guarantees all materials, measurements, and site conditions are confirmed to avoid delays and rework.
It directs preparation, safety, and compatibility checks before work begins.
- Verify valve model, fittings, and supply line sizes.
- Confirm stud spacing, wall depth, and mounting height.
- Shutoff locations, required permits, and necessary safety gear.
Post-installation testing checklist
With installation complete and shutoffs verified, the post-installation testing checklist confirms the valve functions, seals, and connections under operating conditions.
The technician systematically verifies pressure, temperature response, and leak integrity, documenting anomalies and corrective actions.
Final steps include verifying escutcheon fit and handle operation, restoring finishes, and informing the homeowner of safe operation and warranty details.
- Pressure and leak test
- Temperature and flow verification
- Handle, trim, and documentation
Conclusion
The guide closes like a seasoned tradesperson pausing to admire a finished wall: the shower valve must be piped with attention to rough-in specs, proper fittings, secure connections, and careful testing. When homeowners follow the outlined tools, safety steps, and piping methods—sweat, compression, or push-fit—they reduce leaks and callbacks. Accurate measurements, correct materials, and patience guarantee the valve performs reliably, turning a complex project into a dependable, long-lasting plumbing solution.