
How to Avoid Damaging Walls During Whirlpool Tub Removal: Step-by-Step Tips and Tools
To safely remove a whirlpool tub without damaging your walls, follow these essential steps: First, shut off all utilities connected to the tub. Next, carefully score the caulk around the tub, then back out any fasteners. Use thin pry bars gently to lift the tub, employing shims and corner protectors to safeguard the edges of your walls. Support adjacent walls with temporary braces and rigid panels to prevent collapse. After removal, clean up non-abrasively to avoid further damage. Don’t forget to inspect for hidden water or mold, documenting any issues for repair. For a more detailed guide on techniques, tools, and preventative measures, continue reading.
Why Removing a Whirlpool Tub Risks Damaging Walls
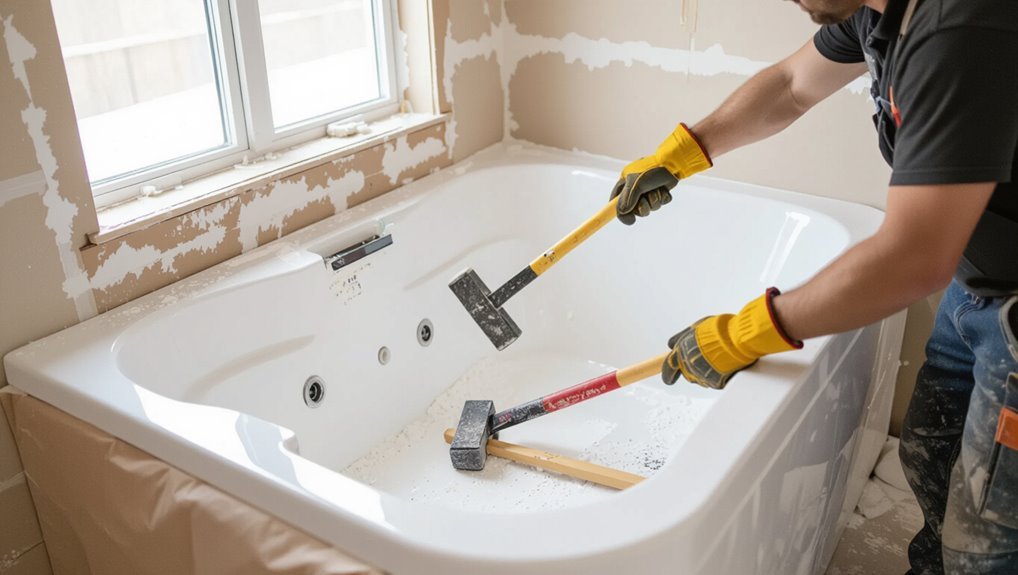
Removing a whirlpool tub can expose fragile assemblies such as tile set over backer board, drywall or plaster, and decorative trim that were never meant to be disassembled.
Common failure points include grout and tile edges, torn drywall or crumbled plaster, and broken trim or casing where the tub met the wall.
Hidden problems like long-term water damage, mold growth, and weakened studs further increase the risk of collateral wall damage during removal.
Common wall structures around tubs and why they’re vulnerable
Bathroom walls around tubs typically consist of a thin layer of gypsum board or cement backer board over wood or metal studs, with a waterproof membrane and tile or acrylic surround as the finished surface.
These layered assemblies are prone to moisture damage, loose fasteners, and brittle grout.
Understanding substrate, fastening methods, and seal integrity guides how to avoid damaging walls during whirlpool tub removal.
Typical failure points: tile, drywall, plaster, and trim
Having outlined typical wall assemblies and their vulnerabilities, attention turns to specific failure points encountered when extracting a whirlpool tub.
Tile grout and brittle tiles crack from prying; drywall tears or crumbles at joint seams and screw points; plaster delaminates where nails flex; trim and casing split or detach when nails pull.
Edges and corners endure concentrated impact, causing chipping.
Hidden issues: water damage, mold, and compromised studs
Reveal hidden damage early: prolonged leaks and poor ventilation often leave water stains, soft drywall, mold colonies, and rotted studs concealed behind the tub apron or tile.
Inspect with moisture meter, cut small access panels, and remove baseboards to assess framing.
Address mold with remediation protocols and replace compromised studs or sister new lumber.
Document findings and plan repairs before reinstallation.
Quick Safety and Preparation Checklist Before Removal
Before beginning removal, a concise checklist should itemize wall-protection materials and the tools required to install them.
It should also specify necessary personal protective equipment and on-site safety steps to minimize injury and collateral damage.
Finally, clear criteria distinguishing DIY feasibility from when to call a professional should be provided.
Tools and materials to protect walls
A compact toolkit and a small collection of protective materials are essential for preventing wall damage during whirlpool tub removal: painter’s tape, heavy-duty drop cloths or rosin paper, rigid foam board or cardboard sheets, corner protectors, and a utility knife with a retractable blade.
Tools are staged for access; materials applied to seams, corners, and adjacent fixtures to absorb knocks and abrasions.
- Painter’s tape
- Drop cloths/rosin paper
- Foam board/cardboard sheets
- Corner protectors
Personal protective equipment and on-site safety steps
Wear appropriate personal protective equipment and perform a concise site safety check to minimize injury and prevent further property damage during whirlpool tub removal.
Inspect for electrical, water, and structural hazards; establish ventilation and lighting; clear access and place drop cloths.
Follow a simple communication plan and emergency access route.
- Gloves, eye protection, and knee pads
- Respirator or dust mask
- Lockout/tagout of plumbing/electrics
- Stable footing and step stool
When to call a professional vs. DIY indicators
When should a homeowner attempt a whirlpool tub removal and when is a professional necessary?
The homeowner can proceed if the tub is lightweight, plumbing is straightforward, structural framing is intact, and basic tools plus experience exist.
Call a professional if:
- electrical or gas lines are involved,
- visible mold,
- complex framing,
- heavy or alcove-mounted tubs,
- uncertain plumbing, or
- lack of proper tools and experience to prevent wall or structural damage.
Assessment Steps to Minimize Wall Damage
Before removing a whirlpool tub, the professional first inspects surrounding finishes and locates seams to predict vulnerable areas.
They then check for plumbing and electrical behind the walls to avoid unintended damage or hazards.
Finally, they map fasteners, anchors, and flange locations to plan removal paths that preserve the wall surface.
Inspecting surrounding finishes and locating seams
A careful visual and tactile inspection of the walls and surrounding finishes identifies vulnerable edges, material changes, and existing flaws that could worsen during tub removal.
The inspector maps seams, joints, trim, tile grout lines, and shifts between drywall, cement board, and tile.
Noting loose trim, soft spots, and caulking gaps allows targeted protection, patch planning, and minimal invasive removal techniques.
Checking for plumbing and electrical behind walls
Although not always visible, plumbing and electrical systems behind tub surrounds pose the greatest risk of inadvertent damage during removal.
Assessors should locate and document all fixtures, shutoffs, wiring runs, and junctions before any demolition begins.
Use noninvasive tools—stud finder with AC sensing, pipe locators, infrared camera—and confirm shutoffs, label circuits, photograph layouts, and mark safe cut zones to prevent accidental breaches.
Mapping fasteners, anchors, and flange locations
Begin by systematically mapping all visible and suspected fasteners, anchors, and tub flange positions to create a reliable demolition guide.
Inspect drywall seams, access panels, and flange edges; mark stud locations and fastener types.
Use stud finder, magnet, and probe to locate hidden anchors.
Document measurements and label risks to plan removals that prevent wall tearing, minimize cutting, and preserve surrounding finishes.
Step-by-Step Tub Removal Process Focused on Wall Protection
The section outlines the sequential steps required to remove a whirlpool tub with minimal impact on surrounding walls, beginning with shutting off utilities and preparing the work area.
It then covers careful removal of trim, caulk, and grout, safe disconnection of plumbing and drain components, and methods for loosening the tub from wall flanges and studs.
Finally, it presents techniques for extracting the tub while supporting adjacent walls to prevent cracks, tile damage, or framing disturbance.
How to shut off utilities and prepare the work area
Before any cutting or prying begins, all water and electrical supplies must be shut off and the immediate area secured; this minimizes risk to workers and prevents accidental wall damage from leaks, sparks, or falling debris.
The installer isolates valves, tags electrical breakers, and drains remaining lines. Protective coverings shield walls and floors. Tools, lighting, and a clear escape path are arranged before work starts.
Method for removing trim, caulk, and grout without harming tile
Carefully removing trim, caulk, and grout preserves tile integrity and prevents costly repairs during tub extraction.
Use a utility knife to score caulk, then peel with a flexible putty knife.
For grout, employ a grout saw or oscillating tool with a grout blade, working slowly along joints.
Protect adjacent tile with painter’s tape and vacuum debris to avoid scratching surfaces.
Safely disconnecting plumbing and drain components
Begin by shutting off the water supply and confirming both hot and cold lines are fully closed.
Then relieve system pressure by opening nearby faucets.
Disconnect electrical-powered pump per manufacturer instructions.
Cap supply lines and use a bucket to catch residual water when loosening unions or soldered joints.
Remove drain assembly after protecting surrounding wall with a thin rigid shield.
Label and bag fittings for reassembly.
Strategies for loosening tub from wall flange and studs
Loosen the tub from the wall flange and studs methodically to prevent drywall damage and preserve framing for future work.
Use a utility knife to cut caulk, remove trim and access screws, then back out fasteners with the correct bit.
Pry gently at flange gaps with a thin pry bar and shim to protect drywall edges, loosening anchors incrementally rather than forcing separation.
Techniques for extracting the tub while supporting adjacent walls
After cutting caulk, removing trim, and freeing fasteners at the flange and studs, the removal process moves to extracting the tub while actively supporting adjacent walls to prevent drywall cracking or stud movement.
Temporary braces or T-braces are placed against studs, shimmed to transfer load.
Slow, even lifting with helpers and a pry bar minimizes leverage on drywall.
Inspect for hidden fasteners and cut remaining sealant.
Final cleanup and immediate wall protection after tub removal
Resume cleanup immediately once the tub is out to prevent damage and simplify repairs.
Debris, adhesive residue, and loose tile must be removed with nonabrasive scrapers and vacuuming.
Inspect studs, drywall edges, and plumbing for nicks or moisture.
Temporarily cover exposed walls with rigid panels or breathable tarps.
Label and document damage for contractors, and apply rust inhibitors to metal fasteners.
Tools, Materials, and Temporary Wall Protection Techniques
The section outlines the essential hand and power tools required for controlled demolition and careful removal near finished walls.
It then reviews protective materials—foam, plywood, protective film, and corner guards—that shield surfaces during work.
Finally, it covers stabilization techniques using clamps, straps, and cribbing to hold wall assemblies steady throughout the removal.
Essential hand tools and power tools for controlled demolition
Begin by assembling a concise set of hand and power tools tailored to controlled demolition: pry bars, adjustable wrenches, utility knives, block planes or oscillating multi-tools for precision cuts, a reciprocating saw for through-material removal, and a drill/driver with mixed bits for fastener extraction.
- Sharp utility blades and spare blades
- Various pry bar sizes for leverage control
- Cordless drill with clutch settings
- Reciprocating saw blades matched to material
Protective materials: foam, plywood, rotective film, and corner guards
Install temporary protective layers to prevent gouges, dents, and abrasion to surrounding walls and trim during whirlpool tub removal.
Protective materials cushion impacts, shield finishes, and simplify cleanup.
Select foam sheets for padding, rigid plywood for high‑traffic zones, adhesive protective film for painted surfaces, and corner guards for edges; secure with low‑residue tape to avoid paint damage.
- Foam sheets
- Plywood panels
- Adhesive protective film
- Corner guards
Using clamps, straps, and cribbing to stabilize walls during removal
Clamp, strap, and cribbing systems secure wall assemblies and nearby trim against unexpected movement during whirlpool tub removal, reducing the risk of cracked drywall, peeled paint, or loosened fasteners.
Properly placed bar clamps and ratchet straps distribute pressure without crushing surfaces; padded cribbing supports countertops or cabinets while tub is shifted.
Inspect connections, protect finishes with tape or foam, and tension gradually for controlled stabilization.
Repair and Restoration Options for Walls After Tub Removal
After the tub is removed, the condition of studs, backer board, and finishing surfaces should be inspected for water damage and structural soundness.
Small areas of tile, drywall, or plaster can often be patched to minimize rework, while extensive rot or compromised backer board may require replacement or reframing before new finishes are installed.
Final preparation should guarantee walls are plumb, properly backed, and moisture-resistant to accept a new tub, shower, or alternate finish.
Assessing and repairing water-damaged studs and backing
Inspect the exposed wall framing immediately upon tub removal to identify water-damaged studs and backing, because early detection limits structural deterioration and mold spread.
Evaluate wood for softness, staining, rot, and fastener pull-out. Remove and replace compromised studs or sister new members to sound framing.
Replace deteriorated backing with pressure-treated or moisture-resistant material, treat adjoining areas for mold, and guarantee proper drying before finishing.
Patching tile, drywall, and plaster with minimal rework
Once studs and backing are sound and dry, attention shifts to restoring finished surfaces with the least invasive repairs possible.
Small tile chips are repaired with matching replacement tiles or epoxy color fills; grout and sealant are renewed.
Drywall punctures are patched with mesh and joint compound, sanded, primed, and painted.
Plaster cracks receive adhesive injection, skim coat, and texture match to minimize replacement.
When to replace backer board or reframe shower walls
Determine whether backer board or framing needs replacement by evaluating moisture damage, structural integrity, and the extent of previous repairs. Localized soft spots, delamination, mold growth, or rusted fasteners typically indicate board replacement, while widespread rot, compromised studs, or misaligned framing warrant reframing.
Assess vapor barrier condition, inspect adjacent floors and ceilings for spread, document findings, and plan scope based on structural safety and code compliance.
Preparing walls for new tub, shower, or other finishes
Before installing a new tub, shower, or wall finish, assess and prepare the wall surfaces to confirm a durable, water-resistant substrate and proper attachment points.
Remove loose debris, damaged drywall, and remaining adhesive.
Repair studs, install cement backer board or moisture-resistant panels, and apply waterproofing membrane or vapor barrier.
Ascertain studs are plumb and blocking is added for secure fixture anchoring and trim.
Common Mistakes That Cause Wall Damage and How to Avoid Them
Many wall damages during whirlpool tub removal stem from preventable errors such as detaching fixtures without properly securing the tub or surrounding walls.
Cutting into fasteners without locating hidden plumbing or electrical lines risks punctures and costly repairs.
Relying on brute force instead of using the correct tools often turns manageable connections into torn drywall and framing.
Removing fixtures without securing the tub or walls
One common error during whirlpool tub removal is detaching fixtures without first stabilizing the tub or supporting adjacent walls. This allows sudden shifts that crack tile, shear drywall, or dislodge plumbing.
Technicians should brace the tub, prop surrounding studs, and use temporary supports before loosening faucets, trim, or access panels.
Removing fixtures only after stabilization prevents unexpected movement and costly wall repairs.
Cutting through fasteners without locating plumbing/electrical
After stabilizing the tub and walls, attention must shift to identifying hidden services before cutting fasteners.
Inspect and map supply lines, drains, and wiring with a stud/multi-detector and visual access via service panels.
Mark safe cut zones, shut off utilities, and use insulated tools.
Proceed slowly, cutting incrementally and verifying clearance to prevent nicking pipes or conductors that cause leaks or electrical hazards.
Over-relying on brute force instead of leveraging proper tools
Relying on brute force—yanking, prying, or hammering without the right tools—often shatters drywall, splinters trim, and strains surrounding framing.
Proper tools—trim pullers, pry bars with protected tips, oscillating multi-tools, and adjustable wrenches—control force and prevent collateral damage.
Slow, methodical disassembly, supported by temporary shoring and targeted cuts, preserves finishes and reduces repair time and cost.
Cost, Time, and When to Hire a Pro
Estimating the cost of wall repairs after a whirlpool tub removal depends on labor rates, materials, and the extent of damage from framing to drywall and finishes.
Time expectations vary as well: a careful DIY with protective measures can take a weekend, while a professional crew typically completes removal and repairs in a day or two.
Homeowners should hire licensed contractors when structural alterations, plumbing or electrical work, or extensive drywall and tile replacement are involved.
Typical labor and repair cost factors related to wall damage
Removing a whirlpool tub can expose a range of repair needs tied to wall damage, and understanding the typical labor and material costs, timeframes, and thresholds for hiring a professional helps plan the project. Costs vary by drywall area, tile removal, mold remediation, and plumbing relocation; labor rates and permit needs drive decisions whether to DIY or hire a licensed contractor.
| Item | Typical cost driver |
|---|---|
| Drywall patch | Labor, materials |
| Tile repair | Removal complexity |
| Mold remediation | Extent, testing |
| Plumbing relocation | Permits, trades |
Time estimates for DIY vs professional removal with wall protection
When planning a whirlpool tub removal, comparing DIY and professional timelines hinges on job scope and wall-protection measures.
Simple, non-tiled installations with prepped access panels can often be completed by an experienced homeowner in a day, while tiled surrounds, concealed plumbing, or evidence of moisture typically extend the work to multiple days or require specialists.
DIY estimates: 6–12 hours for straightforward jobs; professionals: 3–8 hours on average, longer if containment and repair are needed.
Signs the project requires licensed contractors
Complexities that extend a whirlpool tub removal beyond the basic time estimates often indicate the need for a licensed contractor: visible water damage or mold behind tile or drywall, structural framing alterations, concealed or corroded plumbing and electrical connections, presence of gas lines or older knob-and-tube wiring, or municipal permit requirements for altering bathroom plumbing.
Licensed pros assess costs, obtain permits, coordinate trades, and mitigate liability when scope or hazards exceed DIY capacity.
Preventive Measures for Future Remodels
Future remodels benefit from simple preventive measures that minimize wall damage and speed removal.
The text highlights waterproofing and service access panels, designing wall assemblies for removability, and clear documentation and labeling of hidden systems.
Following these practices preserves finishes and reduces labor and repair costs.
Best practices for waterproofing and access panels
Plan waterproofing and access panel placement before tub removal to prevent water damage and simplify any subsequent repairs.
Recommend using continuous membrane behind wall finishes, sealed flashing at joints, and moisture-resistant backerboard.
Locate sturdy, sized access panels aligned with valves and pump components.
Confirm panels are discreet yet serviceable, gasketed for moisture control, and clearly documented for future contractors to minimize demolition.
Designing wall assemblies for easier future removals
Design wall assemblies with removability in mind by using modular components, accessible fasteners, and clearly defined service zones so that future bathtub extraction or mechanical repairs require minimal demolition.
Specify removable trim, standardized panel sizes, and snap-in access panels. Route plumbing and electrical within chases or behind removable boards.
Use corrosion-resistant connectors and reversible fastenings to simplify future disassembly and replacement.
Documentation and labeling of hidden systems for homeowners
Clear, concise documentation and durable labeling of concealed plumbing, electrical, and structural elements gives homeowners the information needed to remove a whirlpool tub with minimal wall damage.
Contractors should provide diagrams, photos, and labeled access points; mark shutoffs, junctions, and fasteners.
Store digital and physical copies with renovation records.
Clear, permanent labels reduce guesswork, speed removals, and prevent accidental cuts or unsupported loads.
Visual Guides and Reference Resources
Clear step-by-step photos and simple diagrams illustrate how to support and protect surrounding walls during tub removal.
Manufacturer installation and removal guides provide model-specific instructions and recommended fastener locations.
Links to local building codes and inspection resources clarify required practices and permit considerations.
Step-by-step photos and diagrams to protect walls during removal
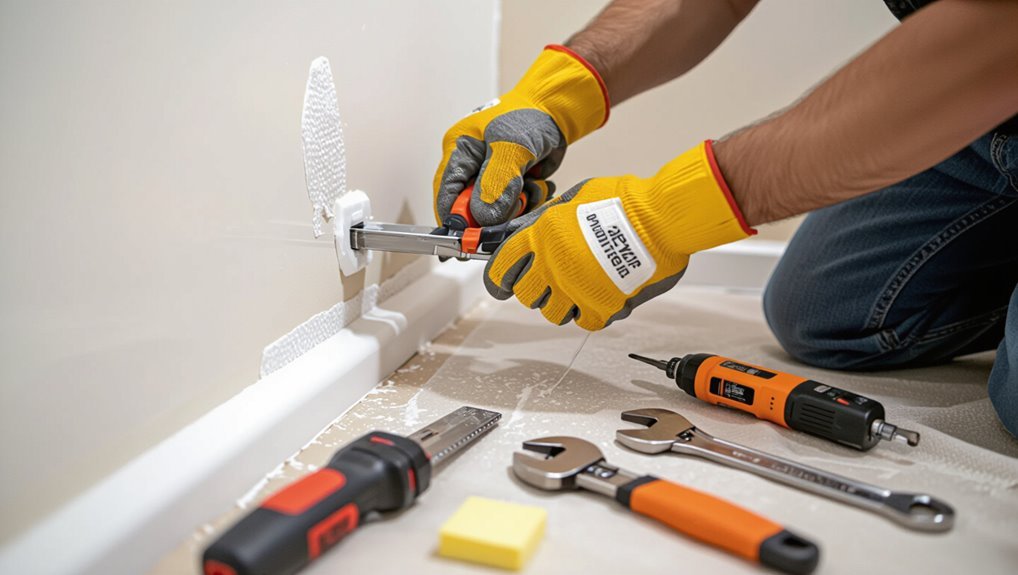
Begin with a sequence of clear, labeled photos that track each stage of tub removal and the specific wall-protection measures applied.
Include close-ups of corner padding, drywall edge covers, and temporary braces.
Add exploded-diagram overlays showing tool paths, fastener locations, and protective-sheet placement.
Caption each image with concise steps, required materials, and common pitfalls to prevent wall dents, scratches, and moisture intrusion.
Links to manufacturer guides and local code considerations
A concise collection of manufacturer installation and service manuals, together with applicable local plumbing and building code references, helps guarantee wall protection measures align with warranty requirements and legal standards during whirlpool tub removal.
Reference links and citations support correct fastening, access panels, and allowable clearances.
Verify permit triggers and inspection points before demolition.
- Manufacturer installation and service manuals
- Local plumbing and building codes
- Permit and inspection requirements
- Documented fastening and clearance specifications
Conclusion
Like a careful archaeologist extracting a fragile relic, the remover proceeds with patience and respect, mindful that each pry and cut preserves the story of the room. Attention to assessment, correct tools, and temporary protections keeps plaster and tile intact, turning a risky demolition into precise conservation. When uncertainty grows, calling a skilled craftsman guarantees the walls endure. Thoughtful planning now spares costly repairs later, leaving the space ready for its next chapter.

