How to Replace a Natural Gas Water Heater: Step-by-Step DIY Guide and Safety Tips
Replacing a natural gas water heater involves several key steps: draining and disconnecting the old unit, removing the venting and gas connections, then positioning and connecting the new heater with proper clearances. You’ll need to reconnect the water lines, install a gas shutoff, and conduct leak tests. After restoring the venting and checking the draft, ensure the temperature and pressure relief valve is functioning and fill the tank. Remember to obtain necessary permits and adhere to local codes for safety. For a detailed step-by-step guide and essential safety tips, continue reading.
Overview of Replacing a Natural Gas Water Heater
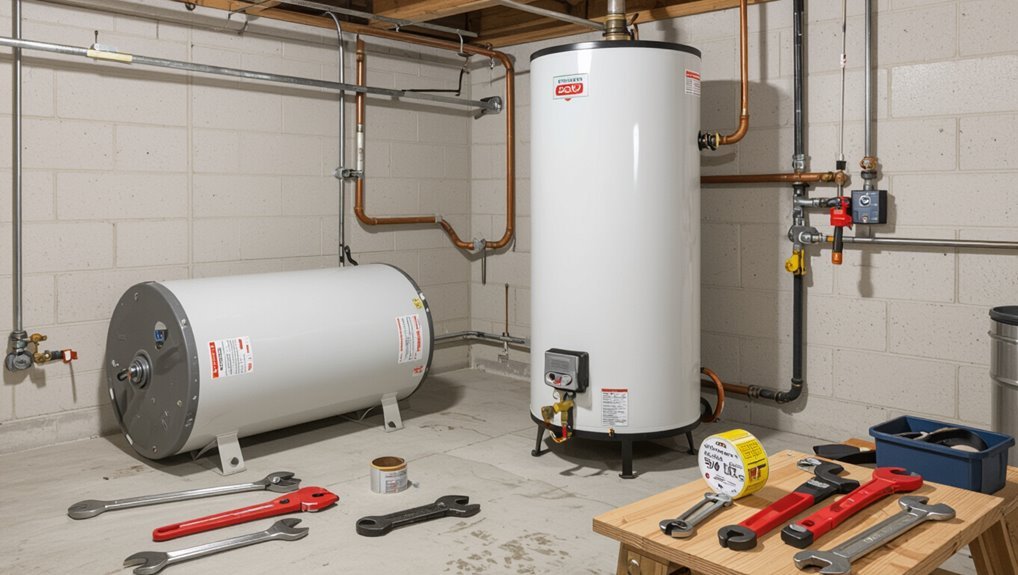
The replacement process typically involves draining and disconnecting the old unit, installing the new heater with proper gas and water connections, testing for leaks, and then restoring service. This task often takes a skilled DIYer several hours to a full day.
Homeowners with plumbing and gas experience may handle the job, but anyone uncertain about gas lines, venting, or code compliance should hire a licensed professional.
Permits, local code requirements, and utility notifications are frequently required and must be confirmed before work begins.
Quick summary of steps and time required
Replacing a natural gas water heater typically involves five main phases—preparation, gas and water shutoff, detachment of the old unit, installation of the new unit, and testing—each taking varying amounts of time depending on complexity.
A concise plan outlines steps for how to replace a natural gas water heater, estimated durations (2–6 hours residential), required tools, parts, and brief safety checkpoints before final testing and leak checks.
Who should attempt this DIY and when to call a professional
Consider attempting this project only if the homeowner has moderate plumbing and gas-handling experience, comfort with basic tools, and the ability to follow local codes; otherwise, a licensed professional should be engaged.
A pro is recommended for complex venting, gas line modifications, unconventional installations, unclear diagnostics, or any sign of corrosion, leaks, or structural challenges.
Prioritize safety and liability considerations.
Required permits, codes, and utility notifications
When local jurisdictions require it, homeowners must secure permits and follow applicable building, plumbing, and gas codes before starting a natural gas water heater replacement.
Inspectors may verify venting, combustion air, seismic strapping, and gas connections.
Notify the gas utility when disconnecting or relighting service; some utilities require a qualified technician.
Document approvals and retain permits until final inspection and sign-off.
Tools, Materials, and Safety Equipment Needed
A concise list of essential hand and power tools, fittings, and consumables establishes what is required to remove and install a gas water heater.
The selection of the replacement unit—tank or tankless, appropriate capacity, and fuel type compatibility—affects needed materials and connections.
Safety equipment and gas-specific precautions, including proper ventilation, gas shutoff procedures, and leak-detection tools, are mandatory before beginning work.
Essential tools checklist
Tools, materials, and proper safety gear are essential before starting any natural gas water heater replacement to guarantee the job proceeds safely and efficiently.
The technician prepares necessary items and verifies functionality.
Essential checklist includes:
- Adjustable wrench, pipe wrench, tube cutter.
- Gas leak detector, pipe thread sealant, tape.
- T&P wrench, drain bucket, hose.
- Safety glasses, gloves, respirator.
Replacement water heater types, sizes, and fuel considerations
Having confirmed tools, materials, and safety gear are in place, the technician next reviews replacement water heater options, sizing, and fuel choices to match performance and installation constraints.
Choices include tank, tankless, heat-pump, and hybrid units.
Consider capacity, recovery rate, footprint, venting, and available gas supply.
Select fuel type and size to meet peak demand and code requirements.
- Tank
- Tankless
- Heat-pump
- Hybrid
Safety equipment and gas-specific precautions
Several essential pieces of personal protective equipment and gas-specific safety devices are required before any work begins.
The technician should verify shutoff, ventilation, and leak detection readiness.
Required items include:
- Gas detector and soap test kit
- Adjustable wrench and pipe sealant
- Flame arrestor/vent cap access tools
- Safety goggles, gloves, and respirator
Follow local codes and consult a licensed gas professional.
Preparing for the Replacement
Before beginning work, the installer verifies the correct replacement unit by matching capacity, BTU rating, and physical dimensions to the household demand and available space.
They inspect the existing installation and record measurements, then shut off gas, water, and electrical power following safety procedures.
Finally, they outline the steps to drain the old tank to relieve pressure and remove remaining water.
How to choose the correct replacement unit (capacity, BTU, dimensions)
Choosing the correct replacement gas water heater requires matching capacity, input (BTU) rating, and physical dimensions to the household’s demand and installation constraints.
Review family size and peak usage to determine gallon capacity and first-hour rating.
Select BTU input to meet recovery needs while matching gas supply and venting.
Confirm unit footprint and clearance fit existing space and code requirements.
Inspecting existing installation and taking measurements
Begin by thoroughly documenting the existing water heater and its surroundings: note model and serial numbers, measure tank height, diameter, and the clearances to walls and ceilings.
Record inlet and outlet pipe sizes and locations, the gas line diameter and connection type, the venting configuration (type, size, and termination), and the locations of T&P relief, drain pan, and nearby combustible materials.
Then photograph connections, label pipes, and sketch measurements for replacement planning.
Shutting off gas, water, and power safely
One should first shut off the gas, water, and power to the heater in a deliberate sequence to eliminate hazards and allow safe work.
Next, close the gas valve at the appliance or meter.
Then turn off the cold-water supply to the tank.
Finally, disconnect electrical power at the breaker and verify gas is off with a detector or soapy water before proceeding.
Draining the old water heater step overview
Drain the tank before disconnecting fittings and removing the unit to prevent spills and reduce weight, ensuring the work area stays safe and accessible.
Next, attach a garden hose to the drain valve, route it to a safe drain or outdoors, open a hot water tap to vent, and open the drain valve.
Verify complete drainage and flush sediment as needed before lifting out the heater.
Step-by-Step Removal of the Old Natural Gas Water Heater
The removal process begins with safely shutting off the gas supply and confirming there are no leaks before any disconnections occur.
Next, the technician disconnects and caps the gas line, then separates water lines, venting, and any electrical connections while preparing to drain and flush the tank.
Finally, the drained unit is removed from its location and handled for proper disposal.
Step 1 Turning off gas and verifying no leak
Shut off the gas supply at the appliance shutoff valve or the home’s main gas shutoff and confirm the pilot light is extinguished before proceeding.
Then open a nearby hot-water faucet to relieve pressure and ventilate the area.
Apply a gas leak detector solution or soapy water to fittings, watch for bubbles, and sniff for odor.
If any leak is suspected, evacuate and call the gas utility.
Step 2 Disconnecting gas line and capping safely
With the gas supply secured and no leaks detected, attention moves to separating the heater from the gas line and preparing the line for safe temporary closure.
A qualified person or experienced DIYer uses appropriate wrenches to loosen the union or flare, removes the connector, then installs a threaded cap or plug rated for gas.
Apply pipe thread sealant for gas and torque to manufacturer spec.
Step 3 Disconnecting water lines, venting, and electrical connections
Begin by draining remaining water from the tank and isolating supply lines to prevent spills.
The technician closes hot and cold valves, disconnects flexible connectors or copper lines with proper fittings, and caps exposed pipes.
Next, detach the vent pipe from the draft hood and seal openings.
Finally, disconnect any electrical feed or thermostat wiring after power is verified off and labeled for reinstallation.
Step 4 Draining tank and flushing sediments
Drain the tank completely and flush out accumulated sediment to prevent clogs and guarantee a cleaner, lighter unit for removal.
Close the cold-water supply, open a hot-water faucet to relieve pressure, attach a hose to the drain valve, and direct discharge to a safe drain.
Open the valve, flush until clear, close the valve, and remove the hose before proceeding.
Step 5 Removing the unit from its location and proper disposal
Prepare to remove the emptied water heater by ensuring all utilities are disconnected and the surrounding area is clear for maneuvering.
Using appropriate lifting techniques and equipment, tilt and slide the unit onto a dolly.
Secure flue and gas fittings capped.
Transport to an approved recycling or disposal facility; follow local regulations for hazardous components.
Retain receipts and documentation for compliance.
Installing the New Natural Gas Water Heater (Detailed Walkthrough)
The installer begins by positioning the new heater on the required platform with proper clearance. Then, they verify venting layout and code compliance.
Next steps cover connecting cold and hot water lines with dielectric unions. This is followed by reconnecting the gas line, fitting a shutoff valve, and performing gas leak tests.
Finally, the tank is filled, air is purged from the system, and pressure and temperature settings are checked.
Step 1 Positioning the new unit and ensuring clearance and platform requirements
Begin by placing the new water heater where it will sit permanently, confirming required clearances to walls, ceilings, and nearby equipment and verifying that the chosen location meets local code and manufacturer specifications.
Confirm adequate space for maintenance access, combustion air, and thermostat visibility. If required, mount on an approved raised platform or drip pan, level the unit, and secure per instructions before proceeding.
Step 2 Installing venting systems and check for code compliance
With the heater set and secured, attention shifts to venting: proper flue and combustion-air connections must be installed to guarantee safe evacuation of combustion products and adequate fresh air for combustion.
Install correct-diameter vent pipe, maintain required slopes and clearances, seal joints, and use approved materials.
Verify termination location, draft, and intake sizing per local code and manufacturer instructions; obtain inspections and permits as required.
Step 3 Connecting water supply lines and installing dielectric unions
Attach the cold and hot water lines to the tank using the correct fittings and thread sealant, ensuring shutoff valves are accessible and oriented for future maintenance.
Install dielectric unions between dissimilar metals to prevent corrosion, tighten to manufacturer torque, and align piping to avoid stress.
Flush debris, open valves slowly to check for leaks and confirm proper flow and pressure before final insulation and securing.
Step 4 Reconnecting gas line, installing shutoff valve, and leak testing
After confirming water connections are secure and the tank has been partially filled and checked for leaks, attention turns to reestablishing the gas supply.
The installer threads the gas connector using approved pipe dope or tape, mounts a listed shutoff valve near the heater, tightens fittings to manufacturer torque, then applies a noncorrosive soapy solution or electronic gas leak detector to all joints, correcting any leaks before proceeding.
Step 5 Filling the tank, purging air, and checking pressure/temperature settings
Begin filling the tank slowly by opening the cold-water supply valve while watching for steady water flow from the nearest hot faucet; this guarantees trapped air can escape and prevents pressure spikes.
Continue until the faucet runs solid, then close it. Inspect all fittings for leaks.
Verify water pressure at the heater matches household supply and set the thermostat to the manufacturer’s recommended temperature, typically 120°F, for safety.
Step 6 Lighting pilot or enabling electronic ignition and testing operation
With the tank full and thermostats set, attention turns to initiating the burner assembly: either lighting the standing pilot or engaging the electronic ignition according to the heater’s model.
Follow manufacturer lighting procedure, verify gas valve on, hold pilot control as instructed, confirm stable flame or ignition sequence.
Observe burner operation, check for proper flame color, inspect for leaks, and verify hot water production and safe venting.
Gas Leak Detection, Testing, and Final Safety Checks
The installer then proceeds to check for gas leaks using a soap solution on fittings and a handheld gas leak detector to confirm no escaping odorless gas.
Draft and vent integrity are inspected to guarantee proper exhaust flow and to identify carbon monoxide hazards.
Finally, the temperature-pressure relief valve and expansion tank are tested to verify correct operation and system safety.
How to perform soap test and use a gas leak detector
Inspecting joints and fittings for leaks is a critical final step before commissioning a replaced natural gas water heater.
Apply a soap-and-water solution to connections; bubbles indicate leaks. Tighten or re-seat fittings, retest.
Complement with a calibrated handheld gas leak detector: scan seams, valves, and flexible connectors, noting alarm thresholds.
If any leak persists, shut gas supply and contact a qualified technician immediately.
Checking draft, carbon monoxide risks, and vent integrity
Many installers perform a draft and vent check as the final safety verification to confirm combustion gases are properly expelled and carbon monoxide (CO) risks are minimized.
Technicians observe flame behavior, measure draft with a manometer or smoke pencil, inspect vent joints and chimney for corrosion or blockage, and verify termination clearances.
If draft is inadequate or CO detected, cease operation and correct venting before use.
Verifying temperature-pressure relief valve and expansion tank function
Verify the temperature-pressure (T&P) relief valve and expansion tank function before placing the system into regular service to secure overpressure protection and accommodate thermal expansion.
Inspect the T&P valve for proper discharge piping, lift test to confirm immediate reset and no leaks, and replace if corroded.
Check expansion tank precharge and diaphragm integrity; verify tank size and pressure match system requirements to prevent thermal shock.
Common Problems During Replacement and How to Fix Them
Replacement projects often encounter space constraints, stubborn gas connections, venting problems, or an absence of hot water after installation.
Each issue—such as difficulty fitting the new unit into the existing footprint, persistent gas leaks, poor venting or backdrafting with combustion odors, and troubleshooting no-hot-water scenarios—requires specific corrective steps.
The following section outlines practical diagnostics and fixes for these common problems.
Difficulty fitting new unit into existing space
Several homeowners encounter tight clearances and unexpected obstructions when installing a new natural gas water heater into an existing space.
Measure dimensions, compare vent and service clearances, and confirm doorway and stair access before purchase.
Consider shorter tank models, offset flanges, flexible connectors, or relocating nearby piping.
If structural alteration is required, consult a professional to guarantee ventilation and code compliance.
Gas fitting issues and persistent leaks
Addressing gas fitting issues and persistent leaks demands careful attention to connections, fittings, and testing methods to guarantee safety and code compliance.
Inspect pipe joints, tighten threaded fittings, and replace damaged flex connectors. Use approved thread sealant only where specified.
After reassembly, perform a soap-bubble or electronic leak test and monitor pressure.
If leaks persist, shut off gas and contact a licensed gas fitter for repair.
Poor venting, backdrafting, or combustion odors
Once gas fittings are secured and leak tests complete, attention must turn to venting and combustion issues, since poor draft or lingering odors pose immediate safety hazards.
Inspect flue alignment, clear obstructions, verify proper chimney height and cap condition, and guarantee fresh-air intake.
Test for backdrafting with a smoke source; if present, stop use and consult a qualified technician to correct venting or combustion-air deficiencies.
No hot water after installation troubleshooting steps
Check basic supply and controls first: confirm the gas valve is open, the water supply and shutoff valves are fully on, and the water heater’s thermostat and pilot (or electronic ignition) are set correctly.
If still cold, inspect pilot flame or ignition sequence, check for air in lines and bleed faucets, verify gas pressure and venting, and guarantee dip tube and burner assembly were installed correctly.
If unresolved, call a licensed technician.
Code Compliance, Inspection, and Documentation
Local regulations typically require scheduling a municipal inspection after installation and obtaining permits before work begins, with timing and fees varying by jurisdiction.
Installers must apply required labels, keep permits and receipts for warranty purposes, and maintain clear record-keeping of the water heater model, serial number, and installation date.
A licensed plumber or an official inspection is mandatory when codes specify gas-line modifications, seismic anchoring, or when local law prohibits homeowner-performed gas work.
Typical municipal inspection requirements and scheduling
Many municipalities require one or more inspections for a water heater replacement to verify compliance with gas, plumbing, and mechanical codes. This typically includes a rough-in inspection before piping is covered and a final inspection after startup.
Applicants should obtain required permits, schedule inspections per local procedures, guarantee accessible work areas, provide documentation for any code deviations, and address inspector corrections promptly to obtain approval.
Required labels, permits, and record-keeping for warranty
When replacing a natural gas water heater, contractors and homeowners must guarantee all required labels, permits, and records are completed and retained to satisfy code compliance and maintain warranty eligibility.
Document permit approvals, inspection reports, manufacturer serial numbers, installation date, installer contact, and parts used.
Affix mandatory warning and gas shutoff labels visibly.
Store digital and physical copies per manufacturer and local jurisdiction timelines.
When an inspection or licensed plumber is mandatory
After securing permits, labels, and records, the next consideration is determining whether an inspection or a licensed plumber is required for the replacement.
Local codes often mandate licensed installation for gas connections, combustion venting, seismic bracing, or when altering fuel lines.
Required inspections validate safety, code compliance, and warranty eligibility.
Homeowners should consult jurisdictional rules and utilities to confirm mandatory professional involvement.
Maintenance Tips After Replacement
After replacement, a clear maintenance plan should outline routine tank flushing to manage sediment and protect heat transfer.
The schedule should also specify periodic anode rod inspections and expected replacement intervals to prevent corrosion.
Seasonal checks, including testing the temperature and pressure relief valve, help guarantee ongoing safety and performance.
Routine flushing and sediment management schedule
Establish a regular flushing and sediment-management schedule to preserve tank efficiency and extend service life.
Flush the tank annually in moderate-hardness areas; twice yearly if water is very hard or sediment accumulates.
Drain until clear, inspect discharge for particles, and repeat as needed.
Use a garden hose and a bucket or drain.
Record dates and observations to anticipate professional cleaning if performance degrades.
Anode rod inspection and replacement intervals
Inspect the anode rod at least once every 12 months and more often in high-mineral-content water to prevent premature tank corrosion.
When inspection reveals heavy pitting, thinning below 1/2 inch, or significant depletion of the sacrificial core, replace the rod.
Use compatible materials (magnesium or aluminum/zinc) and document intervals; aggressive water chemistry may require replacement every 1–3 years.
Seasonal checks and safety valve testing
Following anode rod maintenance, routine seasonal checks and relief valve testing help guarantee the water heater continues to operate safely and efficiently.
Technicians or owners should perform quick inspections and tests quarterly, addressing corrosion, leaks, and venting.
Follow a concise checklist:
- Inspect for leaks and corrosion.
- Test temperature-pressure relief valve.
- Verify proper venting and combustion.
- Drain a few gallons to remove sediment.
Cost Estimates, Timeframe, and When to Hire a Pro
Typical DIY replacement costs are outlined alongside average professional installation fees, creating a clear cost comparison.
The text highlights factors that raise price or complexity, such as permitting, venting upgrades, gas-line work, or tank size changes.
Clear signs for hiring a licensed plumber or HVAC technician—including gas leaks, code-required modifications, or unfamiliar venting—are identified.
Typical DIY cost breakdown versus professional installation
A straightforward cost comparison helps homeowners decide whether to tackle a gas water heater replacement themselves or hire a professional.
Typical DIY expenses: unit, fittings, venting, tools, ~ $400–$900; professional installation: labor plus permit, ~ $900–$2,000.
Timeframe differs: DIY a day or weekend; pro a few hours.
Table summarizes estimates.
| Item | Typical Range |
|---|---|
| Unit | $300–$800 |
| DIY extras | $100–$200 |
| Professional | $900–$2,000 |
| Timeframe | DIY 1 day; Pro few hours |
Factors that increase cost or complexity
With basic cost and time comparisons established, several site-specific and code-related factors can substantially raise expense and complexity for a gas water heater replacement.
Examples include venting upgrades, gas-line resizing, seismic strapping, accessible vs. confined locations, required permits and inspections, conversion to different fuel type, and replacing corroded fittings or damaged flooring.
Each adds material, labor, and inspection time.
Signs to hire a licensed plumber or HVAC technician
Recognize situations that warrant a licensed plumber or HVAC technician: complicated gas-line alterations, signs of venting failure or carbon monoxide risk, electrical hookups for hybrid units, building-code triggers like conversions or relocations, and any permit-required work.
Hire a pro when cost estimates exceed DIY comfort, when timelines are tight, or when diagnostic uncertainty exists.
Licensed contractors guarantee compliance, safety, and warranty protection.
Environmental and Disposal Considerations
The article addresses proper disposal or recycling options for the old water heater, including local salvage, scrap metal, and appliance recycling programs.
It also notes the environmental benefits of upgrading to higher-efficiency models and the potential for reduced emissions.
Available rebates and utility incentives for energy-efficient replacements are summarized to help offset upgrade costs.
Proper disposal or recycling of old water heaters
Every old natural gas water heater must be handled responsibly to prevent environmental harm and comply with local regulations; many components—steel tank, copper fittings, insulation, and electronics—are recyclable or require special disposal.
Homeowners should contact municipal recycling centers, scrap metal yards, or licensed hazardous-waste facilities for pickup or drop-off.
Drain and depressurize tanks safely; obtain receipts to document proper disposal and avoid fines.
Upgrading to more efficient models and potential rebates
Consider upgrading to high-efficiency natural gas water heaters or hybrid heat pump models to reduce fuel use, lower emissions, and qualify for utility or government rebates.
These newer systems often exceed legacy units in thermal efficiency and can greatly cut annual greenhouse gas output when properly sized and installed.
- Check federal, state, and utility rebate programs.
- Compare EF/UE ratings and heat pump benefits.
- Calculate payback including installation costs.
- Confirm eligible recycling or disposal of old units.
Useful Reference Resources and Manufacturer Links
The article points readers to manufacturer websites for installation manuals, spec sheets, and links to local building code resources to guarantee compliance.
It also suggests checking municipal or state code offices for permit requirements and inspection guidance.
Recommended retailers and specialty suppliers for tools, fittings, and replacement parts are listed to simplify sourcing.
Where to find installation manuals and local code resources
When preparing to replace a natural gas water heater, homeowners and technicians should locate official installation manuals from the appliance manufacturer and verify applicable local codes through municipal building departments or state plumbing and gas authorities.
These documents define required clearances, venting, gas line sizing, combustion air, and permitting procedures that govern safe, code-compliant installations.
- Manufacturer websites and product pages
- Printed manuals bundled with units
- Local building department websites
- State plumbing/gas regulatory agencies
Recommended tools and parts suppliers
Many homeowners and technicians rely on a compact set of hand and power tools plus a few specialty parts to perform a safe, code-compliant natural gas water heater replacement.
Recommended suppliers include major manufacturers, plumbing supply houses, and online retailers offering OEM parts and ANSI/CSA-certified components.
- Local plumbing supply
- Manufacturer OEM parts
- Big-box hardware
- Specialty gas fittings vendors
Conclusion
Replacing a natural gas water heater becomes a manageable project when approached methodically, each step fitted like pieces in a puzzle. The homeowner who follows safety protocols, uses proper tools, and verifies gas and water connections can expect improved efficiency and reliability. Remaining mindful of codes, disposal options, and when to call a professional guarantees long-term performance. Ultimately, careful planning and cautious execution turn a challenging task into a steady, predictable upgrade.