How to Take Apart a Bathroom Faucet: Step-by-Step Guide for Every Type
To safely take apart a bathroom faucet, start by shutting off the water supply and relieving pressure by opening the valves. Prepare your workspace by placing towels and a bucket to catch any drips. Remove the handles and trim to access the internal components, such as cartridges, balls, or ceramic disks. Disconnect the supply lines and mounting nuts beneath the sink using the appropriate wrenches. If you encounter corroded fittings, apply penetrating oil or heat as needed. After lifting the assembly, inspect and clean the seals and cartridges for wear. Follow the detailed step-by-step guidance and troubleshooting tips for a successful disassembly.
Overview of Removing a Bathroom Faucet Safely
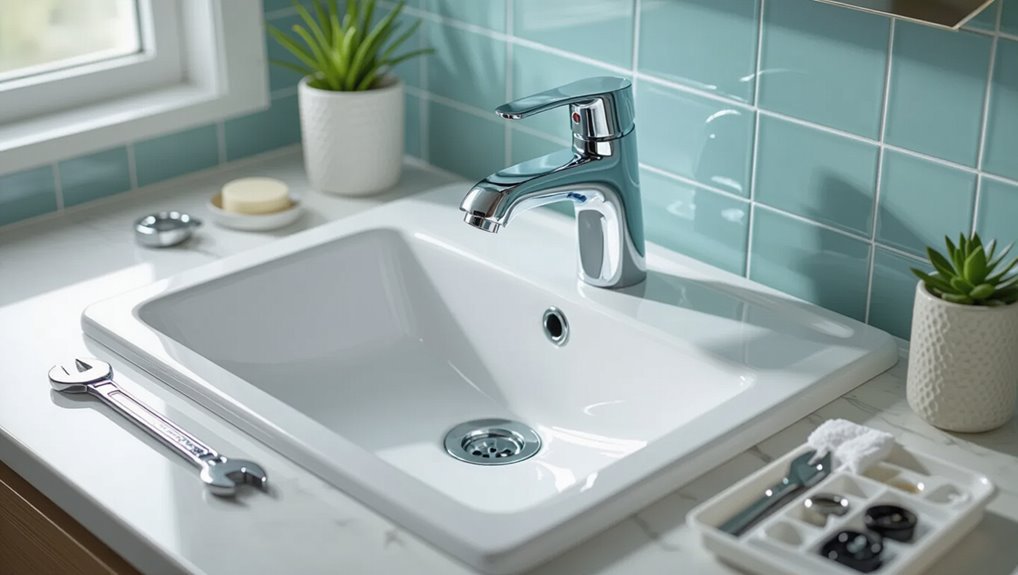
The removal process is summarized as shutting off water, disconnecting supply lines, loosening mounting hardware, and extracting the faucet assembly.
A concise tools-and-materials checklist—including pliers, adjustable wrench, basin wrench, bucket, towels, and replacement parts or seals—ensures the job proceeds without interruption.
Essential safety and preparatory steps cover turning off water, relieving residual pressure, protecting surfaces, and wearing eye and hand protection.
Quick summary of the removal process
Begin by shutting off the water supply and relieving line pressure to prevent spills and accidental activation.
Then disconnect supply lines, remove handles, and detach trim.
Unscrew mounting nuts beneath the sink, lift the faucet assembly free, and clean the area.
Inspect seals, cartridges, and valve bodies for wear.
Document parts and order replacements as needed when learning how to take apart a bathroom faucet.
Tools and materials checklist
Several essential tools and materials are required to remove a bathroom faucet safely: adjustable wrench, basin wrench, Phillips and flathead screwdrivers, plumber’s putty or silicone, replacement O-rings or cartridge, bucket, rags, and towels to catch water, plus penetrating oil and tape for seized fittings.
The list below evokes common items and workspace setup.
- Wrenches and screwdrivers
- Seals, putty, tape
- Bucket, rags, towels
Safety precautions and preparatory steps
Before any work begins, verify the water supply is shut off and the area is prepared to prevent slips, electrical hazards, and water damage.
Wear gloves and eye protection, disconnect power to nearby outlets or lighting, place towels and a bucket to catch drips, clear the workspace, label removed parts, and use proper tools.
Inspect for corrosion or hidden fasteners before proceeding.
Identify Your Faucet Type and Parts
Before disassembly, the reader should identify whether the fixture is a compression, ball, cartridge, ceramic disk, single-handle, widespread, or center-set faucet, since each type has distinct internals and mounting styles.
Visual inspection of the handle, spout, and under-sink fasteners helps recognize components like cartridges, ball assemblies, seals, and mounting nuts.
Decisions to repair or replace parts depend on wear, availability of replacement components, and whether leaks or damage affect critical internal pieces.
Common faucet types: compression, ball, cartridge, ceramic disk, single-handle, widespread, center-set
Identifying the faucet type is the essential first step because each design—compression, ball, cartridge, ceramic disk, single-handle, widespread, and center-set—has distinct internal parts and disassembly methods.
Recognizing features like separate hot and cold handles (compression, widespread), a single lever over a rounded body (ball, cartridge, ceramic disk, single-handle), or a short-spaced base plate (center-set) guides what tools and replacement parts will be needed.
- Two separate handles and stem screws.
- Rounded ball body with cam and springs.
- Flat disk cartridge under a single lever.
How to recognize internal components and mounting styles
After recognizing the broad faucet type—compression, ball, cartridge, ceramic disk, single-handle, widespread, or center-set—the next step is to learn how internal components and mounting styles reveal themselves during inspection.
Look under the escutcheon for retaining nuts, cartridges, valves, springs, and seals. Identify mounting: single-hole, three-hole with deck plate, or thru-deck with nuts.
Note visible fasteners and access points before disassembly.
When to replace vs. repair parts
When should a component be replaced rather than repaired depends on the faucet type, the part’s wear pattern, and the cost and availability of replacements.
Severe corrosion, fractured cartridges, warped seats, or worn valve bodies usually warrant replacement.
Minor seal or O-ring damage can be repaired.
Consider age, part interchangeability, and labor time: replacement often saves effort for obsolete or extensively degraded components.
Shutoff, Drain, and Prepare the Work Area
Before disassembly, the homeowner locates and closes the hot and cold shutoff valves under the sink or at the house main.
They open the faucet to drain remaining water and place towels or a pan to protect sink and cabinet surfaces.
Hoses and fittings are then labeled or photographed to guarantee correct reassembly.
Locating and shutting off water supply valves
One clear step before disassembly is to locate and shut off the water supply valves to prevent leaks and water damage.
The person identifies the hot and cold shutoffs beneath the sink or at the main water line, turns each clockwise until fully closed, and confirms flow stoppage by operating the faucet briefly.
Supply lines should be inspected for corrosion before proceeding.
Draining residual water and protecting sink/cabinet surfaces
With the shutoff valves closed and faucet briefly operated to confirm no flow, any remaining water in the lines and fixtures should be drained and the surrounding surfaces protected.
Drain residual water into a bowl, sponge up pooled liquid, and open drain stoppers.
Line cabinet base with towels or a plastic tray.
Protect countertop edges with cloth or painter’s tape to prevent scratches and stains.
Labeling hoses and connections for reassembly
Begin by identifying each hose, valve, and connection point and marking them clearly to guarantee correct reassembly. Use durable labels, numbered tape, or color-coded tags tied near fittings.
Note hot, cold, supply, and drain lines separately. Photograph arrangements and sketch routing for reference.
Secure loose tags to prevent loss during work. Store small parts in labeled containers for streamlined reinstallation.
Step-by-Step Removal: Single-Handle Faucet (Deck-Mounted)
The technician begins by shutting off the water and disconnecting the supply lines to prevent leaks.
Next, the handle and trim are removed to access the internal cartridge or ball assembly, which is then extracted for inspection.
Finally, mounting nuts are loosened to lift the faucet from the sink and the mounting area is inspected and cleaned before reinstallation.
Turn off water and disconnect supply lines
Shut off the water at the shutoff valves under the sink or, if absent, at the home’s main shutoff.
Then open the faucet to relieve remaining pressure and drain any residual water.
Place a bucket and towels beneath the supply connections.
Use an adjustable wrench to loosen the compression nuts or flexible hose fittings, catching water.
Remove supply lines and inspect for corrosion or damaged washers before proceeding.
Remove handle and trim pieces
Lift the handle straight up or pull it forward to expose the retaining screw and decorative cap.
The technician removes the cap with a flat tool, then unscrews the retaining screw using the correct screwdriver or hex key.
The handle lifts off, revealing the trim.
Escutcheon and aerator are then unscrewed or pried away, taking care not to scratch finished surfaces or dislodge mounting hardware.
Extract cartridge or ball assembly
Begin by locating the cartridge or ball assembly beneath the removed handle and trim, noting its orientation and any retaining clips or screws that secure it to the faucet body. Depress any locking tabs, remove clips, and lift straight up; use pliers gently if stuck. Inspect seals and springs for wear before replacement.
| Part | Action |
|---|---|
| Clip | Unhook |
| Cartridge | Lift |
| Seal | Inspect |
Loosen mounting nuts and lift faucet from sink
With the cartridge or ball assembly removed, the technician loosens the mounting nuts that secure the faucet to the sink using an appropriate-sized basin wrench or adjustable wrench, turning counterclockwise while supporting the faucet from above to prevent sudden drops.
Once nuts are freed, the faucet is lifted straight up through the deck, guiding supply lines and ensuring rubber gaskets or sealant do not snag.
Inspect and clean mounting area
After the faucet is freed and removed from the deck, the technician inspects the exposed mounting area for remaining sealant, plumber’s putty, mineral deposits, and old gasket material. They scrape, neutralize mineral buildup with vinegar, and wipe dry, ensuring a flat, clean surface for resealing. Residue removal prevents leaks and cosmetic defects.
| Concern | Action |
|---|---|
| Sealant | Scrape |
| Deposits | Neutralize |
Step-by-Step Removal: Two-Handle/Widespread Faucet
For two-handle widespread faucets, the process begins with shutting off water and disconnecting the supply lines.
Then, removing the handles to access the valve stems. Next, the valve bodies and escutcheons are unfastened, the spout and its mounting hardware are detached, and any separate deck holes or escutcheon plates are cleared.
Careful organization of parts from the multiple openings prevents confusion during reassembly.
Disconnect supply lines and remove handles
Before loosening any fittings, the installer shuts off the water supply, confirms the shutoff by opening the faucet to relieve pressure, and places a towel or small bucket beneath the work area to catch residual water.
The installer disconnects supply lines with an adjustable wrench, holds the valve with a second wrench to prevent twisting, removes handle caps, unscrews retaining nuts, and lifts handles free.
Remove valve bodies and escutcheons
With the handles removed, the technician exposes the valve bodies and escutcheons beneath the sink deck to begin disassembly. The technician unscrews retaining nuts, lifts escutcheons, and withdraws valve bodies, noting orientation and seals. Parts are inspected for wear and cleaned or tagged for replacement. Care is taken to catch stray fasteners and prevent debris entering supply openings.
| Component | Action |
|---|---|
| Escutcheon | Unscrew, lift |
| Retainer nut | Loosen, remove |
| Valve body | Withdraw, inspect |
| Seal | Check, replace |
| Fasteners | Collect, tag |
Detach spout and mounting hardware
Having removed the valve bodies and escutcheons, the technician moves on to detach the spout and mounting hardware of the two-handle/widespread faucet.
The spout is lifted to access retaining nuts beneath; a basin wrench removes these.
Supply lines and any retaining clips are disconnected.
Mounting nuts or studs securing the spout assembly are unscrewed, allowing the spout and associated hardware to be lifted clear for inspection or replacement.
Handling separate deck holes and escutcheon plates
Several distinct deck holes and their escutcheon plates require individual attention during removal to prevent damage to the countertop and underlying seals.
The technician loosens retaining nuts beneath each hole, supports escutcheons from above, and carefully lifts them free. Corrosion or caulk may require gentle prying.
Clean mating surfaces, inspect gaskets, and replace damaged seals before reassembly to guarantee watertight connections.
Step-by-Step Removal: Centerset and Integrated Pop-Up Models
The procedure for centerset and integrated pop-up faucets begins with removing the pop-up drain linkage and lift rod to free the drain assembly.
Next, the centerset cartridge or base is detached by releasing mounting clips or nuts beneath the sink.
For integrated single-piece units, the focus shifts to identifying welded or molded connections and planning for partial disassembly or full replacement.
Removing pop-up drain linkage and lift rod
Begin by positioning a towel or small bucket beneath the sink to catch water and small parts, then identify the lift rod at the back of the faucet and the horizontal pivot rod and spring clip assembly under the drain. Disconnect the spring clip, slide out the pivot rod, and lift the rod assembly out through the tailpiece. Reassemble in reverse order.
| Step | Action |
|---|---|
| 1 | Locate parts |
| 2 | Remove clip |
| 3 | Withdraw rod |
| 4 | Lift assembly |
Detaching centerset assemblies and mounting clips
Support the faucet from beneath and clear the area around the mounting nuts before detaching centerset assemblies and their clips.
The installer loosens mounting nuts or retaining screws while supporting the assembly to prevent dropping.
Remove any U-shaped mounting clips by prying gently with pliers or a screwdriver.
Lift the centerset unit straight up, disconnect supply lines if needed, and set parts on a protected surface.
Addressing integrated single-piece units
Addressing integrated single-piece faucet units requires careful coordination because the pop-up assembly and spout are often molded or fastened as a single component that transfers weight and alignment forces to the mounting hardware. Remove handle, disconnect supply lines, support spout, loosen mounting nut, and extract as one unit to avoid stress or misalignment.
| Step | Tool | Note |
|---|---|---|
| 1 | Wrench | Support spout |
| 2 | Screwdriver | Loosen nut |
| 3 | Pliers | Disconnect lines |
Step-by-Step Removal: Wall-Mounted Faucets
For wall-mounted faucets, the technician first locates and opens the wall access panel to reach the shutoff valves and supply connections.
After shutting off the main supply and relieving pressure, the water lines are disconnected from the faucets.
Finally, the escutcheon is unscrewed and the spout is withdrawn from its wall fittings for inspection or replacement.
Accessing valves behind wall or access panel
Before removing a wall-mounted faucet, locate and open the access panel or expose the wall cavity to reveal the shutoff valves and supply connections; this gives clear working space and prevents guesswork during disassembly. The technician notes valve types, mounting screws, and insulation, documenting positions before loosening fittings to avoid damage.
| Item | Location | Note |
|---|---|---|
| Valve type | Left/right | Identify |
| Fasteners | Top/bottom | Size |
| Insulation | Around pipes | Protect |
| Clearance | Behind wall | Measure |
Shutting off main supply and disconnecting plumbing
Shut the home’s main water supply and relieve residual pressure by opening a nearby faucet or the fixture’s handle until flow stops and water drips cease.
Then, isolate the wall-mounted fixture by closing any localized shutoffs.
Place a bucket and towels beneath connections, loosen supply lines with an adjustable wrench, and cap or plug exposed pipes to prevent contamination and leaks before proceeding to remove trim or spout.
Removing escutcheon and spout from wall fittings
Begin by removing any decorative caps or handles to expose the escutcheon screws, then loosen those screws with the appropriate screwdriver or hex key while supporting the spout to prevent it from dropping. Once screws are removed, slide escutcheon off, pull spout straight out, and inspect O-rings and mounting hardware before reassembly.
| Tool | Action | Check |
|---|---|---|
| Screwdriver | Loosen screws | O-rings |
| Hex key | Back set screws | Corrosion |
| Pliers | Remove retaining clip | Alignment |
Special Cases and Complications
Some installations present complications that require extra care, such as corroded or seized mounting nuts and brittle or damaged supply lines.
Stuck cartridges, heavy mineral buildup, and rusted parts can resist standard removal methods and may need penetrating oil, heat, or gentle prying.
If hardware is unsafe to salvage or removal risks further damage, cutting and replacing mounting components becomes the prudent option.
Removing corroded or seized mounting nuts
When mounting nuts have seized from corrosion or mineral buildup, they require deliberate techniques and corrosion-safe tools to avoid damaging the faucet or sink.
Apply penetrating oil, allow soak time, then use appropriately sized wrench or basin wrench with steady, controlled force.
If still stuck, alternate heat application (careful with nearby finishes) and tapping to break corrosion.
Protect surrounding surfaces and retest fit.
Dealing with brittle or damaged supply lines
Inspect the supply lines for stiffness, cracks, bulges, or flaking insulation before attempting removal, since brittle or damaged lines can rupture, leak, or detach under tension.
If compromised, isolate water, catch residual drips, and cut the line near the fitting with a tubing cutter or fine saw.
Replace with new flexible braided lines and use proper fittings and thread sealant to guarantee a secure, leak-free connection.
Handling stuck cartridges, mineral buildup, and rusted parts
Tackle stuck cartridges, mineral buildup, and rusted parts methodically to prevent damage and restore function: apply penetrating oil around seams, let it soak, then use proper-sized wrenches and cartridge pullers.
Soak removable parts in vinegar or descaler to dissolve deposits. Tap gently to break corrosion bonds.
Replace irreparably corroded components and clean mating surfaces before reassembly to guarantee smooth operation.
When to cut and replace mounting hardware
Cut through corroded studs or sheared bolts and replace them when extraction risks damaging the sink, countertop, or faucet body, or when repeated attempts with penetrating oil, heat, and pullers fail to free the hardware.
Use appropriate cutting tools, protect surrounding finishes, and remove debris.
Fit new stainless or brass mounting hardware sized to the faucet.
Torque carefully and test for stability and leaks.
Tools and Techniques for Stubborn Fasteners
When fasteners resist standard loosening, applying penetrating oil, controlled heat, or a light impact can free seized threads while minimizing risk to surrounding finishes.
Specialized tools—basin wrenches, strap wrenches, and socket adapters—allow access and torque in tight spaces when used with proper technique.
Temporary measures, such as wrapping jaws with cloth or using cheater bars carefully, can provide extra leverage without marring fittings when executed cautiously.
Using penetrating oil, heat, and impact tools safely
Apply penetrating oil, heat, or an impact tool methodically to free seized fasteners while observing safety precautions and manufacturer guidance.
Allow oil to penetrate per product instructions. Use heat sparingly, protecting nearby finishes and plastic components; cool parts slowly.
Use impact tools with controlled force to avoid stripping.
Wear gloves, eye protection, and ventilate the area.
Stop if resistance persists and reassess to prevent damage.
Proper use of basin wrenches, strap wrenches, and socket adapters
Reach for the right specialty wrench before forcing a stuck fitting: a basin wrench provides reach and leverage for cramped under-sink nuts, a strap wrench grips polished or odd-shaped bodies without marring finishes, and socket adapters convert common ratchets to fit faucet hexes and splines.
Use steady, controlled force, proper jaw alignment, and the correct adapter size; inspect for slippage and reposition as needed.
Temporary fixes to gain leverage without damage
Loosen stuck faucet fasteners without causing damage by using temporary leverage aids that distribute force and protect finishes.
Wrap jaws with cloth, rubber, or tape; employ a strap wrench or adjustable oil-filter tool for broad contact; slide a piece of rubber hose over a nut for fingertip turning; use penetrating spray and short, firm taps to break corrosion before applying steady leverage with a properly sized wrench.
Inspecting and Cleaning After Removal
Once the faucet is removed, the area should be inspected for damage or water stains on the sink mounting surface and countertop.
Mineral deposits and old sealant should be cleaned away to guarantee proper resealing and prevent leaks.
Supply lines, shutoff valves, and the drain assembly must be examined for corrosion, wear, or loose connections.
Checking sink mounting surface and countertop condition
After the faucet and mounting hardware are removed, the sink flange and surrounding countertop should be closely inspected for mineral deposits, old plumber’s putty, silicone residue, and any signs of rot or delamination. The area is noted for soft spots, staining, gaps, and adhesive failure; documented and measured before repair or replacement decisions.
| Area | Issue | Action |
|---|---|---|
| Flange rim | Residue | Record |
| Countertop edge | Delamination | Measure |
| Underside | Rot | Document |
| Surrounding seal | Gaps | Photograph |
Cleaning mineral deposits and old sealant
Cleaning mineral deposits and old sealant begins with a focused inspection to determine the type and extent of buildup around the flange and countertop.
Use vinegar or a mild descaler for mineral scale; a plastic scraper and solvent soften old sealant; rinse and dry thoroughly.
Visualize:
- White crust flaking away.
- Rubber gasket residue lifting.
- Smooth, clean metal and countertop edges.
Inspecting supply lines, shutoff valves, and drain assembly
A brief, systematic inspection of the supply lines, shutoff valves, and drain assembly helps identify wear, corrosion, and blockages that could compromise function or cause leaks.
The inspector checks hoses for cracks, bulges, or soft spots; verifies valve operation and seals; clears debris from the drain and pop-up mechanism; replaces damaged flexible lines, worn valve cartridges, and corroded fittings to guarantee reliable performance.
Preparing for Installation or Replacement
Before reassembly, measurements for hole spacing and countertop thickness are verified to guarantee a proper fit.
The homeowner selects replacement faucets and parts that match those dimensions and the existing water connections.
Worn gaskets, seals, and mounting hardware are replaced to prevent leaks and secure the fixture.
Measuring hole spacing and countertop thickness
Measuring the faucet’s hole spacing and the countertop thickness guarantees the new fixture fits correctly and functions reliably. The technician measures center-to-center hole distance and overall deck thickness, notes overflow or escutcheon needs, and records measurements for mounting hardware and supply line reach.
| Measurement | Typical Range |
|---|---|
| Hole spacing | 4–8 inches |
| Countertop thickness | 0.75–2 inches |
| Deck clearance | 1–3 inches |
Choosing compatible replacement faucets and parts
Several factors determine which replacement faucets and parts will fit and perform reliably in a given installation.
Compatibility hinges on mounting hole count and spacing, countertop thickness, supply line size and connection type, and valve cartridge model.
Material and finish should match corrosion resistance and aesthetics.
Confirm clearance for handles and spout, plus local plumbing code and pressure ratings before purchasing replacements.
Replacing gaskets, seals, and mounting hardware
With compatible parts on hand, attention turns to the seals, gaskets, and mounting hardware that hold the faucet watertight and secure.
Old rubber or neoprene seals are removed, surfaces cleaned, and new gaskets seated evenly.
Threaded mounting nuts, washers, and brackets are inspected and replaced as needed.
Tightening follows manufacturer torque recommendations to prevent leaks while avoiding overtightening.
Common Mistakes to Avoid
Careful attention to common errors can prevent damage and extra work when disassembling a bathroom faucet.
Typical pitfalls include over-tightening or stripping mounting nuts, failing to shut off or depressurize the water supply, and overlooking existing leaks or worn valves that require repair.
Addressing these issues before starting helps guarantee a smoother, safer teardown.
Over-tightening or stripping nuts
Excessive force on mounting nuts often does more harm than good: threads can strip, fittings deform, and replacement parts become necessary.
Careful, even torque prevents damage—use properly sized wrenches, apply steady pressure, and stop when snug.
If a nut resists, inspect for corrosion or misalignment rather than escalating force.
Damaged threads require extractors or replacement hardware to restore a secure seal.
Forgetting to turn off water or relieve pressure
Always shut off the water supply and relieve pressure before starting work; failing to do so can cause sudden sprays, water damage, or injury.
Neglecting this step interrupts safe disassembly, risks ruined finishes, and can flood cabinets or floors.
Confirm shutoff valves fully closed, open faucet to bleed remaining pressure, and have towels and a bucket ready to catch residual water before loosening fittings.
Ignoring underlying leaks or damaged valves
Overlooking hidden leaks or worn valves can turn a simple faucet disassembly into a recurring problem.
Technicians or homeowners should inspect cartridges, seats, and supply lines before reassembly. Failing to identify corroded valves or hairline leaks leads to persistent dripping and water damage.
Replace defective components rather than reassembling faulty parts; test under pressure to confirm the repair before finishing.
Troubleshooting After Removal
After disassembly, attention turns to identifying hidden leaks or damaged fixtures exposed during the process.
If water continues to flow after the shutoff, basic checks of the supply valves and residual pressure should be performed before reassembly.
Persistent leaks, unclear damage, or continued flow despite correct shutoff warrant contacting a licensed plumber.
Identifying hidden leaks or damaged fixtures
Inspect the exposed plumbing and fixture components methodically to reveal hidden leaks and damage that removal may have concealed.
Check for hairline cracks, corroded fittings, warped seals and deteriorated O‑rings.
Dry surfaces, then apply a paper towel to detect slow seepage.
Inspect valve seats, spray channels and supply lines for mineral buildup or loose connections.
Document defects for repair or replacement.
What to do if water still flows after shutoff
Noting any leaks or damaged parts during inspection can help narrow down why water persists.
However, if water continues to flow after the shutoff has been operated, immediate systematic troubleshooting is required.
Verify both hot and cold shutoff valves, fully close and retest.
Check for a secondary shutoff or bypass, drain remaining pressure by opening faucet, and inspect valve stems for damage or debris obstructing closure.
When to call a licensed plumber
Call a licensed plumber when troubleshooting after faucet removal reveals unresolved issues beyond basic repairs, such as persistent leaks from the supply lines, a broken valve seat, seized or damaged cartridge components, or evidence of corroded or compromised piping.
A professional should also be contacted for obscure water pressure problems, improper reassembly, damaged threads, or if local code, warranty, or complex shutoff systems require certified intervention.
Maintenance Tips to Prevent Future Difficult Removals
Regular cleaning to remove mineral buildup and the use of mild descalers help prevent seized fittings and simplify future disassembly.
Periodic inspection of supply lines and shutoff valves detects wear or corrosion early, allowing timely replacement before removals become difficult.
Choosing appropriate sealants and anti-corrosion treatments for threaded connections reduces galling and extends component life.
Regular cleaning and mineral deposit prevention
A few simple habits can greatly reduce mineral buildup and make future disassembly easier: wipe fixtures dry after use, run a weekly vinegar soak on aerators and removable parts, and periodically inspect seals and exposed connections for early signs of scale.
Use a soft brush and mild detergent to remove residue, apply a light lubricant to moving parts, and replace worn washers to prevent trapped moisture.
Periodic inspection of supply lines and shutoff valves
After wiping fixtures and treating aerators, the next maintenance step is a quick inspection of supply lines and shutoff valves to spot leaks, corrosion, or stiffness before they complicate future disassembly.
Visually check for bulges, frays, or mineral buildup. Operate each shutoff to confirm smooth action and tight closure.
Replace any compromised flexible line or valve promptly to avoid emergency repairs.
Best sealants and anti-corrosion practices
Preventing corrosion and ensuring reliable seals begins with choosing the right products and applying them correctly: use plumber’s tape (PTFE) on threaded connections, pipe joint compound rated for potable water on metal-to-metal fittings, and silicone or plumber’s putty where fixtures meet sinks as specified by the manufacturer.
Regularly clean, dry, and inspect joints; apply corrosion inhibitor to exposed metals; replace degraded seals promptly.
- Tightened brass nut with tape
- Cleaned, dry flange edge
- Fresh silicone bead
Conclusion
Removing a bathroom faucet need not be intimidating when approached methodically. Studies show household plumbing problems account for roughly 21% of home service calls, underscoring the value of DIY competence. By identifying faucet type, shutting off supplies, and following the correct disassembly steps for single‑handle or two‑handle models, homeowners can safely remove fixtures and avoid common pitfalls. Proper preparation streamlines replacement and reduces the chance of post‑removal leaks or damage.