How to Repair a Plumbing Vent Pipe: Step-by-Step Guide for DIY and Pros
How to Repair a Plumbing Vent Pipe: A Step-by-Step Guide
Repairing a plumbing vent pipe is essential for preventing sewer gas buildup and ensuring proper drainage. Start by inspecting for signs like odors, gurgling drains, roof stains, cracked flashing, or displaced seals. For minor indoor repairs, you can replace damaged sections, reseal joints, or change couplings. For roof repairs, ensure safe access, remove old sealant, and install new flashing or a vent boot, followed by leak testing. If you discover significant corrosion or hidden leaks, it’s best to contact a licensed plumber. This guide will walk you through the necessary procedures, tools, testing methods, and maintenance tips.
Overview of Plumbing Vent Pipe Repair
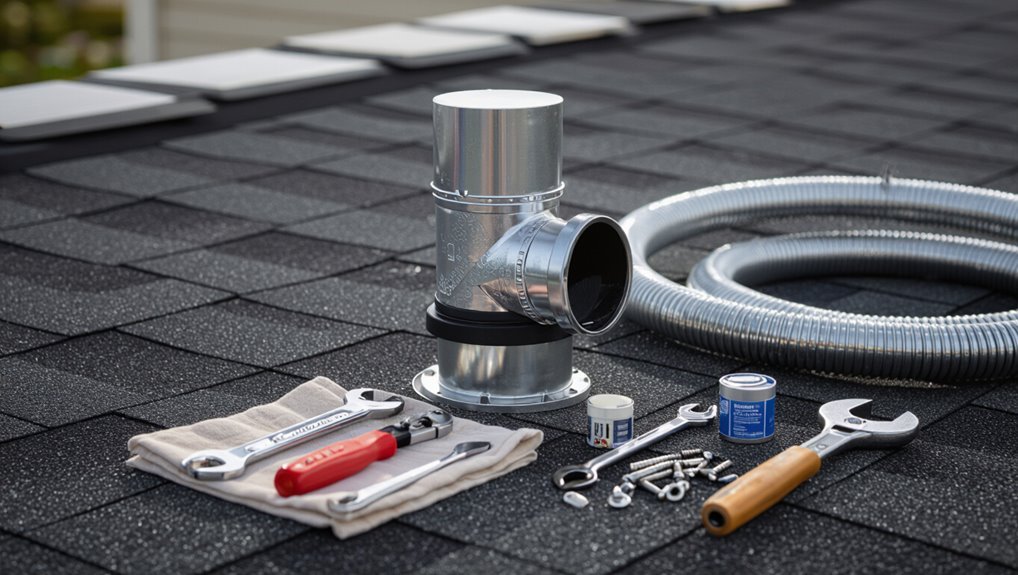
A plumbing vent pipe allows sewer gases to escape and maintains proper drainage by equalizing air pressure in the waste system.
Visible signs that repair is needed include persistent odors, slow drains, gurgling sounds, or roof damage around the vent stack.
Simple clogs or minor flashing repairs may be handled by a homeowner, but major leaks, roof penetrations, or deteriorated stacks warrant a professional inspection.
What a plumbing vent pipe is and why it matters
Plumbing vent pipes, sometimes called soil stacks or vent stacks, channel sewer gases out of the drainage system and equalize air pressure to guarantee drains flow smoothly.
Proper function prevents siphoning, odors, and pressure imbalances. Understanding construction, vent routing, materials, and roof termination is essential for anyone learning how to repair a plumbing vent pipe safely and effectively, guiding diagnosis and correct repair choices.
Common signs you need vent pipe repair
Several clear indicators signal that a vent pipe may need repair: persistent sewer odors inside the building, slow or gurgling drains, water backing up from fixtures, or unusual pressure-related noises when fixtures are used.
Additional signs include recurring clogged traps, fluctuating water levels in toilets, damp or stained roof areas around the vent stack, and visible corrosion, cracks, or displaced vent flashing.
When to call a professional vs. DIY viability
When should a homeowner tackle vent pipe issues themselves versus calling a licensed plumber?
A homeowner may handle minor, accessible problems: loose flashing, simple roof sealant, or replacing a visible cap with basic safety precautions.
Call a licensed plumber for persistent odors, complex roof penetrations, extensive corrosion, hidden leaks, structural damage, code compliance concerns, or when confident assessment and safe repair cannot be guaranteed.
Tools, Materials, and Safety Preparations
Before beginning vent pipe work, the necessary tools—pipe wrenches, PVC cutter, soldering kit or solvent cement, and flashing tools—should be assembled alongside common replacement parts such as couplings, vent caps, and pipe sections.
Materials selection and proper PPE—gloves, eye protection, and a respirator for solvent fumes—must be confirmed to match the repair type.
Finally, applicable permits, local code requirements, and inspection scheduling should be verified to guarantee the repair is compliant.
Required tools for common vent pipe repairs
A basic toolkit, safety gear, and the right materials form the foundation for common vent pipe repairs.
Essential hand and power tools, measuring devices, and protection enable safe, accurate work.
Typical required items include:
- Pipe cutter or hacksaw and files
- Adjustable wrench and pliers
- Cordless drill with bits and hole saws
- Flashlight, respirator, gloves, and eye protection
Typical materials and replacement parts
Common replacement materials for vent pipe repairs include sections of PVC or ABS pipe, appropriate solvent cement or primer, rubber couplings with stainless clamps, and flashing for roof penetrations.
Additional parts often needed are gaskets, vent caps, and strap supports.
Typical items:
- Pipe sections and fittings
- Solvent cement/primer
- Rubber couplings with clamps
- Roof flashing and vent cap replacements
Safety precautions and personal protective equipment
With replacement materials gathered, attention turns to safety precautions and personal protective equipment to reduce injury and exposure risks during vent pipe work.
Workers should wear gloves, eye protection, a respirator for dust or sewer gases, and sturdy footwear.
Use fall protection when on roofs, guarantee ladders are secure, ventilate confined spaces, and keep a first-aid kit and phone accessible for emergencies.
Permit, code, and inspection considerations
Several jurisdictions require permits and code-compliant work before altering or replacing vent pipes.
Professionals must verify local regulations, allowable materials, and required inspections before beginning. Compliance guarantees safety, prevents fines, and protects warranties.
Confirm vent sizing, height, flashings, and clearances per plumbing code.
Schedule required inspections, retain documentation, and consult building departments if uncertainties arise to avoid costly rework.
Diagnosing Vent Pipe Problems
The technician begins by visually inspecting roof vents and flashings for cracks, gaps, or loose seals.
Then, they check indoor vent terminations and any unusual odors that indicate backflow or blockage.
When visual checks are inconclusive, smoke testing, camera inspection, and pressure testing are used to locate leaks, obstructions, or improper connections.
Finally, identifying the vent pipe material and measuring pipe size helps determine compatible repair methods and replacement parts.
Inspecting roof vents and flashings
Begin by visually scanning each roof vent and its surrounding flashing for signs of damage or deterioration.
Note cracked, corroded, loose or missing flashing, split or rusted vent caps, and gaps where sealant has failed.
Check for ponding, shingle damage, nail pops, and any debris blocking vents.
Photograph issues and mark priorities for repair or replacement.
Checking indoor vent terminations and odors
A quick indoor check of vent terminations and odors helps pinpoint blocked, disconnected, or undersized venting that can cause slow drains, gurgling, or sewer smells.
Inspect attic and accessible wall spaces for cracked fittings, loose joints, or missing vent stubs. Run water through multiple fixtures while listening for gurgling, and note locations where persistent odors appear—these observations guide targeted testing such as smoke, pressure, or dye tests.
After documenting, verify trap seals, dry P-traps with traps primer failures, and check mechanical devices (garbage disposals, traps) for leaks.
Using smoke tests, camera inspection, and pressure tests
Having documented indoor vent terminations, odors, and trap conditions, attention shifts to targeted diagnostic methods: smoke testing, camera inspection, and pressure testing offer definitive ways to locate leaks, blockages, and improper connections that visual checks miss.
Technicians introduce non-toxic smoke to reveal exits and leaks, run camera sondes for internal obstructions and joint defects, and apply controlled pressure to verify system integrity.
How to identify material type and pipe size
How can a technician quickly determine vent pipe material and size to guide repair decisions?
Visual inspection of markings, fittings, and color identifies PVC, ABS, cast iron, or galvanized steel.
Use calipers or a tape measure to obtain outside diameter, then consult pipe charts for nominal size.
Note joint type, wall thickness, and corrosion to select compatible repair materials and methods.
Step-by-Step Repair: Small Indoor Vent Pipe Issues
The section outlines practical steps for addressing common small indoor vent pipe problems, including fixing minor leaks and tightening loose fittings.
It covers replacing a damaged section of pipe, properly sealing joints with appropriate solvents or adhesives, and ensuring correct material compatibility.
Finally, it describes how to test the repair for proper airflow and leak-free performance.
Fixing minor leaks and loose fittings
Begin by isolating the small leak or loose fitting to determine its exact location and cause; common culprits include deteriorated rubber seals, cracked solvent-weld joints, or loose slip-nut connections.
Tighten nuts, replace worn gaskets, clean and reapply solvent cement to PVC joints, and use plumber’s tape on threaded fittings.
Test for leaks, recheck after temperature changes, and document repairs.
Replacing a damaged vent pipe section indoors
When replacing a damaged indoor vent pipe section, the technician first isolates the affected run, shuts off water to fixtures if necessary, and clears the surrounding area for safe access.
Next, the damaged segment is measured, marked, and cut out; mating surfaces are cleaned and dry.
A replacement length is fitted, aligned, and secured with appropriate mechanical couplings.
Pressure and smoke testing confirm integrity.
Sealing joints and using appropriate solvents/adhesives
Apply sealants and adhesives methodically to guarantee leak-free, code-compliant vent connections.
Surfaces are cleaned, dried, and checked for fit before primer or solvent cement application. Use manufacturer-recommended PVC/ABS solvent for plastic, and approved silicone or pipe joint compound for metal connections.
Apply even beads, assemble within working time, and wipe excess. Allow full cure per product instructions before restoring insulation or access panels.
Testing the repair for proper function
Verify the vent repair by performing a sequence of functional and visual checks to confirm airtight, code-compliant operation.
Inspect all joints and seals for visible gaps or adhesive bloom.
Run water through fixtures to induce airflow; listen for gurgles and odors.
Use a smoke pencil or incense to detect leaks.
Recheck after 24 hours and document results for warranty or inspection purposes.
Step-by-Step Repair: Roof Vent Pipe and Flashing
Before beginning work on a roof vent pipe, the inspector evaluates safe roof access and current weather to determine whether the job can proceed.
They then address damaged components in sequence—removing and replacing deteriorated flashing or vent stack sections, installing a new vent boot with proper seals, and applying appropriate sealants.
Finally, a careful post-repair roof leak inspection verifies watertight integrity and corrects any remaining issues.
Assessing roof access and weather conditions
When preparing to work on a roof vent pipe and flashing, the inspector evaluates access routes, footing, and weather forecasts to determine whether conditions are safe for climbing and prolonged work.
The inspector checks ladder placement, roof pitch, clear pathways, and secure anchor points.
Wind, rain, ice, and temperature trends are reviewed; unsafe forecasts prompt postponement and rescheduling to guarantee crew safety and effective repair.
Replacing or repairing vent flashing
Remove old sealant and damaged flashing, then inspect the pipe collar, surrounding shingles, and roof deck for rot or gaps that could compromise a new installation.
Cut and fit a new flashing to the pipe, seat it under upper shingles, and fasten with corrosion-resistant nails.
Apply roof-grade sealant around the collar and nail heads.
Verify watertightness and replace any compromised shingles.
Replacing a cracked or corroded vent stack section on roof
Assess the extent of damage to the vent stack and surrounding roof area to determine whether a partial section replacement is sufficient or a full-length swap is required.
Remove damaged pipe above the roofline, cut squarely below corrosion, and fit a matching replacement section with proper couplings or repair sleeves.
Secure joints, guarantee proper alignment and slope, and inspect interior connections for integrity before finishing.
Installing a new vent boot and sealing techniques
After the damaged section of vent pipe has been trimmed and a replacement fitted, attention shifts to installing a new vent boot and properly sealing the roof penetration.
The technician slides the boot over the pipe, aligns the flange under shingles, fastens with corrosion-resistant screws, applies roofing sealant under flange edges and around pipe collar, and installs a bead of silicone at vulnerable seams to prevent water intrusion.
Post-repair roof leak inspection
Why confirm the repair under varied conditions?
The inspector checks for leaks after rainfall simulation and thermal cycling, examines flashings, boot integrity, and sealant adhesion.
Interior ceilings are observed for damp spots.
Roof runoff paths are reviewed to guarantee no pooling.
Any seepage triggers immediate resealing or replacement.
Documentation of findings and photos completes the inspection for warranty and future reference.
Step-by-Step Repair: Cast Iron, Galvanized, PVC, and ABS Vents
Repairing vent pipes requires different methods and materials depending on whether the system is cast iron, galvanized steel, PVC, or ABS.
Cast iron often needs corrosion assessment and mechanical couplings, while galvanized steel may require cutting, threading, or patching with appropriate metal fittings.
PVC and ABS repairs focus on clean cuts, proper solvent welding, and selecting compatible connectors or junction couplings for reliable joins.
Repair considerations for cast iron vent pipes
Evaluating cast iron vent pipes requires attention to corrosion patterns, joint condition, and surrounding structure before any repair work begins.
Inspect for hairline cracks, flaking rust, and saddle corrosion at supports.
Prioritize replacing severely pitted sections and using appropriate couplings or repair sleeves for moderate damage.
Confirm lead and oakum or modern sealants match original joint types and comply with local codes.
Repairing galvanized steel vents
Begin by evaluating the galvanized vent for surface corrosion, seam integrity, and any evidence of leaking or backflow before commencing repairs.
Remove rust with wire brush and abrasive pad; apply rust converter where needed.
For pinholes or small seams, use epoxy putty or self-fusing silicone tape.
Replace sections with threaded galvanized fittings when threads are sound; verify secure joints and proper slope for drainage.
PVC and ABS vent pipe cutting, joining, and solvent welding
Cutting and solvent-welding PVC and ABS vent pipe requires clean, square cuts, dry-fitting, and proper primer and cement application to guarantee leak-free, code-compliant joints.
Use a fine-tooth saw or rotary cutter, deburr and chamfer edges, test-fit components, then apply primer where required and a uniform cement coat.
Assemble quickly with a quarter-turn twist, hold alignment until set, and wipe excess.
Choosing compatible connectors and transition couplings
Select connectors and link couplings that match the materials, sizes, and pressure ratings of the existing vent system to guarantee a durable, code-compliant repair.
Choose corrosion-resistant adapters and approved junction couplings for dissimilar metals.
Verify gasket compatibility and temperature limits.
Install per manufacturer instructions.
- Material match
- Size tolerance
- Gasket type
- Code approval
Replacing an Entire Vent Stack
Replacing an entire vent stack begins with careful planning and precise measurements to size the replacement and locate supports and roof penetration.
The process then moves to safely removing the old stack, fitting and fastening new sections with correct slope and clearances, and installing secure roof flashing or collars.
Final steps include pressure testing the system and completing a code compliance checklist before closing the roof.
Planning and measuring the replacement stack
Before removing the old stack, the installer must establish exact measurements and a clear plan that account for roof penetration size, pipe diameters, required rise above the roofline, and any offsets or bends.
They verify local code minimums, measure vertical run and lateral distances, sketch the assembly with fittings and supports, select materials and flashing, and order prefabricated sections or cut stock to permit accurate, code-compliant reassembly.
Removing the old stack safely
Begin by securing the work area and confirming that all utilities and building occupants are informed of the shutdown. The crew should shut off water to affected fixtures if required, isolate any electrical connections near the roof, and post safety signage.
Next, dismantle the stack from the top down, cutting or unfastening joints, securing loose sections, using fall protection, and removing debris promptly to prevent roof or interior damage.
Installing new stack sections and supports
With the old stack removed and the roof area cleared, attention turns to installing the new vent sections and their supports.
Technicians fit prefabricated pipe segments, ensuring tight joints with solvent welds or mechanical couplings. Vertical alignment is checked with a level.
Straps, brackets, and roof flashing are secured to structural framing. All attachments resist wind load and allow future access for maintenance.
Ensuring proper slope, clearance, and roof penetration
Carefully position the new vent stack to maintain proper slope, required clearances, and a watertight roof penetration.
Verify vertical alignment and provide 1/4 inch per foot slope for horizontal runs.
Confirm clearance from windows, mechanical intakes, and combustibles per local code.
Fit a durable flashing and sealant at the roof, and secure caps and supports to prevent movement and leaks.
Final testing and code compliance checklist
After securing the vent stack, attention turns to final testing and a code compliance checklist to confirm system integrity and legal conformity.
A qualified inspector verifies seals, slopes, and flashing.
Perform pressure/leak tests and verify vent termination height and clearance.
Document materials and permits.
- Leak/pressure test
- Flashing and seal inspection
- Termination height/clearance
- Permit and materials documentation
Temporary Fixes and Emergency Repairs
Temporary measures such as rubber patch kits, silicone sealants, or waterproof tape can stop leaks long enough to prevent immediate water damage.
Guidance should note when these stopgaps are acceptable—typically for days to a few weeks while arranging a permanent repair—and when a full replacement is required.
Delaying permanent repair increases risks of hidden water damage, mold growth, and compromised venting that can affect plumbing performance and safety.
Quick patch methods for leaks
When a vent pipe begins to leak and a full repair cannot be completed immediately, quick patch methods provide short-term containment to prevent water damage and sewer gas intrusion.
Temporary measures include sealing, wrapping, and bracing until permanent work can occur.
- Apply silicone or plumber’s putty to small cracks.
- Use self-fusing silicone tape for joints.
- Clamp a rubber patch over holes.
- Wrap with roofing tape and secure with hose clamps.
When temporary fixes are acceptable and for how long
If a full repair cannot be completed immediately, short-term patches are acceptable only to stop active leaks, limit water damage, and reduce sewer gas entry until a certified plumber can perform a permanent fix.
Temporary measures—sealant, rubber patch with hose clamps, or tarp—should be used sparingly and inspected daily. Limit temporary use to days or, at most, a couple of weeks before professional repair.
Risks of delaying permanent repair
Several common short-term patches can quickly become sources of larger problems when left in place beyond a few days.
Neglected temporary repairs increase risks: water intrusion, mold growth, corrosion, clogged vents, and compromised system pressure.
Odors and health hazards may emerge.
Emergency measures must be replaced promptly to prevent costly structural damage, fixture failure, and code violations requiring extensive corrective work by professionals.
Troubleshooting Common Problems After Repair
After repair, the homeowner should monitor for persistent sewer odors, recurring leaks at the roof penetration, noisy vents or signs of negative pressure, and any damage from pipe freeze and thaw.
Each symptom has distinct likely causes—failed seals or trapped water for odors, flashing or boot failures for leaks, improperly sized or blocked vents for noise and pressure, and insulation or slope problems for freeze damage.
If symptoms persist, further inspection or professional assessment is recommended to identify and correct underlying issues.
Persistent sewer odors causes and solutions
Detecting a lingering sewer odor after vent pipe repair indicates a problem that needs targeted troubleshooting rather than guesswork.
Possible causes include clogged or partially blocked vent piping, damaged trap seals, biofilm buildup in drain lines, or sewer line backflow.
Solutions: inspect and clear vents, verify trap water levels, hydrojet or snake drains, replace compromised traps, and consult a plumber for mainline diagnosis and remedial action.
Recurring leaks around roof penetration
Inspecting roof penetrations for recurring leaks focuses attention on flashings, seals, and fasteners that may have failed or been improperly reinstalled during vent pipe repair.
The technician verifies flashing alignment, replaces degraded neoprene or lead seals, tightens or replaces loose fasteners, and reseals flashing-to-pipe joints with compatible roofing sealant.
Water testing confirms repair integrity; unresolved leaks prompt full flashing replacement or roofer consultation.
Noisy vents and negative pressure issues
Diagnose noisy vents and negative pressure issues by listening for gurgles, hissing, or banging and noting when they occur—during drains, appliance cycles, or wind events—to narrow causes such as partial blockages, improperly sized or routed vent piping, or trapped air in the system.
Inspect vents for obstructions, test stack airflow, verify trap seals, and confirm vent sizing per code.
Resolve by clearing blockages, adding auxiliary vents, or rerouting piping.
Addressing pipe freeze and thaw damage
Freeze-thaw cycles can crack or separate vent pipes, compromise seals, and displace fittings.
A focused assessment after cold weather should prioritize locating hairline fractures, splits, or joint failures and confirming that insulation and support remain intact.
Repair options include replacing damaged sections, re-gluing or re-cementing joints, adding heat tape or insulation, and improving pipe slope and bracing to prevent recurrence.
Cost Estimates and Timeframes
Typical DIY repairs for a plumbing vent pipe often cost under a few hundred dollars for parts and basic tools, while hiring a professional commonly ranges from a few hundred to over a thousand dollars depending on complexity.
Simple fixes like replacing a flashing or patching a small crack can often be completed in an hour or two, whereas roof access, pipe replacement, or extensive sealing may require several hours to a full day.
The following section compares common repair scenarios with representative cost and time estimates to help determine the most practical approach.
Typical DIY vs. professional cost ranges
Repairing a plumbing vent pipe can range from a simple homeowner patch to a multi-hour professional replacement, with costs and timeframes reflecting the scope of work, access difficulty, and local labor rates. DIY parts often cost $20–$150; pros charge $200–$1,000+. Complexity, permits, and roof access raise prices.
| Option | Typical Parts | Typical Labor/Total |
|---|---|---|
| DIY patch | $20–$50 | Minimal |
| DIY replacement | $50–$150 | Moderate |
| Professional service | $200–$1,000+ | Variable |
Expected time to complete common repairs
A single plumbing vent repair can take anywhere from 15 minutes for a quick sealant patch to several hours for a full roof-access replacement; projected times depend on the repair type, ease of access, and whether roof work or permits are required.
Typical timelines:
- sealant or coupling swaps 15–60 minutes,
- flashing or collar replacement 1–3 hours,
- rerouting or full-stack replacement 4–8+ hours,
- inspections adding variable time.
Preventive Maintenance and Long-Term Care
A regular inspection schedule—monthly visual checks and an annual professional review—helps identify cracks, loose flashings, and blockages before they worsen.
Seasonal measures, such as clearing debris in fall and insulating or temporarily capping vents in winter, reduce weather-related damage.
Investing in upgrades like corrosion-resistant stacks, snow guards, or larger-capacity venting can lower the frequency and cost of future repairs.
Routine inspection schedule and what to look for
Although often overlooked, a regular inspection schedule is essential to catch vent pipe issues before they escalate.
Inspect monthly for visible damage, debris, and loose flashing; record findings.
Perform a thorough check biannually, including seals and joints. Replace degraded components promptly.
- Visual roof/top inspection
- Interior attic chase check
- Joint and seal assessment
- Odor and airflow test
Seasonal care and winterization tips
When temperatures drop and precipitation increases, seasonal care and winterization protect vent pipes from ice, blockages, and material fatigue; proactive measures reduce the risk of roof leaks, sewer gas entry, and costly repairs.
Inspect flashing and caps before freeze, clear debris, trim overhanging branches, and guarantee attic insulation prevents pipe condensation.
Apply approved heat tape where allowed and schedule prompt repairs for compromised seals.
Upgrades that reduce future repair needs
To reduce recurring repairs and extend service life, homeowners should prioritize targeted upgrades that address common failure points in vent systems.
Recommended improvements include replacing corroded pipes with PVC or stainless steel, installing insulated vent stacks to prevent freezing, adding durable flashing and proper roof seals, and integrating access points for cleaning.
Routine inspection schedules further minimize unexpected failures and costly repairs.
Additional Resources
The article points readers to local building codes and standard venting diagrams for compliance and proper layout.
It also recommends specific instructional videos that demonstrate common repair techniques and manufacturer guides for model-specific parts and installation details.
These resources support safe, code-compliant repairs and clarify steps discussed earlier.
Local code references and standard venting diagrams
Local plumbing codes and standard venting diagrams provide the authoritative framework for sizing, routing, and connecting vent pipes to guarantee proper drainage and trap protection. References and diagrams should be consulted before repairs.
Key points include:
- Local code citations for vent sizes and materials.
- Diagram examples of individual and common vents.
- Required clearances and stack terminations.
- Inspection and permit requirements.
Recommended instructional videos and manufacturer guides
After consulting codes and diagrams, consult targeted instructional videos and manufacturer guides to apply those requirements practically.
Recommended resources include official manufacturer installation PDFs, step-by-step repair videos, code authority briefings, and product-specific troubleshooting clips.
Verify model numbers, materials, and warranty terms before proceeding.
- Manufacturer installation manuals
- Certified plumber tutorial videos
- Code authority webinars
- Product troubleshooting clips
Conclusion
The guide closes by pairing the mundane with the momentous: a cramped wrench and a rooftop vista, quick patch and season‑long peace. Readers are reminded that small fixes—tightened flashing, cleared obstructions—stand beside larger judgments about safety and skill. Whether a homeowner saves money or a pro refines craft, the repair is both technical task and quiet stewardship of a home’s breath, where careful hands avert chaos and preserve everyday calm.