How to Fix a Broken Drain Pipe in the Wall: Step-by-Step Repair Guide for DIYers
To fix a broken drain pipe in a wall, you’ll need to locate, access, and repair the pipe using basic tools and safety gear. Start by shutting off the water supply and creating a small access panel. Inspect the pipe with adequate lighting or a camera. For small leaks, use epoxy or rubber clamps; for larger breaks, cut out the damaged section and install compatible replacement pipe and couplings. After making the repairs, test for leaks, dry the area, restore the wall, and monitor for any odors. Continue reading for detailed steps, materials needed, and troubleshooting tips.
Overview of Repairing a Broken Drain Pipe Inside a Wall
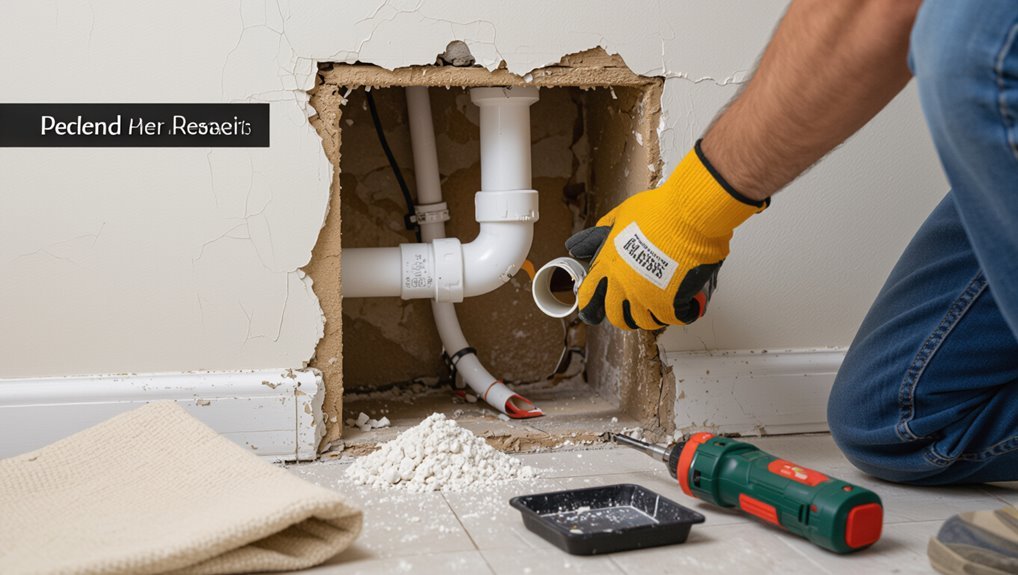
When a drain pipe breaks inside a wall, the decision to attempt a DIY repair or call a professional depends on the extent of damage, access, and the homeowner’s skill level.
Common causes include corrosion, freezing, shifting foundations, and improper installation, while signs often are water stains, musty odors, or reduced drainage.
Confirming the problem requires visual inspection through access panels or small openings, moisture detection tools, and sometimes a camera inspection.
When to attempt a DIY repair vs. calling a professional
How can a homeowner decide whether to tackle a broken drain pipe inside a wall or call a professional?
Evaluate skill, tools, and scope: simple access, small leaks, and familiarity with how to fix a broken drain pipe in the wall favor DIY.
Extensive damage, sewage, structural concerns, or uncertain diagnosis warrant a licensed plumber.
Consider cost, permits, and insurance implications before proceeding.
Typical causes of drain pipe damage in walls
Drain pipes inside walls commonly fail for a few predictable reasons: corrosion from age or chemical exposure, physical damage from settling or nail/screw punctures, freeze bursting in cold climates, joint failures from poor installation, and clog-related pressure buildup.
Other causes include degraded rubber fittings, root intrusion where sewer lines run near foundations, and impact from renovations or rodents chewing plastic pipes.
Typical signs and how to confirm the problem
What clues indicate a broken drain pipe inside a wall? Discolored drywall, bulging paint, damp or musty odors, recurring mold, and slow drains are common signs. Confirmation requires visual inspection—remove a small drywall section—or use a moisture meter, borescope, or leak-detection dye in drains. Persistent water stains after drying strongly suggest an active internal leak needing repair.
Tools, Materials, and Safety Preparations
Before beginning any repair, the necessary tools and materials must be identified, including pipe cutters, wrenches, replacement pipe sections (PVC, ABS, copper, or PEX), fittings, and appropriate adhesives or solder.
Personal protective equipment—gloves, eye protection, and masks—along with basic safety steps should be arranged, and the water supply must be turned off and test-opened to relieve pressure.
Surrounding areas should be protected with drop cloths and containers to catch residual water.
Essential tools list
A clear inventory of tools, materials, and safety gear sets the stage for any effective drain-pipe repair.
Essential items minimize delays and hazards. Recommended basics include:
- Adjustable wrench, pipe cutter, pliers.
- Inspection light, tape measure, deburring tool.
- Safety goggles, gloves, dust mask.
Additional consumables and sealants should be listed separately, matching pipe material and local codes.
Common replacement materials and pipe types (PVC, ABS, copper, PEX)
Different pipe materials offer distinct advantages and installation methods, so selecting the correct replacement—PVC, ABS, copper, or PEX—depends on application, local code, and the existing system. Each type varies by durability, joining method, and cost; match compatibility and temperature/pressure needs.
| Material | Joining | Typical Use |
|---|---|---|
| PVC | Solvent weld | Drain, waste |
| ABS | Solvent weld | Venting, drains |
| Copper | Solder | Water supply |
| PEX | Crimp/exp | Retrofits |
Personal protective equipment and safety precautions
Wear appropriate personal protective equipment and follow basic safety precautions to reduce injury risk and contamination when repairing a drain pipe.
Gloves, safety goggles, a dust mask or respirator, and knee pads protect against contaminants, debris, and sharp edges. Use work boots and long sleeves.
Make certain adequate ventilation, proper lighting, and a clear workspace. Dispose of contaminated materials per local regulations.
How to shut off water and protect surrounding areas
Locate and shut off the water supply to the affected fixture before any repair work begins, ensuring no accidental flow occurs.
Then close the main valve if needed and drain lines by opening taps.
Protect surroundings with waterproof tarps, bucket placement, and plastic sheeting; remove valuables.
Keep towels, mop, and a wet/dry vacuum ready.
Label valves and test for dryness before cutting.
Locating and Accessing the Broken Pipe
Locating a hidden leak begins with observing visual clues like stains and peeling paint, then confirming moisture with a meter, infrared scan, or careful listening for running water.
Once the leak is pinpointed, the installer marks and cuts a minimal access opening in the drywall to expose the damaged section.
Attention is required when removing surrounding insulation and working near electrical wiring to avoid further damage or hazards.
Methods to locate leaks behind walls (visual clues, moisture meters, infrared, listening)
When a drain pipe leaks behind a wall, several noninvasive detection methods can be combined to pinpoint the source before cutting into drywall.
Inspect for staining, bubbling paint, or mold patterns. Use a moisture meter to map dampness.
An infrared camera reveals temperature anomalies from evaporative cooling.
Listening devices or simple water-run tests help localize active dripping for targeted access.
Marking and cutting an access opening in drywall
Carefully mark an access opening that exposes the damaged section while minimizing drywall removal.
Measure pipe location from fixtures and studs; transfer measurements to the wall.
Outline a rectangular opening slightly larger than the repair area for tool access.
Use a stud finder to avoid framing, then score and cut drywall with a utility knife or oscillating tool.
Remove debris and label the panel for reinstallation.
Dealing with insulation and electrical obstacles
Begin by tracing the pipe route and mapping obstructions such as insulation batts, blown-in insulation, and nearby electrical runs to plan a safe, minimally invasive access.
Evaluate insulation type and condition; remove or retract insulation carefully to expose the pipe.
Identify and de-energize nearby circuits if wires are present.
Use insulated tools, fish tape or inspection camera, and restore insulation after repair.
Assessing the Damage and Choosing a Repair Method
The inspector measures the length and location of the break, checks for cracks, corrosion, or misalignment, and notes the pipe material.
Based on the size and condition of the damage, a slip coupling or clamp may suit small clean breaks while patches address short leaks and full section replacement is needed for extensive corrosion or multiple fractures.
Finally, compatibility with PVC, ABS, cast iron, or metal pipes guides the choice of fittings and adhesives to guarantee a reliable repair.
How to inspect the break and measure affected section
A visual and tactile inspection establishes the scope of damage and informs the appropriate repair method.
The inspector notes crack location, extent, and surrounding material condition, removing loose debris and drying the area.
Measure total damaged length plus 1–2 inches of healthy pipe for overlap.
Record pipe diameter, material, wall access dimensions, and any hidden moisture or mold for repair planning.
When to use a slip coupling, clamp, patch, or full section replacement
Decide the repair type by matching the damage profile to the strengths and limits of each method:
Slip couplings suit clean, straight breaks on accessible runs with intact pipe ends.
Adjustable clamps work for localized cracks or leaks where cutting is impractical.
Flexible patches or epoxy wraps address small surface fractures or temporary fixes on irregular shapes.
Full section replacement is required when damage compromises structural integrity, involves corrosion, multiple fractures, or when joints and alignment must be restored.
Choose slip coupling for neat cuts; clamp for minor leaks; patch for short-term or irregular-surface fixes; replace sections for extensive, structural, or recurring failures.
Compatibility considerations for different pipe materials
Because different pipe materials respond to repairs in distinct ways, evaluating compatibility is essential before selecting a method.
PVC bonds with solvent cement and accepts glued patches; ABS requires compatible adhesives or mechanical couplings.
Cast iron resists adhesives, favoring clamps, rubber couplings, or cutting for flange-style replacements.
Copper needs soldering or compression fittings.
Match repair materials and methods to pipe type to guarantee durable seals.
Step-by-Step Repair: Replacing a Section of Drain Pipe
The guide now moves into the practical steps for replacing a damaged section of drain pipe, beginning with preparing the workspace and removing the compromised portion.
It then covers measuring, cutting, and dry-fitting the replacement pipe and fittings, followed by appropriate joining methods—solvent welding for PVC, compression or sleeve fittings, soldering copper, or crimping PEX—and securing the new section with the correct slope.
Finally, pressure and leak testing are performed before closing walls or finishes.
Preparing the workspace and removing the damaged section
Clear the area around the fixture, shut off the water supply, and remove any items from under the sink to create unobstructed access before cutting into the pipe.
Don protective gloves and eye protection, place a bucket and towels to catch water, and open nearby drains to relieve pressure.
Expose the damaged section by removing access panels or drywall as needed, then clean and mark the cut points.
Measuring, cutting, and dry-fitting replacement pipe and fittings
Measure twice and mark precisely where the damaged section ends and the new piece will begin, accounting for the depth of any fittings and the overlap required for solvent welds or slip joints.
Cut squarely with the appropriate tool, deburr and clean cut ends, then assemble replacement pipe and fittings without adhesive.
Confirm alignment, slope, and clearance inside the wall cavity before final joining.
Joining methods: solvent weld for PVC, compression/sleeve fittings, soldering copper, crimping PEX
With dry-fit confirmed and alignment set, attention turns to selecting and executing the appropriate joint method for the pipe material involved.
For PVC, apply primer then solvent cement, seating parts fully.
For copper, clean, flux and solder joints with proper heat.
For PEX, use manufacturer-approved crimp or clamp rings and verify with a gauge.
For repairs using sleeves, tighten compression fittings per torque specs.
Securing the repaired section and restoring slope for proper drainage
Secure the repaired section firmly and reestablish the pipe’s pitch to confirm continuous, gravity-driven flow.
Support the pipe with appropriate hangers or straps spaced per code, avoiding compression at joints.
Shim or adjust mounting blocks to achieve the recommended slope (typically 1/4″ per foot for horizontal drains).
Verify alignment visually, secure fasteners, and ascertain no sagging pockets that could trap water.
Pressure/leak testing the repair before closing the wall
Perform a pressure and leak test to confirm the repaired drain section is watertight before closing the wall.
Plug open ends, fill the pipe with water and observe for visible leaks for 15–30 minutes.
For air testing, pressurize to recommended psi with a gauge and watch for pressure loss.
Repair any leaks, retest, then dry the area thoroughly before wall restoration.
Step-by-Step Repair: Patching Small Cracks or Holes
Patching is recommended for small, localized cracks or pinholes where the pipe material and remaining wall thickness are sound, while widespread damage or corrosion warrants full replacement.
The repair options commonly include epoxy putty applied after cleaning and drying, or a rubber patch and stainless clamp for temporary fixes, each with specific preparation and curing steps.
After curing, the repair should be pressure-tested and inspected for leaks and firmness to confirm durability before restoring normal use.
When patching is appropriate vs. full replacement
Often a repair decision hinges on the extent and location of the damage: small, localized cracks or pinholes in accessible sections of pipe can usually be patched, while widespread corrosion, multiple fractures, significant misalignment, or damage near joints and connections typically require full replacement.
Patching suits low-pressure leaks, short damaged runs, and pipes with intact structural integrity; replace when reliability, code compliance, or long-term access is compromised.
Materials and steps for epoxy putty or clamp repairs
When damage is limited to a small crack or pinhole in an accessible section, a targeted repair using epoxy putty or a repair clamp can restore function quickly.
Required materials: epoxy putty, sandpaper, solvent, gloves, clamp kit, pipe cleaner, utility knife.
Steps: stop water, dry area, roughen surface, apply putty or position clamp per manufacturer, cure time, trim excess, restore normal use.
Testing patched repairs for durability
Begin by inspecting the repaired area visually and by touch to confirm the patch has fully cured and bonded to the pipe surface.
Apply a controlled water flow and observe for leaks for several minutes. Monitor surrounding wall for dampness.
If available, pressurize the line lightly to manufacturer limits and check again.
Record results; reapply or replace repair if any seepage or weakness appears.
Dealing with Drain Pipes Connected to Fixtures
When a broken drain pipe is tied to a fixture, the trap and connection must be removed and later reinstalled with care to avoid leaks.
The technician should document or photograph assembly and replace any worn washers or gaskets before reassembling.
After repair, seals and venting must be tested to confirm proper drainage and prevent siphoning.
Removing and reinstalling trap and fixture connections safely
Carefully disconnecting and reattaching trap and fixture connections prevents leaks and protects finishes.
Turn off water, place a bucket under the trap, loosen slip nuts with channel pliers, and remove trap components.
Inspect washers and threads, replace damaged parts, and clean mating surfaces.
Reassemble hand-tight plus a quarter turn, test for leaks, and retighten only if necessary to avoid cracking fittings.
Ensuring seals and vents remain functional after repair
Confirm that seals and vents function properly after repairing a drain pipe connected to a fixture to prevent odors, siphoning, and slow drainage.
Inspect and replace damaged washers, gaskets, and trap seals.
Verify vent openings are unobstructed and pitched correctly.
Run water and monitor for bubbling or gurgling, indicating venting issues.
Retighten connections and retest until drainage is smooth and odor-free.
Restoring the Wall and Finishing Touches
Once the plumbing is secure, attention turns to restoring the wall by patching the access hole, taping seams, and applying joint compound until smooth.
After sanding, paint matching and trim replacement restore the room’s appearance.
Finally, remove debris and old piping, disposing of waste according to local regulations.
Drywall repair: patching, taping, and mudding the access hole
After the plumbing is secure and the cavity is dry, the access hole in the drywall must be restored with a sequence of patching, taping, and mudding to reinstate structural integrity and create a smooth surface for finishing.
Fit a backing if needed, trim a drywall patch to fit, secure with screws.
Apply joint tape, two thin coats of compound, sand between coats, and feather edges for a seamless repair.
Painting and trim restoration
Begin by priming and painting the repaired area to match the surrounding wall.
Apply thin, even coats, feathering edges to blend texture and color. Allow full drying between coats.
Reinstall or replace baseboards, quarter-round, and moldings, caulking seams and nail holes.
Sand, touch up, and finish trim with stain or paint to restore a seamless, professional appearance.
Cleanup and waste disposal of old piping
Gather and contain all debris and removed pipe sections immediately, segregating materials by type—metal, PVC, galvanized, and hazardous components like lead solder or asbestos-wrapped fittings—so disposal follows local regulations.
Label bags, secure sharp edges, and decontaminate tools. Transport hazardous items to certified disposal facilities.
Record receipts and follow municipality guidelines for recycling or landfill.
Restore work area, replacing insulation and sealing wall penetrations before finishing.
Troubleshooting and Common Problems After Repair
After repairs are completed, common post‑repair issues such as persistent leaks, lingering odors, slow drains, and venting problems should be checked systematically.
Technicians will trace leak sources using visual inspection, pressure testing, and dye or video camera methods.
Odor and slow‑drain complaints often point to trap, vent, or alignment faults.
If recurring failures appear or temporary patches continue to fail, a full replacement rather than repeated repairs may be warranted.
Persistent leaks and how to diagnose their source
Even a well-executed repair can develop a persistent leak, and diagnosing its source requires systematic inspection rather than guesswork.
The inspector checks visible joints, fittings, and surrounding drywall for staining. Pressure-test the section, isolate branches, and use dye or moisture meters to pinpoint seepage.
Reinspect slip joints, crimps, and nearby vent connections; document findings before replacing sections or seals.
Odors, slow drains, and venting issues after repair
Investigate lingering odors, slow drainage, and venting problems methodically, since these symptoms often indicate trapped air, partial blockages, or compromised vent connections rather than a failed pipe seal.
Check traps for dry seals, run water to refill P-traps, clear partial obstructions with a snake, inspect vent terminations for debris or animal nests, and verify proper pitch and joint alignment to restore airflow and prevent recurrence.
When a temporary fix becomes a replacement job
Recognize when a quick patch no longer suffices: temporary repairs that repeatedly leak, crack under pressure, or require frequent adjustments typically signal underlying deterioration, misalignment, or incompatible materials that mandate full replacement.
A definitive job restores alignment, upgrades materials, and guarantees long-term seals.
Inspect surrounding drywall, supports, and fittings; document corrosion, offsets, or multiple failure points before committing to a full replacement.
Cost, Time Estimates, and When to Hire a Pro
Typical DIY repairs often cost between $20 and $200 in parts and can take from one hour to a full day depending on access and complexity.
If leaks persist, multiple breaks are present, or sewer-line issues are suspected, a professional should be contacted.
When seeking a plumber, request written estimates, ask about licensing and warranties, and compare scope and hourly rates before hiring.
Typical DIY cost and time breakdown
When deciding whether to tackle a broken drain pipe as a DIY project or call a professional, owners should weigh the likely costs, the time required, and the complexity of the repair. Typical DIY costs range $30–$200; simple fixes take 1–4 hours; moderate repairs 4–8 hours.
| Task | Cost | Time |
|---|---|---|
| Patch small leak | $30–60 | 1–2 hrs |
| Replace section | $50–150 | 2–6 hrs |
| Reroute/major repair | $100–200 | 4–8 hrs |
Signs the job is out of DIY scope
How can a homeowner tell if a broken drain pipe exceeds DIY capabilities?
Major water damage, mold spread beyond a small area, structural involvement (floor joists, studs), difficult access behind multiple layers, sewer-line failure, complex fittings or cast-iron sections, and lack of proper tools or skills indicate professional help.
If estimated repair costs or time escalate considerably, hiring a licensed plumber is prudent.
What to ask a plumber and how to get estimates
Why ask specific questions before hiring a plumber? A homeowner should request written estimates, scope details, permit needs, timeline, materials, warranty, and insurance proof.
Ask for hourly versus flat rates and contingencies for hidden damage.
Compare at least three bids, check references and licensing, and hire a pro for structural, sewer, or complex wall repairs beyond DIY competence.
Preventing Future Wall Pipe Damage
Preventing future wall pipe damage begins with routine maintenance to prevent clogs and control corrosion, such as periodic flushing and targeted chemical or mechanical cleaning.
Proper insulation and freeze protection for in-wall pipes reduce the risk of bursts in cold climates.
Where recurring problems occur, upgrading pipe materials and fittings can provide long-term resistance to leaks and deterioration.
Maintenance tips to avoid clogs and corrosion
Regular, targeted maintenance greatly reduces the risk of clogs and corrosion in wall-mounted drain pipes.
Inspect visible fittings periodically, flush drains with hot water and baking soda monthly, and install strainers to catch debris.
Avoid chemical drain cleaners that damage pipes; use enzyme-based treatments when needed.
Promptly repair minor leaks, replace corroded sections, and keep ventilation and access panels unobstructed for easy servicing.
Insulation and freeze protection for in-wall pipes
Having addressed routine maintenance to keep drains clear and fittings sound, attention turns to insulating and protecting in-wall pipes from freezing and temperature-related stress.
Apply foam or fiberglass insulation around exposed sections, seal wall penetrations to stop drafts, and add heat tape where freezing risk is high.
Maintain attic and crawlspace ventilation and monitor vulnerable areas during cold snaps to prevent bursts and wall damage.
Upgrades and material choices to reduce future issues
Consider upgrading to corrosion-resistant materials and modern fittings to reduce the likelihood of future wall pipe failures.
Choose PEX or CPVC for durability, flexible routing, and resistance to corrosion. Use stainless steel or brass fittings, quality solvent or crimp connections, and dielectric unions where dissimilar metals meet.
Add accessible access panels and consider installing inline cleanouts and pressure-reducing valves to minimize stress and maintenance needs.
Quick Reference Repair Checklist
A concise checklist helps a homeowner or technician assess and repair a broken drain pipe efficiently.
It outlines safety, diagnostics, and repair steps to prioritize action. Use the list to confirm tools, isolation, and materials before cutting into wall cavity.
- Shut off water, clear area, gather PPE and tools.
- Inspect leak source, map affected section, verify materials.
- Cut, replace or patch, test, and restore finishes.
Conclusion
Repairing a broken drain pipe inside a wall can be accomplished by a prepared DIYer following safe, methodical steps. For example, a homeowner in Portland who found slow drains and mold removed drywall, confirmed a cracked PVC elbow, cut out the damaged section, and spliced in new pipe and couplings with primer and cement—restoring flow and preventing future leaks. Careful diagnosis, proper materials, and patience yield durable results; complex situations warrant a licensed plumber.