How to Hide Laundry Room Plumbing: 15 Stylish Solutions for Exposed Pipes
To effectively hide laundry room plumbing while maintaining style and functionality, consider using decorative pipe covers, curtains, or plants for quick solutions. For more permanent options, install removable access panels, shallow cabinets, or sliding panels that allow for easy maintenance access. Modular cabinets, painted pipes, and moisture-resistant finishes can further enhance your decor while preventing issues. Thoughtful planning for cost and upkeep ensures long-lasting results. This guide provides detailed solutions and tips to help you achieve a stylish and practical laundry space.
Overview of Options for Hiding Laundry Room Plumbing
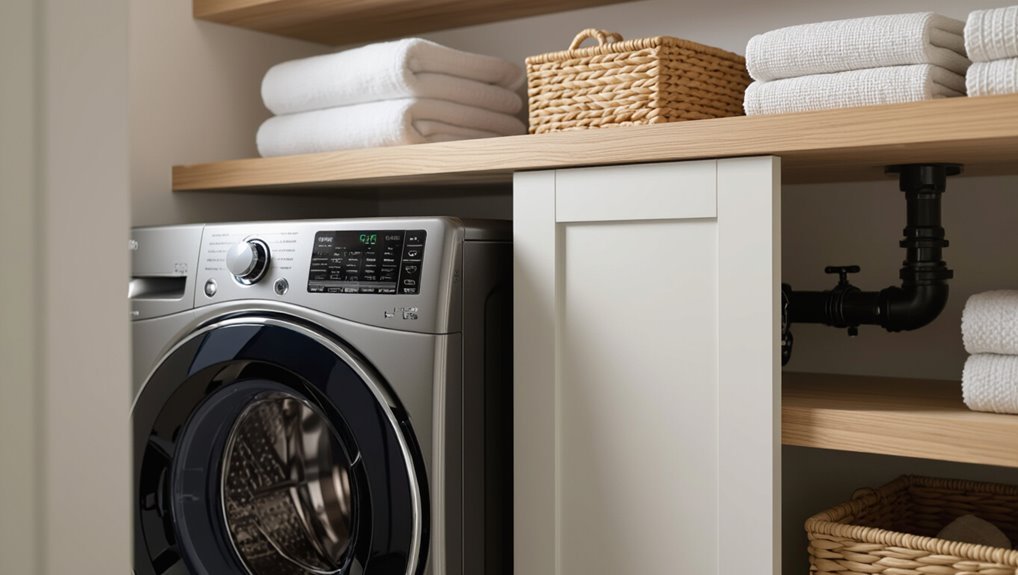
The section outlines common approaches for concealing laundry room plumbing while balancing aesthetics and practicality.
It highlights key factors—budget, needed access for maintenance, material durability, and whether the project suits a DIYer or requires a professional.
These considerations guide the selection of solutions such as cabinetry, access panels, boxing, or decorative covers.
Quick summary of aesthetic and functional goals
A successful concealment strategy balances aesthetics and accessibility: it should present a clean, cohesive look while allowing for routine maintenance and ventilation.
Goals prioritize seamless integration with decor, durable materials, and unobstructed service access.
Solutions range from decorative covers and cabinetry to paint and panels, addressing how to hide laundry room plumbing exposed pipes while maintaining ventilation, durability, and simple future repairs.
Factors to consider when choosing a solution (budget, access, materials, DIY vs pro)
When selecting how to conceal laundry room plumbing, homeowners should weigh budget, required access, material performance, and whether to DIY or hire a professional; each factor narrows suitable options and affects long-term maintenance.
Practical considerations include frequency of future repairs, moisture resistance, local code, aesthetic compatibility, and time. Low-cost covers suit DIYers; complex rerouting or finish work often requires licensed trades.
Immediate Concealment Techniques for Exposed Pipes
For quick, practical solutions to exposed laundry pipes, the article highlights decorative pipe covers and sleeves alongside removable fabric or curtain panels.
Freestanding furniture and shelving can obscure plumbing while adding storage, and plants or decorative screens offer simple visual barriers.
Each option is presented for ease of installation and immediate improvement to the room’s appearance.
Use of decorative pipe covers and sleeves
Installers and homeowners can quickly conceal exposed laundry-room pipes using decorative covers and sleeves that blend function with style.
Metal shrouds, plastic sleeves, and fabric-wrapped foam provide neat, low-profile concealment while allowing access for maintenance. Choices include painted finishes, brushed metals, and wood-look options to match décor.
Measurements must be precise; clips or adhesive strips secure covers without permanent alteration.
Removable fabric or curtain panels
A simple curtain or fabric panel offers an immediate, nonpermanent way to hide exposed laundry-room plumbing while preserving access for maintenance.
Panels attach to tension rods or discreet tracks and can be cut to fit around fixtures. Fabrics selected for moisture resistance and washable properties withstand laundry-room conditions.
Patterns or neutral hues integrate with decor, and quick removal enables inspections or repairs without tools.
Freestanding furniture and shelving to obscure pipes
Moving from soft coverings to more substantial screening, freestanding furniture and shelving provide immediate, sturdy concealment for exposed laundry plumbing while maintaining access.
Compact cabinets, narrow bookcases, or open shelving units can be placed before pipes, offering storage and visual blocking.
Choose moisture-resistant materials, allow removable panels or adjustable shelves for service access, and secure tall units to the wall for safety and stability.
Plants and decorative screens as visual barriers
Visual harmony can be achieved by positioning plants and decorative screens to mask exposed laundry pipes without permanent alteration.
Lush potted plants soften metal lines and introduce texture; tall, narrow species work best in limited space.
Foldable or freestanding screens provide instant coverage and style variety.
Both options allow access for maintenance, improve aesthetics, and suit renters seeking noninvasive, flexible concealment solutions.
Built-In Concealment Solutions That Maintain Access
Built-in concealment solutions balance aesthetics with serviceability by providing hidden but accessible access to laundry plumbing.
Options include removable access panels and hinged cabinets, custom shallow enclosures, false walls or soffits with access doors, and sliding or bi-fold panels for tight spaces.
Each approach can be tailored to room layout and maintenance needs to guarantee fittings remain reachable without sacrificing a clean finish.
Simple removable access panels and hinged cabinets
Installers and homeowners often choose simple removable access panels or hinged cabinets to conceal laundry room plumbing while preserving serviceability.
These solutions provide unobtrusive covers that match surrounding finishes, permit quick inspections, and allow tool-free removal or hinged access for routine maintenance.
Materials range from painted plywood to prefinished metal panels; sizes are tailored to reach valves, traps, and disconnects without sacrificing aesthetic cohesion.
Custom shallow cabinet enclosures
For homeowners seeking a more finished look than removable panels or hinged cabinets, custom shallow cabinet enclosures offer a tailored way to conceal laundry plumbing while keeping components accessible.
These slim built-ins fit between studs or flush against walls, provide removable or hinged front sections for valve access, and match finishes to surrounding cabinetry, creating a cohesive appearance without sacrificing serviceability or reducing usable room depth.
False walls or drywall soffits with access doors
A false wall or drywall soffit provides a streamlined way to conceal laundry plumbing while preserving access for maintenance.
Constructed slightly offset from existing pipes, these built-ins hide valves and hoses behind a clean plane. Removable access doors or hinged panels blend with surrounding finishes, allowing quick inspections and repairs.
Proper framing and labeled panels guarantee code compliance, ventilation, and straightforward technician access.
Sliding panels and bi-fold doors for compact spaces
Whereas a false wall or soffit creates a continuous face, sliding panels and bi-fold doors offer a space-saving alternative that maintains ready access to laundry plumbing in tight layouts.
They conceal pipes behind lightweight, track-mounted panels or folding leaves, enabling quick inspections and repairs.
Materials range from painted MDF to louvered, ventilated slats for airflow; hardware choices prioritize smooth operation and minimal protrusion.
Plumbing-Friendly Cabinet and Vanity Ideas
Bathroom-style sink bases with recessed interiors are suggested to accommodate laundry plumbing while keeping cabinet fronts clean.
Open-shelf vanities can conceal traps and supply lines behind a visually open face, permitting quick inspection.
Modular cabinet systems offer removable panels and reconfigurable sections to simplify access for repairs and upgrades.
Laundry sink base cabinets designed for plumbing clearance
Installers and homeowners often choose laundry sink base cabinets specifically configured to accommodate plumbing runs, combining functional clearance with storage and a finished look.
These cabinets feature recessed toe kicks, removable back panels, and adjustable shelving to clear traps and shutoffs. Durable, water-resistant materials protect against leaks.
Customizable widths and cutouts permit easy service access while preserving concealed appearance and organized utility in laundry spaces.
Open-shelf vanities that hide pipes while allowing inspection
Several open-shelf vanities are designed to conceal plumbing while keeping it accessible for inspection and maintenance.
These units use recessed back panels, removable slatted shelves, and partial false fronts to hide pipes visually without sealing them in.
Contractors appreciate clear access panels and adjustable shelving for trap and valve work.
Materials resist moisture; finishes coordinate with laundry room styling while prioritizing serviceability.
Modular cabinets for easy reconfiguration and repairs
Modular cabinets simplify access and adaptability by allowing individual units to be moved, removed, or reconfigured around plumbing fixtures without disturbing adjacent cabinetry.
Sections with removable backs or adjustable shelves permit plumbers to reach valves and traps quickly.
Units can incorporate recessed toe-kicks, access panels, and snap-in plumbing chases.
This approach minimizes demolition, speeds repairs, and supports future layout changes with minimal cost.
Creative Aesthetic Treatments for Exposed Pipes
Exposed pipes can be treated as intentional design elements rather than eyesores. Options include painting them to blend with or contrast the room, wrapping them in wood, rope, or faux-stone sleeves, or embracing an industrial look by highlighting fittings as features.
Complementary backgrounds like tile or beadboard help integrate the plumbing into the overall scheme.
Painting pipes to blend or contrast with the room
When painted thoughtfully, pipes can either recede into the background or become a deliberate design feature, transforming functional elements into cohesive or contrasting accents.
Choosing a matte neutral will help them blend, while a bold color or metallic finish will make them a focal point.
Preparation matters: clean, sand, and prime metal or PVC.
Select durable, moisture-resistant paint and consider color placement for visual balance.
Wrapping pipes with wood, rope, or faux-stone sleeves
Several approaches transform visible plumbing into intentional decor by wrapping pipes with wood, rope, or faux-stone sleeves, each offering a distinct texture and style.
Wood cladding adds warmth and can be routed for fittings; natural rope provides a casual, tactile cover secured with adhesive or staples; lightweight faux-stone sleeves create a masonry look without weight.
All are removable for maintenance.
Industrial styling: turning pipes into design features
Embrace industrial styling by celebrating plumbing as purposeful architecture—metallic finishes, oversized fittings, and visible brackets become intentional elements rather than concealment.
Pipes get powder-coated or left raw, paired with matte black valves and Edison bulbs for contrast.
Strategic routing creates rhythmic lines; shelving mounts on pipework.
This approach frames utility as design, turning necessary plumbing into a cohesive, purposeful aesthetic statement.
Tile or beadboard backdrops to integrate plumbing visually
After celebrating pipes as architectural features, a subtler strategy frames them against structured surfaces so they read as integrated details rather than standalone fixtures.
Tile backsplashes or beadboard panels unify plumbing with surrounding walls, conceal anchors, and simplify cleaning. Choices in grout color, tile size, or beadboard orientation control contrast and rhythm, allowing pipes to recede or register as deliberate, cohesive elements within a refined laundry room palette.
Materials, Tools, and Cost Estimates
Common materials and finishes for concealing laundry plumbing—such as drywall boxes, plywood enclosures, beadboard, and paintable access panels—are summarized along with their typical appearance and durability.
Essential tools for DIY installation, including a stud finder, circular saw, drill, and basic plumbing wrenches, are listed to set expectations for skill and time.
Typical cost ranges compare low-to-moderate DIY expenses (materials and tools) with higher professional labor and permit fees so readers can weigh budget versus convenience.
Common materials and finishes for concealment projects
Materials for concealing laundry room plumbing range from simple, low-cost options like drywall and plywood to higher-end solutions such as custom cabinetry, tile-backed access panels, and decorative metal screens.
Finishes include paintable primers, moisture-resistant paints, waterproof sealants, and trim that matches existing millwork.
Other common choices include beadboard, MDF, laminate panels, mosaic tile, stainless or powder-coated metals, and moisture-resistant caulks for seams.
Tools required for DIY installations
With materials and finishes selected, attention turns to the tools needed for a successful DIY concealment project.
Essential hand and power tools include a drill/driver, circular saw or jigsaw, measuring tape, level, stud finder, utility knife, and clamps.
Plumbing-specific items: pipe cutter, adjustable wrench, PTFE tape.
Safety gear—gloves, goggles, dust mask—completes the kit for efficient, safe installation.
Typical cost ranges for DIY vs professional installation
A basic budget for concealing laundry room plumbing typically falls into two bands: a lower-range DIY route and a higher-range professional installation. DIY materials and tools commonly cost $50–$400; labor-free but time-consuming. Professional jobs run $400–$2,500 depending on complexity, finishes, and local rates.
| Option | Typical Cost | Notes |
|---|---|---|
| DIY basic | $50–$150 | Paint, pipe wrap |
| DIY upgraded | $150–$400 | Boxed enclosures, trim |
| Pro standard | $400–$1,000 | Labor, modest finishes |
| Pro premium | $1,000–$2,500 | Custom cabinetry, relocation |
Step-by-Step Guide for a Simple DIY Concealment Project
A concise step-by-step plan begins with evaluating and measuring the existing plumbing layout to determine clearances and access needs.
Next, the appropriate concealment method is chosen, materials are gathered, and the area is prepared for installation.
Finally, panels or cabinets are constructed and installed with removable access panels, then fittings are tested for leaks before finishing.
Assessing and measuring the plumbing layout
Begin by visually mapping the exposed pipes, valves, and drain lines to establish their positions, directions, and clearances before any measurements are taken.
Record pipe diameters, center-to-center distances, wall and floor setbacks, and vertical offsets.
Note access points and fittings requiring future service.
Use a tape measure and level, sketching dimensions to scale and labeling materials and mounting surfaces for accurate planning.
Selecting the right concealment method for your space
Several practical concealment options exist, and selecting the right one depends on measured clearances, access needs, budget, and the room’s style.
Choose open shelving if frequent access and ventilation matter; framed doors or removable panels for neat concealment with tool access; boxed enclosures for full coverage when aesthetics dominate; or decorative screens for flexible, nonpermanent solutions.
Consider durability and finishing to match the room.
Preparing the area and gathering materials
Clear the workspace, shut off water at the valve, and unplug appliances before any work begins; this guarantees safety and prevents accidental leaks or electrical hazards.
Measure pipe runs and surrounding clearances. Remove nearby obstacles and protect floors with drop cloths.
Gather tools: measuring tape, level, utility knife, screwdrivers, adjustable wrench, mounting hardware, sealant, paint or finish materials, safety goggles and gloves.
Constructing and installing panels or cabinets
Constructing and installing panels or a simple cabinet involves measuring, cutting, assembling, and fastening components to create a clean, accessible cover for plumbing while preserving service access.
The builder measures pipe layout, selects materials, cuts panels to fit, assembles frames or box, attaches hinges or removable fasteners, seals edges, and secures the unit to studs or anchors, ensuring stability and neat visual integration.
Creating removable access and testing for leaks
Begin by planning a removable access panel that balances concealment with quick serviceability: measure the plumbing layout and valve locations, choose a panel size that permits comfortable reach, and decide on a fastening method (hinges, magnetic catches, or thumb screws) that allows removal without tools while remaining secure during everyday use.
Install gasketing for moisture, test fittings under pressure, inspect for drips, and verify easy reattachment.
When to Hire a Professional
Professional help is recommended when plumbing work triggers code requirements, involves concealed leaks, or exceeds the homeowner’s skill level.
Homeowners should prepare specific questions about scope, materials, timeline, and warranty, and expect itemized quotes that separate labor, parts, and permit fees.
Confirming required permits, local building-code compliance, and contractor insurance is essential for safety and avoiding costly rework.
Signs you need a plumber or contractor (code, complexity, hidden leaks)
Recognize when a job exceeds routine DIY: visible code violations, complex rerouting of supply or drain lines, persistent or concealed leaks, and tasks that require permits all indicate the need for a licensed plumber or contractor.
Additional signs include water stains, mold growth, low water pressure, corroded fittings, inaccessible connections behind walls, or multi-system changes affecting vents, gas, or structural elements—situations demanding professional assessment and compliant repairs.
Questions to ask contractors and what to expect in a quote
Once it becomes clear a job is beyond routine DIY, homeowners need to know what to ask and what a realistic quote should include.
Ask about experience with laundry plumbing, timeline, materials, warranties, and subcontracting.
Expect an itemized estimate covering labor, parts, disposal, and contingency for unforeseen issues.
Clarify payment terms, change-order procedures, and cleanup responsibilities before signing.
Permits, building codes, and safety considerations
Three situations almost always require a permit and professional oversight: moving or adding water lines, altering structural walls or floors to conceal plumbing, and modifying gas or electrical connections for laundry appliances.
Homeowners should check local codes, secure permits, and hire licensed plumbers or HVAC/electric contractors.
Proper inspections prevent leaks, fire hazards, and code violations; documented work preserves property value and insurance coverage.
Common Problems and How to Avoid Them
Concealing laundry plumbing can inadvertently block shut-off valves and access to drains, so designs should include clear, lockable access panels or removable covers.
Poor ventilation and trapped moisture around hidden pipes promote mold growth, making vapor barriers and exhaust or passive airflow essential.
Materials and fastening methods must prioritize durability and straightforward maintenance to prevent future repairs.
Blocking access to shut-off valves and drains safe solutions
Although hiding piping and fixtures improves aesthetics, care must be taken not to block access to shut-off valves and drains, since restricted access can delay emergency shutoffs and complicate routine maintenance.
Designers should incorporate removable panels, hinged access doors, or labeled service panels; maintain clearances per code; and avoid permanent enclosures over critical fittings to guarantee rapid access for repairs and inspections.
Moisture, mold, and ventilation issues around concealed pipes
Many hidden plumbing runs increase the risk of trapped moisture, which can lead to mold growth and structural damage if ventilation and leak detection are neglected.
To avoid problems, guarantee cavities have airflow, install vents or passive grilles, use moisture-resistant materials, and incorporate accessible inspection panels.
Regularly monitor for condensation and odors, and employ discreet leak sensors to catch issues before they escalate.
Ensuring durability and ease of maintenance
Prioritize durability and maintainability from the outset to prevent common failures and costly repairs.
Choose corrosion-resistant materials, accessible access panels, and simple fastenings.
Design panels and covers for quick removal so leaks or valve work are straightforward.
Use labeled shutoffs and standardized fittings to speed repairs.
Schedule periodic inspections and avoid permanent adhesives that impede future servicing.
Design Examples and Room Layout Ideas
Practical layout ideas show how plumbing can be concealed without sacrificing function or style.
Examples range from compact closet solutions to full mudroom integrations, each using different concealment tactics and access strategies.
The following list outlines specific configurations and their key benefits.
- Small laundry closet with a sliding panel solution for quick access and a clean facade
- Larger laundry room with built-in cabinetry and an integrated utility sink to hide pipes within millwork
- Stackable washer/dryer alcove screened by a decorative partition to mask hookups in tight spaces
- Integrated mudroom-laundry hybrid with concealed plumbing behind durable, serviceable panels
Small laundry closet with sliding panel solution
When space is tight, a small laundry closet with a sliding panel offers a compact, elegant way to conceal plumbing while maintaining access for maintenance.
A recessed track allows panels to slide flush, hiding pipes and hookups. Panels can be plain, mirrored, or louvered for ventilation.
Inside, labeled shutoffs and removable access sections guarantee serviceability without disrupting the overall minimalist aesthetic.
Larger laundry room with built-in cabinetry and utility sink
A larger laundry room with built-in cabinetry and a utility sink combines organized storage, durable surfaces, and concealed plumbing into a functional work zone:
Cabinets hide supply lines and drain pipes behind removable access panels, while integrated sinks sit above boxed plumbing chases.
Countertops provide folding space, appliance footprints remain accessible, and coordinated finishes keep the room cohesive without exposing pipes or sacrificing maintenance access.
Stackable washer/dryer alcove with decorative screen
Several compact homes and apartments incorporate a stackable washer/dryer alcove screened by a decorative panel to maximize floor space while concealing plumbing and vents.
The screen can be perforated metal, laser-cut wood, or slatted MDF, providing ventilation and aesthetics.
Placement near existing plumbing minimizes rerouting; add a removable access panel for maintenance and a shallow shelf for detergents.
Integrated mudroom-laundry hybrid with concealed plumbing
Moving from compact alcoves to more multifunctional footprints, integrated mudroom-laundry hybrids combine concealed plumbing with practical entryway features to streamline daily routines.
Concealed lines run behind durable cabinetry and utility walls, protecting aesthetics while allowing easy access panels.
Layouts prioritize a drop zone, bench, hooks, and a laundry center with sink.
Durable finishes and zoned storage maintain order and simplify maintenance.
Maintenance and Long-Term Care Tips
Routine inspections and built-in quick-access panels help catch leaks and mechanical issues before they escalate.
Careful cleaning of finishes and protective treatments for concealment materials preserve appearance and function.
When remodeling, plan updates that maintain accessibility while modernizing covers and cabinetry.
Routine inspection and quick access methods
Inspect the laundry plumbing at regular intervals to catch small issues before they become major problems; quick visual checks of hoses, valves, and trap connections reveal leaks, corrosion, or loosened fittings that warrant immediate attention.
Use accessible access panels, removable kickboards, or hinged covers to allow fast intervention. Label shutoffs, keep basic tools nearby, and document inspection dates for prompt maintenance scheduling.
Cleaning finishes and protecting concealment materials
Preserve finishes and concealment materials by establishing a simple cleaning and protection regimen tailored to each surface—paint, laminate, wood, metal, or fabric—to prevent premature wear from moisture, detergent residue, and friction.
Use mild, pH-neutral cleaners, quick-dry methods, and protective sealants or fabric guards.
Inspect hardware and seams quarterly, address corrosion or delamination promptly, and document products used for consistent care.
Updating concealment during laundry room remodels
When remodeling a laundry room, homeowners should reassess concealment choices to guarantee they remain functional, durable, and compatible with new layouts or appliances.
This includes evaluating access panels, flexible hose routing, ventilation needs, and materials that resist moisture and detergent exposure.
Inspect mounts, seals, and fasteners for wear, upgrade to modular access systems, reroute piping to accommodate machine changes, and select finishes that tolerate cleaning and occasional service.
Product Recommendations and Where to Buy
The article now turns to specific product recommendations and purchase options for concealing laundry room plumbing. It outlines practical access panels, pipe covers, and durable hardware, and points readers toward reliable sources for custom cabinetry and qualified contractors.
Practical buying tips and installation considerations are highlighted to help readers choose the right solutions.
- Recommended access panels (metal and paintable plastic) and their sizing tips
- Pipe covers and insulating sleeves for a clean, code-compliant look
- Durable hinges, magnetic catches, and moisture-resistant fasteners
- Best sources for custom cabinetry and vetted contractors (local shops, online marketplaces, trade directories)
Recommended access panels, pipe covers, and hardware
A handful of reliable access panels, pipe covers, and basic hardware will simplify maintenance and keep a laundry room looking finished; recommended options include recessed metal or composite access panels for washer hookups, low-profile PVC or fabric pipe covers for visible drains and vents, and corrosion-resistant shutoff valves and hose washers.
Also consider magnetic or spring-hinged panels, snap-fit pipe sleeves, flexible insulation, and stainless mounting screws for longevity.
Best sources for custom cabinetry and contractors
Consider local custom cabinet shops, specialty online retailers, and vetted contractors as primary sources for tailored laundry-room solutions; each offers distinct tradeoffs in lead time, customization, and cost.
Local shops provide hands-on measurements and quicker adjustments. Online specialty vendors supply modular, finish-verified options. Licensed contractors coordinate installation, plumbing access, and permits.
Compare portfolios, references, warranties, and delivery timelines before hiring or ordering.
Final Checklist Before Installation
Before beginning work, the installer confirms precise pre-installation measurements and completes safety checks to guarantee fittings, clearances, and shutoffs are correct.
They verify access panels, ventilation paths, and ease of reach for valves and hoses.
Finally, they consider future-proofing needs such as space for larger appliances or additional supply lines.
Pre-installation measurements and safety checks
When all rough work is complete and fittings are staged for concealment, the installer performs a final, systematic sweep of measurements and safety checks to confirm clearance, alignment, and code compliance.
They verify pipe centerlines, access panel locations, fixture heights, and insulation clearances; test for leaks and proper shutoff operation; confirm electrical separation and grounding; and document dimensions for trim and mounting.
Access, ventilation, and future-proofing considerations
Having confirmed measurements, clearances, and leak-free connections, the installer next verifies that planned enclosures provide adequate access, ventilation, and adaptability for future repairs or upgrades.
Removable panels, labeled shutoff access, and service clearances guarantee swift maintenance. Vent openings and moisture-resistant materials prevent condensation and mold.
Design allows routing changes, appliance upgrades, and addition of insulation or soundproofing without major demolition.
Conclusion
In sum, the guide equips homeowners with practical, stylish ways to tame exposed laundry plumbing, offering quick fixes and built-ins that balance access with aesthetics. Like a tailor fitting a suit, each solution is chosen to match the room’s scale and function. Readers can confidently select concealment that eases maintenance, enhances design, and fits budget—leaving a laundry room that works well, looks polished, and endures through routine care.