How to Clean Brass Fittings: Step-by-Step Methods for Sparkling, Tarnish-Free Results
To effectively clean brass fittings and restore their shine, start by inspecting them for tarnish caused by oxygen, moisture, salts, and chemicals. Begin with a gentle wash using warm, soapy water to remove grime. For tarnish removal, apply a mild acid polish such as vinegar or lemon juice, or make a paste with baking soda. For more stubborn buildup, use a commercial brass polish. After cleaning, rinse and dry the fittings thoroughly. To protect the polished surface and slow down re-oxidation, consider applying a lacquer or wax. Follow these steps for a sparkling, tarnish-free finish.
What Makes Brass Fittings Tarnish and When to Clean Them
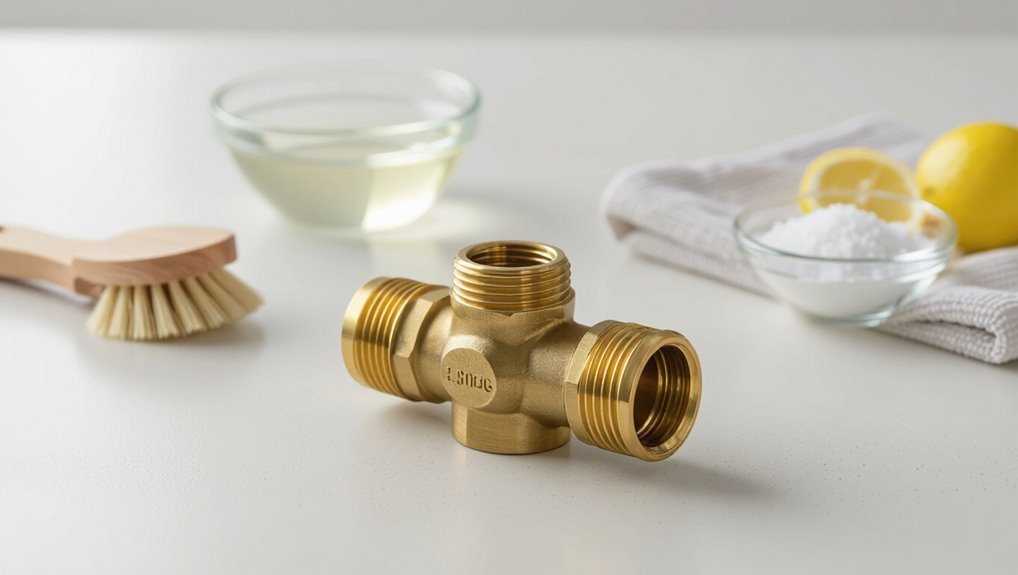
Brass fittings tarnish when exposure to oxygen, moisture, acids, salts, or household chemicals causes oxidation and corrosion on the surface.
The alloy composition and any lacquered, plated, or polished finishes influence both how quickly tarnish appears and which cleaning methods are appropriate.
Before cleaning, assess the fitting type and finish, and follow safety measures such as wearing gloves, ensuring ventilation, and avoiding abrasive techniques on delicate coatings.
Chemical and environmental causes of brass tarnish
When exposed to air, moisture, and certain chemicals, brass undergoes surface reactions that produce tarnish and corrosion.
Sulfur compounds, chlorides, acids, and ammonia accelerate patination, while humidity and salt spray promote pitting.
Industrial fumes and household cleaners cause discoloration.
Regular inspection guides when to clean; knowledge of contaminants helps determine how to clean brass fittings safely and which protective measures to apply.
Types of brass fittings and how finish affects cleaning
Classifying fittings by type and finish helps determine both their susceptibility to tarnish and the appropriate cleaning approach.
Solid brass, plated brass, and lacquered pieces age differently: solid develops patina, plated loses coating, lacquer prevents immediate oxidation.
Machined versus cast surfaces influence grime adherence.
Identify finish before selecting abrasives, polishes, or chemical cleaners to avoid damage and preserve appearance and function.
Safety and protective considerations before cleaning
Several environmental and usage factors drive tarnish on brass fittings, and understanding them is essential before any cleaning begins.
Protective measures include wearing gloves and eye protection, ensuring adequate ventilation to avoid inhaling fumes, disconnecting fittings from systems, and testing cleaners on inconspicuous areas.
Materials like lacquered finishes require gentler methods.
Proper containment and disposal of cleaning residues prevent environmental contamination.
Quick Recommendation: Best Overall Method for Shiny, Tarnish-Free Brass
The best-practice approach is a gentle, regular cleaning with mild soap and a soft cloth followed by a light polish to maintain shine and prevent tarnish.
Gentle methods are recommended for decorative or thin-plated fittings and routine maintenance, while abrasive or chemical treatments are reserved for heavily tarnished, solid brass pieces.
The choice hinges on the fitting’s finish, condition, and value to avoid damage while restoring appearance.
One-sentence best-practice summary
For consistently bright, tarnish-free brass, combine a gentle mechanical polish (soft cloth or nylon brush) with periodic application of a mild acidic cleaner (dilute vinegar or commercial brass polish).
Rinse thoroughly, and finish with a protective coat of clear lacquer or microcrystalline wax to slow future oxidation.
Maintain regular light cleaning, dry completely after rinsing, and reapply protective coating when shine diminishes to prevent recurrence.
When to choose gentle versus aggressive methods
Most brass pieces benefit from a gentle-first approach: start with soft cloths, mild soap, or a dilute vinegar solution and only escalate to abrasives or stronger chemicals when heavy tarnish, corrosion, or paint residues resist those methods.
Gentle methods preserve lacquer and detailing; aggressive techniques (brass polish, steel wool, chemical strippers) suit stubborn oxidation or industrial grime but risk surface damage and should be tested on inconspicuous areas first.
Tools, Materials, and Safety Gear You’ll Need
A concise inventory of tools and materials helps guarantee safe, effective brass cleaning.
Common household supplies and commercial cleaners will be listed alongside specialty brushes, polishing cloths, and pads tailored to different fittings.
Personal protective equipment and simple workspace setup recommendations complete the preparation checklist.
Common household supplies and commercial products
Gather basic household items and a few specialized products to clean brass fittings effectively and safely. A concise kit speeds tasks and reduces risk.
- Mild dish soap and warm water for routine cleaning.
- White vinegar or lemon juice for mild acid polishing.
- Baking soda paste to lift tarnish gently.
- Commercial brass cleaner for stubborn oxidation; follow label precautions.
Specialty brushes, cloths, and polishing pads
Select brushes, cloths, and pads that match the brass item’s size, profile, and finish to avoid scratching or uneven polishing.
Use soft cotton or microfiber for light cleaning, fine-bristle nylon for crevices, brass- or bronze-wire for heavy tarnish on robust pieces, and non-woven polishing pads or felt wheels for buffing finishes without cutting into the metal.
- Soft cloths
- Nylon brushes
- Metal wire brushes
- Polishing pads
Personal protective equipment and workspace setup
Several essential items and a safe workspace are required before beginning brass cleaning to protect the user and preserve the piece.
Prepare a ventilated area, stable work surface, and absorbent mats. Wear gloves and eye protection. Keep chemicals contained and a neutralizing solution nearby.
- Nitrile gloves
- Safety goggles
- Well-ventilated table with mat
- Spill tray and neutralizer
Step-by-Step: Cleaning Small Brass Fittings (Valves, Connectors, Lamps)
Before cleaning, each small fitting should be prepared by removing loose debris and inspected for damage or delicate finishes.
For light grime, a mild soap and warm water wash is sufficient, while moderate tarnish responds to a vinegar-and-salt paste or the lemon-and-baking-soda alternative.
Heavier buildup or final polishing can be handled with a commercial brass polish following the manufacturer’s instructions.
Preparation and inspection of fittings
A clear, well-lit workspace and a few basic tools set the stage for effective preparation and inspection of small brass fittings.
Cleaning should begin with a careful visual check for cracks, heavy corrosion, or stripped threads, followed by verification that moving parts function smoothly and that any seals or O-rings are intact and replaceable.
Document part orientation, note damage, and separate components for targeted cleaning and safe storage.
Method A Mild soap and warm water (for light grime)
With parts documented and seals removed or noted, cleaning can begin using the gentlest effective method: mild dish soap and warm water.
Prepare a soft bristle brush and lint-free cloth. Mix a few drops of dish soap in warm water, submerge brass briefly, gently scrub grime, rinse thoroughly with clean water, and dry immediately to prevent spotting.
Reassemble when completely dry.
Method B Vinegar and salt/paste technique (for moderate tarnish)
Begin by mixing a paste of white vinegar and table salt to create a mildly abrasive, acidic cleaner that removes moderate tarnish without harsh chemicals.
Apply with a soft cloth or toothbrush, work gently into crevices, let sit 5–10 minutes, then rinse thoroughly with warm water.
Dry immediately and polish lightly with a microfiber cloth to restore shine and prevent water spots.
Method C Lemon and baking soda alternative
For those seeking a gentler, more natural option than vinegar and salt, lemon and baking soda offer an effective mild abrasive acidic cleaner suited to small brass fittings like valves, connectors, and lamp parts.
Mix fresh lemon juice with enough baking soda to form a paste, apply briefly with a soft cloth or toothbrush, rinse thoroughly, then dry and buff to prevent water spots.
Method D Commercial brass polish procedure
Select a commercial brass polish when consistent, long-lasting shine and minimal elbow grease are desired; these products are formulated to remove tarnish, protect metal, and restore luster on small fittings such as valves, connectors, and lamp parts.
Apply a small amount with a soft cloth, work in gentle circular motions, follow manufacturer dwell time, repeat for stubborn spots, then proceed to the next maintenance step.
Rinsing, drying, and buffing to a shine
After polishing, the fittings should be rinsed to remove residue from polish and loosened tarnish; a gentle stream of warm water or a damp microfiber cloth will clear away remaining product without reintroducing grit.
Pat dry immediately with a clean, lint-free towel, then air-dry briefly.
Finish by buffing with a soft cloth in small circular motions until a uniform, reflective shine appears.
Step-by-Step: Cleaning Large or Fixed Brass Fittings (Plumbing Fixtures, Railings)
When treating large or fixed brass fittings, the technician first weighs whether removal is feasible or if on-site cleaning is necessary to avoid damage and service disruption.
Paste polishes and mechanical polishing tools can be effective but must be used with appropriate speed, pads, and pressure to protect the metal and nearby finishes.
Adjacent surfaces should be masked and water kept away from sensitive joints, followed by a suitable sealant or lacquer to prolong the restored appearance.
Safe removal vs. on-site cleaning considerations
Decide whether removal is feasible and safer than cleaning in place by evaluating the fitting’s size, attachment method, surrounding materials, and access to tools and helpers.
If removal risks damaging plumbing, finishes, or structural elements, plan on-site cleaning.
Consider water isolation, ventilation, drip containment, protective coverings for nearby surfaces, and safe ladder or scaffold use.
Prioritize minimizing strain and avoiding chemical runoff.
Applying paste polishes and mechanical polishing (rotary tools) safely
Begin by evaluating the brass surface to choose between a paste polish and mechanical polishing: use paste for light tarnish and delicate profiles, and reserve rotary tools for heavy corrosion or large, flat areas where controlled abrasion is safe.
Apply paste with soft cloths, working gently; for rotary tools, use low speed, appropriate pads, light pressure, and frequent inspection to avoid gouging or heat buildup.
Protecting adjacent surfaces and preventing water ingress
After selecting the appropriate polishing method, attention turns to protecting nearby surfaces and preventing water from entering fixtures.
Mask adjacent countertops, tiles, and wood with painter’s tape and plastic sheeting. Plug drain openings and cover spouts with waterproof tape or removable caps.
Route runoff into buckets, work with minimal water, and test seals before polishing to avoid corrosion or interior damage.
Final sealing and finishing for long-lasting results
Several final steps guarantee the cleaned brass retains its appearance and resists future tarnish: thorough drying, application of a protective sealant, and careful buffing.
After drying, apply a thin, even layer of lacquer, microcrystalline wax, or clear polyurethane designed for metal; allow full cure per manufacturer instructions.
Lightly buff with a soft cloth to even sheen. Reinspect periodically and reapply sealant as needed.
Techniques for Restoring Heavily Tarnished or Corroded Brass
For severely tarnished or corroded brass, professionals must choose between electrolysis and chemical dips based on metal composition, extent of damage, and accessibility.
Strict safety precautions—proper ventilation, personal protective equipment, and correct handling and disposal of aggressive chemicals—are essential to prevent injury and further damage.
After restoration, neutralization of residual chemicals and careful polishing and sealing restore appearance and protect against rapid re-corrosion.
When to use electrolysis or chemical dips
When brass parts show heavy verdigris, pitting, or thick oxide layers that mechanical cleaning cannot remove without risk of damage, electrolysis and chemical dips become appropriate restoration options.
Electrolysis is suited for items with deep corrosion or intricate shapes because it reduces oxides without abrasive contact, while chemical dips work faster on bulky, less-delicate pieces but can alter surface finish and remove plating.
Choose electrolysis for delicate profiles; use dips for robust, heavily encrusted components, accepting potential finish changes and the need for neutralization and rinsing afterward.
Detailed safety precautions for aggressive restoration
All aggressive restoration work demands strict safety measures to protect the restorer and the work environment from chemical, electrical, and particulate hazards.
Use chemical-resistant gloves, eye protection, and respirators rated for fumes and particulates.
Confirm ventilation or fume extraction, isolate work area, and keep neutralizers and spill kits nearby.
Disconnect power for electrolysis, use grounded equipment, and follow manufacturer safety data sheets precisely.
Post-restoration neutralization and finishing steps
Neutralize any residual chemicals immediately after aggressive cleaning to halt ongoing reactions and prevent staining or pitting of the brass.
Rinse thoroughly with deionized or distilled water, then apply a mild alkaline dip (baking soda solution) if acid was used.
Dry completely, polish with nonabrasive compound, inspect for remaining corrosion, and seal with lacquer or microcrystalline wax to protect finish and slow re-tarnishing.
Methods to Identify and Preserve Brass Plating vs. Solid Brass
The article explains simple tests—such as checking weight, looking for base metal at wear points, and using a gentle scratch or chemical spot test—to determine whether a fitting is brass-plated or solid brass.
It then contrasts cleaning methods, noting that plated items require milder cleaners, nonabrasive cloths, and avoidance of aggressive polishing to prevent removing the thin brass layer.
Guidance emphasizes inspecting plated pieces before treatment and testing any cleaner on an inconspicuous area.
How to test whether a fitting is brass-plated or solid
How can one tell if a fitting is solid brass or merely brass-plated?
Visual inspection reveals wear at edges, seams, or threads—exposed base metal indicates plating.
A magnet test: strong attraction suggests steel core beneath plating.
A gentle scratch in an inconspicuous spot with a fine file or coin can expose layers; consult weight and color consistency compared with known brass pieces for confirmation.
Cleaning approaches specific to plated items to avoid damage
Because plating can be thin and easily worn away, cleaning methods for brass-plated fittings must prioritize gentle, non-abrasive techniques and mild, pH-neutral cleaners to prevent exposure or removal of the plating.
Use soft cloths, cotton swabs for crevices, and diluted soap solutions.
Avoid abrasive pads, acidic cleaners, and aggressive polishing.
Test a discreet spot first and dry thoroughly to prevent corrosion beneath plating.
Comparative Guide: Home Remedies vs. Commercial Products
A concise comparison of home remedies and commercial brass cleaners helps readers weigh effectiveness, cost, speed, safety, and best use cases before choosing a method. Below is a quick reference table highlighting typical differences. The following discussion will clarify when to favor DIY mixtures and when to opt for formulated products.
| Home Remedies | Commercial Products |
|---|---|
| Often low cost, variable effectiveness, slower action, generally safe for small jobs | Higher cost, more consistent effectiveness, faster, formulated safety instructions |
| Best for light tarnish and budget projects | Best for heavy corrosion, professional or frequent use |
Effectiveness, cost, speed, safety, and best use cases
Compare home remedies and commercial brass cleaners across five practical criteria—effectiveness, cost, speed, safety, and best use cases—to determine which approach suits a given task. Home methods: cheap, gentler, slower, variable results; commercial: faster, more consistent, costlier, stronger chemicals. Choose based on brass condition and user safety.
| Method | Strength | Best use |
|---|---|---|
| Home | Low–medium | |
| Commercial | Medium–high |
Common Mistakes and How to Avoid Them
Common mistakes when cleaning brass fittings include over-polishing that removes protective lacquer, using abrasive tools that scratch or strip plating, and inadequate rinsing that leaves residue and promotes rapid tarnish.
Each error shortens the fitting’s lifespan or worsens its appearance.
Practical precautions and proper techniques prevent these outcomes.
Over-polishing and removing protective lacquers
Polishing brass too vigorously or removing its factory lacquer can strip away protective layers and accelerate tarnish, pitting, or uneven color changes.
Use gentle, nonabrasive cleaners and soft cloths; limit polishing frequency.
If lacquer must be removed, reseal promptly with appropriate clear coating.
Test methods on inconspicuous areas and follow manufacturer guidance to preserve finish and long-term corrosion resistance.
Using abrasive tools that scratch or remove plating
Avoid abrasive tools that can gouge, scratch, or wear away brass plating, because such damage exposes underlying metal and greatly accelerates corrosion and discoloration.
Use soft cloths, nonabrasive pads, and brushes with nylon or natural bristles. Test cleaners on an inconspicuous area.
When stubborn deposits remain, opt for gentle chemical methods or professional refinishing rather than aggressive mechanical abrasion.
Inadequate rinsing causing residue or accelerated tarnish
Many brass-cleaning failures stem from insufficient rinsing after using detergents, acids, or homemade solutions; residues left on fittings can leave streaks, accelerate tarnish, or continue to chemically attack the metal.
To avoid this, rinse thoroughly with warm water, use a soft brush for crevices, follow with a neutralizing rinse (baking soda solution if acidic cleaner was used), then dry completely with a lint-free cloth.
Preventive Steps to Keep Brass Fittings Shiny Longer
Preventive measures prolong the shine of brass fittings by creating physical barriers and reducing exposure to tarnishing agents.
Simple actions include applying protective lacquers, waxes, or light oil coatings and establishing a routine maintenance schedule with quick-touch cleaning between deep cleans.
Controlling the environment—reducing humidity, limiting corrosive fumes, and avoiding direct contact with acidic substances—further minimizes future tarnish.
Applying protective lacquers, waxes, or oil coatings
Applying a protective finish such as lacquer, microcrystalline wax, or a light oil forms a barrier that slows tarnish and reduces the need for frequent polishing.
The surface must be clean and dry before application. Lacquer gives longer protection but can yellow; wax preserves appearance and is reversible; light oil repels moisture on functional parts.
Reapply when finish shows wear.
Routine maintenance schedule and quick-touch cleaning tips
After a protective finish is applied and allowed to cure, a compact maintenance routine preserves the coating and the underlying brass with minimal effort.
Inspect monthly, dust with a soft cloth, and promptly remove fingerprints or spills. Perform light polishing quarterly using a nonabrasive cleaner and reapply wax after heavy use.
- Wipe weekly with microfiber
- Remove spots immediately
- Light polish quarterly
- Re-wax as needed
Environmental controls to minimize future tarnish
Because brass tarnishes faster in humid, polluted, or salty air, controlling the surrounding environment is the most effective long-term defense.
Store fittings in dry, ventilated spaces; use silica gel or dehumidifiers where humidity is high.
Avoid direct exposure to road salt, chemicals, and cooking fumes.
Apply protective lacquers or waxes and inspect seals periodically to limit corrosive contact and moisture accumulation.
Troubleshooting: Problems You Might Encounter and Fixes
Common stubborn issues with brass fittings include persistent stains that resist polishing, verdigris or active corrosion, and post-cleaning discoloration.
The section outlines causes for each problem and practical corrective steps, from using stronger cleaners and mechanical removal to neutralizing corrosion and reconditioning finishes.
It also explains why some treatments alter color and how to restore or prevent unwanted discoloration.
Persistent stains that resist polishing
Stubborn discoloration on brass fittings can persist despite repeated polishing, often indicating deeper corrosion, lacquer failure, or embedded contaminants that surface cleaners cannot remove.
Assess by removing lacquer, inspecting under magnification, and testing with mild acid on an inconspicuous spot.
For embedded grime, use ultrasonic cleaning or gentle mechanical abrasion with brass wool.
If metal is pitted, consider professional restoration or replacement.
Green verdigris and active corrosion management
When polishing and lacquer removal reveal green build-up rather than mere surface discoloration, the diagnosis shifts from cosmetic staining to active verdigris formation and corrosion.
The procedure requires neutralizing acids, removing loose corrosion mechanically, and treating pits with a mild chelating cleaner.
Thorough rinsing, drying, and applying corrosion inhibitor or lacquer restore protection; replace heavily pitted fittings to guarantee safety and function.
Discoloration after cleaning’ why it happens and how to correct it
Occasional discoloration after cleaning occurs because chemical residues, heat from polishing, or microscopic surface changes alter the brass’s appearance rather than its metal content.
To correct it, rinse thoroughly, neutralize cleaners with baking soda solution, and dry immediately.
Lightly re-polish with a nonabrasive cloth or fine polish; for persistent spots, gently abrade with 0000 steel wool then reapply polish and sealant.
Recommended Products and Tools for Different Needs
Recommended products and tools vary by budget, application, and environmental concerns, so readers should match choices to the job’s scale and sensitivity.
Household staples can handle light tarnish, while professional polishes and equipment suit heavy restoration or frequent use.
Eco-friendly, non-toxic options offer safer alternatives for indoor or food-contact fittings.
- Best budget-friendly household options
- Best professional-grade polishes and equipment
- Eco-friendly and non-toxic alternatives
- Tool and accessory checklist for each use case
Best budget-friendly household options
Many households can restore brass fittings effectively using a few inexpensive, commonly available items like vinegar, baking soda, lemon, mild dish soap, soft brushes, and microfiber cloths.
These supplies cover light tarnish removal, gentle polishing, and routine maintenance without specialty tools.
- Vinegar and baking soda paste for mild tarnish
- Lemon juice with salt for spot cleaning
- Mild dish soap for regular washing
- Soft brushes and microfiber cloths for drying and buffing
Best professional-grade polishes and equipment
For homeowners and professionals tackling heavier tarnish or seeking long-lasting finishes, professional-grade polishes and specialized tools deliver faster, more consistent results than household remedies.
- Micro-abrasive metal polish (cream) for deep oxidation removal.
- High-speed rotary buffer with soft wool and foam pads.
- Protective lacquer or clear coat formulated for brass.
- Ultrasonic cleaner for intricate fittings and repeatable cleanliness.
Eco-friendly and non-toxic alternatives
Why choose eco-friendly brass cleaners? Eco-friendly, non-toxic options protect surfaces, users, and the environment while offering effective tarnish removal.
They reduce fumes, disposal hazards, and corrosion risk, suitable for homes, kitchens, and antique pieces.
- Baking soda paste — gentle abrasive.
- Vinegar and lemon — mild acid cleaner.
- Castile soap — residue-free wash.
- Microfiber cloths — polish without chemicals.
Care Checklist: Step-by-Step Summary for Cleaning Brass Fittings
A concise care checklist guides users through a pre-clean inspection to note corrosion, fittings’ condition, and any necessary disassembly.
It then outlines cleaning steps tailored to severity—from light polishing to heavy descaling—and appropriate rinsing.
Finally, it covers post-clean protection and scheduled maintenance to preserve finish and function.
Pre-clean inspection
Before any cleaning begins, the brass fitting should be closely inspected to identify its condition, any markings, and potential problem areas.
The inspector notes corrosion, cracks, worn threads, soldered joints, and plating. Document serial numbers or maker’s marks and photograph damage.
Assess whether fittings require disassembly, specialized tools, or professional repair.
Record material type and previous repairs for informed cleaning decisions.
Cleaning steps by severity
Begin by categorizing fittings according to the severity of contamination—light tarnish, moderate oxidation with verdigris, heavy corrosion or pitting, and mechanical damage—so that cleaning methods and required precautions match the condition.
For light tarnish: mild detergent and soft cloth.
Moderate: vinegar or commercial brass cleaner, soft brush.
Heavy corrosion: mechanical removal, professional assessment.
Mechanical damage: repair or replacement.
Post-clean protection and maintenance reminders
Protection and routine care prolong the results of cleaning and prevent rapid re-tarnishing of brass fittings.
After polishing, a thin coat of clear lacquer or wax seals surfaces.
Inspect fittings monthly, wipe with a soft cloth, and avoid abrasive cleaners.
Promptly remove water spots and corrosive residues.
Reapply protective coating annually or as needed, and store spare fittings in a dry, low-humidity place.
Image Reference Guide for Common Brass Tarnish Stages

How does one quickly identify the common stages of brass tarnish from images?
A concise visual guide shows:
- bright yellow (clean)
- light patina (dull sheen)
- brown spots (early oxidation)
- dark brown/black (advanced tarnish)
- green verdigris (corrosion).
Include scale, lighting notes, and close-up insets for texture.
Label examples with probable cause and recommended cleaning intensity for each stage.
Conclusion
Like a well-tended garden reclaiming sunlit patches, brass that receives regular care rewards with steady, lasting shine. One homeowner who polished a storm-stained porch rail every season noted a drop in corrosion spots from weekly touch-ups—about 70% fewer—compared with neglected rails. Small, consistent actions (cleaning, rinsing, sealing) prevent big restorations. With the right routine and tools, brass remains serviceable and bright, turning routine maintenance into reliable preservation.