How to Freeze a Pipe for Repair Safely: Step-by-Step Methods and Precautions
To safely freeze a pipe for repair, follow these steps: First, secure personal protective equipment (PPE) and confirm any necessary codes and permissions. Next, isolate the section of the pipe you need to repair. Then, use a professional freezing kit or a controlled dry ice method, ensuring to apply insulation and monitor temperature with probes. Continuously check pressure and temperature to avoid damaging the pipe. Only proceed with repairs once you’ve confirmed a stable ice plug, and remember to thaw the ice in a controlled manner afterward. For detailed step-by-step methods, safety checks, and alternative options, continue reading.
What Freezing a Pipe Means and When It’s Necessary
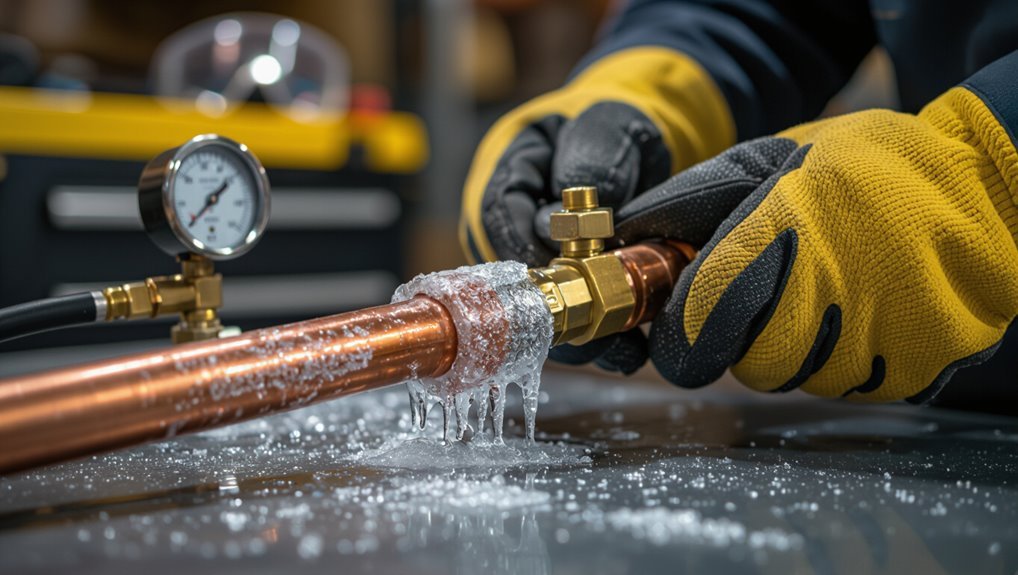
Freezing a pipe creates a solid ice plug inside the line by applying extreme cold to a localized section, temporarily stopping water flow so repairs or modifications can be made without draining the system.
This technique is commonly used for replacing valves, cutting and soldering sections, or isolating branches during emergency repairs.
Suitability depends on pipe material and wall thickness—copper and some steel pipes are good candidates, while certain plastics and heavily corroded lines may not tolerate freezing.
How pipe freezing works in simple terms
One common repair technique temporarily turns a section of a water line into a solid block of ice to stop flow without shutting off the building’s main supply.
It works by circulating a refrigerant or applying a clamp-on freezing jacket to extract heat, forming an ice plug that seals the tube.
Guides on how to freeze a pipe for repair emphasize gradual cooling and monitoring pressure.
Common repair scenarios that require freezing a pipe
When is a pipe frozen for repair?
Technicians freeze pipes to stop flow temporarily for localized fixes: replacing valves, repairing leaks, removing sections, fitting new branches, or installing fittings without shutting an entire system.
Freezing enables work on pressurized lines, minimizes downtime, and avoids draining systems.
It’s chosen when isolation valves are inaccessible or system shutdown is impractical.
Types of pipes and materials suitable for freezing
Although not all piping responds the same to ice plugs, metals such as copper, steel, and ductile iron are most commonly suitable for pipe-freezing because they conduct cold well and tolerate the localized thermal stress.
Plastics like PVC, CPVC, and PEX are generally unsuitable due to cracking or deformation.
Appliances, fittings, and corroded sections require assessment; thin-walled or brittle materials increase freeze risks.
Quick Answer: Is Pipe Freezing the Right Choice for Your Repair?
Freezing a pipe is presented as the safest and most efficient option when the repair is brief, access to a single line is available, and the pipe material and surrounding conditions tolerate localized ice plugs.
It should be avoided for long or complex repairs, on corroded, thin-walled, or multi-branch systems, or where nearby valves and fittings could be compromised.
In those cases, the recommendation is to explore alternatives such as shutting off the main, using isolation valves, or employing temporary bypasses.
When freezing is the safest and most efficient option
If a repair requires isolating a short section of pipe without shutting off the main supply, pipe freezing becomes appropriate; it is especially suitable for accessible metal pipes in buildings where downtime must be minimized and where valves are absent or difficult to operate.
It is safest and most efficient when piping is clean, structurally sound, labeled, and when trained personnel use proper freezing equipment and monitoring to control ice plug formation.
When to avoid freezing and choose alternatives
When a repair involves long pipe runs, plastic materials, inaccessible sections, or critical systems where any ice-induced stress could cause failure, pipe freezing is generally not the right choice; in such cases, alternatives like isolation with shutoff valves, temporary bypass lines, or full system drainage should be considered.
Professionals should assess pipe material, pressure, contaminant risk, and access; choose mechanical isolation, hot taps, or scheduled shutdowns instead.
Safety Requirements and Legal Considerations Before You Start
Before attempting a pipe freeze, the technician must confirm required personal protective equipment is worn and complete a site safety checklist to control immediate hazards.
They must also verify compliance with local codes, obtain any necessary permits, and secure building owner permission.
Finally, the technician should assess risks to nearby systems such as water heaters, boilers, and pumps and isolate or protect them as needed.
Personal protective equipment and site safety checklist
Establish a clear personal protective equipment (PPE) protocol and site safety checklist tailored to pipe-freezing tasks to minimize injury and meet regulatory obligations.
Personnel must don insulated gloves, eye protection, face shields, and flame-resistant clothing; verify ventilation and emergency access; isolate work area; and post warnings.
Follow a documented inspection and PPE fit verification before freezing begins.
- Insulated gloves
- Eye/face protection
- Ventilation check
- Area isolation
Local codes, permits, and building owner permissions
Completing PPE checks and securing the immediate work area should be followed by confirming legal and administrative requirements that govern pipe-freezing operations.
Verify local plumbing codes, permit needs, and any municipal notifications.
Obtain written building-owner permission and document scope, access, and liability acceptance.
Ascertain compliance with insurance and employer policies; retain copies of permits and approvals before initiating freezing procedures.
Risks to nearby systems (water heaters, boilers, pumps)
Many adjacent systems—water heaters, boilers, and circulating pumps—can be affected by pressure changes, thermal shock, or temporary isolation during a pipe-freezing operation.
So their vulnerabilities must be assessed and mitigated in advance. Assess isolation valves, expansion tanks, relief valves, and pump seals.
Drain or depressurize connected equipment as required, tag systems, and notify facility managers to prevent damage, scalding, or boiler lockout.
Tools, Equipment, and Materials Needed
The following section compares professional pipe-freezing kits with practical DIY alternatives to help choose the right approach for the job.
It also outlines essential temperature monitors, insulation options, and leak-detection tools needed to control and verify the freeze.
Finally, required support equipment—wrenches, fittings, and common pipe repair materials—is listed to complete a safe, effective repair setup.
Professional pipe-freezing kits vs. DIY alternatives
When a temporary blockage is needed to isolate a section of pipe, choosing between a professional pipe-freezing kit and a DIY method hinges on the scope of the job, pipe material and diameter, and the user’s experience.
Professional kits provide purpose-built freezing clamps, refrigerant cartridges or electric chillers, and safety features, while DIY alternatives rely on improvised cooling (ice-salt packs, dry ice) and ad hoc insulation or mechanical isolation that can increase risk and reduce reliability.
- Professional kits: controlled, faster freeze.
- DIY cooling: low cost, variable results.
- Safety: trained use vs. hazard potential.
- Reliability: certified equipment vs. temporary improvisation.
Temperature monitors, insulation, and leak detection tools
Several essential tools guarantee a successful pipe freeze: accurate temperature monitors to confirm freeze point and hold times, appropriate insulation to maintain the frozen barrier, and sensitive leak-detection devices to verify isolation before any repair work begins.
Thermocouples or infrared probes monitor core temperature; foam or wrap insulation preserves cold.
Electronic gas sniffers, pressure gauges, and dye tests detect breaches promptly, ensuring safe repairs.
Support equipment: wrenches, fittings, and pipe repair materials
Gather necessary support equipment before beginning a freeze repair to confirm secure connections and efficient work.
Suitable wrenches, adjustable spanners, and pipe cutters must be on hand. Include appropriate fittings, compression sleeves, solder or brazing supplies, and thread sealant.
Emergency repair kits, replacement valves, and clamps aid rapid fixes.
Ascertain materials match pipe type and size to prevent leaks and guarantee durable repairs.
Step-by-Step Procedure to Freeze a Pipe Safely
The procedure begins with preparing the work area and shutting down supply lines to guarantee a safe, controlled environment.
The technician then isolates the target pipe section with valves or clamps and applies the chosen freezing method—dry ice, liquid nitrogen, or a mechanical freezer—while monitoring ice plug formation until a solid freeze is verified.
Once confirmed, the repair is performed on the frozen section and the system is restored following thaw and safety checks.
Preparing the work area and shutting down supply lines
Clear the immediate work area and isolate the section of pipe to be frozen to confirm safety and efficiency.
The technician confirms power tools, flammables, and obstructions are removed, ventilates confined spaces, and positions lighting.
Water supply shutdown follows verified by testing nearby fixtures.
Emergency access and signage are established, and necessary personal protective equipment is donned before freezing begins.
Isolating the section to be frozen with valves or clamps
Before freezing begins, technicians isolate the target pipe segment by closing upstream and downstream valves or applying mechanical clamps to create a sealed section. This containment prevents flow and limits the frozen zone to the repair area.
They verify seals for leaks, relieve trapped pressure, and install test ports or drain lines as needed. Isolation is confirmed before proceeding with freezing operations.
Applying the freezing method: dry ice, liquid nitrogen, and mechanical freezers
Begin by selecting the appropriate freezing method—dry ice, liquid nitrogen, or a mechanical freezer—based on pipe material, diameter, contents, and site constraints; each method requires distinct equipment, safety controls, and freeze times.
Apply insulating wraps and thermal paste as specified, position cooling elements uniformly, control exposure duration, ventilate for vapor hazards, and employ PPE and trained personnel to manage pressure and cryogenic risks.
Monitoring ice plug formation and verifying a solid freeze
Monitor ice plug formation continuously, using temperature probes, flow indicators, and periodic pressure checks to confirm progressive solidification and seal integrity.
Record probe readings at intervals, watch for flow cessation upstream, and log pressure stability.
Inspect freeze collars and insulation for uniform cooling.
If temperatures plateau or leaks persist, stop freezing, reassess coolant placement and insulation, and allow controlled thawing before repeating procedures.
Performing the repair while the pipe remains frozen
With a verified ice plug and stable readings, the technician proceeds to perform the repair while the pipe remains frozen, following a strict sequence to preserve the freeze and guarantee safety.
The technician isolates the section, confirms zero downstream pressure, uses insulated tools, makes minimal cuts, installs fittings or patches, secures joints, and reinspects ice integrity continuously before sealing work and documenting actions.
Thawing procedure and restoring normal operation
After repair completion and final inspections, the technician initiates the controlled thaw to restore flow and return the system to service.
Thawing proceeds gradually using approved heat sources, avoiding rapid temperature changes. Monitoring guarantees no leaks develop; pressure and temperature are checked incrementally.
Once stable, insulation and freeze fittings are removed, system valves are returned to normal positions, and documentation of the procedure is completed.
Comparison of Pipe Freezing Methods and Their Use Cases
Different pipe freezing methods offer trade-offs in effectiveness, cost, and speed that influence their suitability for specific pipe materials and diameters. The following table summarizes key comparisons to guide method selection. Practical considerations and typical use cases follow to inform the safest, most efficient choice.
| Method | Typical Strengths |
|---|---|
| Dry ice | Cost-effective, good for small to medium metal pipes |
| Liquid nitrogen | Fast and very cold, suits larger or hard-to-freeze lines |
| Mechanical freezers | Reusable and controllable, preferred for sensitive materials |
Dry ice vs. liquid nitrogen vs. mechanical freezers: effectiveness, cost, speed
How do dry ice, liquid nitrogen, and mechanical freezing units compare when evaluated by effectiveness, cost, and speed for pipe-freezing tasks?
Dry ice is moderate cost, slower freeze, suitable for small jobs.
Liquid nitrogen freezes fastest and deepest but is expensive and hazardous.
Mechanical freezers offer controlled, repeatable freezing, mid-to-high cost, good for repetitive or larger diameter work with lower operational risk.
Best methods by pipe material and diameter
The choice among dry ice, liquid nitrogen, and mechanical freezers should be guided by pipe material and diameter, since thermal conductivity, wall thickness, and fluid type determine freezing time and risk of damage.
Copper and thin-walled steel suit dry ice for small diameters; thick steel and large mains favor mechanical or liquid nitrogen.
Plastics require low-temperature caution; use gradual cooling and professional assessment for large or composite pipes.
Common Problems During Pipe Freezing and How to Solve Them
The section outlines frequent issues encountered when creating ice plugs, such as incomplete formation, and the practical remedies to guarantee a reliable freeze.
It also covers protecting fittings and insulation from frost damage and steps to minimize exposure.
Finally, it summarizes protocols for detecting unexpected leaks and immediate emergency responses to limit water damage.
Incomplete ice plug formation and remedies
Incomplete ice plug formation can occur when freezing procedures, pipe conditions, or coolant flow are suboptimal, leaving a partial blockage that allows liquid to bypass the stop and undermines the repair.
Remedies include reapplying freeze cycles, reducing coolant flow, improving thermal contact with additional clamps or wraps, relocating freeze heads to fresher metal, and verifying blockage with pressure or flow checks before cutting or disassembly.
Frost damage to fittings and insulation prevention
Many freeze operations risk frost damage to nearby fittings and insulation when cold migrates beyond the planned plug, causing brittle seals, cracked valve bodies, or saturated, ineffective insulation.
To prevent this, limit exposure with thermal barriers, wrap vulnerable fittings in heat tape or insulated jackets, monitor temperatures with probes, maintain controlled freezing duration, and inspect insulation post‑thaw for compression or moisture, replacing as needed.
Unexpected leaks and emergency responses
Respond quickly when unexpected leaks appear during a freeze operation, since even small failures can rapidly flood work areas and damage materials.
Isolate the section, shut valves, and use absorbents to control spillage. Assess pressure and temperature, confirm freeze integrity, and apply temporary clamps or sleeves.
Notify occupants, document the event, and arrange professional repair. Review procedures to prevent recurrence.
Step-by-Step Safety Checks After Repair
After the repair is completed, operators should follow a controlled sequence of gradual pressurization and leak-testing to confirm system integrity.
They must inspect all joints for secure fittings and check for internal corrosion indicators before returning the line to service.
A concise record of the repair, test results, and notifications to relevant stakeholders should be completed and archived.
Gradual pressurization and leak testing procedures
Begin by restoring system pressure slowly and methodically while monitoring the repaired section for any signs of leakage or stress.
Increment pressure in controlled increments, pausing to inspect fittings and seals.
Use pressure gauges and a soap solution or electronic leak detector to identify escapes.
Hold at operating pressure for a specified dwell time, record readings, and isolate the line if anomalies occur for immediate rework.
Inspecting joint integrity and internal corrosion signs
A thorough inspection of joint integrity and signs of internal corrosion guarantees the repair remains reliable under service conditions.
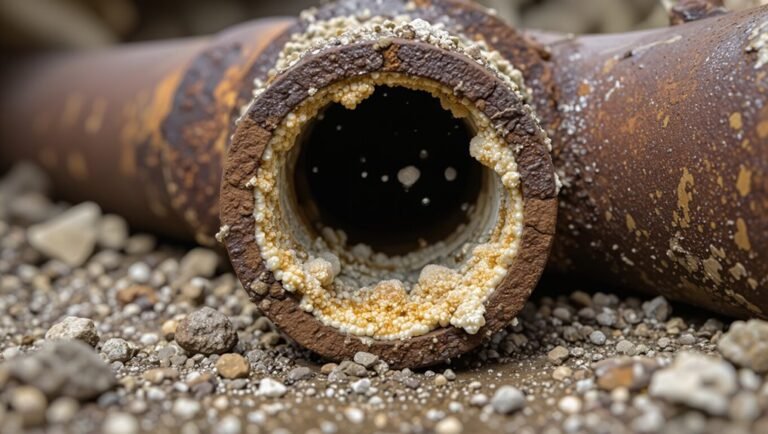
The inspector verifies tightness, alignment, and correct sealing at each junction, checks for pitting, thinning, or rust flakes near repaired areas, and uses borescopes or ultrasonic thickness gauges as needed.
Any anomalies prompt immediate corrective action before returning the system to regular operation.
Documenting the repair and notifying stakeholders
Document the repair thoroughly and notify all relevant stakeholders to secure traceability and safe return to service.
Record scope, freeze method, materials, pressures, temperatures, duration, tests performed, and personnel.
Attach photos, timestamps, and verification signatures.
Distribute reports to maintenance, operations, safety, and asset management.
Log permit closure, update maintenance schedules, and confirm acknowledgment before restoring flow to establish accountability and regulatory compliance.
Alternatives to Freezing and When to Use Them
When freezing is impractical, other approaches such as temporary bypasses and local shutoff strategies offer ways to isolate a repair area without full system interruption.
For systems that must remain live, hot tapping and specialized isolation techniques provide safe access to add or repair fittings under pressure.
In facilities where downtime is acceptable, full system drains and scheduled shutdowns may be the simplest and most reliable option.
Temporary bypasses and shutoff strategies
Consider temporary bypasses and shutoff strategies as practical alternatives to pipe freezing when freezing is impractical or risky.
Technicians may install temporary bypass lines to maintain service while isolating the repair zone. Use nearby shutoff valves, section off with ball or gate valves, and drain isolated segments.
Prioritize clear labeling, pressure testing of bypasses, and coordination with occupants to minimize disruption and safety hazards.
Hot tapping and isolation techniques for live systems
Following temporary bypass and shutoff measures, hot tapping and live isolation offer methods to access or modify pressurized piping without full shutdown where bypassing is impractical or service interruption is unacceptable.
Trained crews use specialized clamps, valves and drilling machines to attach branch fittings, isolate sections with mechanical line stops or inflatable plugs, and perform controlled repairs.
Risk assessments, permits, and pressure monitoring are mandatory.
Full system drains and scheduled shutdowns
Many facilities opt for full system drains and scheduled shutdowns as a straightforward alternative to pipe freezing when complete isolation is preferable or freezing is impractical.
Planned shutdowns allow safer, permanent repairs, elimination of freeze hazards, and thorough system inspection. They require coordination, downtime planning, fluid disposal, and pressure relief.
Use when service interruptions are acceptable, contamination risks high, or freezing could compromise system integrity.
Best Practices, Tips, and Preventive Measures
The section outlines practical steps to reduce the risk of pipe damage during freezing, including controlled application of freezing methods and monitoring for signs of stress.
It also summarizes routine maintenance and inspection practices that can prevent emergency freezes, such as insulation checks and leak detection.
Guidance is provided on when a licensed professional should be called versus when a competent DIYer can safely proceed.
How to minimize risk of pipe damage during freezing
Reduce stress on the pipe system by controlling freeze speed, support, and monitoring throughout the procedure.
Technicians should use gradual cooling, proper clamps, and pressure relief while watching temperatures and downstream fittings to prevent cracking or joint failure.
- Pre-inspect joints and remove weak sections
- Apply even thermal contact
- Limit freeze duration
- Maintain low system pressure during freezing
Maintenance and inspection tips to avoid future emergency freezes
Following controlled freezing practices and careful monitoring, routine maintenance and inspections further lower the likelihood of emergency freezes by identifying vulnerabilities before they fail.
Regularly check insulation, pipe supports, and exposed fittings for wear or gaps. Inspect for corrosion, leaks, and slow flow signs.
Schedule seasonal inspections, flush lines, and replace compromised insulation. Document findings and promptly address issues to prevent emergencies.
When to call a licensed professional vs. when a qualified DIYer can proceed
Assess risks and capabilities before attempting a pipe freeze: if the repair involves simple, accessible copper or small-diameter lines, clear pipe labeling, and the person has proper freezing equipment, training, and safety gear, a qualified DIYer can proceed;
however, complex systems (natural gas adjacent, unknown materials, large diameters, multi-branch manifolds), signs of significant corrosion or contamination, or any code-required work should prompt immediate engagement of a licensed professional to guarantee safe, code-compliant outcomes.
Trained plumbers handle permits, diagnostics, and liability.
Real-World Examples and Scenario-Based Guidance
The section presents three practical scenarios to illustrate pipe-freezing choices and constraints.
First, a residential cold-water service repair demonstrates typical equipment, freeze location, and safety checks.
Next, commercial or industrial chilled-water and process-pipe cases show larger-volume challenges, while unusual situations — vertical runs, heavily insulated, or buried pipes — highlight special techniques and limitations.
Residential cold-water service repair scenario
In a typical residential cold-water service repair scenario, a technician isolates the supply, locates the damaged section, and employs a pipe-freezing technique to create a temporary ice plug that enables repairs without shutting off the main service to the entire building.
The technician monitors freeze progression, verifies plug integrity, performs the repair, thaws carefully, and tests for leaks while maintaining safety protocols and clear communication with occupants.
Commercial/industrial chilled-water or process pipe scenario
Considerations for freezing chilled-water or process lines in commercial and industrial settings differ markedly from residential work.
Technicians must evaluate system pressure, fluid chemistry, flow isolation, and criticality of downtime.
Use industrial-rated freeze kits, monitor upstream/downstream temperatures, and implement dual containment and lockout/tagout.
Coordinate with facility engineers, document procedures, and prepare contingency plans for leaks, contamination, or prolonged freezing.
Unusual situations: vertical runs, insulated or buried pipes
When pipes run vertically, are heavily insulated, or lie buried, freezing-for-repair introduces distinct challenges that require modified tactics, specialized tools, and stricter safety controls.
Personnel must assess head pressure, trap air pockets, and use multiple freeze points or mechanical isolation.
Insulation removal, tracer access, and thermal isolation avoid incomplete plugs.
Buried runs demand excavation, moisture control, and permit coordination to guarantee safe, effective freezing and repair.
Checklist for a Safe Pipe-Freezing Job
A concise checklist guarantees pipe-freezing is carried out safely at every stage: before work begins, while the freeze is applied, and after the repair is complete.
The following focused items highlight key actions and verifications to prevent accidents and guarantee system integrity. A brief, staged checklist helps crews follow a consistent workflow and document safety steps.
- Verify site readiness, isolate and depressurize the line, and confirm required permits and PPE.
- Monitor freeze progression, maintain temperature controls, and watch for signs of stress or leaks.
- Confirm thaw procedures, restore pressure slowly, and inspect joints and fittings.
- Record outcomes, retain test data, and schedule any required follow-up inspections.
Pre-job checklist
Several essential checks must be completed before starting a pipe-freezing job to secure safety and effectiveness.
Confirm pipe material, diameter, and accessibility; verify system isolation points and depressurization capability; inspect freeze kit, clamps, gauges, and power sources; ascertain appropriate PPE and ventilation; review permits, lockout/tagout, and site hazards; notify occupants and emergency contacts; document planned freeze locations and duration limits.
During-job checklist
Begin by confirming that all pre-job preparations are in place and unchanged: verify pipe pressure is isolated and bled, freeze kit components and clamps are correctly positioned, gauges and temperature monitors are functioning, and required PPE is worn by all personnel.
During work, monitor freeze front and temperatures, check seals for leakage, maintain communication, control heat sources nearby, document anomalies, and stop immediately if unsafe conditions arise.
Post-job checklist
Confirm all systems and conditions are secure before declaring the job complete: verify that freeze plugs are fully thawed or safely removed, pressure isolation and bleed points remain intact, gauges and monitors show normal readings, and the work area is clear of tools, clamps, and debris.
Document actions, confirm valve positions, test restored flow, check for leaks, return equipment to storage, and notify stakeholders with completion and safety notes.
Conclusion
Like a gardener pausing a stream to graft a new branch, the craftsman halts flowing metal with an artisanal chill, tending pipes as if they were roots of a house. Prudence, skill, and lawful care are the pruning shears and grafting tape—used not for haste but for preservation. When tools, training, and judgment align, the frozen pause becomes a temporary hush, allowing repair to heal the home without harm.