How to Plan Plumbing for a House: Step-by-Step Guide to Design, Materials & Costs
To effectively plan plumbing for a house, start by identifying your household’s specific needs, considering future growth, establishing a budget, and understanding local code requirements. This plan should clearly differentiate between the water supply, distribution, and drainage, waste, and vent (DWV) systems. Choose suitable pipe materials such as PEX, copper, CPVC, or PVC, along with the correct fittings.
Next, calculate the fixture-unit demand to determine the size of mains and branches, and design the drain and vent systems with appropriate slopes. Don’t forget to incorporate pressure control measures, testing protocols, and necessary permits and inspections. Avoid common pitfalls like undersizing pipes or poor layouts. For a comprehensive understanding, continue with detailed sizing, material selection, testing methods, and cost estimations.
How to Determine Plumbing Goals and Requirements for Your House
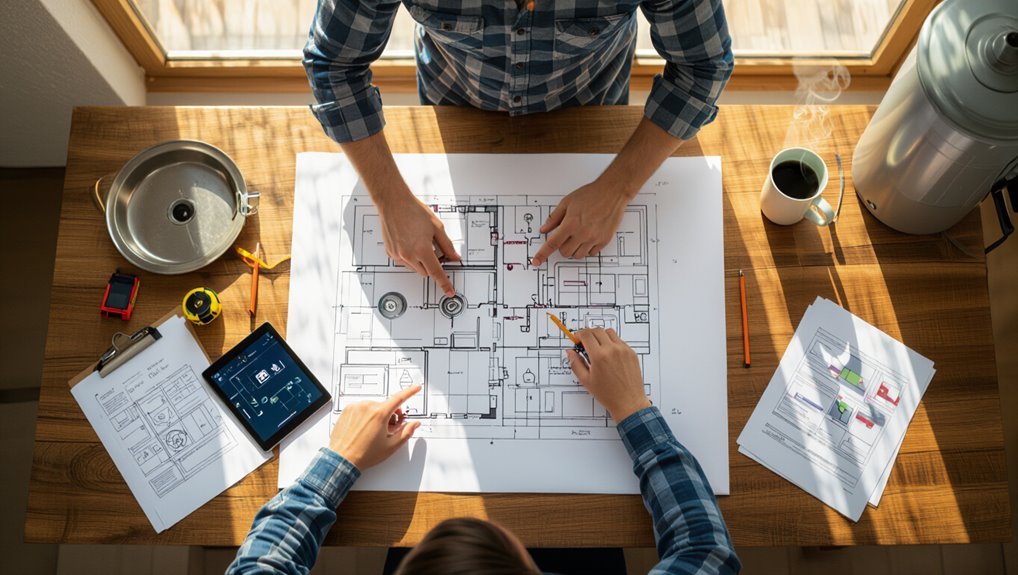
Effective plumbing planning begins with a clear assessment of household size, the number and type of fixtures, and foreseeable future needs such as additions or accessibility modifications.
The designer must also account for applicable local building codes, permit processes, and inspection schedules that will shape system layout and materials.
A concise budgeting overview should identify major cost drivers—labor, fixtures, piping materials, and site-specific conditions—to align scope with available funds.
Assessing household size, fixtures, and future needs
When planning plumbing, the household’s size, daily routines, and anticipated changes dictate pipe sizing, fixture count, and system layout.
The designer evaluates occupants, peak-demand events, number and type of fixtures, water heater capacity, and future additions.
Calculations balance supply pressure, fixture units, and drainage loads.
This step anchors how to plan plumbing a house to meet present needs and adaptable growth.
Local building codes, permits, and inspection requirements
A clear understanding of local building codes, permit processes, and inspection schedules is essential before laying out a home’s plumbing system.
Research jurisdictional code differences, required materials, fixture counts, and seismic or backflow provisions.
Determine permit types, submission documentation, fees, and expected inspection stages.
Coordinate plans with licensed plumbers and inspectors to guarantee compliance, avoid delays, and secure occupancy approvals.
Budgeting overview and cost drivers
Begin by defining clear plumbing goals—fixture counts, water-heating capacity, irrigation needs, and special systems like water treatment or graywater reuse—to establish the scope that drives budget decisions.
Estimate materials, labor, permit and inspection fees, and contingency.
Major cost drivers include fixture quality, pipe type and routing complexity, hot-water system, sewer connection vs. septic, and accessibility for installation or future maintenance.
Understanding Basic Plumbing System Components
A basic plumbing overview distinguishes the water supply components—mains, service line, meter and shutoffs—from the distribution network that delivers hot and cold water via branch lines or a manifold.
The DWV system, composed of traps, vents, stacks and cleanouts, handles wastewater and prevents sewer gases from entering the home.
Fixtures, appliances and specialty equipment such as water heaters, pumps and softeners interface with both systems and determine layout and sizing decisions.
Water supply system: mains, service line, meters, and shutoffs
The water supply system connects the municipal mains to a home’s plumbing through the service line, meter, and various shutoff valves that control flow and enable isolation for maintenance or emergencies; understanding each component’s role and location is essential for effective planning.
The service line links the main to the meter, which records usage.
Shutoffs—main and localized—permit repairs, prevent backflow during emergencies, and comply with codes.
Distribution piping: hot vs cold, branch lines, manifold systems
With the service line, meter, and shutoffs in place, attention turns to how water is routed within the home: distribution piping defines where hot and cold water travel, how branch lines are laid out, and whether a traditional trunk-and-branch or a manifold (home-run) system is used.
Hot lines connect from the water heater; cold lines from supply.
Manifolds simplify isolation and reduce fittings; branch layouts balance pressure and minimize runs.
Drain-waste-vent (DWV) system: traps, vents, stacks, and cleanouts
Begin by mapping how wastewater and air move through the home: the drain-waste-vent (DWV) system carries sewage and greywater away while maintaining air balance to prevent trap siphonage and sewer gas entry.
Traps hold water seals; vents equalize pressure and route gases outdoors; stacks collect discharge vertically.
Strategically placed cleanouts allow access for inspection and clearing blockages, preserving flow and preventing backups.
Fixtures, appliances, and specialty components (water heaters, pumps, softeners)
Following the DWV layout, attention turns to the fixtures, appliances, and specialty components that connect to and rely on that network.
Fixtures (sinks, toilets, showers) require correct trap sizes, supply lines, and shutoffs.
Appliances (dishwashers, laundry) need dedicated drains and vents.
Specialty equipment—water heaters, pumps, softeners—demands proper sizing, pressure controls, electrical connections, expansion tanks, and accessible service clearances.
Choosing Pipe Materials and Fittings
The selection of pipe materials and fittings hinges on properties, costs, and planned use, comparing common options such as PEX, copper, CPVC, PVC, and galvanized steel.
The discussion should contrast pros and cons for supply versus drain lines, outline common fitting types, and summarize joining methods.
It should also note typical tools required for cutting, joining, and securing each material.
Comparison of common materials: PEX, copper, CPVC, PVC, galvanized steel
Choosing pipe materials requires balancing cost, durability, installation ease, and application-specific risks such as corrosion, freezing, or chemical exposure. A concise comparison follows.
| Material | Strengths | Typical Use |
|---|---|---|
| PEX | Flexible, freeze-resistant | Cold/hot supply |
| Copper | Durable, antimicrobial | Supply, high-temp |
| CPVC | Chemical-resistant | Hot water lines |
| PVC | Inexpensive, lightweight | Drain/vent/sewer |
Pros and cons by application (supply vs drain)
Selects of pipe materials hinge on the distinct demands of supply and drain systems: supply lines require pressure resilience, temperature tolerance, and potable-water safety, while drain/vent pipes prioritize flow capacity, chemical resistance, and ease of joining large diameters.
Supply pros: durable, safe, low-leak risk; cons: cost, thermal limits.
Drain pros: inexpensive, large bore, chemical-tolerant; cons: lower pressure rating, susceptibility to clogging.
Fitting types, joining methods, and tools required
Consideration of fitting types, joining methods, and required tools is essential when matching pipe materials to their planned use; different systems demand compatible connectors, seals, and installation techniques to guarantee reliable, code-compliant performance.
Selection includes solvent-weld PVC, compression and flare fittings for copper and PEX, threaded metal joints, crimp or push-fit PEX, and appropriate sealants, solder, cutters, torches, and crimping or pressing tools.
Calculating Water Demand and Pipe Sizing
The section covers methods for estimating fixture units and determining peak water demand to establish realistic supply requirements.
It then explains how to size supply lines, main risers, and branch runs to maintain adequate pressure and flow.
Finally, guidance is given for sizing drains and vents to guarantee proper waste removal and venting.
Estimating fixture units and peak demand
When designing a home’s water system, estimating fixture units and peak demand translates disparate fixture types and usage patterns into a common metric that guides pipe sizing and supply capacity.
Plumbing codes assign fixture unit values; summing them and applying diversity factors yields probable simultaneous demand.
Convert demand to flow rate (gpm) for system analysis, accounting for peak periods and special high-use appliances.
Sizing supply lines, main risers, and branch runs
Sizing supply lines, main risers, and branch runs requires converting calculated peak flow rates into pipe diameters, layout decisions, and pressure-loss expectations so the system reliably meets demand.
The designer applies fixture-unit totals and peak flows to sizing charts or formulas, selects materials and diameters, plans riser locations and branch lengths, and verifies available pressure versus allowable loss to prevent inadequate flow or excessive velocity.
Sizing drains and vents for proper flow
After supply lines and risers are sized to meet peak demand and pressure loss limits, attention shifts to the gravity side: drains and vents must be sized and routed to guarantee efficient waste removal and proper air circulation.
Calculate fixture unit loads, convert to drainage fixture units (DFUs), apply code tables for pipe diameters and slopes, account for venting to prevent siphonage, and minimize trapping and backflow.
Creating a Plumbing Layout and Plan
The plumbing layout must be integrated with architectural drawings and MEP coordination to guarantee fixtures, walls, and service spaces align.
Fixture placement should prioritize efficiency and cost savings while routing mains, branches, and vents to minimize runs and preserve access.
The plan should also include maintenance features—access panels, cleanouts, service loops—and reference example floor plans and typical single‑family layouts.
Integrating plumbing with architectural plans and MEP coordination
Successful integration of plumbing into architectural and MEP (mechanical, electrical, plumbing) plans requires early coordination to align fixture locations, riser routes, and service penetrations with structural and aesthetic constraints.
Designers, engineers, and contractors should share drawings, confirm shaft sizes, coordinate ceiling and slab penetrations, and resolve access for maintenance.
Clash detection, load considerations, and local code compliance minimize rework and guarantee constructability.
Fixture placement best practices for efficiency and cost savings
When planning fixture placement for efficiency and cost savings, designers prioritize grouping wet areas to shorten pipe runs, simplify venting, and centralize maintenance access. This reduces material, labor, and energy costs while improving system reliability.
They also position fixtures to minimize wall penetrations, enable future fixture swaps, maximize slope for drainage, accommodate appliance clearances, and align with water heater and sewer tie-in points to lower installation complexity.
Routing mains, branches, and vents to minimize runs and maintain access
Building on fixture grouping and alignment, routing mains, branches, and vents requires laying out a coherent circulation of supply and waste lines that keeps runs short, preserves access for maintenance, and respects slope and venting rules.
The plan concentrates mains along central chases, staggers branches to reduce crossings, maintains required fall, avoids unnecessary fittings, and positions vents to guarantee air admittance and prevent traps while simplifying future alterations.
Designing for maintenance: access panels, cleanouts, and service loops
Plan for maintenance by locating access panels, cleanouts, and service loops where they provide straightforward reach to critical components without compromising finishes or structural elements.
Specify removable panels at fixtures, wall or ceiling cleanouts at branch junctions and main runs, and service loops for appliances and water heaters.
Confirm clearances, labeling, and coordination with finishes and insulation for durable, code-compliant access.
Example floor plans and typical layouts for single-family homes
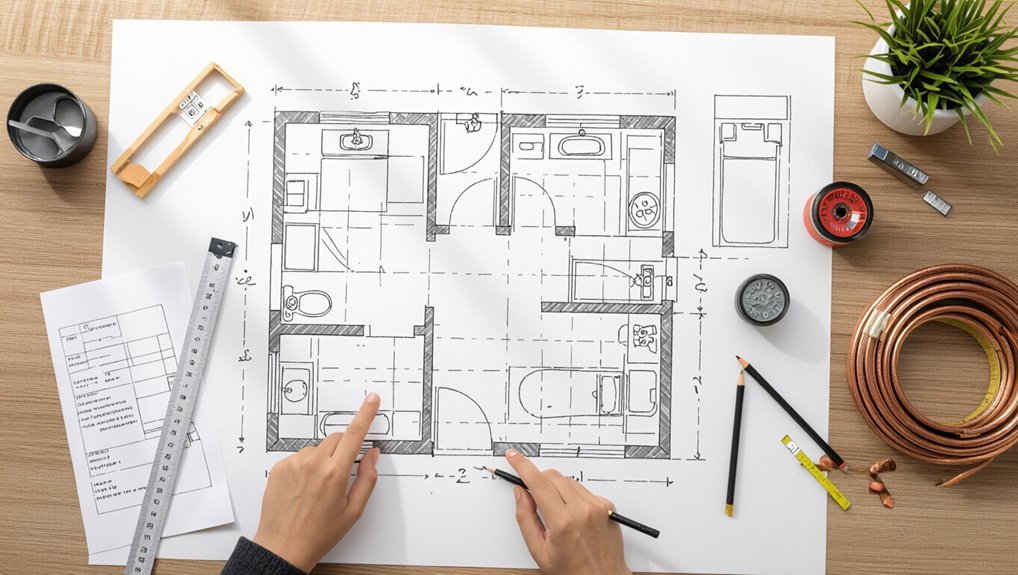
Having established access points and service clearances, the discussion shifts to concrete examples of plumbing layouts for single-family homes.
Typical plans cluster wet rooms—kitchen, bathrooms, laundry—near main soil stacks and supply risers to minimize pipe runs.
Single-story homes favor centralized utility cores; multi-story designs stack bathrooms vertically.
Garage mechanical rooms house water heaters and main shutoffs for efficient service and venting.
Hot Water System Design Options
The section on hot water system design compares tank and tankless heaters, emphasizing correct sizing and strategic placement to meet household demand.
It also examines recirculation options to reduce wait times for hot water and the trade-offs in energy and water use.
Finally, it outlines insulation practices and other efficiency measures to minimize heat loss and operating costs.
Tank vs tankless water heaters: sizing and placement
When choosing between tank and tankless water heaters, considerations center on household hot water demand, space constraints, energy efficiency, and installation logistics. Tank models provide stored capacity; tankless units offer on-demand flow rates. Proper sizing matches peak simultaneous fixtures; placement minimizes run lengths and venting. Compare upfront cost, maintenance, and fuel type before selecting.
| Type | Strength | Consideration |
|---|---|---|
| Tank | Capacity | Space, standby loss |
| Tankless | Efficiency | Flow rate, venting |
| Hybrid | Balance | Cost, complexity |
Recirculation systems and minimizing hot water wait time
Comfort and convenience drive the choice of hot water recirculation systems, which reduce wait times by keeping heated water near fixtures rather than letting lines cool between uses.
Options include timed, demand-activated, and continuous-loop systems. Selection depends on plumbing layout, fixture density, and energy trade-offs.
Proper pump sizing, check valves, and integration with existing heaters guarantee reliable performance and acceptable operating costs.
Insulation strategies and energy-efficient options
Although often overlooked, effective insulation and energy-efficient choices greatly reduce heat loss and operating costs in domestic hot water systems.
Pipe insulation, insulated tanks, and thermal wraps minimize standby losses. Heat-trap fittings and low-loss recirculation loops cut energy waste.
High-efficiency heaters, heat pump water heaters, and solar thermal integration further lower consumption.
Careful sizing and zoning optimize performance and return on investment.
Sewage and Septic Considerations
The choice between connecting to a municipal sewer and installing an on-site septic system shapes routing, permitting, and long-term maintenance requirements.
Basic septic design—tank type, drainfield sizing, and soil/site constraints—must match household load and local code.
Where gravity discharge is impossible, sump pumps, sewage ejectors, and proper foundation drainage become essential to prevent backups and protect the system.
Connecting to municipal sewer vs on-site septic systems
Which treatment path to choose—municipal sewer hookup or an on-site septic system—hinges on site conditions, local regulations, long-term costs, and household usage patterns.
Municipal connections simplify maintenance and eliminate tank management but incur hookup fees and monthly service charges.
Septic systems require initial installation, periodic pumping, and responsible effluent management; they suit remote sites where sewer access is unavailable.
Septic system design basics, sizing, and site constraints
Several key factors determine a viable septic system: household size and wastewater load, soil permeability, site topography, seasonal groundwater levels, and local permitting rules.
Designers calculate tank volume and drainfield area from fixture counts and daily flow estimates.
Soil percolation tests and setback requirements shape layout.
Access for maintenance, future expansion, and effluent treatment options (e.g., aerobic units) influence selection and cost.
Sump pumps, sewage ejectors, and foundation drainage
Many homes require mechanical assistance to move groundwater and wastewater away from foundations and living spaces, so sump pumps, sewage ejectors, and foundation drainage systems are integral components of a building’s sewage and septic strategy.
Proper selection, basin placement, discharge routing, check valves, alarms, and backup power guarantee reliability.
Regular testing, maintenance, and freezing protection minimize backups, basement flooding, and system failures.
Special Systems and Water Quality Treatments
Consideration of water quality and alternative supply systems is essential when planning a home’s plumbing.
Options for filtration, softening, and conditioning should be evaluated alongside rainwater harvesting and greywater reuse strategies to meet household needs and local regulations.
Proper backflow prevention and cross-connection controls must be specified to protect potable water and guarantee compliance.
Water filtration, softeners, and conditioning options
A range of water treatment options—filtration, softening, and conditioning—can be integrated into a home plumbing system to address specific contaminants, hardness, and taste or odor issues; selecting the appropriate combination depends on source water quality, household demands, space constraints, and maintenance capacity.
Common choices include sediment and carbon filters, reverse osmosis units, ion-exchange softeners, salt-free conditioners, and UV disinfection, each with installation and upkeep trade-offs.
Rainwater harvesting and greywater reuse planning
Incorporating rainwater harvesting and greywater reuse into a home’s plumbing strategy reduces potable water demand and can lower utility costs while supporting sustainable landscaping and nonpotable applications.
Design includes separate collection, storage, filtration, and delivery lines for irrigation and toilet flushing, sizing tanks and pumps to demand, ensuring simple maintenance access, and complying with local codes and water-quality treatment requirements for designated end uses.
Backflow prevention and cross-connection control
Protecting potable water from contamination requires robust backflow prevention and cross-connection control measures that isolate nonpotable sources and prevent reverse flow into the public supply.
Systems include air gaps, reduced-pressure zone assemblies, double-check valves, and vacuum breakers.
Proper device selection, installation, routine testing, and compliance with local codes guarantee safety.
Documentation and periodic inspections minimize risks from irrigation, boilers, pools, and auxiliary supplies.
Cost Estimation and Materials Takeoff
A clear line-item cost breakdown covering materials, labor, permits, and fixtures establishes the budget baseline for a plumbing project.
A materials takeoff and procurement checklist translates plans into quantities and purchase plans to prevent delays and overruns.
Practical cost-saving strategies—such as bulk purchasing, value-engineered fixture choices, and scheduling to reduce labor hours—should be evaluated only where they maintain code compliance and system performance.
Line-item cost breakdown: materials, labor, permits, and fixtures
Cost estimation for plumbing breaks costs breaks into discrete line items—materials, labor, permits, and fixtures—so each component can be priced, tracked, and adjusted independently; this approach enables accurate budgeting, comparison of supplier bids, and clear communication with contractors about scope and allowances.
Itemize piping, fittings, valves, and sealants; separate skilled and general labor hours and rates; include permit fees and fixture allowances with contingency.
Creating a materials takeoff and procurement checklist
When preparing a materials takeoff and procurement checklist for a residential plumbing project, the estimator systematically converts the plumbing design into an itemized list of all pipes, fittings, valves, fixtures, hangers, sealants, and accessories, including quantities, sizes, materials, and relevant standards.
This list becomes the basis for pricing, ordering lead-time calculations, and on-site staging plans.
- Verify codes, material specs, and substitutions
- Schedule deliveries to match construction phases
- Include wastage, spares, and supplier lead times
Cost-saving strategies without compromising code compliance
Several practical strategies can reduce plumbing expenses while maintaining code compliance: consolidating pipe runs to minimize fittings, specifying durable yet economical materials compatible with local regulations, and scheduling bulk purchases to capture volume discounts without overstocking.
Value-engineering layout, using standardized fixtures, negotiating contractor labor rates, and verifying permit requirements prevent costly rework.
Prioritize long-term performance to avoid lifecycle replacement costs.
Phased Implementation and Construction Coordination
A clear phased plan aligns plumbers, contractors, and inspectors from pre-construction through completion.
The pre-construction checklist covers permits, site access, and coordination of rough-in requirements and common inspection pitfalls.
The trim phase then schedules fixture installation, pressure and leak testing, and final sign-offs.
Pre-construction checklist for plumbers and contractors
Because phased implementation defines which plumbing tasks occur at each stage of construction, contractors and plumbers must coordinate schedules, access, and deliverables to prevent rework and delays.
A pre-construction checklist should confirm scope, drawings, permit status, materials list, site access, temporary services, sequencing, subcontractor responsibilities, inspection timelines, safety plans, and contingency allowances to guarantee clarity and accountability before work begins.
Rough-in phase: requirements, inspections, and common pitfalls
With the pre-construction checklist finalized and responsibilities assigned, the project moves into the rough-in phase where the bulk of concealed plumbing is laid out and installed.
This stage requires accurate as-built drawings, adherence to code clearances, proper support and slope, and pressure testing.
Coordinate trades for inspections, document approvals, and avoid common pitfalls: incorrect elevations, inadequate venting, and obstructed access for future service.
Trim phase: fixture installation and final testing procedures
Begin installing fixtures after confirming rough-in locations and completing required inspections, ensuring each fixture aligns with the as-built layout and manufacturer specifications.
Technicians set sinks, toilets, tubs, showers, and appliances, secure mounts, and connect water and waste lines.
Perform pressure and leak tests, verify flow and drainage, adjust trim, document changes, and obtain final approvals before turnover to the owner.
Testing, Commissioning, and Final Inspections
Testing and commissioning verify system integrity through water pressure and DWV tests and thorough leak detection.
Hot water systems are commissioned and recirculation loops balanced to guarantee delivery, temperature control, and energy efficiency.
Final municipal inspections are prepared for with complete documentation, test records, and any corrective actions to secure sign-off.
Water pressure testing, leak detection, and DWV testing
Conduct a systematic sequence of pressure and leak tests, followed by DWV verification, to confirm the integrity of supply and drainage systems before occupancy.
Record static and dynamic pressures at fixtures and outlets; hold mains at specified test pressure for required duration.
Inspect joints, valves, and concealed runs with visual and electronic methods.
Perform standard water-tightness and air or water-filled DWV stack tests, documenting results.
Commissioning hot water systems and balancing recirculation
Commissioning hot water systems and balancing recirculation guarantees correct temperatures, flow rates, and control response so occupants receive reliable, sanitary hot water while minimizing energy loss.
Technicians verify heater setpoints, safety devices, and pump speeds; purge air, measure return temps, and adjust valve settings for even distribution.
Recordings of system performance, PID tuning and insulation checks finalize commissioning before occupancy handover.
Preparing for and passing final municipal inspections
After balancing recirculation and verifying heater performance, attention shifts to the municipal inspection phase where documented proof of safe, code-compliant operation is required.
Inspectors review test logs, pressure and leakage tests, backflow prevention, fixture counts, and materials.
Contractors guarantee accessible shutoffs, labeled valves, and compliant venting.
Promptly addressing deficiencies, submitting corrected documentation, and scheduling re-inspections secures final approval and occupancy certificates.
Common Planning Mistakes and How to Avoid Them
Common planning errors often stem from undersizing supply and waste lines or ignoring peak demand, which leads to low pressure and backup problems.
Poor fixture placement and inadequate access for maintenance create costly repairs and disruption later.
Skimping on materials or skipping permits increases failure risk and can result in fines or required rework.
Undersizing lines and ignoring peak demand
When designers underestimate fixture flow or choose smaller-diameter pipes to save cost, systems often fail to meet simultaneous peak demand, causing low pressure, noisy pipes, and premature wear on pumps and valves.
Proper sizing requires calculating fixture unit loads, considering diversity factors, and allowing margin for future changes.
Undersized mains force compensating measures that raise long-term costs and reduce system reliability.
Poor fixture placement and insufficient access
Undersized piping that forces rerouting or pump additions often exposes another frequent planning flaw: poor fixture placement and insufficient access.
Fixtures positioned without service clearances complicate repairs and replacement, increasing labor and demolition. Inadequate access panels, cramped chase spaces, and concealed valves impede maintenance.
Early coordination of fixture layout, service zones, and access points reduces disruption, shortens downtime, and lowers lifecycle costs.
Skimping on materials or skipping permits
Cutting corners on materials or bypassing permits creates hidden costs and legal risks that outweigh any short-term savings.
Inferior pipes, fittings, or insulation lead to failures, water damage, and higher replacement expenses.
Unpermitted work can incur fines, force demolition, or impede sale or insurance claims.
Prioritizing code-compliant materials and proper permitting protects investment, safety, and resale value.
Maintenance Plan and Long-Term Considerations
A clear maintenance plan schedules routine inspections and servicing for both supply and DWV systems to prevent deterioration and blockages.
The text outlines common warning signs—such as slow drains, odors, pressure drops, and recurring leaks—and specifies when professional intervention is warranted.
It also reviews targeted upgrades, like corrosion-resistant piping, efficient fixtures, and accessible shutoffs, that extend system life and reduce operating costs.
Routine maintenance schedule for supply and DWV systems
How often should each component of the water supply and DWV systems be inspected and serviced to prevent failures and extend service life?
Recommend annual checks for fixtures, valves, and accessible piping;
biannual inspection of pressure regulators, backflow preventers, and water heaters;
drain cleanouts and venting evaluated every 1–2 years;
sewer line camera inspections every 3–5 years;
proactive sealing, insulation, and corrosion treatments as needed.
Signs of failure and when to call a professional
Routine inspections and scheduled service reduce risk, but clear indicators of system distress still appear and demand prompt attention.
Persistent leaks, water stains, low pressure, recurring clogs, foul odors, gurgling drains, discolored water, or sudden meter movement when fixtures are off signal failure.
When basic troubleshooting fails or risks of structural or health damage exist, engage a licensed plumber for diagnosis and repair.
Upgrades to improve longevity and efficiency
Consider targeted upgrades and a documented maintenance plan to extend system life and boost efficiency: prioritize replacing aged galvanized or polybutylene piping, installing high-efficiency fixtures and tankless or hybrid water heaters, adding whole-house water filtration and pressure-regulating valves, and integrating accessible shutoffs and inspection ports.
Schedule routine inspections, proactive component replacements, water quality testing, and recordkeeping.
Budget for resilience improvements and plan contractor inspections every 3–7 years.
Sample Project Scenarios and Cost Examples
The section presents three practical scenarios with associated budgets: a small remodel plumbing plan and a sample budget, a full plumbing design and cost ranges for a new single-family build, and a high-efficiency retrofit featuring water-saving fixtures.
Each scenario summarizes typical scopes, key cost drivers, and representative price brackets.
Readers can use these examples to compare options and estimate likely expenditures for their projects.
Small remodel plumbing plan and budget example
A small remodel plumbing plan and budget example outlines scope, materials, labor, and contingencies for typical projects like relocating a bathroom sink, upgrading fixtures, or adding a stacked washer/dryer, giving homeowners realistic expectations of costs and timelines.
It lists required permits, pipe and fixture types, estimated labor hours, sample cost ranges, and a 10–20% contingency, aiding informed decisions and contractor bids.
New build single-family home: full plumbing design and cost ranges
Several typical new-build scenarios—ranging from a compact 1,200 sq ft two-bedroom to a 3,000+ sq ft four-bedroom with multiple bathrooms and a detached garage—require distinctly different full-plumbing designs and cost structures.
Design factors include fixture count, layout complexity, water heater capacity, and sewer connection type.
Typical cost ranges span modest single-level builds to high-end multi-bath homes, reflecting materials, labor, and local permit fees.
High-efficiency retrofit with water-saving fixtures
Start by evaluating existing systems and fixture counts to determine the most cost-effective combination of low-flow toilets, faucet aerators, showerheads, and high-efficiency appliances for a retrofit. Prioritize fixtures with WaterSense/ENERGY STAR ratings, estimate water and energy savings, and compare upfront costs versus payback periods to inform selection.
| Item | Benefit |
|---|---|
| Low-flow toilet | Reduced water use |
| Aerator | Lower flow, low cost |
| Showerhead | Comfort + savings |
| Appliance | Big energy savings |
| Payback | Months–years |
Conclusion
Like a well-tended garden fed by hidden streams, a thoughtfully planned plumbing system sustains the home’s life and growth. By laying pipes with purpose, choosing resilient materials, and testing each junction, the house becomes a vessel of comfort rather than a maze of leaks. With foresight, maintenance, and smart design, plumbing transforms into silent stewardship—water’s journey guided reliably from source to use, nurturing daily routines and future peace of mind.