How to Clean Water Storage Tanks Safely: Step-by-Step Guide for Homeowners
Homeowners should regularly clean their water storage tanks to ensure safe drinking water and extend the tank’s lifespan. Start by draining and rinsing the tank until the water runs clear. Next, scrub the interior surfaces with a long-handled brush. Measure the tank’s volume and disinfect it using household bleach to achieve a concentration of 50–200 ppm free chlorine. Allow the solution to sit for the recommended contact time, then drain, neutralize, refill, and test for chlorine residual and turbidity. Keep records of your cleaning activities and schedule routine inspections. For detailed steps and safety checks, follow the provided guidelines.
Why Regular Cleaning of Home Water Storage Tanks Matters
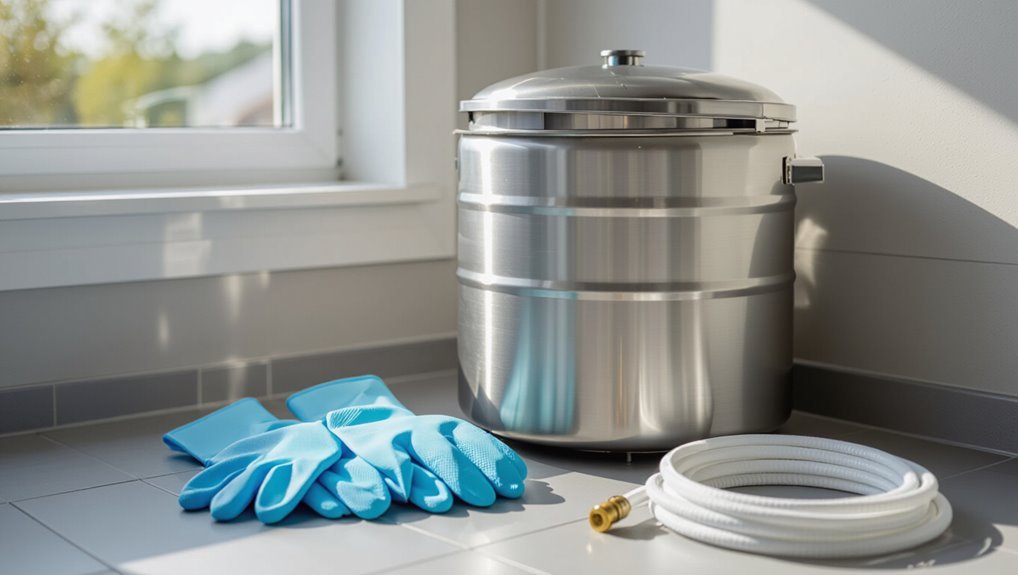
Regular cleaning of home water storage tanks prevents bacterial growth and other contaminants that pose direct health risks to occupants.
Accumulated sediments and biofilms also alter taste, odor, and appearance while accelerating corrosion and damage to tanks and connected plumbing.
Recommended cleaning frequency varies by tank material, location, and water quality, with guidelines ranging from annually to every few years.
Health risks from contaminated tanks
Because stored water can become a breeding ground for bacteria, parasites, and biofilms, contaminated tanks pose direct threats to household health.
Exposure can cause gastrointestinal illness, skin infections, and respiratory problems, especially in children, elderly, and immunocompromised individuals.
Regular maintenance, including guidance on how to clean water storage tank safely, reduces pathogen load and lowers risks of outbreaks linked to domestic water supplies.
Effects on water taste, odor, and appearance
Neglected tanks often impart unpleasant tastes, odors, and discoloration to stored water, signaling microbial growth, chemical reactions, or sediment buildup.
These sensory changes reduce water acceptability and may indicate contamination levels that affect boiling or filtering decisions.
Regular cleaning and disinfection restore clarity and neutral taste, prevent staining of fixtures, and help homeowners detect and address underlying water-quality issues before they worsen.
Tank lifespan and plumbing system impacts
Many factors shorten a water tank’s service life and compromise connected plumbing, with biofilm, sediment, and corrosive deposits among the most damaging.
Accumulation accelerates corrosion, clogs pipes, stresses pumps, and degrades seals and fittings. Reduced flow and increased leak risk raise repair and replacement costs.
Regular cleaning and inspection preserve structural integrity, maintain hydraulic efficiency, and extend component lifespans while preventing costly system failures.
How often to clean different types of tanks
Establishing a cleaning schedule depends on tank type, water source, and usage: municipal-supplied, covered household tanks typically need inspection and cleaning every 12 to 24 months, while rainwater harvesting systems, gravity-fed tanks, and tanks fed by wells or untreated sources require more frequent attention—every 6 to 12 months—to prevent sediment buildup, algal growth, and microbial contamination.
Inspections after storms and visible issues are advised.
Quick Safety Checklist Before You Start
Before beginning, the preparer should check that appropriate personal protective equipment is on hand and identify necessary tools and cleaning supplies.
They must confirm the water source, locate shutoff valves, and plan how to isolate the tank.
If access is restricted, contamination is severe, or there is uncertainty about procedures, a qualified professional should be contacted.
Personal protective equipment (PPE) required
Don protective gear that prevents chemical exposure, inhalation of fumes, and physical injury before entering a tank: chemical-resistant gloves, splash-proof goggles or a face shield, a respirator rated for the cleaning agents in use (or supplied-air if confined), a chemical-resistant suit or apron, and non-slip, chemical-resistant boots.
Verify fit, integrity, and proper cartridge type; replace damaged items.
Use hearing protection if powered equipment will be operated.
Tools and supplies to prepare
Having fitted the appropriate PPE, attention turns to assembling the tools and supplies needed for a safe tank cleaning.
Prepare non-sparking hand tools, long-handled brushes, buckets, food-grade disinfectant, bleach with measured dosing, hose with spray nozzle, portable pump, clean rags, scrub pads, disposable waste bags, a flashlight, ladder with stabilizer, and a first-aid kit.
Verify tool condition before use.
Confirming water source and shutoff procedures
One clear action is to identify and label the incoming water source, the tank’s supply and outlet valves, and any secondary feeds or backflow preventers before any cleaning begins.
Confirm utility meters and isolation points, test shutoff valves for smooth operation, and note locations of overflow and drain lines.
Document valve positions, then shut off supply and depressurize the system before entry.
When to call a professional
After labeling valves and confirming shutoffs, assess whether the job requires professional intervention: call a licensed plumber or tank specialist if the tank is elevated, confined, structurally compromised, chemically contaminated, or connected to complex treatment systems.
Also seek help when safety equipment, confined-space entry, respiratory protection, or permit-required procedures are needed.
Professionals reduce risk, guarantee compliance, and provide proper disinfection and disposal.
Step-by-Step Guide to Cleaning a Water Storage Tank
The procedure begins with safely draining the tank and then isolating it by disabling electrical connections and pumps.
A careful inspection of the interior and access points follows, after which sediment, debris, and biofilm are removed.
The process concludes with thorough scrubbing of interior surfaces and fittings to restore cleanliness.
Step 1 Drain the tank safely
Begin by shutting off the supply and any electrical connections.
Then open the tank’s outlet valve to allow water to flow out steadily into an appropriate drain or storage container.
Monitor flow to prevent overflow, use hoses or pumps suited to volume, and direct discharge to authorized drainage.
Wear protective gloves and eye protection; avoid standing in runoff.
Confirm tank level reaches accessible low point.
Step 2 Isolate the tank and disable electricity/pumps
Lock down all mechanical and electrical connections to guarantee the tank is fully isolated before anyone enters or works on it.
All pumps, float switches and breakers should be tagged and locked out.
Close inlet and outlet valves, bleed pressure lines, and secure auxiliary systems (UV, heaters).
Verify isolation with meters and physical attempts to start equipment.
Record isolation status for safety compliance.
Step 3 Inspect interior and access points
With mechanical and electrical systems secured and documented, attention shifts to the tank itself: a thorough interior and access-point inspection identifies hazards, contamination, and structural issues before cleaning.
Personnel examine manholes, vents, ladders, seals, and gaskets for corrosion, cracks, or insect ingress.
Interior surfaces are assessed for stains, deposits, and leaks; photos and notes record findings for repair or safety mitigation.
Step 4 Remove sediment, debris, and biofilm
To remove accumulated sediment, debris, and biofilm effectively, operators follow a systematic sequence that isolates the work area, reduces resuspension, and targets both loose and adhered material.
They drain partially, collect settled solids with pumps or vacuums, remove floating debris with nets, and use controlled flushing to carry residues to collection points.
Removed waste is contained and disposed per local regulations.
Step 5 Scrub interior surfaces and fittings
Begin scrubbing interior surfaces and fittings after sediment and loose debris have been removed and the tank is partially refilled to provide a stable working environment.
Use a long-handled brush and non-abrasive pads to clean walls, corners, inlet/outlet screens, and fittings.
Apply a mild disinfectant solution sparingly, agitate stubborn deposits, and collect loosened material for removal, avoiding damage to seals and coatings.
Step 6 Rinse thoroughly to remove residues
Flush the tank thoroughly until rinse water runs clear, removing all cleaning agents, loosened sediment, and suspended particles.
Continue rinsing via inlet and outlet ports, directing flow toward drains.
Inspect with a flashlight while rotating the rinse stream to dislodge hidden debris.
Repeat until clarity is consistent and no residue remains on surfaces or fittings.
Close drains and prepare for the next step.
Step 7 Disinfect the tank (chlorination method)
Prepare to disinfect the emptied and rinsed tank using a controlled chlorination process that eliminates remaining microbes without harming plumbing or occupants.
Measure tank volume, calculate required free chlorine dose (commonly 50–200 ppm for potable tanks), dissolve household bleach in water, apply evenly to interior surfaces, guarantee safe handling and ventilation, and record amounts used.
Do not introduce untreated water afterward.
Step 8 Allow contact time and flush disinfectant
Allow the chlorine solution to remain undisturbed for the prescribed contact time—typically 30 minutes to 24 hours depending on concentration and guidelines—so it can inactivate pathogens throughout the tank.
After contact, drain or pump out chlorinated water, ensuring outlets and fittings are flushed.
Neutralize residual chlorine if required, and safely dispose of effluent per local regulations to protect the environment and downstream systems.
Step 9 Refill, flush, and test water quality before use
Refill the tank with potable water, then run taps and outlet points until water flows clear and free of disinfectant odor.
Collect samples from multiple outlets and a tank tap, and test for chlorine residual, turbidity, and microbial indicators using reliable kits or a certified lab.
Confirm results meet local drinking-water standards before resuming regular use; repeat flushing if standards are not met.
Step 10 Record cleaning date and observations
Documentation of the cleaning event provides a clear record for maintenance history and regulatory compliance.
The cleaner notes date, start/end times, personnel, methods, products, and any repairs or defects found.
Record water test results and corrective actions taken.
Store the log securely, attach photos or certificates, and schedule the next inspection.
Accurate entries support accountability, trend analysis, and timely preventative maintenance.
Recommended Cleaning Agents, Concentrations, and Alternatives
Recommended cleaning agents, appropriate concentrations, and safer alternatives are presented to guide effective disinfection without damaging the tank or contaminating water.
Household bleach is addressed with typical safe dilution ranges and usage notes, while commercial tank disinfectants are compared for efficacy and potential drawbacks.
Non-chemical options and their limitations are outlined, and cleaners that pose corrosion or health risks are specifically warned against.
Household bleach: safe concentrations and usage
When properly diluted, household bleach (sodium hypochlorite) is an effective, widely available disinfectant for water storage tanks. Users should follow precise concentrations and contact times to guarantee safety and efficacy.
Typical recommendation: 50–200 ppm free chlorine for disinfection, achieved by adding measured bleach to drained tanks, scrubbing, then rinsing.
Allow at least 30 minutes contact, ventilate, and flush thoroughly before reuse.
Commercial tank disinfectants: pros and cons
After outlining safe household bleach use, attention can shift to commercially formulated tank disinfectants, which offer alternatives tailored for different tank materials, sizes, and contamination levels.
Commercial products often provide stabilized chlorine, chlorine dioxide, or peracetic acid with clear dosing and contact times.
Pros: efficacy, manufacturer guidance, compatibility claims.
Cons: higher cost, potential material incompatibility, and stricter handling and disposal requirements.
Non-chemical alternatives and their limitations
Although chemical disinfectants are common, several non-chemical methods can reduce biofilm and sediment in water tanks:
- mechanical cleaning (scrubbing and pressure washing),
- thermal treatment (flushing with hot water where feasible),
- UV-C irradiation for circulating systems,
- and filtration to remove particulates before storage.
These methods lower contamination but often require regular maintenance, may not reach deep biofilms, need energy or equipment, and offer limited residual protection.
Avoiding harmful cleaners and corrosion risks
Because improper cleaners can damage tank linings, fittings, and plumbing, selection of cleaning agents should prioritize compatibility with tank materials and minimal corrosive potential.
Recommended options include dilute household bleach (50–200 ppm free chlorine) or NSF‑approved tank cleaners used per label.
Avoid strong acids, caustics, and undiluted solvents. Rinse thoroughly.
Consider citric acid or oxygen‑based cleaners as gentler alternatives when compatible.
Specific Considerations by Tank Type and Material
Different tank materials and installations require tailored cleaning techniques and safety measures. Guidance covers polyethylene tanks (chemical compatibility and gentle scrubbing), concrete tanks (removing sediment and addressing cracks or sealants), steel/galvanized tanks (rust identification and appropriate treatments), rooftop/elevated tanks (secure access and fall protection), and the differing procedures and equipment for small domestic tanks versus large cisterns.
Each category highlights specific hazards, tools, and maintenance steps to guarantee both effective cleaning and structural longevity.
Plastic (polyethylene) tanks: precautions and techniques
Handle polyethylene tanks with care due to their susceptibility to scratching, chemical sensitivity, and thermal expansion.
Cleaners should use soft brushes, non-abrasive pads, and mild detergent; avoid strong solvents or bleach at high concentrations.
Rinse thoroughly, allow complete drying, and inspect fittings, seams, and vents for deterioration.
Work in moderate temperatures to prevent distortion and follow manufacturer recommendations for safe cleaning agents.
Concrete tanks: debris removal and sealing issues
Polyethylene tanks require gentle care; concrete tanks demand a different approach due to their porous, heavy-duty construction and susceptibility to loose debris and seepage.
Inspect for cracks, accumulated sediment, and biofilm. Remove debris manually or with nonmetallic tools, then pressure-rinse.
Repair hairline fractures with appropriate hydraulic cement or epoxy mortar and apply a potable-water-rated sealant or cementitious coating to prevent infiltration and contamination.
Steel and galvanized tanks: rust and treatment steps
When exposed to water and oxygen, steel and galvanized tanks develop surface rust and, in severe cases, pitting that compromises structural integrity and water quality.
Addressing corrosion requires inspection, controlled removal, and appropriate protective treatments tailored to the tank material and use.
Inspect for thin spots, remove loose rust mechanically, neutralize residues, apply compatible primers or linings, and reseal fittings.
Test water after treatment.
Rooftop and elevated tanks: access and fall protection
Rooftop and elevated tanks present unique access and fall-protection challenges that vary with tank type and material; proper planning must address anchorage, platform design, and compatible hardware to prevent falls and protect structural elements.
Assessment should verify roof load capacity, corrosion susceptibility, and anchor compatibility. Use certified fall-arrest systems, guarded walkways, lockable access hatches, and non‑penetrating mounts where possible.
Regular inspections guarantee integrity and safe cleaning access.
Small domestic tanks vs large cisterns: scale differences
Moving from access and fall‑protection concerns on elevated installations, attention shifts to how size and construction influence cleaning methods and safety for domestic tanks versus large cisterns.
Small polyethylene or stainless tanks allow quick draining, manual scrubbing, and limited PPE.
Large concrete or metal cisterns require confined‑space protocols, mechanical agitation, professional pumping, structural inspection, and more thorough decontamination and disposal planning.
How to Test and Confirm Water Safety After Cleaning
After cleaning, the water should first undergo simple sensory checks for unusual smell, taste, or cloudiness to flag obvious problems.
On-site test kits for residual chlorine and basic bacterial indicators can provide immediate, actionable results, while persistent concerns or failed rapid tests warrant sending samples to a certified laboratory.
Test results should be interpreted against local health standards to determine whether further disinfection, system inspection, or repeat sampling is required.
Simple sensory checks (smell, taste, clarity)
How can simple senses provide a quick check of water safety after tank cleaning?
Observers should note odorless water, absence of chemical or sewage smells, and clear appearance without floating particles or discoloration.
A brief taste test only applies if no smell or visual issues exist; it must be minimal and cautious.
Any off-odor, cloudiness, particles, or unpleasant taste warrants further testing or professional inspection.
On-site test kits for chlorine and bacterial indicators
Several inexpensive on-site test kits allow quick verification of free chlorine levels and the presence of bacterial indicators like total coliforms or E. coli after tank cleaning.
Test strips, colorimetric DPD kits, and compact membrane filtration or presence/absence kits yield rapid results.
Follow manufacturer instructions, compare promptly to provided charts, record readings, and repeat tests at intervals to confirm residual disinfectant and absence of indicator bacteria.
When to send samples to a lab
When is laboratory testing necessary following tank cleaning?
Laboratory testing is recommended when on-site kits indicate contamination, after visible biofilm or sediment removal, following repairs or extended stagnation, or if occupants report illness.
Send samples for microbiological culture (coliforms, E. coli), turbidity, and chemical contaminants when uncertainty persists or regulatory compliance is required.
Use accredited labs and follow sampling protocols.
Interpreting common test results and next steps
Interpreting common post-cleaning test results requires matching measured values against relevant health-based standards and considering context such as recent maintenance, sampling methods, and tank history.
Presence of coliforms or high heterotrophic plate counts signals contamination; repeat sampling, shock chlorination, and inspection for breaches follow.
Elevated turbidity or disinfectant decay suggests sediment or biofilm; flush, clean, and retest.
Document actions and confirm safe results before reuse.
Maintenance Schedule and Preventive Measures
A clear maintenance schedule aligns cleaning intervals with tank use and contamination risk, with high-risk systems checked more frequently.
Seasonal inspections should include drainage and debris removal, and fitments such as screens, first‑flush diverters, and secure covers help prevent contamination.
Routine visual and structural inspections catch leaks, blockages, or damage before they compromise water quality.
Recommended cleaning intervals by use and risk level
Different uses and contamination risks require distinct cleaning frequencies for water storage tanks: high-risk systems such as potable water supplies for healthcare facilities or food production typically need inspection and cleaning every 3–6 months.
Moderate-risk systems like residential or small commercial supplies generally follow a 6–12 month schedule.
Low-risk, non-potable tanks used for irrigation or fire suppression may be inspected and cleaned annually or biennially, with adjustments based on water quality tests, visible sediment, or changes in use.
Routine monitoring, documented schedules, and prompt cleaning after contamination events help manage risk.
Seasonal checks and drainage tips
When seasons change, scheduled inspections should target inlet screens, vents, overflow paths, and visible sediment to catch issues before they worsen.
Drain low areas to remove accumulated debris and test outlets for flow.
Flush sections showing stagnation, then refill slowly while checking for leaks.
Record observations and dates, adjust inspection frequency for heavy rainfall or drought, and plan prompt professional servicing if contamination is suspected.
Installing screens, first-flush diverters, and covers
Regularly installing and maintaining inlet screens, first‑flush diverters, and secure covers reduces contaminant entry and eases long‑term upkeep.
Select corrosion‑resistant screens sized to block debris while allowing flow. Fit diverters to divert initial runoff and flush before storage.
Guarantee covers seal against insects and dust, with vents screened. Replace or clean components per manufacturer intervals to maintain water quality.
Routine inspections to catch problems early
After installing screens, diverters, and sealed covers, a scheduled program of routine inspections helps identify wear, leaks, and contamination before they escalate.
Inspect monthly for sediment, biofilm, and pest entry points; check seals, vents, and overflow lines. Record findings, photograph issues, and schedule prompt repairs.
Annual professional assessments and water quality tests verify tank integrity and safe storage.
Common Problems, Troubleshooting, and When to Seek Help
Persistent odors or discoloration after cleaning, recurring sediment or biological growth, and visible leaks or structural damage signal issues that require systematic troubleshooting.
The text outlines likely causes, simple on-site checks and temporary fixes, and when problems exceed routine maintenance.
It also summarizes what to expect from professional services and key questions to ask before hiring a contractor.
Persistent odors or discoloration after cleaning
If odors or discoloration remain after cleaning, they signal that contaminants, biofilm, or staining agents were not fully removed or that the disinfection step failed.
The homeowner should reinspect tank surfaces, scrub inaccessible areas, flush lines, and repeat disinfection with correct contact time and concentration.
If problems persist, arrange professional inspection and laboratory water testing to identify chemical residues or microbial contamination requiring targeted remediation.
Recurring sediment or biological growth
Lingering odors or staining sometimes signal deeper issues that also manifest as recurring sediment or biological growth within a storage tank.
Recurrent deposits often arise from nutrient buildup, inadequate disinfection, or contaminated inflows. Regular inspection, scrubbing, thorough flushing, and periodic shock chlorination reduce regrowth.
If sediment returns quickly or biofilm persists despite proper maintenance, consult a water quality professional to diagnose source and recommend targeted remediation.
Leaks, structural damage, and repair options
Leaks and structural damage in water storage tanks range from small pinhole seepage to major cracks or corrosion that compromise containment and water quality.
Homeowners should inspect seams, fittings, supports, and coatings for dampness, deformation, or rust.
Small leaks may be patched with appropriate sealants or liners; larger fractures, foundation settling, or compromised walls require tank emptying and structural repair or replacement to guarantee safety.
Professional services: what to expect and questions to ask
When should a homeowner call a professional rather than attempt DIY repairs? A professional assessment is advised for contamination, structural failure, complex plumbing, or confined-space entry.
Expect inspection, water testing, cleaning, disinfection, and documented results.
Ask about licenses, insurance, methods, chemicals, costs, warranties, timeline, and safety protocols.
Request references and a written estimate detailing scope and liability limits.
Cost Estimates and Time Requirements
The section summarizes typical time and expense breakdowns for DIY tank cleaning, noting average hours, materials, and minor equipment costs.
It then outlines factors that influence professional cleaning prices—tank size, access, contamination level, and required treatments—and provides rough estimate ranges.
Readers are advised to compare DIY versus professional time commitments and expenses before choosing an approach.
Typical DIY time and expense breakdown
Although complexity varies with tank size and condition, a typical DIY cleaning of a residential water storage tank can be estimated in both time and cost. Tasks, durations, and common expenses are summarized below:
| Task | Time | Typical Cost |
|---|---|---|
| Drain & access | 0.5–1 hr | $0–$10 |
| Scrub & disinfect | 1–2 hrs | $5–20 |
| Rinse & refill | 0.5–1 hr | $0–$5 |
| Safety gear | — | $10–$40 |
Professional cleaning cost factors and estimates
After outlining typical DIY time and expense, attention shifts to professional services, which present different cost drivers and timeframes.
Professionals factor tank size, access difficulty, contamination level, required disinfection, permits, and disposal. Estimates typically range from modest fees for small, accessible tanks to several hundred dollars for large or complex jobs.
Scheduling usually requires a half day to a full day, sometimes longer for repairs.
Practical Checklists and Templates
The article introduces ready-to-use forms to support safe tank cleaning, including a pre-cleaning checklist to confirm preparations and hazards are addressed.
A concise step-by-step cleaning checklist designed for homeowners outlines tasks, required tools, and safety checks.
A post-cleaning water test and maintenance log template records results and schedules future inspections.
Pre-cleaning checklist
A concise pre-cleaning checklist guarantees all safety, access, and contamination-control items are confirmed before entering a water storage tank.
Inspect structural integrity, lids, vents, and ladders; verify PPE, respirators, and harnesses; confirm water isolation, drainage, and notification of occupants.
Record contamination test results and emergency contacts.
- Safety gear and access secured
- Isolation and drainage verified
- Tests logged and contacts confirmed
Step-by-step cleaning checklist for homeowners
Several clear steps guide homeowners through safe, effective cleaning of a water storage tank, covering preparation, decontamination, rinsing, and post-clean procedures.
A concise checklist guarantees safety, thoroughness, and recordkeeping without delay.
- Drain, isolate power, and ventilate; inspect for damage.
- Scrub walls, floor, and fittings with approved disinfectant; contact time observed.
- Rinse thoroughly, refill partially, sanitize, and note completion date.
Post-cleaning water test and maintenance log template
Following completion of cleaning, homeowners should perform a standardized post-cleaning water test and record results in a maintenance log to confirm potability and create an auditable history.
This process includes sampling protocols, basic sensory checks (clarity, odor), chlorine/residual and microbial tests if available, and documenting date, personnel, disinfectant used, and any corrective actions.
- Sample details: location, time, method.
- Test results: sensory, residual chlorine, microbial (coliform/E. coli).
- Actions: corrective steps, follow-up testing date, responsible person.
Conclusion
Regular cleaning preserves water quality and prevents costly repairs. Homeowners following the guide can cut contamination risk greatly; for example, WHO notes proper storage and handling can reduce diarrhoeal disease by up to 70%. Simple safety checks, periodic inspections, and appropriate disinfectants keep systems safe and functional. Routine maintenance schedules, tailored to tank type and usage, extend lifespan and protect household health, making small investments in cleaning yield substantial long‑term benefits.