How to Clean Bathtub Stains Fast: Proven DIY Methods for Soap Scum, Rust & Hard Water
To quickly remove bathtub stains caused by soap scum, rust, or hard water, start by identifying the type of stain. Use nonabrasive cleaners or mild DIY solutions like vinegar, baking soda, or citric acid for rust, paired with soft scrubbers. Always rinse, dry, and ventilate the area while wearing gloves and goggles for safety. Begin with gentle methods and increase intensity as necessary to protect your bathtub’s surface, whether it’s porcelain, acrylic, or stone. For detailed steps, timing, and product recommendations, continue reading.
What Removes Bathtub Stains Quickly and Safely
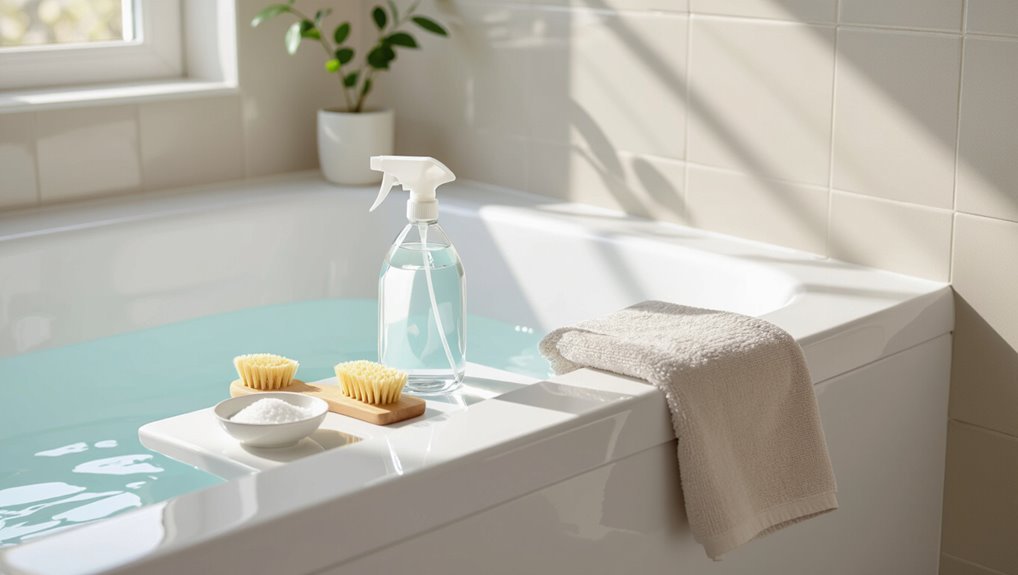
Fast-acting cleaners target specific stains such as soap scum, rust, and hard-water buildup for quicker results.
The choice between DIY remedies and commercial products depends on stain severity, surface material, and desired convenience.
Appropriate safety precautions and protective gear should be used whenever chemical cleaners or abrasive methods are applied.
Fast-acting cleaners for soap scum, rust, and hard water
Speed and effectiveness matter when tackling soap scum, rust, and hard-water deposits, so choosing cleaners formulated for each residue type yields the best results.
For how to clean bathtub stains, recommend enzymatic or surfactant spray for soap scum, oxalic or citric acid rust removers, and chelating agents or CLR-type solutions for mineral buildup.
Always follow label safety and rinse thoroughly.
When to use DIY solutions vs. commercial products
When should a homeowner reach for a homemade paste instead of a store-bought specialty cleaner?
DIY is ideal for light, recent soap scum, mild hard-water haze, or when ingredients are already on hand; it’s economical and gentle on many surfaces.
Commercial products suit stubborn rust, entrenched mineral deposits, or faster results; choose based on stain severity, surface compatibility, and time available.
Safety precautions and protective gear
A few basic precautions greatly reduce risks when removing bathtub stains: gloves to protect skin, eye protection against splashes, and adequate ventilation to disperse fumes from cleaners.
Wear a mask for strong chemicals, avoid mixing cleaners (especially bleach and ammonia), test products on a small area, and keep children and pets away.
Rinse thoroughly and follow manufacturer instructions for safe disposal.
Identify the Type of Bathtub Stain
Before choosing a cleaning method, the reader should identify whether the mark is soap scum, rust, or hard water mineral buildup by noting its color, texture, and location.
Observing whether residues scrub off with mild soap or leave reddish-brown streaks points to soap or rust respectively, while chalky white deposits suggest mineral scale.
The material of the tub—porcelain, acrylic, fiberglass, or enamel—also guides product choice and technique to avoid surface damage.
How to recognize soap scum
How does one spot soap scum amid other tub residues? It appears as a white or grayish filmy layer, often clinging to corners, faucets, and the tub rim.
It feels slippery or slightly gritty when rubbed, dulls surface shine, and resists clear water rinsing.
Unlike mineral stains, it wipes away with acidic or alkaline cleaners and scrubbing, not staining the porcelain.
How to identify rust stains
Where do the reddish-brown streaks in a bathtub come from? They result from iron particles oxidizing on porcelain, enamel, or acrylic surfaces.
Rust stains appear as orange to dark brown marks, often near drains, faucets, or scratched areas where metal corrodes. They resist soap scum cleaners but usually react to mild acid treatments or commercial rust removers formulated for bathroom fixtures.
How to spot hard water mineral deposits
What causes the chalky white rings and cloudy film that resist rinsing? Hard water leaves mineral deposits—primarily calcium and magnesium—after water evaporates.
These appear as dull, whitish crusts, cloudy residue, or textured buildup around drains, faucets, and tub rims.
Test with vinegar: minerals soften or dissolve, unlike soap scum.
Recognizing location, color, and response to acid helps confirm hard water scaling.
How surface material (porcelain, acrylic, fiberglass, enamel) affects cleaning
Because bathtub finishes react differently to cleaners and abrasives, identifying whether a tub is porcelain, acrylic, fiberglass, or enamel is essential before treating stains.
Porcelain and enamel tolerate stronger cleaners and mild abrasives; avoid acidic agents on enamel with exposed metal.
Acrylic and fiberglass require nonabrasive, pH-neutral cleaners to prevent scratches and crazing; test any product in an inconspicuous spot first.
Quick-Start Cleaning Checklist (Under 10 Minutes)
A brief checklist lists the tools and materials to have ready for immediate action: gloves, a nonabrasive scrubber, an appropriate cleaner, and a spray bottle of water.
It then outlines a step-by-step micro-routine for under-ten-minute stain reduction—pre-rinse, apply cleaner, short dwell, and targeted scrubbing—so readers can act quickly.
Finally, it explains simple criteria for when to repeat the routine versus escalate to stronger treatments or longer soaking.
Tools and materials to have ready
Before starting, assemble the few essentials that let one tackle common bathtub stains quickly and safely: a nonabrasive sponge or soft brush, a spray bottle with a mild all-purpose cleaner or equal parts white vinegar and water, a paste-form cleaner (baking soda or a gentle commercial product) for spot treatment, a microfiber cloth for wiping and buffing, rubber gloves, and a small bucket or bowl.
- Gloves and sponge
- Spray bottle cleaner
- Paste cleaner
- Microfiber cloth
Step-by-step micro-routine for immediate stain reduction
With tools laid out, the quick-start cleaning checklist guides a focused, under-10-minute routine to reduce fresh or light bathtub stains.
Spray an all-purpose cleaner or vinegar solution, let sit 1–2 minutes. Agitate with a nonabrasive sponge in circular motions. Rinse thoroughly.
Dry with a microfiber cloth. Inspect and spot-treat remaining marks with baking soda paste for 1–2 minutes.
When to repeat vs. escalate treatment
Several short cycles of the quick-start routine are appropriate when light stains persist after the initial pass: if residue fades but remains visible, repeat the spray–agitate–rinse sequence once or twice more, checking after each cycle.
If stains remain unchanged, escalate: switch to a stronger cleaner suited to the stain (acidic for mineral, bleach for organic), use a scrub pad, and allow longer dwell time.
Proven DIY Methods by Stain Type
The guide next outlines proven DIY approaches tailored to common bathtub blemishes: targeted recipes for dissolving soap scum, methods for lifting rust stains, and techniques for removing hard water and mineral deposits.
Each method notes suitable cleaners, simple application steps, and safety precautions.
Practical tips help readers choose the right approach based on tub material and stain severity.
Soap scum removal methods
This section outlines proven DIY approaches for removing soap scum, organized by stain type and severity.
It describes a vinegar-and-dish-soap spray, a baking-soda paste with recommended application and scrubbing technique, and a steam or hot-water treatment for stubborn buildup.
Each method includes steps and tips to maximize effectiveness while protecting tub surfaces.
Vinegar and dish soap spray recipe and application
A simple vinegar-and-dish-soap spray combines acetic acid and surfactant to break down and lift soap scum without harsh chemicals.
Mix equal parts white vinegar and warm water, add a few drops of liquid dish soap, and pour into a spray bottle.
Saturate affected areas, let sit 10–15 minutes, then wipe with a microfiber cloth and rinse thoroughly.
Baking soda paste how to apply and scrub technique
Sprinkle baking soda onto damp bathtub surfaces to form a light, even layer that adheres without clumping.
Mix a small amount of water into remaining powder to create a thick paste.
Apply paste to soap scum, let sit 10–15 minutes, then scrub with a nonabrasive brush or sponge in circular motions.
Rinse thoroughly and repeat on stubborn spots if needed.
Steam and hot water method for stubborn scum
Loosen stubborn soap scum by applying concentrated heat: steam softens mineral deposits and dissolves greasy residues, making them far easier to remove with minimal scrubbing.
Use a handheld steamer or run very hot water to saturate the area, wait several minutes, then wipe with a microfiber cloth or nonabrasive sponge.
Repeat as needed and ventilate the bathroom to cool surfaces safely.
Rust stain removal methods
Rust stains respond well to targeted treatments that vary by severity and surface.
For light stains, a mixture of lemon juice and salt applied at a roughly 1:1 ratio and left to sit for 10–30 minutes can lift iron deposits.
Alternatively, a paste of cream of tartar and water spread thin and allowed to dry offers an option for moderate staining.
For stubborn or extensive rust, low-odor commercial rust removers formulated as tub-safe and nonabrasive should be used according to label instructions and with proper ventilation.
Lemon juice and salt proportions and dwell time
When treating rust stains with a lemon-and-salt paste, a common starting ratio is about 1 tablespoon of table salt per 1/2 tablespoon of fresh lemon juice, adjusted to a spreadable consistency; the mixture should cling to vertical surfaces without running.
Apply a thin, even layer, let sit 15–30 minutes for light stains, up to 1 hour for stubborn spots, then rinse and scrub gently.
Cream of tartar paste instructions
Mix cream of tartar with enough hydrogen peroxide to form a thick, spreadable paste, typically about 1 part cream of tartar to 1–2 parts peroxide by volume; for extra abrasiveness on stubborn spots, a pinch of baking soda may be added.
Apply to rust stains, let sit 15–30 minutes, scrub gently with a soft brush, rinse thoroughly, and repeat if necessary until discoloration fades.
Commercial rust removers safe for tubs usage notes
Consider commercial rust removers labeled safe for bathroom fixtures, as they offer targeted formulations and clear usage guidelines for tubs.
Read labels for compatibility with porcelain, enamel, acrylic or fiberglass. Follow dilution, contact time and ventilation instructions.
Test on an inconspicuous area first. Rinse thoroughly and neutralize per manufacturer directions.
Avoid mixing with bleach or ammonia to prevent toxic fumes.
Hard water and mineral deposit removal
Hard water and mineral rings respond well to targeted treatments depending on severity and surface.
For light buildup, a white vinegar soak—applied for 30–60 minutes and followed by gentle scrubbing—softens deposits, while stronger cases may require a commercial descaler like CLR used according to label directions and with proper ventilation.
Stubborn rings on durable surfaces can be removed with a pumice stone or non‑abrasive scrubs used cautiously to avoid scratching.
White vinegar soak best practices and timing
Soak affected areas in white vinegar to dissolve mineral deposits and loosen hard-water staining without harsh chemicals.
Apply full-strength vinegar, cover with soaked cloths or plastic to maintain contact, and let sit 30–60 minutes for light buildup or up to several hours (overnight) for heavy deposits.
Rinse, scrub with a soft brush, and repeat once if residue remains; ventilate the room.
CLR and similar descalers when and how to use them
When mineral deposits resist vinegar, commercial descalers like CLR provide a faster, stronger option for dissolving calcium, lime, and rust stains; they should be used sparingly, following the product instructions, in well-ventilated areas, with appropriate gloves and eye protection.
Apply to affected areas briefly, agitate with a soft cloth, rinse thoroughly, and test inconspicuously first.
Neutralize residue if directed and store safely.
Pumice stone and non-abrasive scrubs for mineral rings
For mineral rings caused by hard water, pumice stones and non-abrasive scrubs offer targeted mechanical removal without harsh chemicals.
The method requires wetting both stone and surface, working gently to avoid glazing or scratches, and rinsing frequently to remove grit. Test an inconspicuous area first.
Follow with a mild cleaner to remove residues and dry thoroughly to discourage rapid re‑deposition of minerals.
Step-by-Step Deep Clean for Heavily Stained Tubs
Before beginning a deep clean, one should guarantee adequate ventilation, protect fixtures with tape or covers, and pre-rinse the tub to loosen surface grime.
The recommended multi-stage sequence starts with degreasing, followed by de-scaling, and finishes with polishing to restore shine.
A thorough post-clean rinse and careful drying prevent streaks and residue.
Preparation: ventilation, protecting fixtures, and pre-rinse
Although effective stain removal relies on proper technique, thorough preparation is essential: guarantee adequate ventilation, shield fixtures and hardware, and perform a quick pre-rinse to loosen surface grime.
Open windows or run an exhaust fan, cover faucets and drains with plastic or tape, remove mats and bottles, and rinse with warm water to soften soap scum and mineral deposits before applying cleaners.
Multi-stage cleaning sequence (degrease → de-scale → polish)
Begin the multi-stage clean with a clear sequence: degrease to lift oils and soap scum, de-scale to dissolve mineral deposits and rust, then polish to restore shine and protect the surface.
Use appropriate cleaners in that order, allowing dwell time between steps.
Agitate stubborn spots with nonabrasive pads during degreasing, target mineral residues with acidic de-scalers, then finish with a gentle polish.
Post-clean rinsing and drying to prevent streaks
Once rinsing follows the final polish, thorough removal of residues and cleaning agents prevents streaks and water spots on the tub surface.
Use a strong spray and warm water, working top-down, to flush loosened grime. Wipe immediately with a microfiber cloth or squeegee, drying seams and fixtures.
Ventilate until fully dry to inhibit mineral spotting and mildew formation.
Safe Cleaning Techniques by Bathtub Material
Cleaning approaches should match the tub material to prevent damage: porcelain and enamel tolerate mild abrasives and non-abrasive cleaners but not metal scrapers.
Acrylic and fiberglass require non-abrasive, soft methods to avoid scratching.
Stone or cultured marble needs pH-neutral products to protect the surface and sealant, and metal fixtures and drains demand cleaners that won’t cause corrosion.
The following guidance outlines permitted cleaners and prohibited tools for each material.
Porcelain and enamel allowed cleaners and prohibited tools
For porcelain and enamel tubs, select pH-neutral or mild nonabrasive cleaners—liquid dish soap, diluted vinegar solutions, baking soda paste, or commercial products labeled safe for porcelain/enamel—to remove soap scum and stains without damaging the glaze.
Avoid abrasive powders, metal scouring pads, wire brushes, razor blades, and harsh acid or bleach concentrates that etch or dull the finish.
Rinse thoroughly and dry to prevent water spots.
Acrylic and fiberglass gentle methods to avoid scratching
Treat acrylic and fiberglass tubs with mild, nonabrasive cleaners and soft tools to prevent micro-scratches that dull the finish; use a diluted dish soap solution, a baking soda paste applied gently, or commercial cleaners labeled safe for acrylic/fiberglass, and always test in an inconspicuous spot first.
Rinse thoroughly, dry with a microfiber cloth, avoid scouring pads or abrasive powders, and limit bleach or strong solvents that can haze or weaken surfaces.
Stone or cultured marble pH-neutral approaches
Many stone and cultured marble tubs require pH-neutral cleaners to protect their sealed, porous surfaces from etching and discoloration.
Use manufacturer-approved, non-acidic cleaners or a mild dish soap solution applied with a soft microfiber cloth or sponge.
Rinse thoroughly and dry to prevent mineral buildup.
Test any product on an inconspicuous area first and avoid abrasive pads or harsh chemicals.
Metal fixtures and drains avoiding corrosion
Protect metal fixtures and drains by using gentle, non-abrasive cleaners and by promptly removing soap scum and mineral deposits that accelerate corrosion.
Regularly rinse and dry hardware after cleaning to prevent water spots.
Apply a thin protective layer of wax or silicone-safe lubricant to fittings.
Avoid acidic or bleach-based products on brass, chrome, and stainless steel.
Inspect seals and replace corroded components promptly.
Comparison of DIY vs Commercial Cleaners
A brief comparison of DIY and commercial cleaners helps assess effectiveness, cost, speed, and surface safety alongside environmental and health trade-offs. The table below summarizes typical differences to guide choice based on priorities. Readers should weigh performance against potential surface damage and chemical exposure.
| Aspect | DIY | Commercial |
|---|---|---|
| Effectiveness & Speed | Moderate; slower on heavy stains | High; faster on tough stains |
| Cost & Safety | Low cost; gentler if using mild agents | Higher cost; may risk surface finish or fumes |
| Environmental/Health | Often greener if using vinegar/baking soda | Varies; can include harsher chemicals and VOCs |
Effectiveness, cost, speed, and surface safety
When comparing DIY solutions and commercial cleaners for bathtub stains, effectiveness, cost, speed, and surface safety diverge in predictable ways: homemade mixes (baking soda, vinegar, hydrogen peroxide) are inexpensive and gentler on finishes but often need longer contact time and more elbow grease.
Whereas commercial products deliver faster, often stronger stain removal at higher cost and with greater risk of damage to delicate surfaces or grout if misused.
DIY suits maintenance; pro cleaners aid heavy buildup.
Environmental and health considerations
Many homeowners weigh the environmental and health trade-offs of DIY versus commercial bathtub cleaners: homemade mixtures of baking soda, vinegar, and hydrogen peroxide generally pose lower risks of volatile organic compound (VOC) emissions and aquatic toxicity, while commercial products can contain concentrated acids, alkalis, or solvents that increase inhalation hazards and require careful disposal to avoid wastewater contamination.
Users should consider ingredient toxicity, ventilation, PPE, and proper dilution.
Common Cleaning Mistakes and How to Avoid Them
Many cleaners unknowingly worsen bathtub conditions by using abrasive tools that strip finishes.
Hazardous results can also follow from mixing incompatible products, which may release toxic fumes.
Failure to protect surrounding surfaces and grout often leads to staining and costly repairs.
Using abrasive tools that damage finishes
Scrubbing vigorously with steel wool, metal brushes, or harsh scouring pads can strip a bathtub’s protective coating and leave permanent scratches.
Such damage dulls finish, promotes staining, and shortens lifespan. Instead, use nonabrasive sponges, microfiber cloths, or nylon brushes and gentle cleaners.
Test products on an inconspicuous spot, follow manufacturer guidance, and replace aggressive tools with safer alternatives to preserve surface integrity.
Mixing cleaners that create dangerous fumes
Mixing common household cleaners can produce toxic gases and pose immediate risks such as respiratory distress, eye irritation, and even chemical burns.
Combining bleach with ammonia, acids, or peroxide creates chloramine, chlorine, or oxygen-releasing reactions.
Always read labels, use one product at a time, ventilate thoroughly, and store chemicals separately.
If exposure occurs, seek fresh air and medical help promptly.
Skipping protection for nearby surfaces and grout
Around the bathtub, failing to protect adjacent surfaces and grout can turn a routine cleaning into a source of staining, etching, or water damage.
Cleaners and scrubbing can strip grout sealant, discolor tile, or corrode fixtures. To avoid harm, cover nearby surfaces with plastic or towels, tape edges, test products on an inconspicuous spot, and reseal grout periodically after deep cleaning.
Preventing Future Stains and Simplifying Maintenance
A brief, consistent maintenance routine—wiping surfaces after use and a weekly scrub—keeps soap scum from becoming stubborn stains.
Addressing hard water through water-softening options reduces mineral buildup that accelerates discoloration.
Applying protective coatings or sealants further limits staining and simplifies long-term upkeep.
Weekly maintenance routine for soap scum control
Establishing a simple weekly routine keeps soap scum from building up and turning into stubborn stains. A brief, consistent approach preserves finishes and reduces intensive scrubbing later.
- Rinse tub after each use to remove residue.
- Wipe surfaces with a microfiber cloth or squeegee.
- Apply diluted vinegar spray weekly; let sit 5–10 minutes, then rinse.
- Inspect grout and caulk; spot-clean as needed.
Water-softening options to reduce hard water buildup
Many households benefit from installing water-softening measures to cut mineral deposits that cause stubborn bathtub stains and accelerate wear.
Options include ion-exchange softeners to remove calcium and magnesium, salt-free conditioners that sequester minerals, and reverse-osmosis units for point-of-use purity.
Regular maintenance of softeners prevents scale buildup.
Choosing the right system depends on water hardness, budget, installation complexity, and ongoing operating costs.
Protective coatings and sealants for long-term stain resistance
Beyond reducing mineral buildup, homeowners can further protect tubs by applying durable coatings and sealants that block stains and simplify cleaning.
Professional-grade epoxy, acrylic refinishing kits, and silicone or polyurethane sealants form impermeable barriers against soap scum, rust, and hard-water deposits. Proper surface preparation and curing guarantee adhesion.
Periodic inspection and reapplication extend protection, reduce scrub time, and preserve finish integrity.
Quick Troubleshooting Guide
If stains persist after routine cleaning, a clear escalation plan helps determine next steps, from stronger cleaners to targeted scrubbing techniques.
Guidance should include when to test a product in an inconspicuous area and when the problem warrants contacting a professional refinisher.
The aim is to resolve stubborn marks safely while avoiding damage to the tub surface.
When a stain won’t budge: escalation steps
When a routine cleaning fails to shift a stubborn bathtub stain, escalate methodically: identify the stain type, verify the tub material and finish, then progress from milder to stronger treatments while testing each on an inconspicuous area.
Try repeated gentle scrubbing, enzyme or oxygen bleach soaks, then targeted rust removers or diluted acid cleaners only if safe.
Rinse thoroughly and inspect between steps.
When to call a professional refinisher
At what point does a stubborn bathtub stain justify calling a professional refinisher?
When deep discoloration, surface pitting, extensive rust, or cracks resist all safe DIY methods, or when previous repairs worsened appearance, professional refinishing is appropriate.
Hire a pro if longevity, uniform finish, or structural restoration matters, or if the tub material (cast iron, cultured marble) requires specialist equipment and expertise beyond household tools.
How to test cleaners in an inconspicuous spot
Before applying a cleaner broadly, test it in a small, inconspicuous area to confirm compatibility and results.
Apply a drop, wait the manufacturer’s suggested dwell time, then blot with a soft cloth.
Inspect for discoloration, finish damage, or residue. Rinse thoroughly and allow to dry.
If no adverse effects appear after 24 hours, proceed with full cleaning.
Recommended Tools and Products to Keep on Hand
A concise kit of tools and products makes routine stain removal faster and safer. The list below highlights scrubbers, cleaning agents, and protective gear recommended for most tubs.
Keeping these on hand prevents last-minute trips and reduces surface damage.
- Soft scrubbers, nylon brushes, and non-abrasive pads
- Baking soda, white vinegar, oxygen bleach, and a mild commercial tub cleaner
- Rubber gloves, eye protection, and a mask for fumes
- A spray bottle, microfibre cloths, and a plastic scraper
Scrubbers, brushes, and non-abrasive pads
Select scrubbers and brushes that match the tub material and the type of stain to guarantee effective cleaning without damage.
Use soft-bristle brushes for acrylic and fiberglass, nylon pads for porcelain, and non-abrasive sponge pads for sealed stone.
Long-handled scrubbers reach corners and reduce strain.
Microfiber cloths polish finishes after cleaning.
Rinse tools thoroughly and replace worn pads to avoid scratching.
Essential DIY ingredients and commercial product types
When tackling common bathtub stains, keeping a small collection of proven DIY ingredients and targeted commercial cleaners simplifies treatment and prevents damage across materials.
Essential DIY items:
- white vinegar
- baking soda
- hydrogen peroxide
- lemon juice
- mild dish soap.
Recommended commercial types:
- non-abrasive bathroom cleaners
- rust removers
- limescale dissolvers
- gel bathroom sprays formulated for porcelain, acrylic, and enamel finishes.
Personal protective equipment
Because cleaning agents and scouring can irritate skin, eyes, and lungs, appropriate personal protective equipment should be kept readily available: chemical-resistant gloves, safety goggles, a simple respirator or mask for strong fumes, and non-slip footwear.
Additionally, keep microfiber cloths, abrasive pads with hand guards, and a waterproof apron.
Store items near cleaning supplies, inspect for damage, and replace worn PPE promptly to guarantee safety.
Closing Checklist Before You Finish
A final inspection verifies that all stains have been removed and no residue remains in grout, corners, or around fixtures.
The checklist includes running water to test drains, wiping surfaces dry to spot missed areas, and noting any stubborn marks needing repeat treatment.
It also lists simple maintenance actions—regular rinsing, occasional mild scrubs, and a quick weekly wipe—to preserve results for months.
Final inspection steps to ensure stain removal
Before declaring the job complete, the cleaner should perform a systematic inspection to confirm every stain is removed and no residue or cleaner remains on surfaces.
Check under varied lighting, run water to reveal hidden marks, test grout and corners with a fingertip, inspect fixtures and drain edges, wipe with a clean microfiber cloth, and note any spots needing targeted retreatment before final rinse and drying.
Steps to maintain results for months
Seal the effort with a concise closing checklist that preserves the tub’s condition for months:
Rinse thoroughly, dry surfaces, and ventilate to prevent mildew.
Apply a protective sealant or wax if appropriate.
Schedule weekly quick wipes and monthly deep cleans.
Use water softener or descaler for hard water.
Inspect fixtures and grout quarterly, reapply sealant as needed to maintain stain resistance.
Conclusion
The guide concludes that quick, safe stain removal hinges on correct identification, targeted DIY methods, and routine prevention. Testing the theory that routine micro‑maintenance prevents major restorations proves largely true: small, frequent cleanings dramatically reduce buildup and staining, while occasional deep cleans handle stubborn deposits. Adopting simple tools and a ten‑minute checklist minimizes labor and chemical use, making bathtub upkeep predictable, efficient, and less prone to emergency overhauls.