How to Install a Garden Watering System: Step-by-Step Guide for Beginners
Installing a garden watering system is an effective way to ensure your plants receive consistent moisture with minimal effort. This guide will walk you through the process step-by-step, making it accessible for beginners using basic tools.
First, determine the right type of system for your garden—choose between drip, soaker, or sprinkler systems based on your plants’ needs and garden layout. Next, plan your zones, calculate water flow, and map out the lines.
Begin installation by setting up backflow prevention, regulators, main tubing or pipe, valves, and emitters. After that, connect a timer to automate watering and test the system for leaks. Regular maintenance is key: remember to clean filters, flush lines, and winterize the system as needed.
Follow this guide for detailed steps and troubleshooting tips to ensure a successful installation.
What a garden watering system is and why install one
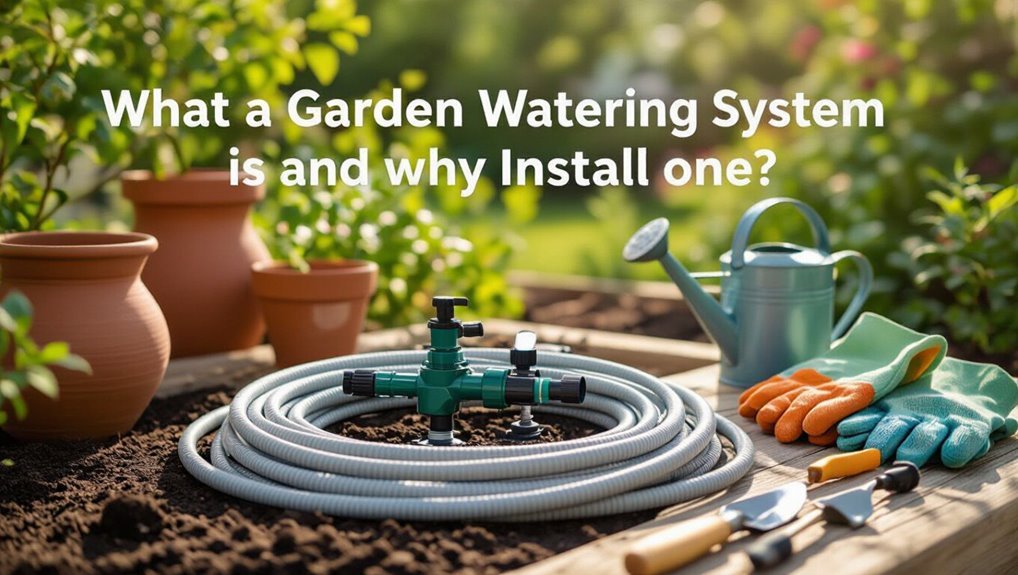
A garden watering system is an arrangement of components—controller, valves, pipes or tubing, and emitters—that work together to deliver water efficiently to lawns, flower beds, potted plants, or vegetable plots.
Automated systems offer benefits across garden types, including consistent moisture, water savings, reduced labor, and scheduling tailored to plant needs.
Understanding typical components and their interactions helps a gardener choose and install the right system for a given landscape.
Benefits of an automated watering system for different garden types
An automated garden watering system delivers measured amounts of water to plants on a preset schedule or in response to soil and weather conditions, reducing manual labor and improving consistency.
Benefits vary by garden type: lawns gain uniform coverage and water savings; vegetable beds enjoy precise timing for productivity; container gardens receive regular moisture; drought-prone landscapes reduce waste.
Guides on how to install watering system for garden simplify setup.
Typical components and how they work together
Systems of pipes, valves, emitters and controllers form the backbone of a garden watering system, each component performing a specific role that together delivers measured water where and when plants need it.
A controller schedules zones; valves regulate flow; pipes distribute water; emitters or sprinklers apply precise doses.
Filters, pressure regulators and backflow preventers protect performance and guarantee uniform, efficient irrigation.
Choose the right watering system for your garden
Choosing the right watering system begins with comparing common types—such as drip irrigation, soaker hoses, and sprinklers—to match distribution style with plant needs.
System size should be planned to cover the garden area and accommodate different water requirements of plant groups.
The choice of water source—municipal supply, well, or rain barrel—affects pressure, filtration, and scheduling options.
Compare common types
Selection of a watering system hinges on plant type, bed layout, and water efficiency goals. Drip irrigation and soaker hoses deliver slow, targeted moisture for beds, while sprinkler systems cover larger lawns; micro-sprayers and bubblers suit containers and raised beds with close-range needs. The table below briefly compares typical features and best uses.
| System type | Best for | Key advantage |
|---|---|---|
| Drip irrigation | Flower beds, vegetable rows | Precise, water-efficient delivery |
| Soaker hoses | Garden beds, shrubs | Simple, low-cost soak |
| Sprinkler systems | Lawns, large areas | Broad coverage |
| Micro-sprayers/bubblers | Containers, raised beds | Localized, adjustable flow |
Drip irrigation vs soaker hoses vs sprinkler systems
Which watering method best matches a garden’s needs depends on plant type, layout, water availability, and maintenance tolerance.
Drip irrigation delivers precise, low-volume water at roots—efficient for beds and individual plants but requires emitters and flushing.
Soaker hoses provide even, simple soil wetting with moderate efficiency and less installation.
Sprinklers cover lawns and broad areas quickly but waste more water and encourage foliage wetness.
Micro-sprayers and bubbler systems for containers and raised beds
For smaller plantings where emitters or soaker lines may not distribute water evenly, micro-sprayers and bubblers offer targeted solutions for containers and raised beds.
Micro-sprayers produce fine, adjustable spray patterns for shallow, uniform coverage; bubblers deliver concentrated flow to individual root zones.
Both reduce runoff, conserve water, and integrate with timers or drip mains, ideal for varied container sizes and raised-bed layouts.
Sizing the system to fit garden area and plant water needs
Determining the correct system size starts with mapping the garden’s layout and cataloging plants by water requirements and sun exposure.
Calculate total flow rate needed by grouping zones with similar needs, then sum emitter or sprinkler output per zone.
Match pipe diameter and valve capacity to peak demand, allow margin for pressure loss, and plan separate irrigation schedules for differing plant types.
Water source options: municipal, well, rain barrel
Several clear choices exist for supplying an irrigation system: municipal water, a private well, or captured rainwater from barrels or cisterns.
Municipal supplies are reliable but may incur metered costs and pressure limits.
Wells provide independence and strong flow but require pumping and maintenance.
Rain capture reduces cost and is eco-friendly yet variable seasonally and needs filtration and storage sizing for consistent supply.
Plan your watering layout and water requirements
The gardener should begin by mapping the garden into zones based on plant types and sun exposure to determine distinct watering needs.
Next, they must calculate available flow rate and pressure to set appropriate run times for each zone.
Finally, a parts list and budget should be assembled to match the layout and hydraulic requirements.
Mapping your garden: zones, plant types, sun exposure
Before laying pipe or placing emitters, sketch the garden into distinct irrigation zones based on plant type, root depth, and daily sun exposure; each zone should group plants with similar water needs so flow rates and run times can be matched precisely.
Note slopes, soil type, and microclimates. Mark trees, beds, containers, and turf separately.
Label shaded versus full‑sun areas for tailored watering frequency.
Calculate flow rate, pressure, and run times
Once zones are defined, calculate each zone’s flow rate and required pressure to size pipes, valves, and emitters correctly. This begins by tallying the flow (gallons per minute or liters per minute) of every sprinkler head or drip emitter in a zone, then summing them to get the zone demand.
Compare demand to source capacity, adjust grouping or sequencing, and determine runtime based on plant water needs and application rate.
Create a parts list and budget
Several clear steps convert calculated zone demands into a practical parts list and realistic budget.
The planner lists required components, estimates quantities, and assigns costs.
Prioritize valves and controller capacity, pipe and fittings, and emitters based on pressure and flow.
- Valves, controller, filters
- Pipe, fittings, clamps
- Emitters, sprinklers, timers
Totals and contingency finalize purchasing.
Tools and materials you’ll need
Installation requires a handful of basic tools—pipe cutters, a drill, pliers, a tape measure, and a shovel—to guarantee clean cuts and proper placement.
A parts checklist should include control valves, supply tubing, emitters or drip lines, fittings and clamps, and a programmable controller.
Gathering these items before starting streamlines the build and reduces interruptions.
Essential tools for installation
A concise set of hand tools, measuring devices, and quality fittings makes a smooth garden watering installation; at minimum this includes a tape measure, garden hose, pipe cutter or utility knife, adjustable wrench, Teflon tape, hose clamps, a shovel for trenching, and fittings compatible with the chosen system (polyethylene tubing, PVC, or drip line).
- Basic hand tools: wrench, cutter, shovel
- Measuring and marking tools: tape, marker
- Small supplies: Teflon, clamps, fittings
Parts checklist: valves, tubing, emitters, fittings, controller
With basic tools in hand, attention turns to the specific components that make a watering system function: valves, tubing, emitters, fittings, and a controller.
Valves regulate zones; main tubing distributes water; lateral tubing reaches beds.
Emitters (drippers, micro-sprays) match plant needs.
Fittings and clamps guarantee leak-free joins.
A programmable controller automates schedules.
Include pressure regulator and filter as required.
Step-by-step installation for a basic drip irrigation system
The installer begins by preparing the site, marking the main lines, and fitting a backflow preventer with a pressure regulator at the water source.
Next, the main tubing is laid and secured, then lateral lines are added with emitters or dripline placed near plant roots.
Finally, the system is connected to a timer or manual valve and tested for leaks and proper flow.
Prepare the site and mark main lines
Begin by clearing debris, weeds, and obstacles from the planned layout so pipe trenches lie on firm, level ground; then sketch the main supply line and lateral branches on the soil or with stakes and string to reflect plant groups and elevation changes.
Confirm measurements, note valve, filter and emitter locations, mark sleeves where lines cross paths, and guarantee access points and gentle slopes for drainage.
Install the backflow preventer and pressure regulator
Install the backflow preventer and pressure regulator at the main supply connection to protect potable water and guarantee consistent downstream pressure.
The installer shuts off water, cleans threads, applies plumber’s tape, and mounts the backflow device per manufacturer instructions.
Next, the pressure regulator is fitted downstream, adjusted to the drip system’s recommended PSI, and tested for leaks before restoring flow.
Lay and secure main tubing
After confirming the backflow preventer and pressure regulator are secure and leak-free, the layout of the main tubing can be established across the garden.
Run 1/2″ or 3/4″ poly tubing along planned routes, uncoil and straighten sections, and anchor with stakes every 3–6 feet.
Trim to fit, attach fittings and end caps, then press connections firmly and test for leaks before continuing.
Add lateral lines and install emitters or dripline
With the mainline secured, lay lateral lines from the main tubing toward planting beds, using 1/4″ microtubing or 1/2″ poly dripline as appropriate for plant spacing and flow needs.
Cut and attach laterals with barbed fittings or tees, stake tubing to prevent movement, and space emitters according to root zones.
Install pressure compensating emitters or adjustable drippers, cap ends, and flush lines before covering.
Connect to a timer or manual valve and test the system
Begin by choosing the control method—either a battery-powered timer or a manual ball valve—and mount it at the supply source so tubing alignment is straightforward.
Attach pressure regulator and backflow preventer if required, then connect mainline.
Open water slowly, check for leaks at fittings and emitters, adjust pressure and timer settings, confirm uniform flow across zones, and repair or re-seat connections until system operates correctly.
Burying lines vs surface mounting: when to choose each
Although both burial and surface mounting deliver water reliably, choosing between them depends on soil type, plant root depth, aesthetics, and maintenance access.
Burying lines protects tubing, reduces evaporation, and suits perennial beds but complicates repairs.
Surface mounting offers easy inspection, flexibility for seasonal layouts, and suits containers or annuals.
Select based on durability needs, visibility preference, and how frequently adjustments or winterizing will be required.
Step-by-step installation for a sprinkler system
The section outlines a practical sequence for installing a sprinkler system, beginning with calculating head spacing and mapping the layout.
It then covers trenching and pipe installation, mounting heads, valves, and the manifold, and wiring the controller and zone valves.
Finally, it explains system start-up procedures and methods for testing and adjusting coverage.
Determine sprinkler head spacing and layout
When planning sprinkler head spacing and layout, the installer should map the lawn into zones and arrange heads so their spray patterns overlap by at least 50% to guarantee uniform coverage.
This prevents dry spots and reduces water waste. Calculate head radius and flow rates, select appropriate head types for turf versus beds, position heads at boundaries and obstacles, and adjust for slopes and wind exposure.
Trenching and laying PVC or polyethylene pipe
Begin by marking trench routes and verifying utility locations to guarantee safe, efficient pipe runs.
Trenches should be 6–12 inches deep for polyethylene or 12–18 inches for PVC, sloped for drainage.
Cut pipe to length, deburr edges, and use solvent cement or push-fit fittings per material.
Lay pipe in trenches, secure with stakes or sand bedding, and backfill carefully to avoid kinks.
Install sprinkler heads, valves, and manifold
Install sprinkler heads, valves, and the manifold by following a logical sequence: lay out head locations, set valve boxes and the manifold near the water source, cut and connect branch lines, then mount and adjust heads to the proper height and spray patterns.
Use appropriate fittings and solvent or compression joints, secure lines, test each zone for leaks and coverage, and trim risers to finish.
Wire the controller and zone valves
Proceed to wire the controller and zone valves with a clear plan: locate the controller in a dry, accessible spot near the main water source and route multi-conductor irrigation cable from the controller to each valve box, keeping runs as direct as possible and avoiding electrical conduit carrying high-voltage lines.
Strip conductors, label wires by zone, connect common to C and each zone to its terminal, secure splices in waterproof connectors and fasten cables.
System start-up and coverage testing
Power up the controller and run each zone individually to verify operation and coverage before finalizing the installation.
Observe nozzle patterns, adjust rotor and spray heads for uniform distribution, and reposition heads to eliminate dry spots and overspray.
Check for leaks, proper valve cycling, and adequate water pressure.
Document zone run times, program the controller, and perform a final full-cycle test.
Installing controllers, timers, and smart irrigation tech
The section outlines common controller types and the basic programming steps needed to schedule zones and run times.
It then covers the addition of soil moisture sensors and weather‑based controllers that adjust watering automatically.
Finally, it explains options for integrating irrigation controls with home automation platforms for remote monitoring and voice or app control.
Types of controllers and programming basics
Controllers for garden watering range from simple mechanical timers to advanced smart systems that adjust schedules based on weather and soil data.
Mechanical and digital timers provide basic on/off scheduling and zone control. Programmable controllers offer multiple start times, run durations, and seasonal adjustments.
Smart controllers add remote management via apps and integrate with valves; users must match controller capacity to valve count and water pressure.
Adding moisture sensors and weather-based controllers
Begin by choosing sensors and weather-based controllers that match the irrigation layout and local climate: soil moisture probes, in-ground sensors, and evapotranspiration (ET) or weather-station–linked controllers each provide different inputs that alter run times automatically.
Install sensors at representative zones, wire or wirelessly connect to the controller, calibrate thresholds, and verify override options.
Test adjustments over several weeks for ideal water savings and plant health.
Integrating with smart home systems
Following calibration of sensors and weather-based controllers, attention turns to connecting the irrigation system with broader smart-home ecosystems through controllers, timers, and smart irrigation devices.
The installer mounts a compatible controller, configures Wi‑Fi or hub integration, programs schedules and zones, and enables app or voice control.
Firmware updates, secure passwords, and testing guarantee reliable automated watering and coordination with weather forecasts.
Common problems during and after installation and how to fix them
Common installation and post‑installation issues—such as low water pressure, leaks, and clogged emitters—are identified and resolved through straightforward troubleshooting and component replacement.
Uneven coverage typically requires zone rebalancing by adjusting heads, changing nozzle types, or altering valve run times.
Preparing the system for cold weather and preventing freeze damage involves proper winterization, drainback or blowout procedures, and insulation of exposed components.
Low pressure, leaks, and clogging causes and solutions
Diagnose low pressure, leaks, and clogs promptly to prevent uneven watering and wasted water; these issues typically stem from poor system design, damaged components, or debris buildup.
Inspect fittings, valves, and emitters for cracks or loose connections, test pressure with a gauge, flush lines, clean or replace filters and clogged drip emitters, and repair or replace damaged tubing.
Regular maintenance prevents recurrence.
Uneven coverage and how to rebalance zones
Fixing low pressure, leaks, and clogs is only part of achieving an even watering pattern; attention must also be paid to how zones are sized and balanced.
Assess spray distance, plant water needs, and run times per zone.
Combine similar flow-demand plants, split oversized zones, adjust sprinkler arc and nozzle types, and recalibrate controller schedules.
Test and fine-tune until uniform coverage is confirmed.
Winterization and freeze protection
Prepare the system before the first hard freeze to prevent burst pipes, damaged valves, and ruined controllers.
Drain lines, blow out with compressed air at recommended pressure, and close and insulate backflow preventers.
Remove and store timers/controllers indoors or use rated covers.
Check for leaks and brittle tubing in spring; replace damaged components and retest zones to guarantee proper operation.
Maintenance schedule and seasonal care
A clear maintenance schedule helps preserve system performance and prevents small issues from becoming costly repairs.
Regular tasks include a routine inspection checklist, flushing lines, cleaning filters, and replacing clogged emitters as needed.
Seasonal procedures cover winterizing the system to prevent freeze damage and following a restart checklist in spring to guarantee proper operation.
Routine inspection checklist
While routine inspections are simple, they are essential to catch small problems before they escalate and to keep the watering system operating efficiently year-round.
A concise checklist guides seasonal care and quick fixes:
- Inspect lines, fittings, and valves for leaks or damage.
- Verify zone timers and sensors function and adjust schedules.
- Check spray patterns, riser stability, and visible clogs; note repairs.
Flushing, filter cleaning, and emitter replacement
Following the inspection checklist, attention shifts to flushing, filter cleaning, and emitter replacement to maintain flow and prevent blockages.
Flush mains and laterals monthly during active season to remove sediment. Clean or backflush filters per manufacturer intervals or whenever flow decreases.
Inspect emitters for clogging; replace malfunctioning or worn units. Record dates and parts replaced to track maintenance and optimize performance.
Preparing the system for winter and restarting in spring
Winterize the watering system before the first hard freeze to protect pipes, valves, and emitters from freeze damage and to guarantee a smooth spring restart.
Drain lines, blow out remaining water with compressed air at low pressure, shut off and insulate backflow preventers, remove and store filters and timers as recommended.
In spring, inspect, reconnect, test for leaks, and recalibrate schedules before regular use.
Cost estimates and ways to reduce expenses
The section compares typical DIY and professional installation costs to help homeowners set realistic budgets.
It highlights affordable upgrades—like pressure regulators or dripline additions—that yield noticeable water savings.
It also identifies higher-impact investments, such as smart controllers and quality mainlines, and when they justify the extra expense.
Typical DIY vs professional installation costs
Many homeowners weigh the cost difference between DIY and professional garden-watering installations, which typically ranges from a few hundred dollars for a basic do-it-yourself drip system to several thousand for a full, zoned sprinkler setup installed by a contractor. Typical costs, pros, cons, and savings strategies are summarized below.
| Item | Range |
|---|---|
| DIY kit | $50–$500 |
| Professional | $800–$5,000 |
| Labor | $300–$1,500 |
| Savings tips | Buy bulk, phase install |
Affordable upgrades and high-impact investments
Consider prioritizing upgrades that deliver measurable water and time savings—smart controllers, pressure regulators, and efficient nozzles typically provide the highest return on investment.
Cost estimates: smart controller $100–$300, pressure regulator $20–$60, rotor/spray nozzles $5–$20 each.
Reduce expenses by phasing purchases, buying in kits, choosing DIY-compatible parts, applying rebates, and prioritizing high-use zones for immediate benefit.
Troubleshooting quick-reference guide
A concise quick-reference helps identify common watering problems and immediate fixes.
For each issue, list:
- Symptom
- Probable cause
- First steps to fix.
This format lets a reader move from observation to action without excess troubleshooting.
Symptoms, probable cause, and first steps to fix
This quick-reference guide lists common symptoms of a malfunctioning garden watering system, pairs each symptom with the most likely cause, and outlines immediate first steps to diagnose or temporarily fix the problem.
Low pressure: clogged filter or valve — clean filter, check valves.
No water: closed main or broken pipe — open main, inspect for leaks.
Uneven zones: blocked emitters — flush or replace.
Resources for further help
The article lists reputable suppliers and recommended brands for valves, tubing, emitters, and controllers to help readers source correct parts.
It also outlines common scenarios—complex grading, municipal regulations, or persistent leaks—when hiring a professional installer is advisable.
Contact information for local contractors and links to manufacturer support are suggested for further assistance.
Where to buy parts and recommended brands
Gardeners seeking parts and trusted brands can find components at several types of outlets: local garden centers and irrigation suppliers for hands-on advice, big-box stores for common fittings and timers, and specialized online retailers for wide selections and technical specs.
Recommended brands often include Rain Bird, Hunter, Netafim, Orbit and Toro; compare warranties, reviews and compatibility before purchasing.
When to call a professional installer
When should a professional be called in?
A professional installer is advised for complex layouts, municipal permit requirements, unreliable water pressure, or integration with existing irrigation and smart systems.
Call when underground utilities are uncertain, soil drainage is problematic, or local codes demand licensed work.
Professionals guarantee proper zoning, efficient water use, and durable installation, reducing risk and long-term maintenance.
Conclusion
Like a careful gardener building a small river through a dry field, the homeowner assembles pipes and emitters to coax life from soil. Each chosen line, valve and timer becomes a promise—quiet channels that deliver nourishment where roots wait. With planning, simple tools and steady maintenance, the garden transforms into a patient orchestra of water and growth. In time, the system proves itself: modest labor yielding steady abundance, season after season.