How to Connect PEX Pipe to a Compression Valve: Step-by-Step Guide for DIY Plumbers
To connect PEX pipe to a compression valve, follow these essential steps: First, shut off the water supply and drain the line. Next, cut the PEX to a square end and deburr it. Slip the compression nut and ferrule onto the PEX, ensuring the tapered side of the ferrule faces the valve. Push the PEX fully onto the valve stem, hand-tighten the compression nut, and then snug it with a wrench according to the manufacturer’s specifications. Finally, test for leaks and re-tighten if necessary. The guide also includes information on alternative fittings, torque specifications, and troubleshooting tips to ensure a successful connection.
Overview of Connecting PEX Pipe to a Compression Valve
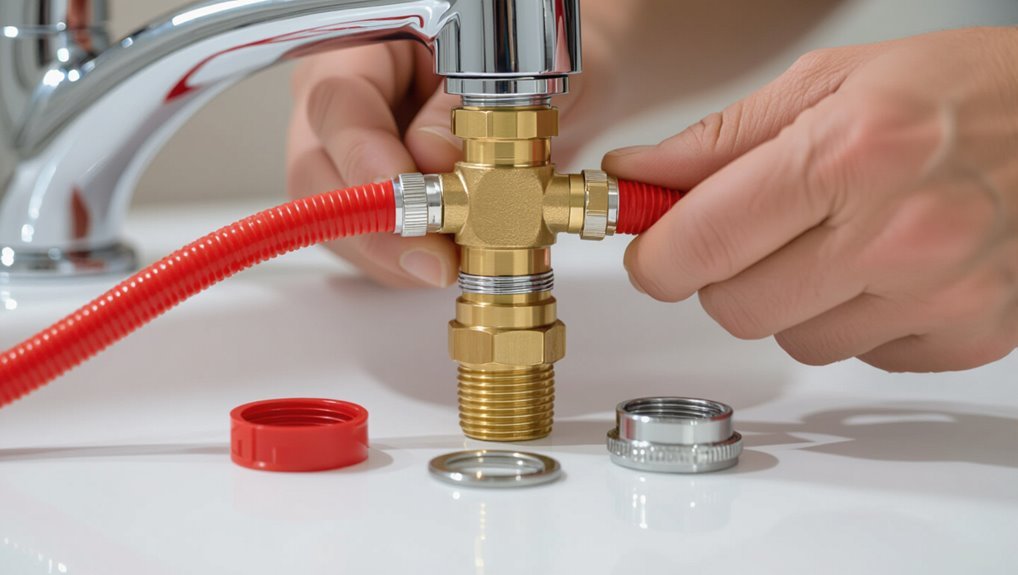
This section outlines the steps for joining PEX tubing to a compression valve, the tools and materials required, and the expected leak-free outcome when done correctly.
It notes that the task is suitable for a homeowner with basic plumbing skills and recommends hiring a licensed plumber for complex systems or uncertain connections.
Typical applications include sink and faucet installations, appliance hookups, and isolated repairs on residential water lines.
What this guide covers and expected outcome
An overview outlines the step-by-step process, required tools and materials, common connection methods (compression nut with ferrule, compression sleeve, and adapters), and safety considerations for attaching PEX to a compression valve.
The guide explains how to connect PEX pipe to a compression valve, presents clear steps, necessary fittings, leak-testing and troubleshooting, and the expected result: a secure, code-compliant, watertight connection.
Required skill level and when to hire a pro
Confidence in basic hand skills and familiarity with common plumbing tools determine whether a homeowner can reliably connect PEX to a compression valve.
Moderate DIY experience—measuring, cutting, deburring, and tightening fittings—is typically sufficient.
Hire a licensed plumber for limited access, unfamiliar codes, multi-branch systems, visible leaks, or discomfort with solderless fittings.
Professional help guarantees compliance, warranty protection, and rapid resolution of unexpected complications.
Common applications for PEX-to-compression valve connections
When installing or retrofitting plumbing in residential and light-commercial settings, PEX-to-compression valve connections are commonly used to tie flexible tubing into shutoff valves for sinks, toilets, ice makers, dishwashers, and washing machines.
They also serve water supply branches, appliance hookups, and fixture replacements where metal piping is impractical. The method supports quick repairs, minimizes brazing, and facilitates future servicing without major demolition.
Materials, Tools, and Parts You Need
This section identifies the specific materials, tools, and parts required to join PEX to a compression valve safely and reliably.
It covers compatible PEX tubing types and sizes, the common compression valve styles and their mating fittings, and a concise list of necessary tools and consumables.
Optional tools that speed the job or improve finish quality are also noted.
PEX tubing types and sizes compatible with compression valves
Plumbing professionals and informed DIYers must match PEX tubing type and size to a compression valve to guarantee a watertight, code-compliant connection; commonly used options are PEX-A, PEX-B, and PEX-C in nominal sizes 1/2-inch and 3/4-inch, with 1/2-inch being the standard for most residential angle and stop valves.
Compatible tubing requires clean cut ends, correct OD for fittings, and appropriate wall thickness per manufacturer specifications.
Compression valve types and compatible fittings
A clear inventory of compression valve types and their compatible fittings helps guarantee correct material selection and successful installation.
Common valve types include straight stop, angle stop, and multi-turn or quarter-turn cartridges.
Compatible fittings: brass compression nuts and olives, PEX-to-compression adapters, and dielectric unions where dissimilar metals meet.
Verify thread size, material compatibility, and pressure rating before purchase and installation.
List of tools and consumables
After confirming the correct compression valve type and compatible fittings, the next step is assembling the required materials, tools, and replacement parts for the connection.
Essential items include PEX tubing, compression nuts and olives, and replacement valve cartridges.
Needed tools and consumables:
- PEX cutter, adjustable wrench, and deburring tool
- Teflon tape, pipe cleaner, and marker
- Spare compression nuts, olives, and fittings
Optional tools for a cleaner or faster installation
Several additional tools can make the PEX-to-compression valve connection cleaner and quicker without being strictly necessary. A deburring tool and fine file smooth cut ends.
A handheld heat gun or hair dryer speeds shaping of PEX rings. PEX clamp or cinch tool guarantees secure fittings. A small lubricating spray eases assembly.
Masking tape and marker aid precise measurements.
Safety Precautions and Preparations
Before beginning the connection, the water supply should be shut off and system pressure relieved to prevent leaks or injury.
The installer should verify local codes and obtain any required permits to guarantee compliance.
The workspace must be cleared and surfaces protected to keep the area safe and prevent damage.
Shutting off water and relieving system pressure
Shut off the main water supply to the area and open a nearby faucet to release residual pressure; this prevents sudden water flow when disconnecting the valve.
Confirm shutoff by testing multiple fixtures.
Drain lines by opening lowest and highest taps as needed.
If working on hot lines, allow cooling.
Use a bucket and towels to catch remaining water.
Verify pressure gauge reads zero before proceeding.
Checking local codes and permits
With the water off and pressure relieved, verify any local building codes and permit requirements that apply to modifying or replacing valves.
Consult municipal plumbing regulations, homeowner association rules, and labor licensing standards.
Determine whether a permit, inspection, or licensed plumber is required.
Keep documentation and permit numbers on hand.
Failure to comply can result in fines, repair mandates, or insurance disputes.
Preparing the workspace and protecting surfaces
Clear the work area and lay down protective coverings to prevent damage from tools, debris, and water.
The installer secures lighting and ventilation, removes tripping hazards, and isolates nearby electrical sources.
Surfaces are shielded with drop cloths or cardboard; fixtures are wrapped.
Necessary tools and parts are organized within reach.
A bucket and towels are placed for spills, and a fire extinguisher is accessible.
Step-by-Step Guide: Connecting PEX to a Compression Valve
The following steps outline the practical process for joining PEX to a compression valve, beginning with confirming that the valve and fitting are compatible.
The technician measures and trims the PEX to length, then prepares the cut end by deburring, reaming, and straightening.
Finally, the compression nut and ferrule are slid onto the PEX before inserting the tube into the valve tailpiece and positioning the ferrule for tightening.
Verify valve and fitting compatibility
Before any fittings are installed, confirm that the compression valve and PEX system share compatible dimensions, materials, and connection types to guarantee a secure, leak-free joint.
Inspect valve threads or compression nut size, verify PEX outer diameter (OD) and required ferrule or insert type, and match materials to prevent galvanic corrosion.
Check manufacturer specifications and approved fittings for the specific PEX brand.
Measure and cut PEX to length
Measure the run carefully and mark the PEX with a fine-tip marker at the exact point where it will enter the compression nut, accounting for any necessary overlap with the valve stem or insert.
Use a square, clean cut with a quality PEX-cutting tool. Confirm length against the valve and nearby fittings before cutting.
Keep cuts straight to guarantee proper seating and alignment.
Prepare the PEX end (deburring, reaming, and straightening)
After confirming the cut length and squareness, attention turns to finishing the PEX end so it seats properly in the compression nut.
Deburr the inside and outside edges with a deburring tool or file.
Ream the inner bore to remove any pinch or liner curl.
Straighten any slight ovality with gentle hand pressure or a roller.
Clean and inspect the finished end.
Install compression nut and ferrule onto PEX
Slide the compression nut onto the prepared PEX, threading it over the pipe with the threaded end facing the valve.
Then follow with the ferrule (also called an olive) oriented per the manufacturer’s direction—typically tapered side toward the valve—to guarantee proper seating.
Confirm ferrule sits straight, nut threads move freely, and no damage or contamination occurred before proceeding to the valve connection.
Insert PEX into valve tailpiece and position ferrule
Push the prepared PEX end firmly into the valve tailpiece until it bottoms out, ensuring the pipe passes fully through the ferrule and the compression nut threads are close to the valve body.
Verify ferrule seating so its beveled side faces the valve and the PEX remains straight without kinks.
Hold alignment, maintaining consistent insertion depth before proceeding to nut engagement.
Tighten the compression nut correctly (torque guidance and turn counts)
Begin tightening the compression nut by hand until it is snug against the ferrule.
Then use a wrench to complete the connection with controlled turns; typically tighten an additional 1/4 to 3/4 of a turn past hand-tight for brass ferrules and up to 1 full turn for stainless or harder ferrules, or follow the valve manufacturer’s specified torque if provided.
Use a second wrench to hold the valve body steady.
Test for leaks and pressure-test procedure
After tightening the compression nut, the installer visually inspects the joint and then performs a controlled pressure test to confirm a watertight seal.
The installer pressurizes the line to recommended PSI, watches gauges for stability, and examines all connections for drips.
If pressure holds and no leaks appear after the specified dwell time, the joint passes; otherwise, depressurize and recheck fitting alignment and compression.
Final adjustments and securing line
With the integrity of the connection verified, the installer makes final adjustments to align the PEX run and secures the line to prevent movement and strain on the compression fitting.
He trims excess slack, positions supports at recommended intervals, and uses appropriate clamps or straps without overtightening.
The installer checks for proper bend radius, clears obstructions, and confirms the assembly remains accessible for future maintenance.
Alternative Connection Methods and When to Use Them
The article next compares common PEX adapters—crimp, clamp/crimp, and push-fit—with traditional compression connections to clarify suitable applications.
It outlines practical pros and cons such as installation speed, tool requirements, reliability, and suitability for repairs or permanent installs.
Readers are guided on when an alternative adapter may be preferable to a compression fitting based on access, skill level, and long-term performance.
Using PEX adapters (crimp, clamp/crimp, push-fit) versus compression
Consideration of PEX adapters—crimp, clamp/crimp, and push-fit—versus compression fittings centers on compatibility, tool requirements, and long-term reliability.
Crimp and clamp need rings and crimpers or stainless clamps; push-fit requires no special tools and offers quick installation.
Compression suits alterations to valve threads without PEX-specific fittings.
Choice depends on access, available tools, and desired permanence, not discussed here.
Pros and cons comparison of compression fittings and alternatives
A clear comparison of compression fittings and alternative PEX connection methods highlights trade-offs in durability, installation complexity, cost, and suitability for different situations. Compression is durable and tool-light but bulkier and pricier; crimp/clamp is economical yet tool-dependent; push-fit is fastest but costlier; expansion is reliable for permanent installs.
| Method | Key trade-off |
|---|---|
| Compression | Durable, bulkier |
| Crimp/Clamp | Economical, tool-needed |
| Push-fit | Fast, higher cost |
| Expansion | Permanent, specialized tools |
Troubleshooting Common Problems
Common issues when connecting PEX to a compression valve include leaks at the compression joint, PEX pulling out of the fitting, and cross-threaded or damaged valve threads.
Each problem has specific fixes—replacement or reseating of ferrules and nuts, using proper insertion depths and support for PEX, and repairing or replacing compromised valves.
Attention to techniques for working in tight spaces and hard-to-reach valves can prevent damage and simplify repairs.
Leaks at the compression joint causes and fixes
Leaks at a compression joint typically stem from improper seating, damaged components, or incorrect tightening.
Common causes include misaligned ferrules, scratched or deformed valve seats, and insufficient or excessive torque.
Fixes involve cutting and re-seating the PEX, replacing bent ferrules or worn olives, cleaning mating surfaces, and tightening to manufacturer torque specs.
Pressure-test after repair to confirm leak-free performance.
PEX pulling out of fitting solutions
When PEX pulls out of a compression fitting, the connection has typically failed due to incorrect installation, incompatible components, or damaged tubing.
Diagnosing whether the tubing slipped because the ferrule was misaligned, the pipe was undersized or over-expanded, or the fitting’s grab ring or insert is missing guides the corrective action.
Correct by cutting back to undamaged PEX, deburring, reinstalling proper insert/ferrule, and retightening to manufacturer torque.
Cross-threading or damaged valve threads repair options
Inspect the valve threads carefully to determine whether cross-threading, stripped threads, or burrs are present, since the appropriate repair—rethreading, using an insert, replacing the valve, or switching to a compression-to-shear-off adapter—depends on the damage extent and the valve material.
Light burrs can be removed with a file; minor cross-threads may be chased with a die.
Severe stripping often requires valve replacement or threaded insert installation.
Dealing with hard-to-reach valves and limited space
Because access is often limited behind cabinets, appliances, or tight joist bays, working with hard-to-reach valves requires planning and the right tools to avoid damaging fittings or creating leaks.
Use right-angle adapters, flexible PEX, offset compression fittings, and low-profile wrenches.
Support piping, mark alignments, and test under low pressure first.
If inaccessible, consider relocating the valve or cutting access panels for future service.
Preventive Tips and Best Practices
To guarantee long-term, leak-free performance, regular attention to installation details and material compatibility is required.
Proper support, the use of expansion loops where needed, and consideration of thermal movement reduce stress on compression fittings.
A seasonal maintenance and inspection checklist helps catch potential issues early and preserves system reliability.
Ensuring long-term leak-free performance
Maintain consistent installation habits and routine checks to preserve a leak-free connection between PEX pipe and a compression valve.
Inspect fittings periodically for corrosion, movement, or moisture.
Verify compression nut torque and ferrule seating after thermal cycles.
Replace damaged ferrules, degraded tubing, or aged valves promptly.
Use quality components and document installation details to simplify future maintenance and timely troubleshooting.
Proper support, expansion loops, and thermal considerations
When exposed to temperature changes, PEX runs require deliberate support placement and planned expansion loops to prevent stress on compression joints and valves.
Support at regular intervals prevents sagging; secure within 12–18 inches of fittings.
Incorporate calculated expansion loops or offsets near long runs and near fixed points.
Allow for thermal movement, avoid overtight clamping, and prevent contact with abrasive or hot surfaces.
Seasonal maintenance and inspection checklist
Although seasonal temperature swings are predictable, regular inspections and timely maintenance are essential to preserve PEX integrity and protect compression valves from failure.
Routine checks should identify leaks, secure fittings, and confirm insulation.
Recommended actions:
- Inspect for cracks, kinks, and corrosion at valves.
- Test valve operation and replace worn washers.
- Reapply insulation and verify support after extreme weather.
Cost, Time Estimates, and Materials Checklist
A concise comparison of expenses distinguishes typical DIY costs—mainly fittings, PEX tubing, and tools—from professional installation fees that include labor and overhead.
Time estimates note that individual compression connections often take 15–30 minutes for an experienced DIYer, while full projects require planning for additional cutting, testing, and potential troubleshooting.
A clear materials checklist and realistic schedule help minimize surprises and keep the job within budget and timeline.
Typical cost breakdown for DIY versus professional installation
Several factors determine whether a PEX-to-compression valve connection is tackled as a DIY project or left to a professional, with labor, materials, permit fees, and complexity of the existing plumbing layout being the primary cost drivers. Typical DIY costs favor tools and fittings; professionals add labor and warranty. Compare items succinctly:
| DIY | Professional |
|---|---|
| Fittings, tools | Labor, markup |
| Permits optional | Permits handled |
| No warranty | Warranty provided |
| Lower upfront | Higher total |
Estimated time per connection and project planning checklist
One connection typically takes 15–30 minutes for an experienced DIYer and 10–20 minutes for a plumber, with total project time scaling by the number of fittings, access difficulty, and need to shut off and drain lines.
A concise planning checklist guides efficient work:
- Gather tools, fittings, and replacement valves.
- Confirm shutoff points and drain procedure.
- Allocate buffer time for tight access or unexpected repairs.
Real-World Examples and Quick Scenarios
Common situations illustrate different approaches: replacing an angle stop with PEX to a toilet or sink typically requires a short stub of tubing and a compression fitting sized to the fixture.
Connecting PEX to a shutoff valve during a remodel often involves adapting to existing copper or threaded fittings, while new construction allows direct PEX-to-valve connections and simpler routing.
These scenarios highlight common choices in fittings, length of runs, and whether adapters or isolation valves will be needed.
Replacing an angle stop with PEX supply to a toilet or sink
When replacing an old angle stop with a PEX supply to a toilet or sink, the installer must assess valve type, pipe access, and required fittings before cutting any lines.
Remove the old stop, deburr the copper or CPVC stub, and choose either a compression-to-PEX adapter or a sweat-to-PEX connection.
Secure connections, test for leaks, and trim PEX to proper length before finalizing.
Connecting to a shutoff valve in a remodel vs. new construction
Although the core goal—creating a watertight connection between PEX and a shutoff valve—remains the same, the approach differs markedly between remodels and new construction: remodels often require adaptations to existing fittings, access constraints, and potential corrosion or nonstandard valve types, while new construction permits planned valve placement, easier access to studs or manifolds, and use of dedicated PEX-compatible shutoffs from the start.
Remodel scenarios: retrofit compression nuts, measure tight spaces, use flexible PEX or adapters.
New build: install straight PEX stops, position for access, test pressure easily.
Useful Reference Resources
The article points readers to manufacturer installation guides and specification sheets for brand-specific fittings, torque values, and approved PEX types.
It also recommends consulting local plumbing codes and national standards that govern PEX installations and compression fittings.
Together, these resources help guarantee compliant, reliable connections between PEX pipe and compression valves.
Recommended manufacturer installation guides and spec sheets
Because installation details and part tolerances vary by brand, consulting manufacturer installation guides and spec sheets is essential before connecting PEX to a compression valve.
These documents specify materials, torque, fittings, and temperature/pressure limits.
Recommended actions:
- Download current install guides from the valve and PEX manufacturers.
- Verify part numbers and dimensional tolerances.
- Follow torque and crimping specs to guarantee leak-free connections.
Code and standards resources for PEX installations
When ensuring compliant PEX installations, professionals should consult authoritative codes and standards that define acceptable materials, installation practices, and inspection criteria.
Relevant resources include the International Plumbing Code (IPC), Uniform Plumbing Code (UPC), ASTM standards (e.g., F876/F877), NSF/ANSI certifications, and local jurisdiction amendments.
Inspectors and installers should reference these documents alongside manufacturer instructions to verify compatibility, testing, and permitted fittings.
Conclusion
To sum up, the guide equips DIY plumbers with clear steps to connect PEX to a compression valve confidently and safely. Studies show that PEX use in residential plumbing rose to over 60% of new installations in recent years, underscoring its popularity and relevance. By following proper preparation, tool use, and leak-testing routines, hobbyists and pros alike can achieve reliable, long-lasting connections while avoiding common mistakes and costly callbacks.