How to Clean a Moldy Shower Head Fast: Step-by-Step Fixes That Work
To quickly clean a moldy shower head, start by shutting off the water and removing any loose debris. Soak the shower head in white vinegar to dissolve mold and mineral buildup. After soaking, scrub it with a soft brush and use a needle to clear clogged nozzles. For stubborn spots, apply diluted hydrogen peroxide or a mild bleach treatment, then rinse thoroughly. Run hot water through the shower head and dry it off. If you encounter persistent clogs or corrosion, consider disassembling the shower head for a deeper clean or think about replacing it. For more detailed instructions and tips on prevention, continue reading.
How to Remove Mold from a Shower Head Quickly and Safely
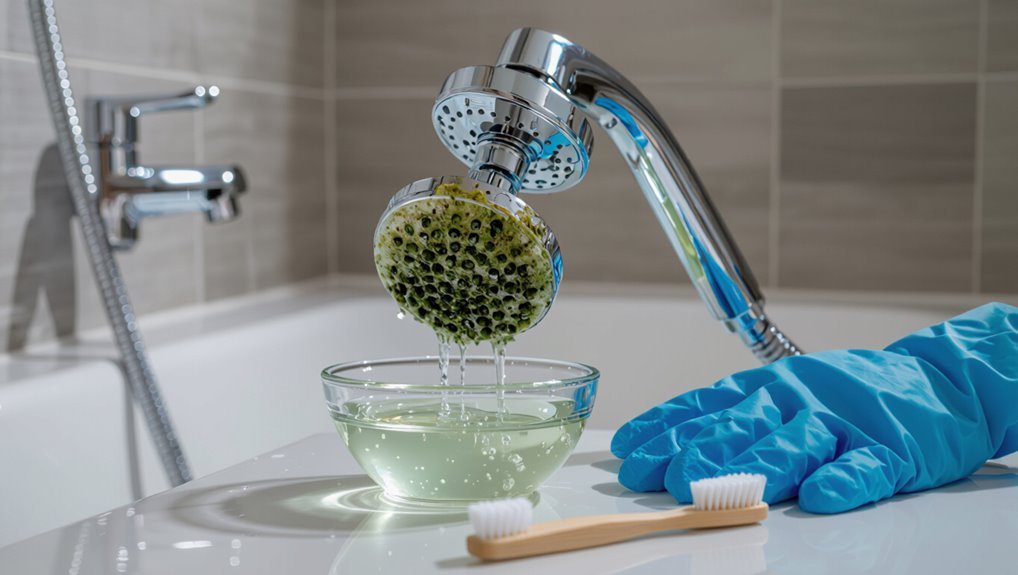
A quick, effective approach uses a vinegar soak and a soft brush to remove visible mold and restore flow within an hour.
Stronger disinfectants or replacement may be recommended if corrosion, persistent biofilm, or contaminated supply lines are present.
A professional plumber or mold remediation specialist should be consulted when mold recurs after cleaning or when structural damage or health risks are suspected.
Quick overview: What works fast for moldy shower heads
Start by turning off the water and removing loose debris from the shower head surface to speed cleaning.
Effective fast methods include soaking in white vinegar, scrubbing with a soft brush, and using diluted hydrogen peroxide for stubborn spots.
For routine maintenance, routinely run hot water and wipe dry.
These steps answer how to clean moldy shower head quickly while minimizing damage and exposure.
When to call a professional instead of DIY
When should a homeowner call a professional instead of tackling a moldy shower head themselves?
Call a pro if mold is extensive, recurring despite cleaning, or linked to leaks, damaged plumbing, or persistent odors suggesting hidden growth.
Also hire help when allergic reactions or respiratory issues occur, or when removal requires disassembly beyond the homeowner’s skill.
Professionals assess, remediate, and repair safely.
What Causes Mold to Grow in Shower Heads
Shower heads provide a warm, damp environment and organic residue that make them especially susceptible to mold and mildew growth.
Common bathroom molds such as Aspergillus, Penicillium, and Cladosporium frequently colonize these fixtures.
If left untreated, mold can pose respiratory health risks and impair plumbing by clogging nozzles and accelerating corrosion.
Why shower heads are prone to mold and mildew
Because they sit in a warm, humid environment with frequent water exposure and limited airflow, shower heads provide ideal conditions for mold and mildew to establish.
Mineral deposits, soap residue and organic debris trap moisture and feed spores. Low light and intermittent drying prevent eradication.
Porous seals, internal cavities and neglected maintenance further encourage biofilm formation and persistent fungal growth on and inside fixtures.
Common types of mold found in bathrooms
A handful of fungal species and common microbes are responsible for most bathroom mold issues.
Black mold (Cladosporium, Stachybotrys) and dark yeasts colonize damp grout and fixtures.
Aspergillus and Penicillium appear as powdery or greenish spots.
Bacteria and biofilms also contribute, trapping minerals and organic debris on shower heads, encouraging persistent colonies that thrive in warm, wet conditions.
Health and plumbing risks of ignoring mold
Those common molds and biofilms pose more than an aesthetic problem; left unchecked, they create tangible health and plumbing risks.
Respiratory irritation, allergic reactions, and infection risks rise for vulnerable occupants. Biofilms harbor bacteria, reducing water quality.
Mineral- and slime-clogging accelerates corrosion, restricts flow, and damages seals and valves.
Early removal prevents health issues and costly repairs, preserving fixture lifespan and water safety.
Tools and Supplies You’ll Need
A selection of household cleaners—white vinegar, diluted bleach, baking soda, and hydrogen peroxide—provides effective options for killing mold depending on surface and ventilation.
Basic tools and protective gear such as a plastic bag and rubber bands for soak treatments, an old toothbrush, a needle or pin for nozzle clogs, gloves, and a mask will make the job safer and more thorough.
For heavy mineral buildup or persistent mold that resists these methods, consider using a commercial descaler or mold cleaner following the manufacturer’s safety instructions.
Household ingredients that kill mold (vinegar, bleach, baking soda, hydrogen peroxide)
Identify common household ingredients that effectively remove mold: white distilled vinegar, household bleach, baking soda, and hydrogen peroxide.
Vinegar (undiluted) kills many molds; bleach disinfects nonporous surfaces but must be diluted and ventilated.
Baking soda scrubs and deodorizes when mixed with water; hydrogen peroxide (3%) is an effective antifungal alternative.
Use appropriate concentrations and avoid mixing chemicals.
Tools and equipment (plastic bag, rubber bands, old toothbrush, needle/pin, gloves, mask)
After selecting an appropriate household mold remover—vinegar, bleach, baking soda solution, or 3% hydrogen peroxide—the next step is gathering the right tools and protective gear.
A clear plastic bag and rubber bands create a soak chamber; an old toothbrush and needle/pin clear nozzles; disposable gloves and a mask protect skin and lungs.
Keep paper towels and a small container for mixing solutions.
When to use commercial descalers or mold cleaners
Consider commercial descalers or mold cleaners when household remedies fail, the buildup is extensive, or visible mold returns quickly after treatment.
Choose EPA-registered mold products or descalers formulated for metal/plastic shower heads. Follow label directions, use protective gear, guarantee ventilation, and test on a small area.
Reserve stronger chemicals for persistent infestations or mineral deposits beyond household cleaners’ capacity.
Fast Step-by-Step Methods to Clean a Moldy Shower Head
A concise set of quick, practical methods helps address mold on a shower head depending on severity and materials.
Consider these options before choosing the most suitable approach:
- Vinegar soak (fast and chemical-free)
- Bleach or hydrogen peroxide spot treatment (for heavy mold)
- Remove and deep-clean the shower head (best for stubborn buildup)
- Use a descaling product or commercial mold cleaner
Each method has simple steps and safety notes to follow for effective results.
Method 1 Vinegar soak (fast and chemical-free)
The vinegar soak method begins by mixing a mild vinegar solution to loosen mineral deposits and mold.
A bag filled with the solution is secured over the shower head to allow thorough soaking.
After soaking, the head is scrubbed, rinsed, and tested to confirm normal spray function.
Step 1: Prepare the vinegar solution
Mix white distilled vinegar and water in a container to create a mildly acidic soak that will dissolve mold and mineral deposits without harsh chemicals.
Use a 1:1 ratio for general buildup or undiluted vinegar for tougher stains.
Pour enough solution to fully submerge affected components.
Confirm the container is clean and nonreactive, and ventilate the area briefly before proceeding.
Step 2: Soak the shower head using a bag and secure it
Place the prepared vinegar solution into a sealable plastic bag, then slip the bag over the shower head so the nozzles are fully submerged.
Secure the bag with a rubber band or twist tie around the shower arm to prevent leaks and movement.
Confirm the bag hangs without stretching, leaving time for vinegar to dissolve mineral buildup and mold safely before proceeding to the next step.
Step 3: Scrub, rinse, and test spray
After removing the vinegar bag, a firm but gentle scrubbing of the nozzles and faceplate dislodges softened mineral deposits and visible mold.
Use an old toothbrush or soft-bristled brush, targeting crevices. Rinse thoroughly with warm water, flushing loosened debris.
Reattach the shower head, run hot water for one to two minutes, and inspect spray pattern.
Repeat scrubbing if streams remain uneven.
Method 2 Bleach or hydrogen peroxide spot treatment (for heavy mold)
For stubborn, heavy mold, a targeted spot treatment with diluted bleach or hydrogen peroxide can be more effective than a simple vinegar soak.
First, the person should follow safety precautions and mix the solution to the recommended dilution ratios before use.
Next, they should apply the solution, allow contact time while agitating moldy areas, then rinse thoroughly and neutralize any residue.
Step 1: Safety precautions and dilution ratios
Before treating heavy mold with bleach or hydrogen peroxide, the user should prioritize personal and household safety by using gloves, eye protection, and adequate ventilation; a mask rated for chemical vapors is recommended if ventilation is limited.
Use 1 part household bleach to 10 parts water for spot treatment, or 3% hydrogen peroxide undiluted for porous areas.
Keep children and pets away; label and store solutions safely.
Step 2: Apply solution, wait, and agitate
With safety measures in place and the correct dilution prepared, the next step is to apply the chosen solution directly to the mold-affected areas of the shower head.
Saturate crevices and nozzle faces, allow dwell time per product instructions (typically 5–15 minutes), then agitate gently with a soft brush or toothbrush to dislodge mold and deposits without scratching the finish.
Step 3: Rinse thoroughly and neutralize
Flush the shower head and surrounding fittings thoroughly to remove loosened mold, cleaning solution residue, and dislodged debris.
Continue rinsing until water runs clear.
Neutralize remaining bleach with a mild vinegar rinse or, if hydrogen peroxide was used, rinse with plain water.
Wipe external surfaces with a clean cloth.
Allow components to air dry completely before reassembly and resuming normal use.
Method 3 Remove and deep-clean the shower head (best for stubborn buildup)
For stubborn mold and mineral buildup, the shower head should be removed for a thorough cleaning.
First, the fixture is safely unscrewed and disconnected; next, parts are soaked and internal nozzles scrubbed to dislodge residue.
Finally, the unit is reassembled and tested for leaks before regular use.
Step 1: How to safely remove the shower head
Before attempting deep cleaning, the shower head should be removed to allow full access to internal chambers and stubborn deposits.
The person turns off water, covers the drain, and protects fittings with a cloth. Using an adjustable wrench with padding, they loosen the swivel joint or unscrew the head by hand.
They note thread direction and keep plumber’s tape and small parts for reassembly.
Step 2: Soak parts and clean internal nozzles
Soak the removed parts in a descaling solution and then clear each nozzle to remove mold and mineral deposits.
Allow 30–60 minutes for vinegar or commercial descaler to dissolve buildup.
Use a soft brush, toothpick, or compressed air to dislodge softened deposits from each hole.
Rinse thoroughly with water, inspect for remaining clogs, and repeat soaking if necessary until all nozzles flow freely.
Step 3: Reassemble and check for leaks
Reassemble the shower head by reversing the disassembly steps, ensuring each gasket and swivel joint seats correctly and any Teflon tape on threaded connections remains intact.
Tighten fittings hand‑firm, then slightly more with a wrench if needed, avoiding overtightening.
Run water to flush debris, inspect for drips at joints, and retighten or reseat seals if leaks appear.
Confirm even spray pattern before finishing.
Method 4 Use a descaling product or commercial mold cleaner
Method 4 recommends selecting a descaler or commercial mold cleaner suited to the shower head material and labeled safe for plumbing fixtures.
The procedure emphasizes following manufacturer safety instructions during application, including ventilation, protective gloves, and proper contact time.
After treatment, the product must be thoroughly rinsed away and the shower head inspected to confirm mold removal and that no damage occurred.
Step 1: Choosing the right product
One clear choice is a descaling product or a commercial mold cleaner designed for bathroom fixtures, which targets both mineral buildup and mold without harsh DIY mixtures.
Select a product labeled safe for the shower head material (chrome, brass, plastic).
Prefer EPA-registered mold cleaners or citric/oxalic acid descalers.
Check directions, concentration, and compatibility with seals and finishes before proceeding.
Step 2: Application and safety steps
Begin by ensuring the bathroom is well-ventilated and that protective gear—gloves, eye protection, and, if recommended by the product label, a mask—is worn; this minimizes inhalation and skin contact with fumes or residues.
Apply the descaler or mold cleaner per label directions, targeting affected areas and crevices. Allow prescribed dwell time, avoid mixing chemicals, and keep children and pets clear until treatment completes.
Step 3: Rinse and verify results
After the cleaner’s dwell time has elapsed and any fumes have dissipated, the shower head should be thoroughly rinsed to remove residue and loosened deposits.
Water pressure is used to flush passages; a soft brush or toothpick clears stubborn ports.
Inspect for remaining stains or odor. If mold persists, repeat treatment or replace the head.
Dry surfaces to prevent recurrence.
How to Clean Specific Shower Head Types
Different shower head designs and materials require tailored cleaning approaches to remove mold effectively.
The guide will cover fixed wall-mounted units, handheld heads and hoses, larger rain-style fixtures, and the distinct care needed for plastic versus metal nozzles.
Practical tips will focus on safe disassembly, appropriate cleaners, and reassembly to prevent damage and recurrence.
Fixed wall-mounted shower heads
Fixed wall-mounted shower heads are common and generally straightforward to clean because they stay attached to the plumbing and typically have accessible spray nozzles and an exposed faceplate.
To remove mold, turn off water, scrub faceplate with a brush and diluted bleach or vinegar solution, rinse thoroughly, and soak removable parts if possible.
Inspect seals and reattach securely.
Handheld shower heads and hoses
Handheld shower heads and their flexible hoses require attention to both the spray face and the interior of the hose, since mold can form in crevices and in standing water trapped near connections.
Detach head, soak spray plate in vinegar, scrub nozzles with a soft brush, flush hose with vinegar solution, rinse thoroughly, and allow both parts to air-dry before reassembling to prevent recurrence.
Rain shower heads and large fixtures
Rain shower heads and other large overhead fixtures require a gentler, more methodical approach because their size and mounting make full removal impractical in many bathrooms.
Treat them by soaking a vinegar-soaked cloth or plastic bag over the face, securing it with tape, and allowing time to loosen mineral deposits and mold.
Rinse thoroughly, scrub accessible nozzles gently, and dry to prevent recurrence.
Plastic vs. metal nozzles: different care considerations
Material matters when treating nozzles: plastic and metal heads respond differently to cleaning agents and techniques.
Plastic nozzles tolerate mild vinegar solutions and soft brushes but can warp with bleach, harsh acids or high heat.
Metal nozzles, especially chrome or brass, resist vinegar but need gentle descaling to protect plating; avoid abrasive pads.
Rinse thoroughly and dry both types to prevent corrosion or residue.
Troubleshooting Common Problems
If mold returns after cleaning, the next steps include repeating treatment, inspecting for hidden leaks, and considering replacement if contamination persists.
Clogged nozzles and low water pressure can often be resolved with targeted soaking, mechanical clearing, or cartridge maintenance.
When fixtures show permanent discoloration or corrosion, cleaning may not restore them and replacement should be evaluated.
Persistent mold after cleaning: next steps
When mold returns after an initial cleaning, the problem often stems from missed buildup, ineffective cleaning methods, or lingering moisture that encourages regrowth.
Reinspect the head, disassemble if possible, and target hidden rubber seals and internal channels with a stiff brush and vinegar soak.
Rinse thoroughly, dry components, and restore improved ventilation or a routine wipe-down to prevent recurrence.
Clogged nozzles and low water pressure solutions
Evaluating clogged nozzles and low water pressure begins with observing flow patterns and testing water output from the shower head.
Remove the head, inspect nozzles for mineral buildup, and soak in vinegar or descaling solution. Use a toothpick or soft brush to clear orifices, flush lines, and reassemble.
If pressure remains low, check supply valves and in-line filters before replacing the fixture.
Discolored or corroded fixtures: when cleaning won’t help
Evaluating a shower head that shows persistent discoloration or visible corrosion requires more than routine cleaning: surface rust, pitting, or greenish verdigris often indicate material degradation or chemical damage that compromises function and safety.
In such cases, replacement is recommended. Inspect fittings and seals; if metal integrity is compromised or leaks persist after descaling, install a new, corrosion-resistant fixture and discard the damaged unit.
Prevent Mold from Returning
Preventing mold from returning requires simple daily and weekly habits such as wiping the shower head and running water to clear standing moisture.
Improvements to ventilation and, if possible, upgrading fixtures or adding exhaust fans reduce humidity that encourages growth.
A regular cleaning schedule—monthly deep cleans with a mild descaler and quarterly inspections—keeps buildup and recurrence at bay.
Daily and weekly habits to reduce mold growth
Because mold thrives in damp, poorly ventilated environments, maintaining consistent daily and weekly cleaning and ventilation habits is essential to keep a shower head—and the surrounding shower area—dry and mold-free.
- Wipe down shower walls and fixtures after use to remove moisture.
- Use a squeegee on glass and tiles daily.
- Empty and dry shower caddies weekly; launder loofahs.
- Run hot water briefly after cleaning to flush residues.
Installation and ventilation improvements that help
Several targeted upgrades to shower installation and ventilation can greatly reduce the likelihood of mold returning.
Install a properly sized exhaust fan vented outdoors, add a humidity-sensing switch or timer, and guarantee adequate ceiling insulation to prevent condensation.
Use mold-resistant drywall and grout, slope shower floors for drainage, and keep seams sealed with mildew-resistant caulk to minimize persistent moisture pockets.
Recommended cleaning schedule for long-term maintenance
A simple, consistent cleaning schedule keeps mold from reestablishing itself in a shower.
Weekly rinses and wiping down after use prevent residue buildup.
Monthly deep cleans—soaking the head in vinegar or descaler, scrubbing nozzles, and inspecting seals—address hidden growth.
Quarterly checks of ventilation, grout, and caulking catch problems early.
Log maintenance dates to guarantee habit and track effectiveness.
Safety and Environmental Considerations
The author notes that proper personal protective equipment and good ventilation are essential when using strong cleaners on a moldy shower head.
They warn against mixing chemicals—especially bleach with acids or ammonia—to prevent dangerous gases.
The piece also suggests eco-friendly cleaning alternatives and proper disposal of leftover solutions to minimize environmental harm.
Proper PPE and ventilation when using strong cleaners
Wear appropriate personal protective equipment and guarantee adequate ventilation when using strong cleaners to remove mold from a shower head.
Gloves, eye protection, and a respirator rated for chemical vapors minimize exposure. Open windows, run exhaust fans, and allow fresh-air circulation.
Follow product label instructions, dispose of contaminated materials safely, and avoid confined spaces to reduce inhalation and skin-contact risks.
Mixing chemicals to avoid (what not to combine)
After PPE and ventilation are in place, attention must turn to which household chemicals must never be mixed.
Chlorine bleach must not contact ammonia or acidic cleaners—mixing creates toxic chloramine or chlorine gas.
Do not combine bleach with vinegar, toilet bowl cleaners, or hydrogen peroxide.
Avoid mixing multiple commercial disinfectants; unintended reactions can emit harmful fumes or reduce effectiveness, so use one product per task.
Eco-friendly alternatives and disposal tips
Consider eco-friendly cleaners and proper disposal to minimize environmental harm and household exposure.
Use vinegar, baking soda, or biodegradable castile soap for soaking and scrubbing; avoid chlorine where runoff enters drains.
Rinse parts thoroughly and collect contaminated residues for sealed disposal.
Recycle metal components per local rules; wrap heavily contaminated filters or cartridges before discarding to prevent mold spread during transport.
Comparison of Common Cleaning Methods
Different cleaning agents offer trade-offs in effectiveness, speed, cost, and safety when treating a moldy shower head. A concise comparison of vinegar, bleach, and commercial cleaners helps the reader choose based on priorities. The following quick table frames the emotional stakes of those choices:
| Choice | Impression |
|---|---|
| Vinegar | Frugal and gentle |
| Bleach | Powerful but harsh |
| Commercial cleaner | Convenient and neutral |
| No treatment | Risky and regret-inducing |
Effectiveness, speed, cost, and safety of vinegar vs bleach vs commercial cleaners
Several common approaches—white vinegar soaking, diluted bleach rinses, and commercial mold cleaners—differ markedly in effectiveness, speed, cost, and safety.
Vinegar is inexpensive, safe for many finishes, slow but effective on light biofilm.
Bleach kills mold quickly but can corrode metal, irritate lungs, and requires ventilation.
Commercial cleaners balance speed and cost; efficacy and hazards vary by formulation—read labels and follow PPE recommendations.
Quick Reference: Fast Cleaning Checklist
A concise checklist helps guide quick action before committing to a full shower-head overhaul.
- One-minute safety and prep steps (ventilate, remove fixtures, gather supplies)
- 10–15 minute fast-clean routine (vinegar soak, scrub, rinse)
- Signs that indicate it’s time to schedule a deeper clean
The list above gives a compact roadmap for immediate cleaning and when to plan more thorough maintenance.
One-minute actions before you start
Before starting, gather essentials and guarantee safety: gloves, eye protection, a small container or plastic bag, white vinegar or a mild descaling solution, an old toothbrush, and a towel.
Turn off water at the valve or faucet, place the container or bag under the head, loosen fittings if needed, open a window or run exhaust, and remove soap or items that obstruct access.
10 to 15 minute fast-clean routine
With tools and safety measures in place, proceed to the fast-clean routine designed to restore flow in about 10–15 minutes.
Remove the head if detachable. Soak in vinegar or a descaling solution for 8–10 minutes.
Scrub nozzles with a toothbrush, poke clogged holes gently, rinse thoroughly, and reattach.
Run hot water to flush debris and confirm improved spray pattern before finishing.
When to schedule a deeper clean
How often should a deeper clean be scheduled depends on water hardness, frequency of use, and visible buildup; if mineral deposits return within a month, spray patterns degrade, or mold appears along the rim or inside the head, plan a thorough descaling and disassembly.
A deeper clean is also warranted after persistent odors, reduced flow despite quick fixes, or following renovation dust and plumbing work that introduces debris.
Conclusion
Cleaning a moldy shower head needn’t become a long, messy chore. With simple household supplies and a few focused steps—soaking, scrubbing, rinsing—mold can be removed quickly and safely, restoring water flow and hygiene. Even skeptics worried about stubborn buildup will picture lime and grime dissolving as vinegar fizzes away residues, revealing clean metal or chrome beneath. Regular rinsing and occasional vinegar soaks keep mold from returning, saving time and worry.