
How to Reset the Thermostat on a Water Heater: Step-by-Step Guide for Safe DIY Fixes
To reset the thermostat on a water heater, follow these steps: For electric models, turn off the power at the breaker, remove the access panel and insulation, press the high-limit reset button, adjust the thermostat dial if necessary, then restore power and test for hot water. For gas models, turn off the gas and pilot light, follow the manufacturer’s instructions to cycle the control valve, safely relight the pilot, and check if the heater operates correctly. Continue reading for detailed step-by-step procedures, potential risks, and guidance on when to consult a professional.
What a Water Heater Thermostat Does and Why Resetting May Be Necessary
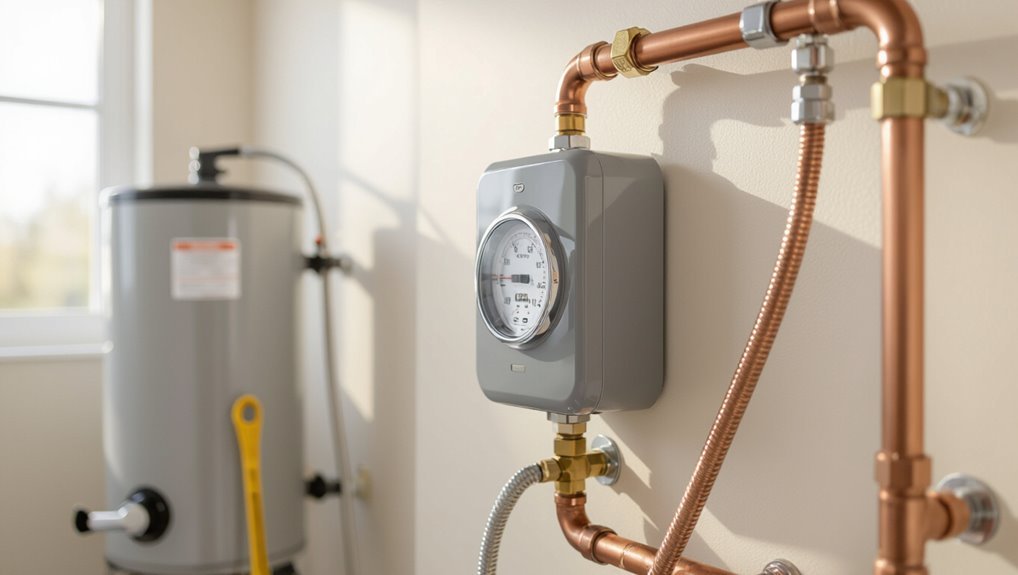
The thermostat regulates water temperature by controlling the heating elements in electric models and the gas valve and pilot in gas units.
Common signs that it may need resetting include inconsistent water temperature, lack of hot water, or frequent short cycling.
Resetting is appropriate for simple faults and trips, but persistent problems, electrical issues, or gas-related faults warrant a professional inspection.
Purpose and function of the thermostat in electric and gas water heaters
A thermostat regulates a water heater’s temperature by sensing the tank’s heat and cycling the heating element or burner to maintain a set point.
In electric units, it switches power to upper and lower elements; in gas models, it modulates the gas valve and pilot operation.
Understanding these functions helps users follow guidance on how to reset the thermostat on a water heater safely and effectively.
Common signs that indicate the thermostat may need resetting
When water from taps alternates between scalding and lukewarm, fails to heat at all, or heats inconsistently despite correct thermostat settings, these symptoms often point to thermostat issues rather than plumbing or element failures.
Additional indicators include frequent cycling, tripped high-limit switches, visible corrosion or burned wiring at the thermostat, and temperature readouts that don’t match set points.
Monitor patterns before acting.
When resetting is appropriate versus when to call a professional
If patterns of overheating, no heat, or erratic cycling point to the thermostat, homeowners can often try a reset as a first step. Simple electronic glitches, temporary sensor faults, or tripped high-limit switches are common faults that a reset may clear.
If problems persist, involve unusual noises, leaks, burnt smells, repeated trips, or age-related component failure, a licensed technician should inspect and repair.
Safety Precautions Before You Start
Before attempting any thermostat reset, the technician should assemble required safety gear (gloves, eye protection) and insulated tools.
Power and fuel must be shut off—disconnect circuit breakers for electric units or close the gas valve and follow manufacturer shutdown steps—and lockout/tagout procedures should be applied with verification of zero power before proceeding.
The technician should also check stored water temperature and acknowledge scalding risks, relieving pressure or cooling the tank if necessary.
Required safety gear and tools
A small set of personal protective equipment and basic tools is essential to safely reset a water heater thermostat.
Recommended PPE: safety glasses, insulated gloves, and closed-toe shoes.
Tools: multimeter, screwdriver set (flat and Phillips), nut driver, and flashlight.
Also include a non-contact voltage tester, adjustable wrench, and a small rag.
Keep a first-aid kit nearby for emergencies.
How to turn off power and fuel safely for electric and gas units
With PPE and tools ready, power and fuel shutdown procedures must be completed to eliminate shock, burn, and explosion hazards.
For electric units, switch off the circuit breaker at the panel and confirm the breaker position.
For gas units, shut the gas supply valve to the water heater and close the appliance service valve.
Observe manufacturer instructions and local codes before proceeding.
Lockout/tagout and verification of zero power
Implement lockout/tagout procedures and verify zero energy before any work begins to guarantee the water heater cannot be energized accidentally.
The technician applies approved locks and tags to breakers or fuel controls, documents actions, and notifies occupants.
Use a calibrated voltage tester to confirm absence of electrical potential at thermostat terminals and wiring.
Only proceed after written authorization and verified zero power.
Water temperature and scalding risk considerations
Because residential water heaters can deliver temperatures that cause severe scalding within seconds, technicians must assess and control water temperature risks before any work begins.
Verify water temperature at taps, drain or isolate hot supply, and allow cooling time. Use insulated gloves and eye protection.
Post warning signs and inform occupants. Consider lowering thermostat temporarily and testing mixed output to prevent accidental burns.
Identifying Your Water Heater Type and Thermostat Location
The guide outlines how electric, gas, and tankless water heaters differ in thermostat placement and controls.
It explains where thermostats or temperature sensors are typically found on common tank and tankless models and how to spot multiple thermostats on electric units.
It also advises checking the thermostat model number and the unit’s wiring diagram before proceeding.
Differences between electric, gas, and tankless units
When identifying a water heater type and locating its thermostat, one should first note visible features: electric models typically have two access panels and an external power disconnect.
Gas units display a burner access door and venting at the top, and tankless systems are compact wall-mounted units with inlet/outlet piping and an electronic control module.
Electric thermostats sit behind panels; gas units use a control near the burner; tankless controls are digital.
Locating the thermostat(s) on common models
Identifying thermostat locations begins with recognizing the unit type: electric tanks conceal thermostats behind two removable side panels (usually mid- and upper-level elements).
Gas water heaters have an internal gas control valve and thermostat assembly near the burner access at the bottom.
Tankless units place electronic temperature controls on the exterior control panel.
Hybrid/heat-pump models locate controls on the unit’s access panel or top-mounted service area.
Reading the thermostat model and wiring diagram
Reading the thermostat model and wiring diagram starts with locating the manufacturer label and schematic printed on or inside the access panel. This information reveals component part numbers, voltage, and wiring color codes required for safe adjustment or replacement.
Photographs help record wire positions. Match the printed model number to the thermostat faceplate and wiring diagram to verify element locations, jumper settings, and correct terminal identification before servicing.
Step-by-Step Reset Procedure for Electric Water Heaters
A concise checklist of tools and safety items precedes the reset steps to guarantee readiness.
The procedure then instructs cutting power at the breaker, verifying zero voltage, and removing the access panel and insulation with care.
Finally, the thermostat and high-limit switch are located and inspected before pressing the high-limit reset button and adjusting the thermostat as needed.
Tools and materials checklist
One should gather a compact set of tools and safety gear before attempting the thermostat reset to guarantee the job proceeds smoothly and safely.
- Multimeter, insulated screwdrivers, needle-nose pliers.
- Replacement thermostat or elements, electrical tape, wire connectors.
- Safety gloves, safety glasses, a non-contact voltage tester and flashlight.
Step 1: Cut power at the breaker and confirm
With tools and safety gear on hand, the next move is to cut power at the breaker and verify the circuit is dead before touching the heater.
Locate the correct breaker, switch it off, and lock or tag if available.
Use a non-contact voltage tester on heater terminals and wires; confirm no voltage before proceeding.
If uncertainty remains, consult a professional.
Step 2: Remove access panel and insulation safely
Begin by removing the outer access panel and any surrounding insulation to expose the thermostat and heating element; this must be done carefully to avoid disturbing wiring or damaging the insulation.
Use insulated gloves, a screwdriver or nut driver, and store fasteners in a small container.
Peel back insulation gently, folding it aside without tearing, and set the panel and insulation in a clean, dry place.
Step 4: Locate and inspect thermostat and high-limit switch
A rectangular metal thermostat cover and a small red button for the high-limit switch are typically mounted on the side of the tank. The technician should first identify these components by locating the access openings exposed in the previous step.
Next, visually inspect covers for corrosion, loose screws, and wiring condition. Verify labels, note thermostat model and switch orientation before proceeding.
Step 5: Resetting the high-limit (reset) button and thermostat
Proceed to confirm the power is off at the circuit breaker before touching any components; this safety check prevents electric shock while working on the thermostat and high-limit switch.
Press the red high-limit reset button firmly until it clicks. If accessible, adjust the thermostat dial to the recommended setting.
Inspect for damaged wiring or burn marks; replace components if the reset won’t hold.
Step 6: Reassemble, restore power, and test water temperature
With the thermostat cover and access panels replaced, the technician restores power at the breaker and checks that indicator lights or digital displays return to normal.
The technician runs hot water at a nearby tap, verifies steady temperature after several minutes, monitors for unusual noises or leaks, and rechecks thermostat settings.
If temperatures remain incorrect, further diagnostics or professional service is recommended.
Step-by-Step Reset Procedure for Gas Water Heaters
A concise checklist of tools and materials should be prepared before beginning the reset.
The procedure then proceeds: turn off the gas and pilot, locate the gas control valve and thermostat settings, and reset or cycle the gas control and pilot assembly.
Finally, relight the pilot following safety steps and verify that the burner and thermostat operate correctly.
Tools and materials checklist
Before beginning the reset, gather the essential tools and materials so the task can be completed safely and efficiently: a flathead and Phillips screwdriver, insulated gloves, a non-contact voltage tester, a flashlight, replacement thermostat or reset button if specified by the manufacturer, and the water heater’s manual for reference.
- Personal protective equipment and basic hand tools.
- Electrical testing device and light source.
- Manufacturer-specified replacement parts and documentation.
Step 1: Turn off gas supply and pilot
Shut off the gas supply and extinguish the pilot light to eliminate ignition sources before any thermostat work begins.
Next, confirm the gas valve is fully closed and verify no scent of gas. Allow the unit to cool for several minutes.
Use a spark-free flashlight if inspection is needed. Record the pilot’s status before proceeding to prevent ignition errors during later steps.
Step 2: Locate gas control valve and thermostat settings
With the gas supply closed and the pilot confirmed off, the technician locates the gas control valve assembly on the front of the water heater—usually near the lower access panel—and inspects the thermostat dial and temperature markings.
They verify model-specific labels, note current setpoint, and check for visible damage, corrosion, or loose knobs.
Photographs or notes record original settings before any adjustments.
Step 3: Reset or cycle the gas control and pilot assembly
Proceed to the gas control and pilot assembly to perform a controlled reset or cycle of the system.
Turn the control knob to OFF, wait five minutes for gas to clear, then move it to PILOT and press down if required to reset the safety valve.
Release, then rotate to ON.
Observe indicator positions and listen for normal clicks; do not attempt ignition here.
Step 4: Relight pilot safely and verify operation
Relight the pilot following the manufacturer’s instructions and local codes, using the control knob set to PILOT while holding the reset button or pilot button as required to establish a steady flame.
Once lit, release the button and turn the control to ON; listen for steady burner ignition and inspect the pilot flame for correct size and color.
Confirm the gas valve remains closed to smell.
Step 5: Monitor for proper heating and leaks
After the pilot and main burner are operating, observe the heater for at least 30–60 minutes to confirm the tank reaches the set temperature and that cycles occur normally.
During this period, check all visible plumbing and the temperature-and-pressure relief valve for drips or wetness.
Listen for unusual noises, and feel nearby fittings for warmth or seepage.
If leaks, persistent noise, or failure to reach temperature occur, shut gas, turn off water, and call a qualified technician.
Troubleshooting If Reset Doesn’t Fix the Problem
If a thermostat reset does not restore hot water, further diagnostic checks should target heating elements, thermostat contacts, and control circuits.
Technicians can use a multimeter to test thermostats for continuity and heating elements for resistance, while inspecting for a tripped high-limit switch, failed element, or heavy sediment buildup.
Repeated tripping of the reset button often signals an underlying fault such as a shorted element, a stuck high-limit, or persistent overheating from sediment insulation.
Diagnostic checks for heating elements, thermostats, and controls
Begin systematic diagnostic checks when a simple reset fails to restore hot water; these steps determine whether the issue lies with heating elements, thermostats, or control circuits.
Inspect visible wiring and access panels for burnt connectors, corrosion, or loose terminals.
Verify power supply at breakers and reset switches.
Note abnormal noises, sediment buildup, or leaks.
Record observations to guide targeted repairs or professional referral.
How to test thermostats and heating elements with a multimeter
Proceed to testing thermostats and heating elements with a multimeter to pinpoint faults when a reset fails to restore hot water.
Disconnect power, remove access panels and insulation, and isolate wires.
Set the multimeter to continuity or resistance (ohms).
Test thermostat terminals for continuity when calling; check element resistance across both terminals and to ground for shorts.
Compare readings to manufacturer specifications.
Identifying common faults: tripped high-limit, faulty element, sediment buildup
Several likely causes should be considered when a thermostat reset does not restore hot water: a tripped high-limit cutoff, a failed heating element, or significant sediment accumulation in the tank.
Inspect the high-limit for visible trip indication, test elements for continuity and proper resistance, and check for reduced flow or banging suggesting sediment.
Document findings and proceed with targeted repairs or professional service.
When a reset button repeatedly trips underlying causes
If the reset button trips repeatedly after checking the high-limit, elements, and sediment, deeper faults are likely causing persistent shutdowns.
Possible causes include shorted heating elements, damaged thermostats, wiring faults, or grounded tanks. Corrosion, loose connections, or a failed high-limit switch can trip repeatedly.
Recommend isolating circuits, measuring resistance, inspecting grounding, and consulting a licensed electrician or plumber for repairs and replacement.
Maintenance Steps to Prevent Future Thermostat Issues
A routine maintenance plan helps prevent recurring thermostat problems and extends water heater life.
Recommended tasks include scheduled inspections, periodic tank flushing to remove sediment, and timely replacement of aging thermostats and heating elements.
Following these measures reduces failures and preserves system efficiency.
Regular inspection schedule and tasks
Because thermostat problems often develop gradually, establishing a consistent inspection schedule is essential to catch early signs of wear or malfunction.
- Visually inspect wiring, connections, and insulation monthly for corrosion or looseness.
- Test temperature accuracy and reset function quarterly, documenting deviations over time.
- Check mounting, thermostat cover, and surrounding area biannually for moisture, pests, or heat damage; schedule repairs promptly.
Flushing the tank and addressing sediment buildup
Begin by draining and flushing the tank to remove accumulated sediment that can insulate the heating element, reduce thermostat responsiveness, and accelerate wear.
Close water supply, attach hose to drain valve, open hot faucet to vent, and drain fully. Flush until clear water flows.
Inspect and clean the anode rod and sediment trap.
Refill slowly, check for leaks, and restore power.
Replacing aging thermostats and heating elements proactively
Inspect aging thermostats and heating elements regularly and replace them proactively to maintain efficiency and prevent failures.
Technicians or competent DIYers should shut power, verify compatibility, and fit modern, corrosion-resistant components.
Replacing worn thermostats and elements reduces energy waste, improves temperature stability, and avoids abrupt cold-water incidents.
Document part numbers and service dates for future maintenance scheduling and warranty claims.
Potential Risks, Common Mistakes, and How to Avoid Them
The section outlines key hazards and frequent errors to watch for when resetting a water heater thermostat.
It covers electrical risks and improper wiring, gas leaks and pilot light issues, and the danger of overheating with techniques to prevent scalding.
Practical precautions and common corrective steps are summarized to reduce injury and equipment damage.
Electrical hazards and improper wiring mistakes
Working with a water heater’s thermostat carries significant electrical hazards that can cause shock, fire, or equipment damage if wiring errors occur.
Technicians should de-energize circuits, verify power is off with a tester, and follow wiring diagrams.
Common mistakes include reversed polarity, loose connections, and incorrect jumper placement.
If uncertain, consult a licensed electrician to prevent injury and code violations.
Gas leaks and pilot light errors
Many homeowners face serious danger from gas leaks and pilot light errors, which can cause explosions, carbon monoxide poisoning, or loss of heat if left unchecked.
Technicians note common mistakes: ignoring rotten odor, DIY pilot relighting without shutoff, loose fittings, and blocked vents.
Preventive steps include immediate evacuation if smelled, shutting gas valve, ventilating, calling professionals, and installing detectors for early warning.
Overheating and scald prevention strategies
Although often overlooked, overheating and scalding from water heaters pose significant risks—especially to children, the elderly, and people with sensory impairments—because excessively hot tap water can cause deep burns within seconds.
Recommend setting thermostats to 120°F (49°C), install anti-scald mixing valves, test outlet temperatures after adjustments, avoid bypassing safety devices, and educate household members about gradual temperature changes and safe shower practices.
When to Replace Components or Hire a Professional
Visible signs like persistent temperature fluctuations, tripped reset switches, or a burnt smell suggest a faulty thermostat or heating element that may need replacement.
Decisions about DIY versus hiring a pro should weigh part costs, required tools and experience, and the complexity of the repair.
A professional inspection typically includes diagnostic testing, corrosion or wiring checks, and a clear quote for repair or replacement.
Signs that indicate thermostat or element replacement
When should a homeowner consider replacing a water heater thermostat or heating element?
Persistent temperature fluctuations, lack of hot water, tripping circuit breakers, visible corrosion or burning on components, and failed continuity tests indicate replacement.
Repeated resets or short cycling also suggest failure.
If diagnostics confirm faulty parts, replacement restores performance and safety; otherwise, consult a technician for further evaluation.
Cost and complexity considerations for DIY vs professional service
Weigh costs and complexity before deciding between DIY repairs and hiring a professional. Evaluate skill level, tools, part prices, safety risks, and time. Simple thermostat resets or element swaps may suit experienced DIYers; complex diagnostics, tank leaks, or unfamiliar wiring warrant pros.
| Factor | Consideration |
|---|---|
| Skill required | Low to high |
| Cost range | Low to moderate |
| Risk | Minimal to severe |
| Time | Short to extensive |
What to expect from a professional inspection or repair
After evaluating whether a DIY approach is appropriate, a homeowner should understand what a professional inspection or repair entails and when component replacement or hiring a technician becomes necessary.
A technician diagnoses electrical, thermostat, element, and tank issues, tests safety controls, and recommends replacement if parts fail, corrode, or safety is compromised.
Estimates and warranty considerations are provided before work proceeds.
Quick Reference: Reset Checklist and Temperature Settings
A concise reset checklist outlines the necessary steps to safely power down, access the thermostat, press the reset button, and restore power.
Recommended temperature settings—typically 120°F for most homes—are noted alongside brief energy-saving tips such as lowering settings for vacations and insulating pipes.
This quick reference helps users perform a reset correctly while maintaining efficiency and safety.
Compact step-by-step reset checklist
Follow this concise reset checklist to restore a water heater thermostat safely and set the appropriate temperature. A technician or homeowner follows steps precisely, ensuring power is off and protective measures are observed.
- Turn off power, verify with a tester, and shut water supply.
- Access thermostat, press/reset button or replace as needed.
- Restore power, confirm operation and check for leaks.
Recommended temperature settings and energy-saving tips
When restoring a thermostat, set the water heater to 120°F (49°C) for a safe balance of scald protection and energy efficiency; raising it to 140°F (60°C) may be justified for heavy demand or commercial needs but increases burn risk and standby heat loss.
Recommend insulating the tank and pipes, scheduling regular maintenance, using a timer or smart controller, and lowering vacation settings to save energy.
Common Models and Manufacturer Notes
Common manufacturers often include model-specific reset procedures and safety notes that affect thermostat access and reset steps.
Readers are advised to consult the original manual for exact instructions and torque or temperature specifications.
Manufacturer websites and large parts retailers typically host model manuals and OEM replacement parts searchable by model number.
Manufacturer-specific reset tips and manual references
Because thermostats and reset procedures vary by brand and model, consulting manufacturer guidance guarantees correct steps and preserves warranties.
- Refer to the owner’s manual for model-specific reset button location, sequence, and safety interlocks.
- Follow manufacturer torque, wiring, and temperature specifications to avoid voiding warranty.
- Contact brand technical support for ambiguous diagnostics or if reset fails; record model/serial for accurate assistance.
Where to find model manuals and replacement parts online
After consulting the owner’s manual or contacting brand support, users can locate model-specific manuals and replacement parts through several reliable online sources.
Manufacturer websites list PDFs and OEM part numbers. Third-party retailers and parts specialists stock filters, thermostats, and trim kits.
Online diagnostic forums and PDF libraries host user-contributed guides and cross-reference charts.
- Manufacturer sites
- Authorized parts dealers
- Technical forums and PDF archives
Conclusion
Like a clock needing a nudge to keep time, the water heater’s thermostat sometimes asks for a quiet reset to restore balance. After the safety checks and step-by-step adjustments—power isolated, panels open, dials and thermostats gently reset—the system should return to steady warmth. If trouble persists, calling a licensed technician prevents larger failures. This brief, careful maintenance ritual keeps hot water reliable, efficient, and safe, day after day.
