How to Install a Humidifier: Step-by-Step Guide for Every Type
How to Install a Humidifier: Step-by-Step Guide
To install a humidifier, start by selecting the right type based on your room size, noise tolerance, and plumbing access. Gather necessary tools, including a wrench, drill, tape measure, and a water line kit.
For portable units, simply place them, fill with water, and perform routine cleaning. Ultrasonic models require stable placement and occasional descaling. If you’re installing steam or HVAC-integrated models, you’ll need to connect electrical, water, and drain lines, as well as mount it in the duct or plenum, ensuring all safety checks are in place.
Once installed, calibrate the sensors and humidistat. Follow this guide for detailed step-by-step instructions and important safety notes.
What to Know Before You Install a Humidifier
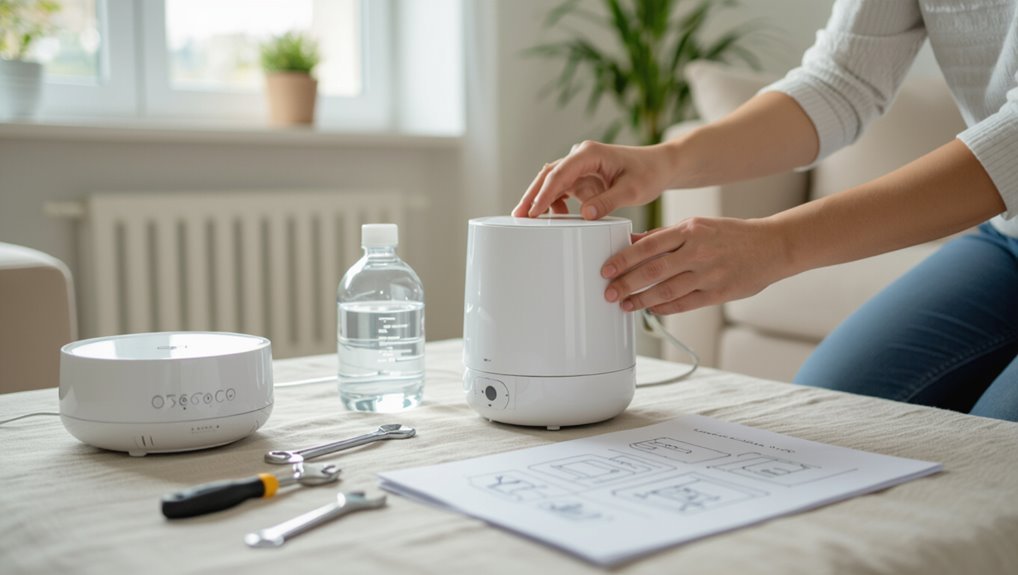
Before installing a humidifier, the reader should consider the expected benefits—improved comfort, respiratory relief, and protection for wood and plants.
They should also understand the main types (console, ultrasonic, evaporative, whole-house) and typical placement for each, plus how to match capacity to room size.
Finally, safety requirements, maintenance needs, and any relevant local building codes or permit rules must be checked.
Benefits of Installing a Humidifier at Home
Several clear benefits arise from adding a humidifier to a home: improved respiratory comfort, reduced nasal and throat irritation, preservation of wooden furniture and musical instruments, and decreased static electricity.
Proper humidity can ease allergy symptoms, protect paint and wallpaper, and contribute to sleep quality.
Readers preparing to learn how to install a humidifier should weigh these advantages against maintenance needs and energy use.
Types of humidifiers and where they are used
Choosing the right humidifier depends on room size, maintenance tolerance, noise preferences, and whether whole-house or single-room coverage is needed.
Evaporative units suit bedrooms and living areas; ultrasonic models offer quiet operation for nurseries.
Steam (warm-mist) units aid cold relief in bathrooms; evaporative or bypass humidifiers integrate with HVAC for whole-house control.
Consider filter needs and mineral buildup for placement.
How to choose the right humidifier for your space
After weighing room size, maintenance, noise, and whole-house versus single-room needs, the next step is to match those factors to specific humidifier features and installation requirements.
Consider output capacity, control type (manual, humidistat, smart), water source and plumbing access, energy use, filter or tray maintenance, and placement constraints.
Prioritize units that meet moisture targets efficiently and fit existing HVAC or room logistics.
Safety considerations and local building codes
Before installing a humidifier, homeowners should review safety requirements and relevant local building codes to prevent water damage, mold growth, and electrical hazards.
They must guarantee proper electrical grounding, follow plumbing permits for line connections, install overflow and drain protection, maintain recommended clearances, and use certified HVAC-compatible units.
Compliance with manufacturer instructions and local inspectors’ guidance reduces liability and long-term maintenance risks.
Tools and Materials You’ll Need
The section lists common tools—screwdrivers, adjustable wrench, drill, tape measure—and basic supplies needed for most humidifier installs.
It then notes additional materials specific to unit type, such as ducting, mounting brackets, or a water line kit.
A concise checklist is provided to guarantee everything is on hand before work begins.
Common tools for all installations
Prepare a concise set of tools and materials to streamline any humidifier installation.
A basic kit includes:
- adjustable wrench
- screwdriver set (Phillips and flat)
- drill with bits
- tape measure
- level
- utility knife
- tubing cutter
- pliers
- plumbers tape
- pipe sealant
- mounting hardware
- safety gear (gloves, eye protection)
Keep replacement filters and a bucket nearby for testing and cleanup.
Additional materials by humidifier type
After assembling the basic kit, additional materials vary by humidifier type and should be gathered to match the chosen model.
For console units: flexible hose, condensate pan, and mounting brackets.
For steam/humidistats: dedicated electrical cable, inline shutoff valve, and high-temperature tubing.
For evaporative/console: replacement filters, wick pads, and water softener cartridge if hard water is present.
Checklist to prepare before you start
Before beginning the installation, gather a concise set of tools and materials tailored to the chosen humidifier type: common items include adjustable wrench, screwdriver set, drill with bits, plumber’s tape, level, bucket, tubing cutters, and a supply of appropriate fittings and hoses.
Additionally, verify availability of replacement filters or wick pads, electrical connectors or dedicated cable for steam units, and a condensate pan or mounting brackets for console models.
- Confirm tools and spare parts.
- Match fittings and tubing sizes.
- Prepare electrical and drainage access.
Installing a Portable (Console or Small Room) Humidifier
The section outlines the steps for unboxing and initial setup of a portable console or small-room humidifier.
It covers filling the tank, installing or replacing filters, choosing an appropriate placement, powering the unit, adjusting basic settings, and routine maintenance.
Common troubleshooting tips for leaks, weak output, and unusual noises are also provided.
Unboxing and initial setup
Begin by verifying the humidifier and all listed components against the manufacturer’s packing list, ensuring the unit, power cord, tank, filter (if included), and any accessories are present and undamaged.
Remove protective packaging, inspect seals and exterior for cracks, and retain manuals and warranty card.
Position the unit upright on a stable, level surface near a grounded outlet, keeping it clear of heat sources and direct sunlight.
Filling, filter installation, and placement guidelines
With the unit positioned and inspected, attention shifts to filling, installing any filters, and choosing the ideal placement for a portable console or small-room humidifier.
Fill the tank with clean, cool water; avoid additives unless specified.
Install manufacturer-supplied filters or pads per instructions, ensuring proper seals.
Place the humidifier on a level, elevated surface away from walls, electronics, and direct sunlight for best distribution and safety.
Powering on, settings, and basic maintenance
Power on the humidifier by plugging it into a grounded outlet and pressing the main power button; confirm operation via indicator lights or a startup beep.
Set desired humidity using the built-in humidistat or manual controls, select fan speed and timer as needed.
Perform weekly water tank cleaning, monthly filter checks or replacements, and wipe exterior surfaces to prevent buildup and guarantee efficient, safe operation.
Troubleshooting common portable unit issues
Troubleshooting common issues for portable humidifiers focuses on diagnosing simple problems—nozzle blockages, inadequate mist, unusual noises, or failure to turn on—and applying straightforward fixes such as cleaning deposits, checking water level and tank seating, inspecting and replacing filters, and verifying the power source and control settings.
- Clean and descale nozzles, tanks, and trays.
- Replace worn filters and inspect seals.
- Confirm power, settings, and fan operation.
Installing an Ultrasonic Humidifier
Ultrasonic humidifiers use high-frequency vibrations to create a fine mist, which distinguishes them from evaporative or warm-mist models and affects noise, energy use, and mist output.
Installation requires step-by-step setup and careful placement to guarantee even coverage and avoid surface damage, plus attention to water quality to limit mineral deposits.
Regular cleaning and a maintenance schedule are essential to prevent buildup and microbial growth and to preserve performance.
How ultrasonic units differ from other types
Because they create a cool, fine mist using high-frequency vibrations rather than heating or evaporating water, ultrasonic humidifiers operate with distinct advantages and considerations compared with evaporative and steam models.
They are quieter, more energy-efficient, and produce immediate visible mist but may disperse minerals as white dust, require regular cleaning to prevent microbial growth, and lack automatic wicking that controls output.
Step-by-step setup and placement
Several clear steps guide the setup and placement of an ultrasonic humidifier to guarantee safe, efficient operation and ideal room coverage.
Position on a flat, water-resistant surface away from walls, electronics, and direct sunlight.
Fill reservoir per manufacturer, secure lid, then connect power.
Center in target room for even distribution, adjust mist output, and verify stable operation and no leaks before regular use.
Water quality and mineral deposit management
After placement and operation are confirmed, attention should shift to water quality and mineral deposit management to maintain performance and indoor air safety.
Using distilled or demineralized water reduces white dust and scale. Inline filters or demineralization cartridges help in hard-water areas.
Periodic tank rinses and immediate removal of visible sediment prevent mineral aerosols.
Consider water softening options if local hardness is high.
Cleaning and maintenance schedule
Establish a regular cleaning and maintenance schedule to confirm an ultrasonic humidifier operates efficiently and safely.
Routine care prevents mold, bacterial growth, and mineral buildup while extending unit lifespan. Follow manufacturer’s intervals for deep cleaning and component replacement.
Use distilled water and soft brushes; disinfect weekly. Track maintenance dates and parts replaced to confirm consistent performance.
- Weekly: empty, rinse, disinfect.
- Monthly: deep clean, descale.
- Annually: replace filters/components.
Installing a Steam (Warm Mist) Humidifier
A steam (warm mist) humidifier requires attention to electrical and burn hazards, proper placement, and compatible power connections before installation.
The installation section covers step-by-step setup, first-run operation, and initial water-treatment recommendations, followed by routine descaling and safety-focused maintenance.
Troubleshooting addresses common issues such as mineral buildup, unit not heating, and steam delivery problems with practical fixes.
Safety considerations for steam humidifiers
When installing a steam (warm mist) humidifier, care must be taken to prevent burns, electrical hazards, and water damage by following manufacturer guidelines, maintaining proper clearances, and ensuring correct electrical and condensate connections.
Install on dedicated circuits, use GFCI protection where recommended, secure shielding to prevent contact with hot surfaces, provide drip pans and proper drainage, and schedule regular descaling and inspection to avoid failures.
Step-by-step installation and initial operation
Having reviewed safety measures for steam humidifiers, the installer should next proceed with a clear, step-by-step plan for mounting, plumbing, wiring, and initial operation.
Mount unit per manufacturer, secure to duct or wall, connect water supply with shutoff and vacuum breaker, wire to dedicated circuit and control panel, verify seals, fill reservoir if required, power on, observe for leaks, confirm steam output and proper control response.
Descaling and safety maintenance
Several routine descaling and safety maintenance tasks keep a steam (warm mist) humidifier operating efficiently and reduce risks: unplug unit before service, let components cool, empty water reservoir daily, and remove mineral deposits weekly with white vinegar or manufacturer-recommended descaler.
Inspect heating elements, gaskets, and safety shutoffs for corrosion or wear.
Replace filters and worn parts per schedule, and test safety interlocks after reassembly.
Common problems and fixes
Troubleshooting a steam humidifier focuses on identifying symptoms—no steam, weak output, leaks, unusual noises, or error lights—and applying targeted fixes such as checking power and water supply, descaling heating elements, reseating or replacing gaskets and filters, and verifying safety interlocks and float switches.
Common remedies prioritize cleaning, replacement of worn parts, and testing electrical and water controls.
- Inspect and descale heating element.
- Replace gaskets/filters.
- Test float switches and interlocks.
Installing an Evaporative (Wick) Humidifier
An evaporative (wick) humidifier draws water through a replaceable wick and uses airflow to evaporate moisture into the room.
The installation process typically covers securing the unit, connecting water supply and drain lines, and fitting the wick, with periodic wick replacement and simple seasonal maintenance recommended.
Proper placement near consistent airflow and away from vents or walls maximizes efficiency and prevents mold or over-humidification.
How evaporative systems work
Evaporative (wick) humidifiers add moisture by drawing water through a replaceable porous wick, where a fan blows air across the saturated surface so moisture evaporates into the airflow and is distributed through the ductwork or room.
Airflow speed, wick surface area, and water temperature determine evaporation rate.
Built‑in controls monitor humidity and cycle the fan and water feed to maintain setpoint efficiently.
Step-by-step installation and wick replacement
Begin by gathering the required tools and parts—humidifier unit, replacement wick, screwdriver, level, hose or tubing, and plumber’s tape.
Then review the manufacturer’s installation diagram to confirm mounting orientation and water connections.
Mount bracket, secure unit, attach water line with plumber’s tape, and level.
Insert wick, guarantee proper seating, restore power and water, check for leaks, run briefly, and verify steady mist output.
Optimal placement and airflow considerations
After confirming the unit is mounted, water-connected, and operating, attention should shift to choosing its location and arranging airflow for efficient humidity distribution.
Place the evaporative wick humidifier near central ductwork or a supply register, avoiding closed rooms and direct obstruction.
Guarantee clear intake and exhaust paths, maintain several inches clearance, and position away from heat sources and exterior walls to prevent condensation and uneven moisture.
Seasonal maintenance tips
When seasonal temperature shifts arrive, regular maintenance guarantees an evaporative (wick) humidifier continues to perform efficiently and safely.
Inspect and replace the wick filter each season, clean the reservoir with mild detergent and vinegar, and check for mineral buildup or corrosion on components.
Store removable parts dry when not in use to prevent mold and odors.
- Replace wick filter
- Clean reservoir
- Store parts dry
Installing a Whole-House Humidifier (Furnace/Forced-Air Systems)
Whole-house humidifiers for furnace/forced-air systems come in three main types—bypass, fan-powered, and steam—each with distinct installation requirements and performance characteristics.
Before beginning any work, the HVAC system should be prepared and basic safety checks completed, including power shutoff, gas isolation where applicable, and confirmation of duct access.
The following sections provide concise, step-by-step installation guidance for bypass, fan-powered, and steam whole-house humidifiers.
Overview of whole-house humidifier types (bypass, fan-powered, steam)
A homeowner choosing a furnace-mounted humidifier must weigh three common types—bypass, fan-powered, and steam—each differing in installation complexity, output capacity, and operating cost. Bypass uses furnace airflow, fan-powered adds its own blower for higher output, and steam offers precise control and highest output with greater cost and electrical needs.
| Type | Key trait |
|---|---|
| Bypass | Low cost |
| Fan-powered | Higher output |
| Steam | Precise, costly |
Preparing the HVAC system and safety checks
Begin by powering down the furnace and shutting off its circuit at the breaker to eliminate electrical and fan-related hazards before any humidifier work begins.
Inspect ductwork for leaks, confirm adequate airflow and access near the return or supply plenum, and verify condensate drain routing.
Test furnace safety switches, note gas or pilot status, and wear appropriate PPE.
Record baseline thermostat and humidistat settings.
Step-by-step installation for a bypass humidifier
Several clear steps guide the installation of a bypass humidifier on a furnace/forced-air system, starting with final placement and routing decisions and proceeding through duct cutting, mounting, water connections, and control wiring.
The installer cuts supply and return ducts, mounts the humidifier, installs the bypass duct and damper, connects a cold-water feed with a shutoff and drain, and wires the humidistat and optional furnace interlock.
Step-by-step installation for a fan-powered humidifier
Installers approach a fan-powered whole-house humidifier by planning placement on the furnace’s supply plenum, ensuring adequate airflow and access for maintenance.
They mount the unit, cut and seal the plenum opening, connect the dedicated duct to the return or supply as specified, install a water line with shutoff and drain, wire the humidistat and power per code, test operation and check for leaks.
Step-by-step installation for a steam whole-house humidifier
For a steam whole-house humidifier, the installer locates a suitable spot on or near the furnace or ductwork where the unit can safely connect to the duct system, water supply, drain, and electrical service while allowing access for maintenance.
The unit is mounted, sealed to the duct opening, and integrated with the furnace control or humidistat.
Final checks confirm steam delivery, airflow clearance, and safe operation.
Wiring, drain, and water supply connections explained
A clear understanding of the humidifier’s electrical, water, and drain connections is essential before beginning work.
The installer locates a 24V control circuit or dedicated transformer, ties neutral and hot per manufacturer, and secures a condensate/drain line to a nearby floor drain with proper slope.
A cold-water feed with shutoff and union provides supply; all fittings must be leak-tested and grounded where required.
Post-installation setup: humidistat calibration and HVAC integration
Begin by powering the system and confirming the humidifier control is receiving the correct 24V signal from the furnace or dedicated transformer; this guarantees the humidistat and HVAC controls communicate before any calibration.
Verify sensor placement in return-air stream, set target relative humidity for outdoor temperature compensation, adjust humidistat sensitivity, test call-for-humidity with heating cycles, and confirm no conflicting signals from zone controls or economizer functions.
Maintenance schedule and seasonal shutdown procedures
Establish a regular maintenance schedule to preserve humidifier performance and prevent moisture-related issues in the ductwork and furnace.
Inspections every 1–3 months, filter and pad replacement per manufacturer, and seasonal shutdown in spring reduce corrosion and microbial growth.
Before shutdown, drain, clean, and remove pads; close water supply and disable humidistat; document service dates.
- Quarterly inspections
- Spring shutdown steps
- Replacement schedule
DIY vs Professional Installation: When to Hire a Pro
Homeowners can handle basic tasks like mounting a bypass or fan-powered humidifier, connecting a water line with a shutoff valve, and performing routine filter and pad replacements.
If the installation requires furnace modifications, electrical wiring, plumbing reroutes, or diagnostics for uneven humidity, a licensed HVAC or plumbing technician should be called.
Typical professional quotes vary by system complexity and region, so obtaining at least three estimates and comparing labor, parts, and warranties helps guarantee a fair price.
Tasks homeowners can safely do themselves
Determine which humidifier tasks are suitable for DIY by weighing skill level, tools, and risk:
Simple cleaning, filter replacement, and basic plug-in unit setup are generally safe for most people, while ductwork modification, electrical hardwiring, and complex whole-house installations typically require a licensed professional.
Homeowners can also handle scheduling, basic troubleshooting, replacing detachable parts, and following manufacturer maintenance schedules to preserve performance.
Signs you should call a licensed technician
Recognize clear indicators that a humidifier issue warrants a licensed technician: persistent leaks, electrical faults, abnormal noises coming from internal components, recurring failures after basic troubleshooting, or any work involving ductwork modifications or hardwired electrical connections.
A professional should also be contacted for suspected water damage, mold growth linked to the unit, complex control or sensor failures, or when warranty conditions require certified installation.
Estimated costs and how to get multiple quotes
After identifying problems that require a licensed technician, the next consideration is cost: comparing DIY expenses against professional installation fees and collecting multiple quotes to guarantee a fair price.
Estimate parts, tools, time and permits for DIY; obtain three bids from licensed installers; verify warranties and liability coverage.
Use itemized quotes to compare scope, timeline, and total cost before deciding.
- Compare DIY vs pro
- Get 3 bids
- Check warranties
Common Installation Mistakes and How to Avoid Them
Common installation mistakes often stem from improper placement and restricted airflow, which reduce effectiveness and can cause moisture damage.
Incorrect water supply or drainage hookups and sloppy electrical work create leaks, shorts, or safety hazards.
Skipping routine maintenance or using improper filters shortens unit life and undermines performance.
Placement and airflow errors
Place the humidifier where it can distribute moisture evenly without obstructing vents or being blocked by furniture.
Incorrect placement causes uneven humidity, condensation, and mold hotspots. Keep units clear of curtains, walls, and floor obstructions; guarantee adequate room airflow and proper return/exhaust clearance.
For whole-house systems, avoid locating near damp basements or enclosed attics; prioritize central, unobstructed locations for balanced circulation.
Water supply and drainage mistakes
Mistakes in water supply and drainage often follow poor placement, since location impacts where pipes, valves, and drains must run and how easily they can be accessed.
Common errors include improper slope causing backups, undersized drain lines, unsecured fittings that leak, and using non‑rated materials.
Proper planning guarantees correct pipe sizing, accessible shutoffs, adequate slope, and corrosion‑resistant components to prevent leaks and clogs.
Electrical and wiring pitfalls
Failing to address electrical and wiring needs properly can render a humidifier unsafe or inoperative. Common pitfalls include incorrect voltage, improper grounding, overloaded circuits, and loose connections.
Ignoring manufacturer wiring diagrams or bypassing required junction boxes invites failure and code violations. Use correct gauge wiring, dedicated breakers when specified, secure terminals, and consult a licensed electrician for complex hookups or unfamiliar electrical work.
Maintenance-related mistakes that shorten unit life
Beyond wiring errors, improper upkeep is a leading cause of shortened humidifier life. Neglecting routine cleaning, ignoring mineral buildup, and skipping filter changes accelerate corrosion, bacterial growth, and mechanical failure.
Proper schedules and water treatment prevent damage. Common maintenance mistakes include:
- Skipping monthly deep cleans
- Using hard water without a softener or demineralization cartridge
- Delaying filter and pad replacements
Optimizing Performance After Installation
After installation, attention turns to maintaining ideal indoor humidity by adjusting targets seasonally to prevent dryness in winter and condensation in summer.
Employing humidistats or smart controls enables accurate monitoring and automated adjustments while helping manage energy use and costs.
Coordinating the humidifier with air filtration and the HVAC system further improves overall indoor air quality and system efficiency.
Setting the right indoor humidity levels by season
Seasonal adjustments to indoor humidity improve comfort, protect the home, and help the humidifier run efficiently; target relative humidity ranges vary by season—about 30–40% in winter to reduce condensation and mold risk, and 40–50% in summer and shoulder seasons to balance comfort and inhibit allergens.
Occupant health, woodwork preservation, and energy use guide fine-tuning; prioritize lower winter levels and moderate summer humidity.
Monitoring and controlling humidity with humidistats and smart controls
Effective humidity control relies on accurate sensing and responsive regulation; humidistats and smart controllers provide the feedback loop that keeps indoor moisture within target ranges.
Users select fixed or programmable humidistats, calibrate placement away from drafts, and set appropriate setpoints.
Smart controllers offer remote monitoring, alerts, and integration with thermostats or home systems, enabling automated adjustments and logging for consistent indoor comfort and mold prevention.
Energy use and cost-saving tips
Optimize operation to balance comfort and cost by tuning runtime, setpoints, and maintenance practices.
Schedule humidification during occupied hours, lower setpoints slightly overnight, and use timers or smart controls to avoid overuse.
Maintain filters, clean tanks, and inspect seals to preserve efficiency.
Choose ENERGY STAR or low-wattage models, and replace worn components promptly to reduce energy consumption and repair costs.
Integrating with air filtration and HVAC for better air quality
Integrating a humidifier with existing air filtration and HVAC systems enhances indoor air quality by ensuring humidity levels complement filtration efficiency and airflow patterns.
Coordination prevents mold growth, allergen persistence, and uneven humidity.
Recommendations include placing humidifier output where airflow distributes moisture, syncing controls with HVAC fans and humidistats, using compatible filters, and scheduling maintenance to preserve system balance and occupant health.
Long-Term Maintenance, Troubleshooting, and Replacement Tips
Long-term care focuses on routine cleaning and timely filter changes to preserve efficiency and air quality.
A basic troubleshooting routine helps identify common faults and quick fixes before they escalate.
Guidance on when to replace parts or the entire unit, plus eco-friendly disposal and recycling options, completes the maintenance plan.
Regular cleaning and filter replacement schedule
Establishing a consistent cleaning and filter replacement routine prevents mineral buildup, bacterial growth, and reduced performance in a humidifier.
Recommended cadence: weekly tank rinse and dry; monthly deep clean with vinegar or manufacturer cleaner; replace disposable filters every 1–3 months or per usage.
Maintain records and inspect wicks for discoloration; adjust schedule for hard water or heavy use.
- Weekly rinse
- Monthly deep clean
- Filter replacement schedule
Diagnosing common faults and quick fixes
Diagnose common humidifier issues by systematically checking power, water supply, and basic components before assuming major failure: confirm the unit is plugged in and switches function, verify the tank has sufficient clean water and the float or sensor moves freely, inspect and clean the nozzle, wick or evaporative pads, and look for visible mineral buildup or damaged seals.
Simple fixes—resetting power, replacing a clogged filter, descaling with vinegar, reseating a loose float, or tightening a leak—often restore operation without professional service.
Visually test airflow, listen for unusual noises, and check indicator lights; if symptoms persist, consult the manual for model-specific troubleshooting steps.
When to replace components or the entire unit
Because wear and deposits eventually impair performance, owners should replace parts or the entire humidifier when cleaning and simple repairs no longer restore proper output, safety, or efficiency.
Signs include persistent low humidity, frequent clogs, mineral buildup on critical components, electrical faults, corrosion, and mold that returns after cleaning.
Replace filters, pads, or the unit based on age, repair cost, and reliability.
Eco-friendly disposal and recycling options
When replacement becomes the only practical option, responsible disposal and recycling help minimize environmental impact.
The guide advises checking local e-waste and appliance recycling programs, separating batteries and electronic controls, and removing reusable parts like fans and humidification cartridges for refurbishing.
Hazardous components require certified disposal.
Manufacturers’ take-back plans and municipal facilities reduce landfill waste and recover materials efficiently.
Quick Reference: Step-by-Step Installation Summaries by Type
Consult the concise step-by-step summaries below to compare installation approaches for common humidifier types—portable, console, whole-house bypass, and furnace-mounted steam models.
The guide lists essential tasks, required tools, safety checks, and typical time estimates for each type, enabling quick decisions and preparation.
- Portable/console: setup, fill, plug, location, test.
- Bypass: ductwork, valve, drain, seal, calibrate.
- Steam/furnace: power, water, controls, safety interlocks.
Conclusion
Installation completes, but the story isn’t over. The new humidifier hums quietly, promising softer air and fewer dry mornings—yet a faint drip and the shadow of mineral buildup hint at hidden chores ahead. If filters are ignored or placement is wrong, comfort will fade. Attentive maintenance will reveal the device’s full benefit; neglect will quietly undo it. The next steps are small but decisive, and they will determine whether relief endures or slowly slips away.