How to Fix a Slow Draining Kitchen Sink: Quick DIY Steps That Actually Work
To fix a slow draining kitchen sink, start by disconnecting the power to the disposal and clearing any visible debris. Flush the drain with boiling water or a baking soda-vinegar mixture. For deeper clogs, use a plunger or plumber’s snake, and manually clean the P-trap if necessary. Always check for leaks when reassembling. If the drain is still slow, additional troubleshooting steps are available below.
Why Your Kitchen Sink Is Draining Slowly: Common Causes
Slow drainage commonly stems from physical obstructions such as food particles and grease clinging to pipe walls or a clogged P‑trap or trap arm.
A jammed or blocked garbage disposal and venting problems that impede airflow can also slow flow.
Less obvious causes include a partial blockage farther down the main drain line.
Food waste and grease buildup in the drain
Food particles and cooled cooking fats commonly accumulate in the trap and pipes, forming sticky clogs that restrict flow. This buildup emits odors and slows drainage, especially after washing greasy dishes.
For homeowners learning how to fix slow draining kitchen sink issues, routine prevention—scraping plates, using a sink strainer, periodic hot-water flushes, and degreasing cleaners—reduces recurrence and preserves pipe function.
Clogged P-trap or trap arm
Inspecting the P-trap and trap arm often reveals the source of a sluggish sink: these curved and horizontal sections collect debris, grease, and mineral deposits that constrict flow or form complete blockages.
Removing and cleaning the trap typically restores drainage; check slip nuts for leaks, clear the trap arm with a small auger if needed, and reassemble with a new washer to guarantee a tight seal.
Blocked garbage disposal
If the P-trap and trap arm check out clean but the sink still drains poorly, attention should turn to the garbage disposal.
Food buildup, grease, or lodged utensils can restrict flow. Power off and check for jams using a hex key at the motor shaft or pliers from above.
Clean the chamber, rinse with hot water, and test operation. Replace unit if damaged.
Venting problems in the plumbing system
Consider ventilation problems when a kitchen sink drains slowly despite clear pipes and a working disposal: trapped air in the drain line, blocked vent stacks, or improperly installed vents can prevent proper airflow, causing slow drainage and gurgling noises.
A professional can inspect roof vents, attic stacks, and vent connections; correcting obstructions, adding or reconfiguring vents, or repairing seals typically restores balanced airflow and normal drainage.
Partial blockage in the main drain line
When venting issues are ruled out, a partial blockage in the main drain line becomes a likely cause of slow sink drainage.
Debris, grease buildup, or foreign objects can restrict flow farther down the system. Symptoms include sluggish draining across multiple fixtures and gurgling.
Inspect accessible cleanouts, use a plumber’s snake for removal, and flush the line with water; persistent obstruction warrants professional service.
Corroded or collapsed pipes in older homes
Many older homes show signs of corroded or collapsed drain pipes, a condition that gradually reduces flow and can cause recurring slow drainage, backups, and leaks.
Metal or clay pipes degrade, joints fail, and roots infiltrate weakened sections.
Symptoms include persistent slow draining despite clear traps, foul odors, and wet spots.
Professional inspection and replacement of damaged sections are often necessary to restore proper flow.
Quick Safety and Preparation Steps Before You Start
Before beginning work on a slow draining sink, a concise tools-and-materials checklist should be assembled, including a plunger, drain snake, bucket, and replacement parts.
The worker should wear gloves and eye protection and guarantee the garbage disposal is unplugged or switched off.
Finally, the water supply must be shut off and cabinet surfaces protected with towels or a plastic sheet to catch spills.
Tools and materials checklist
A concise checklist of tools and materials helps guarantee the task proceeds safely and efficiently.
Essential items and consumables are listed so work is organized and quick.
- Plunger and plumber’s snake (or auger)
- Adjustable wrench and channel-lock pliers
- Bucket, rags, and replacement washers/seals
- Pipe brush, baking soda, vinegar, and a mild drain cleaner
Safety precautions: gloves, eye protection, and unplugging disposal
With tools and materials laid out, attention turns to basic safety measures that reduce risk during the repair.
Wear chemical-resistant gloves and safety glasses to protect skin and eyes from debris, cleaners, and splashes.
Before reaching under the sink, disconnect power to the garbage disposal at the outlet or circuit breaker.
Verify the unit is unpowered to prevent accidental activation while working.
How to shut off water and protect cabinet surfaces
Several simple actions secure the workspace: locate and shut off the sink’s water supply valves—usually the small hot and cold knobs under the cabinet—or, if absent, turn off the home’s main water supply.
Next, open faucets to bleed remaining water.
Place towels or a shallow pan to catch drips, and line cabinet surfaces with plastic or cardboard to protect against spills, tools, and cleaning agents.
Fast DIY Fixes You Can Try Immediately
The following quick fixes can often restore proper flow without tools or professional help. They include a boiling-water flush with timing cautions, a step-by-step baking soda and vinegar treatment, proper plunger technique for kitchen sinks, and manually removing visible debris from the strainer and drain opening.
Each method is described with when to use it and simple, safe steps to follow.
Boiling water flush: when and how to use it
Pouring boiling water down a slow kitchen sink can quickly dissolve grease and loosen minor clogs when used correctly.
It is appropriate for recent, soft buildup in metal pipes; avoid PVC joints and fragile seals.
Boil water safely, pour in stages allowing heat to act between pours, then run hot tap water.
If flow doesn’t improve, pursue mechanical or professional options.
Baking soda and vinegar method: step-by-step
A simple, chemical-free reaction of baking soda and vinegar can break down light grease and clear minor clogs by loosening debris and neutralizing odors.
It is best used for recent slow drains rather than stubborn blockages. Pour 1/2 cup baking soda into the drain, follow with 1 cup white vinegar, seal the drain for 10–15 minutes, then flush with hot water to clear loosened residue.
Using a plunger effectively on a kitchen sink
After using baking soda and vinegar to loosen residue, a plunger offers a quick mechanical follow-up to dislodge remaining debris and restore flow.
Place a sink plunger over the drain, guarantee a tight seal, and add enough water to cover the cup.
Push and pull vigorously for 20–30 seconds, then lift to check drainage.
Repeat if necessary.
Manual removal of visible debris from the sink and strainer
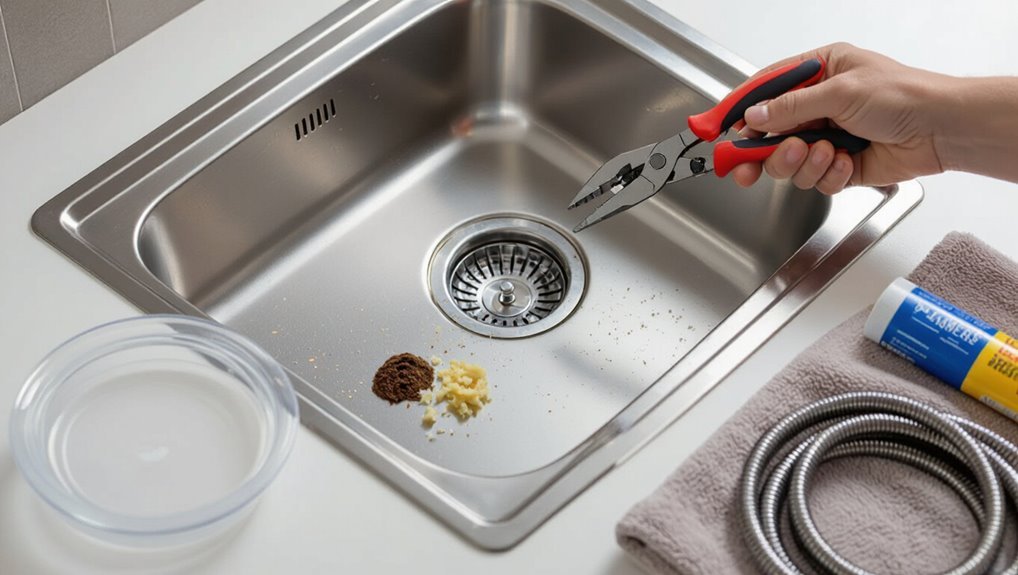
Start by removing the drain strainer or stopper and inspecting the sink basin for visible food particles, grease clumps, hair, and other debris that can be pulled out by hand or with a pair of needle-nose pliers.
Wear gloves, clear trapped gunk, and check the strainer holes.
Rinse under hot water, repeat if needed, and reassemble the stopper securely.
How to Clear a Clogged Garbage Disposal
When a kitchen sink drains slowly due to a garbage disposal issue, the first steps are a safe restart and simple jam-clearing procedures to reset the unit and remove visible obstructions.
If the impeller is stuck, an Allen wrench applied to the disposal hub can free the mechanism without disassembly.
If blockages persist or odors return, removing and cleaning the disposal flange may be necessary to clear trapped debris.
Safe restart and jam-clearing procedures
Clear the power and confirm the blade assembly is stationary before attempting to free a jammed disposal.
With power off, use insulated gloves and a flashlight to inspect the chamber.
Remove visible debris with pliers; never use bare hands.
Restore power only after reinstalling any removed parts and testing that the unit spins freely.
Run water while briefly operating the disposal to verify clearance.
Using an Allen wrench on the disposal hub
An Allen wrench can manually rotate the disposal’s hex-shaped hub to free a jam without disassembling the unit.
The technician inserts a properly sized wrench into the bottom access hole, applies steady alternating turns to dislodge trapped objects, then checks for free rotation.
Power must remain off and the reset button untouched until normal rotation resumes and the unit is reenergized safely.
When to remove and clean the disposal flange
How should a homeowner decide to remove and clean the disposal flange? A homeowner should inspect for persistent slow draining, foul odors, or visible gunk around the sink opening.
If plunging and flipping the disposal don’t help, power is off and the unit unplugged, the flange can be unscrewed and cleaned.
Regular checks every few months prevent buildup and odors.
Removing and Cleaning the P-trap
Before loosening the slip nuts, a bucket should be placed beneath the P-trap to catch water and debris.
The P-trap is then inspected and cleared of buildup before being cleaned and reassembled, taking care to tighten the slip nuts securely.
If cracks, corrosion, or persistent leaks are found, the P-trap should be replaced.
How to place a bucket and loosen slip nuts
Place a bucket beneath the sink trap to catch water and debris that will spill when the slip nuts are loosened.
Wear gloves and position the bucket under both trap connections.
Use adjustable pliers or a basin wrench to turn slip nuts counterclockwise, supporting the trap to prevent twisting.
Loosen nuts until joints separate; allow contents to drain into the bucket before fully removing the trap.
Inspecting, cleaning, and reassembling the P-trap
Loosened and removed, the P-trap should be inspected immediately for clogs, corrosion, and warped washers.
Debris and grease are cleared with a brush and rag; persistent buildup can be soaked in warm, soapy water or vinegar solution.
Rinse thoroughly, reseat washers, and hand-tighten slip nuts before testing for leaks.
Wipe connections and run water to confirm smooth drainage.
Signs the P-trap needs replacement
Several clear signs indicate the P-trap may need replacement after removal and cleaning.
Visible corrosion, cracks, or warping compromise seals and cause leaks.
Persistent odors or recurring clogs despite thorough cleaning suggest internal damage or buildup in inaccessible areas.
Loose or stripped threads on slip nuts prevent reliable reassembly.
Frequent repairs or discoloration also justify installing a new P-trap for dependable performance.
Clearing Blockages Further Down the Line
If clearing the P-trap does not restore flow, attention turns further down the drain line using tools like a plumber’s snake or auger, applied to the recommended depths and with steady, controlled turns.
A straightened wire coat hanger can reach shallow clogs but should be used carefully to avoid pipe damage and is unsuitable for deep or stubborn blockages.
Chemical drain cleaners are best avoided for regular use; when considered, they should be used sparingly and followed by safer alternatives such as enzyme cleaners or a baking soda and vinegar treatment.
Using a plumber’s snake or auger: technique and distances
A plumber’s snake (auger) extends beyond the trap to reach clogs deeper in the drain line. The operator feeds the flexible cable into the pipe while turning the handle to break apart or hook debris.
Advance cautiously, noting resistance changes and rotating to snag buildup. Typical household snakes reach 10–25 feet; longer cables suit main lines.
Retract slowly, clearing removed material into a bucket.
Wire coat hanger method: safe usage and limits
One common improvised tool is an uncoated wire coat hanger reshaped into a narrow hook or probe to reach and pull out hair, grease clumps, and other soft blockages just beyond the trap.
It works for shallow obstructions; avoid forcing it deeper, protect finishes, and wear gloves.
Do not use on old, fragile pipes, tight bends, or to dislodge hard mineral or adhesive buildup.
When to use chemical drain cleaners and safe alternatives
When a wire coat hanger or similar manual tool cannot reach or remove the clog, consideration turns to chemical drain cleaners and other methods for blockages farther down the line.
Chemical cleaners can dissolve grease or organic buildup but pose risks to pipes, health, and the environment.
Safer alternatives include enzyme-based treatments, a plumbing snake, or professional inspection and hydro-jetting for stubborn obstructions.
Checking and Fixing Venting and Main Drain Issues
A blocked or poorly functioning vent stack can cause slow draining and gurgling by preventing air from entering the drain system.
Simple DIY checks include inspecting the roof vent for debris, using a garden hose or plumber’s snake to clear obstructions, and listening for changes in flow.
If multiple fixtures back up or sewage odors appear, main sewer line damage or blockage is likely and a licensed plumber should be called.
How a vent stack affects sink drainage
Inspecting the vent stack clarifies why a sink may drain slowly: vents allow air into the drainage system, preventing vacuum locks that impede flow and permitting wastewater to move freely.
A blocked or undersized vent reduces airflow, causing gurgling, slow drainage, or siphoning of traps.
Proper venting balances pressure, supports efficient drainage, and prevents sewer gas entry, so vent integrity affects overall sink performance.
DIY checks for roof vents and simple fixes
Several straightforward DIY checks can quickly identify whether roof vents or the main drain are causing slow kitchen sink drainage.
Inspect roof vent openings for debris, bird nests, or ice; clear obstructions safely with a plumber’s snake or garden hose.
From inside, run water while listening for gurgling at vents.
Verify trap and drain cleanouts are accessible and clear minor blockages with a hand auger.
Identifying main sewer line problems and when to call a pro
Many homeowners overlook main sewer line issues until multiple fixtures back up or persistent odors appear.
Indicators include sluggish drains throughout the house, gurgling noises, sewage smells, wet spots in the yard, or unusually lush grass.
If root intrusion, collapsed pipe, or chronic backups are suspected, stop DIY attempts.
Hire a licensed plumber for camera inspection, hydro-jetting, or line replacement to prevent health hazards and costly damage.
When to Replace Pipes or Call a Professional
Visible corrosion, persistent leaks, or signs of a collapsed line indicate that pipe replacement may be necessary rather than continued DIY fixes.
Homeowners should expect professional repair to involve diagnostic fees, parts and labor costs, and a timeline that can range from a few hours for simple replacements to multiple days for extensive or hard-to-access work.
When contacting a plumber, provide clear details about symptoms, any prior repairs, pipe material and age, and request written estimates, timelines, and warranty information.
Signs of pipe corrosion, leaks, or collapsed lines
When slow drainage is accompanied by foul odors, persistent wet spots, or discolored water, these can indicate pipe corrosion, active leaks, or a collapsing line that requires prompt attention.
Additional signs include rust flakes in flow, sagging floorboards, sudden pressure loss, and repeated clogs despite clearing.
Visible pipe cracks, mold growth, or unexplained increases in water bills further justify professional inspection.
Cost and timeline expectations for professional repair
A typical professional assessment and repair for a slow-draining kitchen sink can range from a straightforward $150–$350 diagnostic and minor fix to $1,000–$5,000 or more for extensive pipe replacement or addressing collapsed sewer lines.
Timelines can span from a few hours to several days depending on scope and access.
Emergency service, permits, materials, and accessibility drive final cost and schedule.
What to ask a plumber and information to provide
How should homeowners prepare before calling a plumber and what key details will help the technician diagnose whether pipe replacement or simpler repairs are needed?
Homeowners should describe:
- Pipe material
- Age
- Visible leaks
- Noises
- Odor
- Frequency and location of slow drainage
- Recent repairs
- Water pressure
Provide photos, access points, and any DIY steps already attempted.
Ask about diagnosis methods, estimated costs, and warranty.
Preventive Maintenance to Keep Your Sink Draining Well
Routine preventive measures help prevent slow drains before they start. Suggested daily habits include keeping grease, coffee grounds, and fibrous foods out of the sink.
Monthly tasks involve flushing the drain with hot water and inspecting the P‑trap for buildup. Clear guidelines for safe garbage disposal use—running cold water, feeding small amounts at a time, and avoiding certain scraps—round out the maintenance plan.
Daily habits to avoid clogs
Adopt simple daily habits to keep kitchen drains clear and prevent buildup before it becomes a blockage. Daily routines reduce grease, food scraps, and odors that lead to clogs.
Recommended actions include:
- Wiping plates and scraping solids into the trash before washing
- Running hot water briefly after each use
- Using a sink strainer and emptying it regularly
- Avoiding pouring grease or oil down the drain
Monthly maintenance routine: flushing and trap checks
Perform a brief monthly maintenance check to flush the lines and inspect the P-trap, ensuring minor buildup is removed before it becomes a clog.
The homeowner loosens the trap, clears debris, and rinses with hot water. Routine checks prevent odors and slow drains.
- Remove and inspect P-trap
- Flush lines with hot water
- Clear visible debris by hand
- Reassemble and test flow
Best practices for garbage disposal use
After monthly checks of the P-trap and hot-water flushing, attention to garbage disposal habits further reduces the risk of slow drains and clogs.
Only biodegradable scraps should be processed; avoid fibrous, starchy, or greasy waste. Run cold water while grinding and several seconds afterward. Feed items gradually, not all at once.
Periodically clean blades with ice and citrus, and disconnect power before maintenance.
Tools, Products, and Materials Recommended
A concise list of essential hand tools—plungers, pipe wrenches, bucket, and plumber’s snake—sets the baseline for most DIY drain clearing tasks.
Recommended cleaning products and those to avoid are noted, emphasizing enzymatic cleaners over harsh caustics that can damage pipes.
Guidance is provided on when to call for specialized tools or a professional, such as for stuck blockages or complex trap and trap-arm issues.
Essential tools for DIY drain clearing
Gathering the right tools makes DIY drain clearing faster and reduces the chance of causing damage or creating a bigger clog.
Essential items include a plunger, drain snake, bucket, and adjustable wrench for trap removal. Proper gloves and safety glasses protect hands and eyes.
Keep a flashlight and plumber’s tape handy for inspections and resealing connections after clearing.
Recommended products and what to avoid
With tools in place, attention turns to specific products and what to avoid when clearing a slow kitchen sink.
Recommended are enzyme drain cleaners, a narrow bottle brush, plumber’s grease for seals, and a sink strainer.
Avoid chemical drain cleaners, wire hangers, bleach mixtures, and abrasive powders that can damage pipes and finishes.
- Enzyme drain cleaner
- Narrow bottle brush
- Plumber’s grease
- Sink strainer
When specialized tools are necessary
Recognize that most slow drains respond to basic tools and products, but specialized equipment becomes necessary when clogs are stubborn, recurring, or located beyond the trap.
A hand auger (plumbing snake) reaches deep bends; an electric auger or drum machine handles dense blockages; hydro-jetting clears grease buildup professionally.
Use inspection cameras to locate obstructions; reserve heavy tools for experienced users or pros to avoid damage.
Troubleshooting Flowchart: Step-by-Step Decision Guide
A concise troubleshooting flowchart helps identify symptoms, match them to the likely cause, suggest an immediate action, and point to an escalation path if needed. The following table sketches typical symptom-to-action links to guide quick decisions. If the problem persists after the suggested step, the chart directs when to call a professional.
| Symptom | Suggested immediate action |
|---|---|
| Slow water level rising | Check and clear visible debris from the stopper |
| Gurgling or slow only when other fixtures run | Inspect trap and vent; run water to test |
Symptoms, likely cause, immediate action, and escalation path
How can one quickly identify whether a slow draining kitchen sink is a minor clog or a sign of a deeper problem?
Observe symptoms: partial slow drain, gurgling, odors, backups.
Likely causes: local trap clog, grease buildup, vent or mainline obstruction.
Immediate action: plunge, remove trap, use enzyme cleaner.
Escalation: persistent issues, sewer smell, or multiple fixtures—call a plumber for camera inspection.
Common Mistakes to Avoid When Fixing a Slow Drain
Common mistakes can worsen a slow drain or lead to costly repairs, so the repairer should take care.
Overusing harsh chemical cleaners can corrode pipes, while improper disposal habits quickly recreate blockages.
Additionally, certain DIY actions may void garbage disposal or plumbing warranties if manufacturer or installer instructions are ignored.
Overusing harsh chemicals and pipe damage
Although chemical drain cleaners can dissolve clogs quickly, overuse risks corroding pipes, degrading seals, and harming fixtures.
Repeated applications eat metal and plastic, weaken joints, and shorten component lifespan. Residue can trap debris, worsening blockages.
Professionals recommend limited, targeted use and inspection after persistent issues.
Mechanical clearing and enzymatic alternatives reduce chemical exposure and preserve plumbing integrity.
Improper disposal practices that cause recurring clogs
Careless disposal of grease, coffee grounds, fibrous vegetable peelings, and non-biodegradable items is a leading cause of recurring kitchen sink clogs.
People often rinse fats or toss pasta starchy water down drains, letting residue accumulate. Repeatedly using the garbage disposal for inappropriate solids compacts debris.
Adopting simple habits—scraping plates, using a sink strainer, and disposing oils in sealed containers—prevents persistent blockages.
Missteps that void disposal or plumbing warranties
Several actions taken during DIY drain repairs can unintentionally void warranties on disposals and plumbing fixtures.
Unauthorized disassembly, using nonapproved replacement parts, chemical drain cleaners that violate manufacturer instructions, and improper electrical work commonly nullify coverage.
Improper installation or failure to document professional service also risks denial.
Homeowners should consult manuals, retain receipts, and contact manufacturers before attempting repairs to preserve warranty rights.
Quick Cost Estimates for Common Repairs
Typical out-of-pocket costs for DIY drain remedies—such as plungers, enzyme cleaners, or a basic trap removal—are outlined to help readers compare options.
Estimated plumber service calls and common repair ranges, including clog clearing and minor part replacements, are provided for a realistic price expectation.
These figures aim to clarify when a homeowner can reasonably attempt a repair and when hiring a professional is likely more cost-effective.
DIY fix cost breakdown
A basic DIY cost breakdown helps homeowners decide whether to tackle a slow-draining kitchen sink or call a professional.
Common expenses include plungers ($5–15), drain snakes ($10–30), enzymatic cleaners ($8–20), replacement P-traps or fittings ($10–40), and plumber’s putty or sealant ($3–10).
Total DIY projects typically range $25–115, depending on parts needed and tools already owned.
Typical plumber service call and repair ranges
Plumbers usually charge a service call fee plus labor and parts, so most homeowners can expect an initial visit fee of $75–$150 and hourly labor rates of $50–$150 depending on location and time.
Typical repairs:
- unclogging or trap cleaning $100–$250
- auger or sectional cable work $150–$400
- minor pipe repairs $100–$300
- replacement of sink strainer or pop-up assemblies $75–$250
Final Checklist Before Finishing the Job
Before declaring the repair complete, the technician performs a leak test and runs water to confirm proper flow and sealing.
Any removed gunk or old parts are collected, bagged, and disposed of according to local regulations.
A final wipe-down of the area and reattachment of cleaned fixtures guarantee the sink and surrounding surfaces are left functional and tidy.
Leak test and functional test steps
Begin by running water through the sink and inspecting every joint, trap, and connection for visible drips or seepage.
Check under the cabinet with a flashlight and feel fittings for moisture.
Operate hot and cold taps, flush the drain repeatedly, and cycle the disposer if present.
Watch for slow leaks during pressurized flow, tighten or reseal any leaking fittings, and confirm steady, unobstructed drainage.
Cleaning up and proper disposal of removed debris
Gather and contain all removed debris—food scraps, grease clumps, pipe sediment, and sealing materials—into a sturdy, sealable bag or container to prevent odors and spills.
Wear gloves, wipe exposed surfaces with a disinfectant, and dispose of waste per local regulations (grease in sealed containers, solids in trash).
Rinse tools, dry, and store. Note any damaged parts for replacement and finalize paperwork or notes.
Conclusion
The slow sink’s mystery isn’t always what it seems. After trying the quick fixes, checking the disposal, and inspecting the P-trap, one essential moment remains: turn on the water and watch. Will the flow rush free or hesitate again? If resistance lingers, a hidden clog or vent issue may be waiting deeper in the pipes. The next steps—camera inspection or a pro’s call—could reveal the surprise that finally restores full flow.