How to Install a Sink: Step-By-Step Guide for Beginners With Tools and Tips
Installing a sink as a beginner involves several key steps: removing the old fixture, fitting the new basin, and reconnecting plumbing and drain lines. To start, measure your cabinet and countertop, ensure the water shutoffs are functional, and gather essential tools such as adjustable and basin wrenches, sealants, and replacement supply lines. You’ll encounter various sink types—drop-in, undermount, farmhouse, vessel, and integrated—each with unique installation requirements. Proper sealing and thorough leak testing, along with ensuring cabinet support, are crucial for a successful installation. Follow this guide for a detailed, step-by-step walkthrough to ensure your sink is installed correctly and efficiently.
What a Sink Installation Entails and Who Can Do It
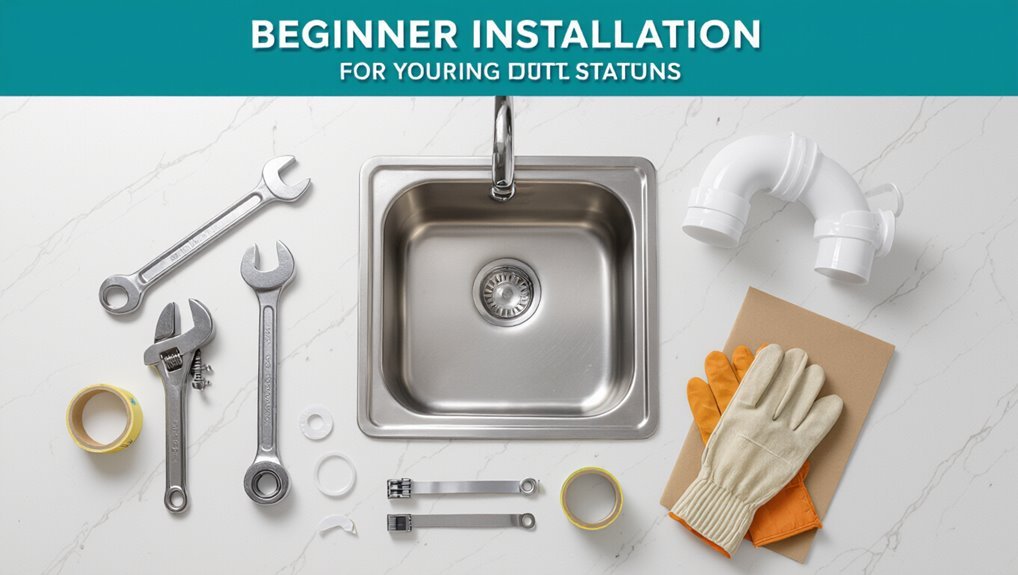
A sink installation typically involves removing the old fixture, fitting and sealing the new basin, and connecting plumbing and drain lines.
The decision to hire a professional depends on factors like plumbing experience, complexity of the job, and local code requirements versus the homeowner’s comfort with basic tools and pipework.
A straightforward DIY install often takes a few hours and costs mainly for parts, while more complex or code-sensitive jobs can take a day or more and incur higher labor and permit expenses.
Overview of tasks involved in installing a sink
Installing a sink combines basic carpentry, plumbing, and sometimes countertop modification, typically involving removal of the old fixture, fitting and securing the new basin, connecting water supply lines and drain assembly, sealing edges, and testing for leaks. The overview outlines steps, tools, and safety considerations to show how to install a sink efficiently.
| Step | Focus |
|---|---|
| 1 | Removal |
| 2 | Fitment |
| 3 | Connections |
When to hire a professional vs. DIY suitability
After outlining removal, fitment, and connections, the question becomes which parts a homeowner can handle safely and when to call a pro.
Simple tasks—measuring, cutting countertop for drop-in sinks, attaching faucet, and basic drain assembly—suit confident DIYers.
Complex plumbing reroutes, gas-related work, major cabinet modifications, or uncertain leak diagnosis warrant hiring a licensed plumber to guarantee code compliance and avoid costly damage.
Typical time and cost range for DIY installation
Although scope and skill level vary, typical DIY sink installations generally take between two and six hours for a single bathroom or kitchen sink when no major changes are required.
Costs usually range from $50–$300 for basic fixtures and supplies; higher-end sinks, connectors, or unexpected plumbing repairs can push totals to $400–$900.
Time and expense scale with complexity, materials, and local parts prices.
Types of Sinks and Mounting Styles
Different sink designs and mounting styles affect installation steps, countertop compatibility, and required support.
Common options include drop-in (top-mount) sinks, undermount sinks, farmhouse (apron) sinks, vessel sinks, and integrated or solid-surface sinks.
Each type brings specific cutout, sealing, and fastening considerations that influence tools and workmanship.
Drop-in (top-mount) sinks
A drop-in, or top-mount, sink sits with its rim resting on the countertop cutout, making it one of the simplest and most common installation methods for kitchens and bathrooms.
It requires a matching cutout, a secure sealant bead, and clips or fasteners underneath. Accessible for DIY, it tolerates imperfect edges and allows easy replacement, though the exposed rim affects cleaning and aesthetics.
Undermount sinks
Installers mount undermount sinks beneath the countertop so the rim is hidden and the work surface flows uninterrupted into the basin. They require solid countertop material and precise cutouts.
Attachment uses clips, epoxy, or silicone and sometimes brackets for heavy materials. Plumbing connections mirror other sinks but access for sealing and support is critical.
Maintenance focuses on keeping the exposed underside and seal clear of debris.
Farmhouse (apron) sinks
While undermount models tuck the rim beneath the countertop, farmhouse (apron) sinks present a prominent exposed front that becomes an integral part of the cabinet face.
They mount through the countertop with the apron projecting forward, requiring cabinet modifications and reinforced support.
Common in fireclay, stainless, or enameled cast iron, they offer deep basins and a vintage aesthetic but demand precise measuring and installation planning.
Vessel sinks
Considered a striking focal point in contemporary and transformational bathrooms, vessel sinks sit atop the countertop rather than being recessed, creating an elevated basin that ranges from glass and porcelain to stone and metal.
Installation requires a compatible faucet height, secure mounting ring or flange, proper drain sizing, and careful sealing to prevent leaks and countertop damage while allowing easy access for maintenance.
Integrated and solid-surface sinks
Integrated and solid-surface sinks combine countertop and basin into a single, seamless unit—often fabricated from engineered stone or acrylic—offering a clean look and simplified cleaning with no exposed seams where grime can collect.
Installation requires precise countertop templating and secure adhesive or mechanical anchoring; recessed support and proper plumbing cutouts are essential.
Repairs are possible by sanding and polishing to remove scratches or minor stains.
How sink material affects installation (stainless steel, porcelain, composite)
Moving from seamless solid-surface installations to traditional standalone bowls highlights how material choices shape mounting and preparation.
Stainless steel requires lightweight support, sound-dampening pads, and careful sealing to prevent galvanic corrosion.
Porcelain demands rigid cabinetry, gentle handling to avoid cracks, and reinforced clips or brackets.
Composite sinks need precise cutouts, adhesive bonds, and compatible sealants to maintain aesthetics and durability.
Tools and Materials Required
A clear list of tools and materials guarantees the sink installation proceeds smoothly and without surprises.
The essentials include basic hand tools and plumbing-specific items, while optional tools can speed work and improve results. It is also important to have replacement fittings and materials on hand to address worn or incompatible parts.
- Adjustable wrench, basin wrench, and pliers
- Pipe cutter, plumber’s tape, and sealant
- Silicone caulk and caulking gun
- Optional: power drill, jigsaw, and cordless driver
- Replacement parts: P-trap, gaskets, supply lines, and shutoff valves
Essential tools for sink installation
Wrenches, a basin wrench in particular, are indispensable for sink installation because they provide access to tight connections beneath the countertop.
Alongside these, a set of adjustable wrenches, screwdrivers (Phillips and flathead), pipe cutters or a hacksaw, plumber’s putty or silicone sealant, Teflon tape, and a tape measure form the core toolkit.
Also required: pliers, a bucket, and rags.
Optional tools that make the job easier
Beyond the basic toolkit just described, several optional tools can speed the job, reduce strain, and improve results.
A cordless impact driver eases stubborn fasteners, a basin wrench with swivel head reaches tight nuts, and a compact inspection mirror helps align fittings.
A caulk finishing tool guarantees neat seals, while a portable LED work light improves visibility in cabinets and under sinks.
Materials, fittings, and replacement parts to prepare
Several essential materials and common replacement fittings should be gathered before starting to remove the old sink: plumber’s putty or silicone caulk, appropriate-size supply lines, a compression or threaded tailpiece, sink strainer assembly, P-trap kit, mounting clips or brackets, and new shutoff valves if the existing ones are old or leaky.
| Item | Condition | Emotion |
|---|---|---|
| Strainer | New | Relief |
| P-trap | Complete | Confidence |
| Valves | Tested | Safety |
| Sealant | Fresh | Calm |
| Clips | Matching | Assurance |
Pre-Installation Preparation
Before any work begins, measurements of the cabinet and countertop opening should be confirmed to guarantee the sink will fit.
The installer must verify plumbing compatibility, locate and test the water supply shutoff, and assess whether the countertop needs additional support or reinforcement.
Finally, the correct sink, faucet, and drain components should be ordered to match the measurements and plumbing layout.
Measuring the cabinet and countertop opening accurately
Measure the cabinet and countertop opening carefully to confirm the new sink fits both the cutout and internal cabinet space. The installer records cutout width, depth, and cabinet interior height, noting obstructions and brace locations. Accurate measurements prevent modifications and guarantee proper support. Use a steady tape, double-check dimensions, and mark cutlines clearly before cutting.
| Item | Measure | Note |
|---|---|---|
| Cutout width | ||
| Cutout depth | ||
| Cabinet height | ||
| Obstructions | ||
| Support location |
Verifying plumbing compatibility and water supply shutoff
With cabinet and cutout dimensions confirmed, attention shifts to the plumbing that will serve the new sink.
The installer inspects drain alignment, trap location, and tailpiece clearance to confirm compatibility.
Supply lines, shutoff valves, and shutoff accessibility are tested; valves must fully close.
Any mismatched fittings or corroded valves are noted for replacement prior to installation to avoid leaks or delays.
Checking countertop support and reinforcement needs
Several key checks determine whether the existing countertop can support the new sink and whether reinforcement is required.
Inspect material (laminate, wood, granite), thickness, and underside condition for rot or delamination.
Measure load from sink type and accessories.
Verify cabinet framing, center support, and fastener integrity.
Plan reinforcement: plywood backing, metal brackets, or additional framing where needed before cutting or mounting.
Ordering the correct sink, faucet, and drain components
After confirming the countertop and cabinet can bear the desired load, attention turns to selecting the sink, faucet, and drain components that match those structural constraints and the homeowner’s functional needs.
Measure cutout dimensions, depth, and cabinet clearance. Choose compatible mounting style, material, and finish.
Match faucet hole count and spout reach. Order a drain assembly and supply lines rated for local codes and fixtures.
Step-by-Step Guide to Installing a Drop-in Sink
The installer begins by removing the old sink and disconnecting the plumbing to create a clean workspace.
Next, the countertop cutout is cleaned and the new drop-in sink is dry-fitted to verify alignment and fit.
Once aligned, sealant is applied, the sink is set in place, and mounting clips and fasteners are secured.
Removing the old sink and disconnecting plumbing
Begin by shutting off the water supply and clearing the countertop area so the old sink can be removed safely and access to plumbing is unobstructed.
Disconnect supply lines and label them.
Place a bucket, loosen and remove trap and tailpieces, detach mounting clips, and cut through old sealant.
Lift the sink out carefully.
Inspect exposed plumbing for corrosion or needed repairs before proceeding.
Cleaning and preparing the countertop cutout
With the old sink removed and plumbing inspected, attention turns to the countertop cutout to guarantee a proper fit and watertight seal.
Debris, old putty and adhesive are scraped away; edges are sanded smooth. Surfaces are cleaned with solvent and dried.
Any damaged laminate or particleboard is repaired or reinforced. Final measurements of the aperture are recorded before proceeding.
Dry-fitting the new sink and checking alignment
Dry-fit the new drop-in sink to confirm fit and alignment before applying sealant or hardware. Position the sink, check overhangs, front-to-back centering, and reveal symmetry. Verify clearance for faucet and countertop accessories. Adjust shims as needed and note any interference. Record measurements and marks for final placement.
| Item | Check |
|---|---|
| Fit | Edge contact |
| Centering | Left/right |
| Front reveal | Even gap |
| Faucet | Clearance |
| Shims | Stability |
Applying sealant and setting the sink in place
After confirming fit and marking final placement, the installer applies a continuous bead of countertop-safe silicone sealant around the sink cutout, keeping the bead just inside the edge to prevent excess squeeze-out.
The sink is lowered straight into place, centered and pressed evenly so sealant spreads uniformly.
Excess sealant is wiped away promptly with a damp cloth before curing begins.
Securing mounting clips and tightening fasteners
Begin by locating the sink’s mounting clip positions beneath the countertop and aligning each clip with the molded flanges or predrilled holes on the sink rim.
Install clips evenly around the perimeter, hand-tightening screws to hold the sink.
Use a screwdriver or socket to alternate tightening clips incrementally until snug, avoiding over-torquing.
Verify uniform compression of the sealant and stable sink seating.
Reconnecting faucet, drain, and supply lines
With the sink secured, attention turns to reconnecting the faucet, drain, and water supply lines in a logical sequence to prevent leaks and guarantee proper operation.
Install faucet tailpieces and tighten mounting nuts, attach supply hoses to shutoff valves, and thread the pop-up drain assembly with plumber’s putty or gasket.
Hand-tighten then snug fittings with tools, ensuring proper alignment and clearances.
Testing for leaks and final adjustments
Turn on the water supply and operate the faucet and drain to inspect every joint and connection for leaks, watching supply line connections, the tailpiece, and the pop-up assembly while feeling for moisture.
Observe under-sink cabinet for dripping, tighten fittings gently if needed, retest.
Check caulk bead around rim, smooth or add sealant, confirm countertop level and faucet alignment before final cleanup.
Step-by-Step Guide to Installing an Undermount Sink
The process begins with removing the old sink and preparing the underside of the countertop to guarantee a clean, even surface.
Next, adhesive is applied and the undermount sink is positioned, then supported and clamped until the adhesive cures.
Finally, the joint is sealed, the countertop edge finished, and the drain and trap are installed and tested for leaks.
Removing old sink and preparing underside of countertop
Begin by disconnecting plumbing and removing any fasteners so the old sink can be lifted out cleanly; this frees the workspace and prevents damage to the countertop.
Remove putty, old sealant, and mounting clips. Scrape residue and clean with a mild solvent.
Inspect underside for water damage or rot; repair or reinforce as needed.
Dry thoroughly before proceeding to the next step.
Applying adhesive and positioning the undermount sink
Apply a continuous bead of appropriate adhesive or silicone to the underside lip of the countertop where the undermount sink will contact it, ensuring an even, unbroken seal that matches the sink manufacturer’s specifications.
Align the sink carefully beneath the cutout, centering it and maintaining consistent overhang. Press upward to seat the rim into the adhesive, checking for squareness and full contact around the perimeter.
Supporting and clamping during cure time
Once the sink is pressed into the adhesive and verified for squareness, temporary supports are installed to hold it in exact position while the seal cures.
Wooden blocks, shims, or adjustable support brackets are used beneath the basin to prevent sagging. Clamps contacting only the sink rim and countertop protect finishes.
Supports remain until adhesive manufacturer’s cure time elapses and initial load testing is performed.
Sealing the joint and finishing the countertop edge
With the sink held securely and the adhesive cured, attention turns to sealing the seam and refining the countertop edge to guarantee a watertight, finished appearance. Apply a continuous bead of silicone, smooth with a wet finger or tool, trim excess, and sand or bevel the countertop edge for a neat reveal.
| Task | Tip |
|---|---|
| Seal seam | Use kitchen-grade silicone |
| Finish edge | Sand or bevel gently |
Installing drain and trap and testing for leaks
Begin by preparing the drain assembly and trap components to guarantee a proper fit and watertight connections; this involves inspecting washers and gaskets, hand-threading and lightly tightening fittings, and aligning the trap arm to the wall drain before final tightening.
Assemble tailpiece, slip nuts, and trap, then run water and fill sink to check for slow leaks. Tighten or reseal joints as needed.
Installing Specialty Sinks (Farmhouse and Vessel)
Specialty sinks require different preparation than standard models: farmhouse sinks often demand cabinet reinforcement or trimming to accommodate their apron and weight, while vessel sinks need precise countertop cutouts and properly sized mounting rings.
The installer should plan for secure support and sealing for heavy or oversized units and confirm that plumbing aligns with the altered sink position.
Safety procedures and at least one additional helper are recommended when lifting or positioning large ceramic or stone sinks.
Farmhouse sink installation considerations and cabinet modifications
Because farmhouse sinks are typically deeper and wider than standard undermount units, they often require deliberate cabinet alterations and support enhancements before installation. The installer assesses cabinet width, removes or relocates false fronts, reinforces the base with a cleat or plywood, and plans plumbing reroutes. Careful measuring and temporary bracing guarantee fit and protect aesthetics.
| Concern | Feeling |
|---|---|
| Width gap | Unease |
| Heavy load | Caution |
| Cut panel | Relief |
| Visible seam | Anxiety |
| Secure fit | Confidence |
Vessel sink countertop preparation and mounting ring installation
Measure the countertop opening carefully and mark the exact centerline where the vessel’s drain will align. Then verify that the chosen material and cabinet layout can support the sink and mounting ring assembly.
Cut the hole to the ring template, dry-fit the ring, and confirm level. Apply plumber’s putty or silicone to the ring flange, secure per manufacturer torque, and reconnect drain and faucet.
Handling heavy or oversized sinks safely
Lift heavy or oversized sinks with a plan that prioritizes structural support and safe handling: assess the sink’s weight and dimensions, confirm the countertop and cabinet can bear the load (including any mounting ring or apron overhang), and arrange appropriate lifting assistance or mechanical aids before attempting placement.
Use straps, padded supports, and at least two strong helpers; protect surfaces, secure temporary bracing, and test stability before final fastening.
Faucet and Drain Installation Details
The next section covers precise steps for mounting single-hole, centerset, and widespread faucets, including required sealants and tightening sequences.
It also explains installing pop-up drains and connecting a garbage disposal, with attention to watertight seals and electrical/safety considerations.
Finally, common assembly steps for traps and P-traps are outlined to guarantee proper alignment and leak-free connections.
Mounting single-hole, centerset, and widespread faucets
Installing faucets—whether single-hole, centerset, or widespread—requires matching the faucet type to the sink’s hole configuration, securing the mounting hardware, and connecting supply lines while maintaining watertight seals.
Single-hole units use one gasket and nut; centerset combines spout and handles on a single base; widespread separates components with individual mounting nuts.
Tighten evenly, route flexible lines without kinks, and test for leaks.
Installing pop-up drains and garbage disposal hookup
After securing the faucet and confirming watertight connections, attention shifts to the drain and disposal to complete the sink assembly.
Install the pop-up drain flange with plumber’s putty, tighten the tailpiece and basket nut, then attach the lift rod linkage.
Mount the garbage disposal per manufacturer instructions, align the discharge, secure mounting ring, and connect the disposal outlet to the tailpiece with a gasketed coupling.
Common trap and P-trap assembly steps
Begin by aligning the trap components beneath the sink to verify fit and orientation: a P-trap assembly typically consists of a tailpiece, trap bend, trap arm, and slip nuts with washers, and each piece should be dry-fit before final tightening to guarantee proper drainage slope and clearance. Assemble slip nuts finger-tight, adjust for level, then fully tighten and test for leaks.
| Step | Action |
|---|---|
| 1 | Dry-fit parts |
| 2 | Finger-tighten nuts |
| 3 | Align slope |
| 4 | Tighten fully |
| 5 | Test for leaks |
Common Problems During Installation and How to Fix Them
Common installation issues include leaks at drain or supply connections, a misaligned sink or uneven countertop fit, and insufficient cabinet support causing sagging.
Problems can also arise from improper garbage disposal or dishwasher drain connections.
Each issue typically has straightforward fixes—tightening or resealing fittings, shimming or adjusting the sink, reinforcing the cabinet, or correcting plumbing hookups.
Leaks at the drain or supply connections
Leaks at the drain or supply connections are among the most frequent issues discovered during sink installation and typically indicate problems with seals, fittings, or alignment.
Technicians should tighten fittings to manufacturer torque, replace damaged washers or O-rings, apply plumber’s tape to threaded joints, and reseat drain gaskets with appropriate sealant.
After repairs, perform a pressure and visual leak test before completing installation.
Misaligned sink or uneven countertop fit
Misalignment of the sink or an uneven countertop fit often stems from measurement errors, warped surfaces, or improper support during installation.
These issues can cause gaps, rocking, or stress on plumbing connections that lead to leaks and premature failure.
To correct this, verify cutout dimensions, shim or plane the countertop edge, adjust sink mounting clips, and reseal seams to guarantee a flush, stable, watertight fit.
Insufficient cabinet support or sagging
Address inadequate cabinet support promptly to prevent sagging, strained fasteners, and damaged plumbing.
Inspect cabinet floor, rails, and rear cleats for rot, gaps, or weak joints. Reinforce with plywood inserts, metal brackets, or additional cleats secured to studs.
Level and shim as needed before sink installation.
Recheck fastener torque and plumbing alignment to avoid stress and leaks over time.
Issues with garbage disposals or dishwasher drain connections
Disconnecting and testing the disposal and dishwasher drain connections before final assembly prevents many common installation failures.
The installer checks for proper gasket seating, secure flange and mounting ring, and correct hose clamps.
Air gaps or high loops must be installed to prevent backflow.
Tightness is verified, leaks are corrected, and electrical or plumbing alignments are adjusted to guarantee reliable operation.
Safety Precautions and Best Practices
Before beginning work, the installer guarantees water and electrical supplies are safely shut off and verified to prevent accidents.
Heavy components are handled with proper lifting technique and, when needed, a second person to reduce strain and risk.
Appropriate sealants and adhesives are selected for the sink and countertop materials to guarantee watertight, durable joints.
Turning off water and electricity safely
Any homeowner preparing to install a sink must first shut off both the water supply and any nearby electrical sources to prevent leaks, shocks, or damage; this involves locating and closing the appropriate shut-off valves (or the main water supply if local valves are absent) and turning off power at the circuit breaker for outlets or hardwired fixtures serving the sink area.
After shutdown, drain lines, verify no flow, and label breakers.
Proper lifting techniques and two-person tasks
Lift with intent and coordination: when moving sinks, cabinets, or countertops, two people should establish clear roles (lead and guide), communicate each step, and use proper body mechanics—bend at the knees, keep the back neutral, hold the load close to the torso, and pivot with the feet rather than twisting the spine.
Use gloves, appropriate footwear, clear pathway, and mechanical aids (dollies, straps) to distribute weight safely.
Using the right sealants and adhesives for different materials
Select sealants and adhesives based on the materials involved, exposure conditions, and manufacturer recommendations to assure durable, watertight bonds and safe installation.
Use silicone for sinks and nonporous countertops, plumber’s putty for removable fixtures, and polyurethane or epoxy for porous surfaces and high-stress joints.
Confirm surfaces are clean, dry, and primed if required. Allow full cure time and follow ventilation and safety guidelines.
Maintenance After Installation
After installation, routine checks help catch slow leaks early by observing beneath the sink after several hours and monitoring water usage for unexplained drops.
Cleaning and care should match the sink material—stainless steel, porcelain, and composite each require specific cleaners and techniques to avoid damage.
Fittings and seals should be inspected periodically and tightened or re-sealed at the first signs of seepage or loosening.
How to test and monitor for slow leaks
Begin by performing a controlled visual and tactile inspection of joints, supply lines, and the P-trap immediately following installation and at regular intervals thereafter. Note dampness, staining, or odor; run water and observe slow drips; use tissue to detect seepage; check under-sink after several hours. Record findings and tighten or replace fittings as needed.
| Area | Test | Action |
|---|---|---|
| Joints | Tissue/visual | Tighten/replace |
| Supply lines | Press/run water | Replace if wet |
| P-trap | Inspect after idle | Reseal/clean |
Routine cleaning and care for different sink materials
Once leak checks and any minor repairs are completed, attention should turn to routine cleaning and care tailored to the sink material.
Porcelain benefits from mild detergent and nonabrasive pads;
stainless steel resists stains with baking soda or vinegar and soft cloths;
composite and granite need pH-neutral cleaners and gentle wiping;
cast iron requires immediate drying and periodic enamel-safe polish to prevent rust and dulling.
When to tighten fittings or re-seal joints
Although fittings and sealant generally hold under normal use, periodic checks are essential to catch loosening or degraded seals before leaks develop.
Inspect joints quarterly, after temperature extremes, vibration, or noticeable drips.
Tighten slip nuts and compression fittings snugly without over-torquing; replace worn washers or reapply plumber’s putty or silicone where sealant has cracked.
Test for leaks and adjust as needed.
Cost-Saving Tips and When Upgrades Are Worth It
The article outlines where homeowners should splurge versus save on sink, faucet, and hardware choices to balance appearance, durability, and budget.
It highlights practical DIY shortcuts—such as proper sealant technique and using quality mounting clips—that reduce costs without sacrificing function.
It also notes when higher-quality materials pay off over time through longevity and reduced maintenance.
Where to splurge vs. save on sink, faucet, and hardware
Deciding where to splurge or save on a sink, faucet, and related hardware hinges on balancing durability, daily use, and visible impact: prioritize a high-quality faucet and durable sink material for longevity and performance, but economize on less critical items like strainers, basic trim, or decorative hardware that can be upgraded later if desired.
Invest in corrosion-resistant finishes and reliable valves; save on cosmetic extras.
DIY shortcuts that don’t compromise quality
Save time and money by choosing targeted DIY shortcuts that preserve function and finish—for example, reuse existing shutoff valves after confirming they seal, install a quality pull-down faucet while opting for a midrange sink material, and substitute a premium garbage strainer with a durable basic model that can be upgraded later.
Prioritize proper mounting, reliable sealants, and correct trap alignment; defer cosmetic upgrades until function is proven.
Long-term benefits of higher-quality materials
After prioritizing targeted shortcuts that preserve function, homeowners should weigh where higher-quality materials pay off over time.
Durable sinks, robust fittings, and corrosion-resistant valves reduce replacements and labor costs. Superior finishes resist stains, lowering maintenance.
Spending more upfront often prevents leaks and water damage, preserving cabinetry and floors.
Calculating lifecycle cost versus immediate savings clarifies when upgrades are fiscally sensible.
Checklist: Ready-to-Install and Post-Install Inspection
A concise checklist guarantees the installer has the right tools, parts, and measurements before beginning and a clear inspection routine after finishing.
The pre-install list prevents delays and mistakes, while the post-install inspection confirms watertight connections, proper alignment, and safe operation. Together these checks reduce callbacks and extend the sink’s service life.
- Verify tools, mounting hardware, sealant, and supply lines are on hand
- Confirm sink dimensions, cutout measurements, and rough-in locations
- Test-fit components and dry-fit connections before applying sealant
- Inspect for leaks, proper drain slope, and secure fastenings after installation
- Run water and operate valves to check flow, drainage, and shutoff function
Pre-install checklist for tools, parts, and measurements
Several essential items and measurements must be confirmed before beginning sink installation: verify sink type and dimensions, countertop cutout size, and cabinet clearance.
Confirm water supply shutoff access, drain alignment, and P-trap compatibility.
Gather required tools—adjustable wrench, plumber’s putty, silicone, basin wrench, tape measure, level—and parts: supply lines, tailpiece, gaskets, mounting hardware, and sealant.
Guarantee measurements match manufacturer specifications.
Post-install inspection checklist to confirm a successful installation
One clear walkthrough guarantees the installer verifies function and seals before declaring the sink complete:
inspect for leaks at supply and drain connections, confirm the faucet and handles operate smoothly with proper water flow and shutoff, check that the sink sits level and the mounting hardware is secure, and examine sealant lines for continuous adhesion with no gaps.
Verify trap alignment, test hot/cold balance, and confirm no movement.
Conclusion
Proper installation transforms a sink from a utility into a reliable centerpiece; about 60% of DIYers report saving over $300 by handling installations themselves, a statistic that highlights both empowerment and risk. With suitable tools, careful prep, and adherence to safety, most homeowners can confidently install a drop-in sink. Yet recognizing when to hire a pro—especially for complex plumbing or countertop work—ensures durability, prevents costly mistakes, and preserves long-term peace of mind.