How to Install Porcelain Sinks: Step-by-Step Guide for a Professional Finish
Installing a porcelain sink involves several key steps to ensure a professional finish. Start by verifying measurements and reinforcing cabinets if necessary. Confirm that your faucet and drain are compatible with the sink. Next, dry-fit the sink in place, apply a continuous bead of neutral-cure silicone around the edge, and secure the sink with mounting clips. Tighten the hardware evenly and reconnect the plumbing. Finally, test for leaks and finish the caulk lines for a polished look. For a detailed guide on tools, each step, and troubleshooting, continue reading.
Overview of Porcelain Sink Installation and Expected Results
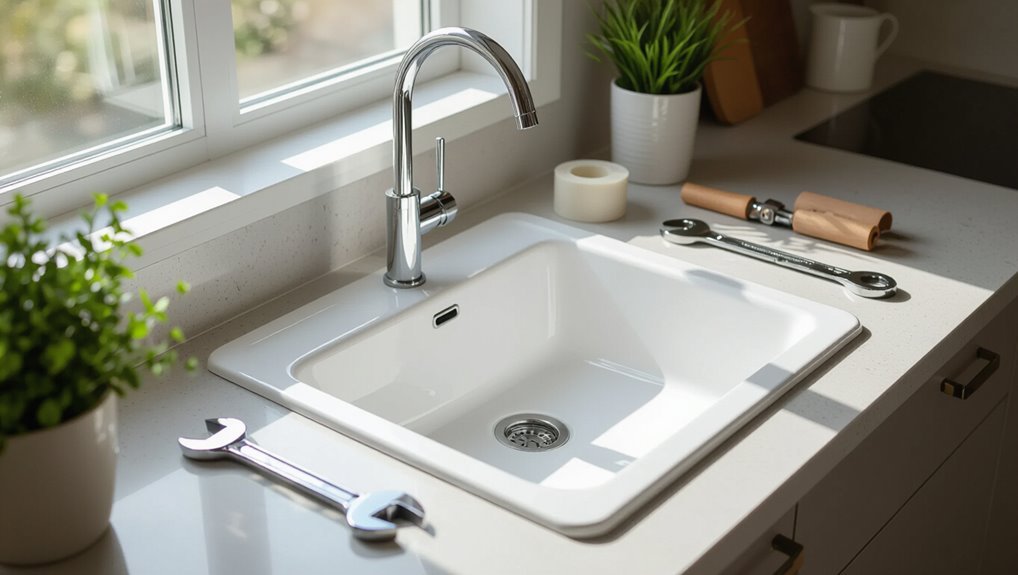
A professional porcelain sink installation presents a secure, level basin with neatly sealed edges and properly aligned fixtures.
It requires specific tools and moderate plumbing and carpentry skills to achieve a durable, water-tight finish.
Time, cost, and careful planning—covering measurements, materials, and potential countertop modifications—determine whether the project suits a DIYer or a hired installer.
What a professional porcelain sink installation looks like
Professional porcelain sink installation presents a precise sequence of steps—accurate measurements, secure mounting, watertight plumbing connections, and careful sealing—that together deliver a durable, level, and visually seamless result aligned with the surrounding countertop and cabinetry.
The finished installation demonstrates correct bowl alignment, uninterrupted countertop lines, no leaks, smooth caulking, properly seated drains, and consistent fixture spacing, illustrating how to install porcelain sinks with lasting, professional appearance.
Tools and skills required for a professional finish
Begin by assembling the right tools and mastering a few essential skills: accurate measuring, steady cutting, precise sealing, and careful plumbing work.
Essential tools include tape measure, level, jigsaw or hole saw, silicone gun, plumber’s wrench, basin wrench, plumber’s putty, clamps, and safety gear.
Skills involve template alignment, countertop cutting, secure mounting, leak-free connections, and clean caulking for a lasting, professional finish.
Time, cost, and planning considerations
With tools assembled and skills practiced, planning time and budget becomes the next priority for a smooth porcelain sink installation.
Estimate 2–6 hours for removal, fitting, sealing, and cleanup; longer for plumbing changes.
Material costs vary: sink $100–$600, fixtures $50–$300, sealant and supplies $20–$80.
Allow contingency time and 10–20% extra budget for unexpected issues.
Types of Porcelain Sinks and Installation Methods
The section outlines common porcelain sink types and appropriate installation methods, starting with drop-in (self-rimming) models and their straightforward fit for framed countertops.
It then contrasts undermount sinks, which require solid substrate and precise mounting, with farmhouse/apron-front sinks that demand cabinet modifications and front support.
Finally, it compares installation complexity and long-term durability to guide selection based on skill level and countertop material.
Drop-in (self-rimming) porcelain sinks: features and suitability
A drop-in (self-rimming) porcelain sink rests on the countertop with a visible lip that supports the bowl and conceals the cut edge, making it one of the simplest sink types to install and replace.
It suits laminate, tile, and older countertops, offers easy access for maintenance and replacement, and tolerates minor countertop imperfections.
Sealing under the rim prevents leaks and stabilizes the fixture.
Undermount porcelain sinks: features and suitability
Undermount porcelain sinks mount beneath the countertop, creating a seamless edge that highlights clean lines and simplifies countertop cleaning by allowing debris to be wiped directly into the basin.
They require sturdy, finished countertop materials and precise cutouts, plus reliable mounting hardware and professional support to prevent stress and leaks.
Best for contemporary kitchens prioritizing uninterrupted surfaces and easier counter maintenance.
Farmhouse/apron-front porcelain sinks: special considerations
Several distinct factors set farmhouse (apron‑front) porcelain sinks apart from other styles, particularly their exposed front panel, deeper basins, and heavier weight requiring reinforced cabinetry and precise front-facing alignment.
Installers must account for cabinet cutouts, support brackets or ledger rails, and front lip clearance. Plumbing connections need careful routing to avoid visible gaps.
Finish coordination guarantees the apron aligns with surrounding trim and countertop edges.
Comparing installation complexity and durability
When comparing porcelain sink options and installation methods, differences in mounting style, weight, and edge profile determine both the labor required and the long-term durability of the installation; top‑mount sinks generally simplify fitting but expose rim edges to chipping, while undermount and apron‑front designs demand stronger cabinet reinforcement and more precise sealing yet offer cleaner lines and better protection against countertop water infiltration.
| Type | Complexity | Durability |
|---|---|---|
| Top‑mount | Low | Moderate |
| Undermount | High | High |
| Apron‑front | High | High |
Pre-Installation Preparation
Before any work begins, measurements for the countertop and sink cutout must be verified against the sink’s specifications to guarantee a proper fit.
The installer should inspect plumbing, cabinet support, and load capacity, and confirm that chosen faucets, drains, and accessories are compatible with the sink and countertop.
Appropriate safety precautions and protective materials—gloves, eye protection, drop cloths, and supports—should be prepared to prevent damage and injury.
Measuring the countertop and sink cutout requirements
Accurate measurements are essential to guarantee the porcelain sink fits the countertop and aligns with plumbing and cabinetry clearances.
Measure sink outer dimensions, bowl depths, and cutout template precisely. Transfer template to countertop, accounting for overhang, faucet holes, and edge distance.
Verify symmetry and level reference points. Double-check measurements before cutting; mark cut lines clearly and confirm tool clearances for a clean, accurate cutout.
Checking plumbing, cabinet support, and load capacity
Having verified countertop cutout and template alignment, attention turns to plumbing connections, cabinet framing, and whether the cabinet can bear the sink’s weight.
Inspect drain and water supply locations for alignment, confirm shutoff valves function, and guarantee cabinet base, back panel, and cleats provide continuous support.
Calculate static load including sink, filler trim, and potential counterloads; reinforce with plywood or brackets as needed.
Selecting compatible faucets, drains, and accessories
When selecting faucets, drains, and accessories for a porcelain sink, the buyer should prioritize compatibility of mounting style, hole spacing, and finish while confirming functional requirements such as flow rate, cartridge type, and drain size.
Verify drain flange dimensions, trapway alignment, and overflow compatibility. Choose corrosion-resistant materials and matching finishes.
Confirm accessory mounting (soap dispensers, sprayers) fits counter thickness and hole pattern before purchase.
Safety precautions and protective materials
After confirming compatible faucets, drains, and accessories, attention shifts to safety measures and protective materials required before cutting, mounting, or sealing a porcelain sink.
Wear safety goggles, dust mask, cut-resistant gloves, and hearing protection.
Protect countertops and floors with drop cloths and plywood.
Use masking tape on porcelain edges to prevent chipping.
Keep a first-aid kit and fire extinguisher nearby.
Materials and Tools Checklist
The installer prepares a concise inventory of tools and materials needed to cut, seal, and mount a porcelain sink, plus recommended sealants, adhesives, and fasteners, and a few optional tools for finishing and troubleshooting.
Below is a focused list to guide procurement and readiness:
- Confidence: the right tools make the job predictable and safe
- Relief: quality sealants prevent leaks and rework
- Pride: neat finishing reflects craftsmanship
- Readiness: spare fasteners and adhesives avoid delays
- Calm: troubleshooting tools reduce stress on installation day
Essential tools for cutting, sealing, and mounting
Prepare a compact toolkit that covers cutting, sealing, and mounting tasks to guarantee a smooth porcelain sink installation.
Essential items include a carbide hole saw and angle grinder with diamond blade for cutouts, silicone gun and caulking tools for bead application, adjustable wrench and basin wrench for plumbing, clamp set and shims for positioning, and safety gear: goggles, gloves, and dust mask.
Recommended sealants, adhesives, and fasteners
Several specific sealants, adhesives, and fasteners are recommended to guarantee a durable, watertight porcelain sink installation.
Use 100% silicone sanitary caulk for perimeter sealing, plumber’s putty for drain flanges, and a neutral-cure silicone where metal meets porcelain.
Select stainless steel or brass mounting clips and corrosion-resistant screws.
Threadlocker on metal fasteners prevents loosening; adhesive pads cushion porcelain against cabinets.
Optional tools for finishing and troubleshooting
Keep a handful of optional finishing and troubleshooting tools on hand to streamline final adjustments and address common issues without rework.
Include small rubber mallet, scratch repair kit, precision screwdriver set, pipe thread sealant tape, plumber’s putty, fuel-free heat gun for adhesive curing, caulk finishing tool, portable inspection mirror, LED flashlight, and replacement mounting clips to resolve fitment, seal, or alignment problems quickly.
Step-by-Step Installation for Drop-In Porcelain Sinks
The process begins with removing the old sink and preparing the countertop to guarantee a proper fit and clean sealing surface.
The new drop-in sink should be dry-fitted and marked, then set with an appropriate bead of caulk around the rim before securing with clips, screws, or other supports.
Finally, plumbing is reconnected and the installation is tested carefully for leaks.
Removing the old sink and preparing the countertop
Begin by shutting off the water supply and disconnecting the faucet, supply lines, and drain to prevent leaks and free the sink for removal.
Cut through old caulk, loosen clips or bolts beneath, and lift out the basin.
Clean residual sealant and debris from the countertop.
Repair or sand damaged laminate or wood, ensuring a flat, dry surface ready for sealing and installation of the replacement sink.
Dry-fitting the new sink and marking cut lines
Dry-fit the new porcelain sink into the countertop opening to verify alignment, clearances, and contact points before any permanent cutting or sealing.
Confirm faucet holes, drain, and mounting lip align; check cabinet clearance and underside plumbing access. Shim as needed for level.
With the sink positioned, trace the rim and any necessary cut lines using a pencil or masking tape, then remove the sink for final adjustments.
Sealing the rim: choosing and applying the right caulk
With the sink removed after marking and adjusting, attention shifts to sealing the rim to prevent water infiltration and secure the fixture.
Select a high-quality silicone or polyurethane caulk rated for bathrooms, mildew-resistant and formulated for porcelain-to-counter surfaces.
Clean and dry the rim, apply a continuous bead with a steady gun, smooth with a damp finger or tool, and allow full cure per manufacturer instructions.
Securing the sink: clips, screws, and support methods
Once the caulk is applied and tack-free, the sink is lowered into position and aligned so the rim sits evenly in the cutout; securing it now prevents movement and guarantees a watertight seal.
Adjustable mounting clips are tightened evenly beneath the countertop; stainless screws resist corrosion. For larger sinks, add adhesive-backed foam or plywood blocks for under-support.
Trim excess caulk and let cure before proceeding.
Reconnecting plumbing and testing for leaks
After the caulk has set and the sink is secured, attention turns to reconnecting the drain and water lines to restore function and check for leaks.
Install the tailpiece, P-trap, and tighten slip nuts hand-tight plus quarter-turn.
Reattach supply lines and open shutoffs slowly.
Inspect all joints for drips, run hot and cold, and tighten any leaking fittings until dry.
Final cleanup and achieving a seamless edge
Begin by removing any excess caulk and adhesive from the sink rim and countertop using a sharp utility knife or a thin, stiff putty knife, working carefully to avoid scratching the porcelain or laminate.
Wipe surfaces with denatured alcohol, dry thoroughly, then apply a consistent bead of color-matched silicone.
Smooth with a wet finger or caulk tool for a tight, even seam; clean residue and polish.
Step-by-Step Installation for Undermount Porcelain Sinks
For undermount porcelain sinks, proper installation begins with reinforcing the cabinet and the underside of the countertop to support the bowl’s weight.
The process then covers creating or refining the countertop cutout, applying adhesive, positioning the sink level, and securing it with clamps, blocks, or hardware while the adhesive cures.
Finally, the joint is sealed and the underside finished to protect against moisture and guarantee long-term stability.
Reinforcing the cabinet and underside of the countertop
Reinforce the cabinet and underside of the countertop to confirm the heavy porcelain sink is fully supported and to prevent sagging or damage over time.
Install solid blocking between cabinet sides, add a plywood brace beneath the cutout, and secure with stainless screws.
Confirm brace thickness matches sink lip clearance, seal wood against moisture, and verify level and rigidity before mounting the sink and hardware.
Creating or adjusting the countertop cutout
Measure the sink template carefully against the countertop to transfer precise cut lines for an undermount porcelain sink.
Verify alignment with cabinet center and plumbing. Score lines with a utility knife, then cut using a jigsaw with a fine-tooth blade for the material.
Smooth edges with a router or sandpaper.
Dry-fit the sink to confirm clearance and adjust as needed before final installation.
Applying adhesive and positioning the sink for level mount
Apply a continuous bead of approved adhesive or epoxy to the countertop flange, following the manufacturer’s bead size recommendations and keeping a clear recess where the sink rim will seat.
Then lower the undermount sink into place while aligning it with layout marks and cabinet center.
Verify the sink sits flush, check for uniform gap and full adhesive contact, and adjust gently to achieve an even, level position.
Clamping, blocking, or using mounting hardware for cure time
Once the sink is seated and level with uniform adhesive contact, temporary support must be provided while the adhesive cures.
Install foam blocks or wood cleats beneath the bowl to bear weight without stressing the rim. Use adjustable clamps or torsion bars where countertop access permits, and attach manufacturer-recommended mounting brackets.
Verify alignment and load distribution; leave supports undisturbed for the full cure time.
Sealing the joint and finishing the underside
After the adhesive has fully cured and temporary supports remain in place, attention turns to sealing the perimeter and finishing the sink underside to prevent leaks and protect against moisture.
Apply a continuous bead of waterproof silicone or urethane sealant between countertop and sink flange, smoothing with a tool for uniform contact.
Trim excess, allow proper cure, and coat exposed underside with rust- and moisture-resistant paint or sealant.
Plumbing hookup and leak check
Begin the plumbing hookup by installing the drain assembly and tailpiece through the sink’s drain opening, ensuring all gaskets and plumber’s putty or silicone (as specified by the manufacturer) are properly seated to create a watertight seal.
Connect trap, supply lines and faucet connections, tightening fittings to manufacturer torque.
Pressurize system, inspect all joints for leaks, correct any seepage, then retest.
Installing Farmhouse/Apron-Front Porcelain Sinks
For farmhouse or apron-front porcelain sinks, the cabinet opening must be framed and the front support reinforced to carry the exposed front and heavy basin.
Careful alignment of the apron with the countertop face guarantees an even reveal, while chosen mounting methods and anchors determine how the sink weight is transferred to the cabinet.
Final sealing and trim work produce a flush, professional appearance and prevent water intrusion.
Framing the cabinet opening and front support
Measure the cabinet opening precisely and install a reinforced front support to carry the weight of the farmhouse sink; apron-front porcelain sinks transfer much of their load to the cabinet face, so the framing must be squared, level, and securely anchored to studs or blocking.
Add cross-bracing, a plywood ledger or steel angle, and guarantee fasteners are rated for the load.
Confirm clearance for plumbing and drawer removal.
Aligning the apron front with the countertop face
With the cabinet face prepared and the front support secured, attention turns to aligning the apron front so its face sits flush and even with the countertop.
The installer checks level and plumb, sets temporary shims behind the lip, and verifies consistent reveal along adjacent cabinet faces.
Minor adjustments correct tilt; gaps are measured for uniformity before final sealing and trim integration.
Mounting methods and securing the sink weight
Secure the farmhouse sink using a method suited to its size and the cabinet’s construction: common options include undermount clips bolted to the cabinet face, a bead of high-strength silicone combined with plywood or metal rear cleats, or a full-support frame that transfers weight to the cabinet floor.
Fasteners should be stainless, load-rated, and spaced to prevent flex. Test fit, tighten progressively, and verify level before final set.
Sealing and trim details for a flush, professional look
After the sink is leveled and fasteners are set, attention turns to sealing and trim to achieve a flush, professional appearance.
Apply a continuous bead of silicone sealant at the countertop-to-apron junction, tool smooth for even contact and drainage.
Install supplied trim or custom molding, ensuring gap-free fits and concealed fasteners.
Wipe excess, cure per manufacturer, then verify watertight seams and aesthetic alignment.
Common Problems and How to Fix Them
Common installation issues include chips or glaze damage, cracks, and persistent leaks at seams or drains that require prompt repair.
Uneven sinks, rocking, or poor leveling are often corrected by adjusting mounting hardware, shims, or the support frame.
Compatibility problems with granite, laminate, or wood countertops demand appropriate cutout techniques, sealants, and support to prevent stress and moisture damage.
Preventing and repairing chips, cracks, or glaze damage
Preventing and repairing chips, cracks, or glaze damage requires both careful use and timely intervention to preserve a porcelain sink’s appearance and function.
Routine avoidance of heavy impacts, use of protective mats, and gentle cleaners minimizes harm.
Small chips or hairline cracks can be filled with epoxy or porcelain repair kits, sanded smooth, and color-matched.
Significant damage warrants professional restoration or replacement to guarantee waterproofing.
Fixing uneven sinks, rocking, or poor leveling
Leveling a porcelain sink guarantees proper drainage and prevents stress that can cause leaks or cracks; when a sink rocks or sits unevenly, the issue usually stems from improper support, warped cabinetry, or uneven mounting hardware.
Inspect underside supports, add or shim blocking, tighten or reposition brackets, and use levelable mounting clips.
Recheck alignment and secure silicone-free temporary supports until adhesive cures.
Stopping and sealing persistent leaks at seams or drains
Identify the source of persistent leaks at sink seams or the drain flange before applying any sealant; leaks often originate from deteriorated plumber’s putty, cracked gaskets, loose mounting nuts, or porous seam caulk.
Tighten mounting hardware, replace worn gaskets or putty, and clean mating surfaces.
Use appropriate marine-grade silicone or plumber’s putty for the drain, allow full cure, then retest for leaks.
Addressing countertop compatibility issues (granite, laminate, wood)
When installing a porcelain sink, assess countertop material—granite, laminate, or wood—to determine necessary modifications and compatible mounting methods; each material has distinct limitations for cutout support, adhesive choice, and load-bearing capacity.
Granite needs reinforced brackets and clean epoxy; laminate requires plywood substrate and water-resistant sealants; wood demands proper bracing, moisture protection, and corrosion-resistant fasteners to prevent sagging and rot.
Finishing Touches for a Professional Look
The final stage focuses on neat caulking with correct color matching, careful polishing to remove adhesive residue, and installation of finish accessories such as strainers, soap dispensers, and trim.
Attention to final alignment checks and minor aesthetic adjustments guarantees consistent gaps and level surfaces. These finishing touches determine the sink’s professional appearance and long-term durability.
Proper caulking technique and color matching
Carefully applied caulking seals gaps and creates a clean junction between the porcelain sink and countertop, preventing water intrusion and staining.
Use a high-quality, mildew-resistant silicone or hybrid sealant compatible with porcelain.
Smooth a consistent bead with a damp finger or tooling tool; remove excess promptly.
Match sealant color to sink or countertop for a seamless look, testing samples under natural light before final application.
Polishing porcelain and removing adhesive residue
After the sealant has been smoothed and cured, attention turns to polishing the porcelain and removing any adhesive residue to achieve a finished, professional appearance.
Use a non-abrasive cleaner and soft cloth to lift smears, then a fine automotive polishing compound for light scratches.
Remove dried adhesive with a plastic scraper and solvent recommended for porcelain, rinsing thoroughly and drying to inspect the result.
Installing accessories: strainers, soap dispensers, and trim
Installers fit strainers, soap dispensers, and trim last to complete both function and appearance, following manufacturer specifications and aligning components precisely with existing openings.
They apply plumber’s putty or silicone per instructions, hand-tighten and then wrench snugly to avoid overtightening, test for leaks, and secure decorative trim.
Excess sealant is removed; moving parts are checked for smooth operation before proceeding.
Final alignment checks and aesthetic adjustments
A final inspection guarantees the sink sits level, seams are flush, and visible hardware aligns with surrounding fixtures; small shifts in mounting clips or shims are corrected until gaps are uniform and the basin presents a clean, symmetrical appearance.
The installer verifies caulk lines are smooth, removes excess sealant, polishes exposed porcelain, confirms faucet alignment and drainage performance, and documents adjustments for quality assurance.
Maintenance and Care to Preserve the Installation
Routine maintenance keeps a porcelain sink looking and functioning its best, so the article outlines simple daily cleaning steps and recommended nonabrasive cleaners.
It then recommends preventive practices to minimize stains, scratches, and chips, such as using gentle tools, avoiding harsh chemicals, and protecting surfaces during heavy use.
Finally, a concise inspection checklist highlights signs of wear or damage and advises when professional repair or resealing is warranted.
Daily cleaning routines and recommended cleaners
Maintain a simple daily wipe-down to keep porcelain sinks looking their best and prevent buildup.
Use a soft microfiber cloth and warm water, adding a mild dish soap for greasy residue. Rinse thoroughly and dry to avoid water spots.
For periodic deeper cleaning, choose nonabrasive, pH-neutral cleaners or a baking soda paste; avoid harsh acids and abrasive pads.
Preventive measures to avoid stains, scratches, and chips
Protect surfaces from common hazards by using simple preventive measures that reduce the risk of stains, scratches, and chips.
Use soft mats or sink grids, avoid abrasive pads and harsh chemicals, wipe spills promptly, and place protective pads under heavy cookware.
Seal grout and caulk edges as recommended, avoid dropping hard objects, and use nonmetallic utensils to minimize surface damage and staining.
Long-term inspection checklist and when to call a pro
While regular visual checks catch many issues early, a concise long-term inspection checklist helps guarantee nothing is overlooked: inspect sealant and caulk for cracks, check mounting bolts and supports for looseness, test drain and trap for leaks, examine glaze for hairline cracks or chips, monitor faucet fittings for corrosion, and confirm countertop interface remains watertight.
Call a professional for persistent leaks, structural movement, or significant damage.
Cost Breakdown and When to Hire a Professional
A basic cost comparison outlines typical DIY expenses—materials, basic tools, and time—against professional fees that include labor, permits, and liability coverage.
Homeowners should consider hiring a licensed installer or plumber when the work involves complex plumbing modifications, structural changes, or uncertain water-tight connections.
Prospective contractors should be asked about credentials, references, estimated timelines, and warranty terms before work begins.
Typical DIY vs. professional cost comparison
Numbers matter when deciding whether to install a porcelain sink oneself or hire a pro: typical DIY costs range from $100–$400 for the sink and supplies, plus the value of time, while professional installations commonly run $300–$900 or more depending on labor, disposal, and plumbing complexity. A concise comparison follows:
| DIY | Professional |
|---|---|
| Lower material cost | Higher labor cost |
| Time investment | Faster completion |
| No warranty | Service guarantee |
| Basic tools only | Includes disposal |
| Variable quality | Consistent finish |
Signs you should hire a licensed installer or plumber
When should a homeowner call a licensed installer or plumber?
Complex plumbing alterations, unfamiliar drain or vent issues, gas lines nearby, or damaged subcounter supports warrant a pro.
Water leaks, persistent clogs after basic fixes, code compliance needs, or desired warranty-backed installation also justify hiring licensed help.
Emergency situations or lack of proper tools and experience are additional clear indicators.
Questions to ask contractors and warranty considerations
How should homeowners evaluate bids and warranties to guarantee value and protection?
Homeowners should request itemized bids, compare labor, materials, disposal, permit fees, and timelines.
Ask about installer licensing, insurance, references, and dispute processes.
Verify warranty scope, duration, transferability, and exclusions for porcelain, seals, and workmanship.
Obtain written contracts and retain documentation for future claims.
Quick Troubleshooting Flowchart for On-the-Job Issues
A concise troubleshooting flowchart guides technicians through common on-site failures and their immediate remedies.
It covers leak detection and quick containment, responses to a dropped or cracked sink during installation, and adjustments for misaligned faucet holes and fittings.
The checklist below highlights actions that minimize damage and downtime:
- Stop the water — prevent further flooding and damage
- Stabilize the sink — reduce stress on porcelain and fittings
- Assess cracks — decide repair versus replacement quickly
- Re-center and shim — align faucet holes before final sealing
- Call for backup if safety or structural concerns arise
Leak detection and immediate steps
Detecting leaks promptly preserves the sink installation and prevents water damage. This quick troubleshooting flowchart guides technicians through immediate diagnostic steps and short-term fixes.
Inspect visible joints, supply lines, and P-trap; dry surfaces, run faucet, and localize drip source.
Tighten fittings, replace damaged washers or compression rings, and apply temporary sealant if necessary.
Document leak origin and schedule permanent repair.
Handling dropped or damaged sinks mid-install
When a porcelain sink is dropped or sustains impact damage during installation, assess safety and structural integrity immediately: clear the area of debris, verify that no one is injured, and determine whether the basin has hairline cracks, fractured glaze, or complete breaks that compromise mounting or drainage.
Document damage, isolate and secure the sink, and evaluate repairability.
Replace if structural integrity is lost; notify client and supplier for warranty or replacement.
Corrections for misaligned faucet holes and fittings
Several common causes can produce misaligned faucet holes and fittings—incorrect template placement, sink rotation during mounting, or variances between fixture and sink hole centers.
The technician should first verify hole spacing and orientation against the faucet specifications before any modification.
If minor, ream or shim with waterproof gaskets; for larger offsets, use an escutcheon plate or relocate faucet with a new drilled hole, sealing with epoxy and waterproof caulk.
Summary Checklist for a Professional Porcelain Sink Installation
A concise checklist guarantees a professional porcelain sink installation proceeds safely, efficiently, and to code: Precision, safety, and pride guide the installer.
Verify measurements, secure mounting, test seals, confirm plumbing alignment, and finish cleanly. Emphasize durability and aesthetic integrity to satisfy standards and homeowners.
- Measure twice, cut once — confidence
- Tighten mounts — relief
- Test for leaks — reassurance
- Align fittings — calm
- Clean finishes — pride
Conclusion
The installer steps back, observing the porcelain basin’s new repose—an elegant compromise between function and grace. Minor blemishes whisper of past hands; seams disguised like quiet conversations. Routine care acts as gentle guardianship, preserving the surface’s soft authority. When complexity grows teeth, discretion recommends a seasoned hand. Ultimately, the finished sink offers domestic calm: a civilized centerpiece that politely accrues years while asking little, its servicefulness wrapped in subtle dignity.