How to Measure an Oval Bathroom Sink for Replacement: Step-By-Step Guide With Diagrams
To replace an oval bathroom sink, you’ll need to take three key measurements: the overall exterior length and width at their widest points, the interior bowl length, width, and depth from the rim to the lowest point, and the cutout dimensions along with the positions of the drain and faucet holes relative to the edges. Use a tape measure and a straightedge, recording measurements to the nearest 1/8 inch. Also, note the mounting style (undermount or drop-in) and rim reveal. Keeping accurate notes and photos will help prevent fitting issues. The following pages provide detailed steps, diagrams, and helpful tips for a successful replacement.
How to Know If You Need to Replace an Oval Bathroom Sink
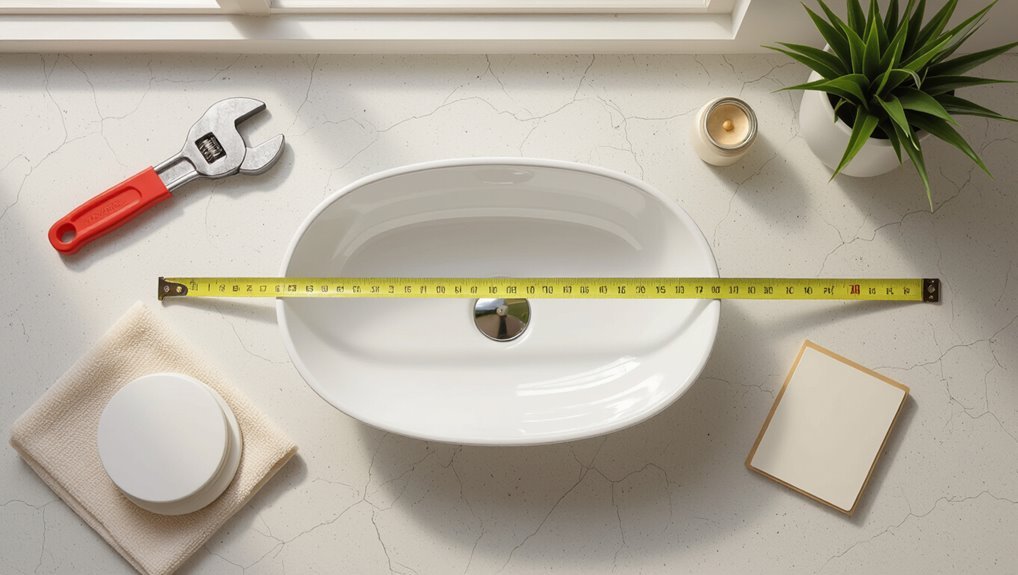
Visible cracks, deep scratches, persistent stains, or structural looseness typically indicate an oval bathroom sink should be replaced.
Minor cosmetic issues, surface chips, or leaky fixtures can often be resolved with a new faucet or professional reconditioning.
Evaluating the extent of damage and the cost of repair versus replacement guides the decision.
Signs of damage and wear that warrant replacement
Evaluating whether an oval bathroom sink needs replacement begins with noting functional failures and structural damage that compromise use or safety.
Cracks, deep chips, persistent leaks, undermount detachment, extensive staining or glaze loss, and rusted drains indicate replacement.
Severe undermining of countertop seals or recurring clogs from deteriorated trap connections also warrant action.
These signs inform decisions about how to measure an oval bathroom sink for replacement.
When a new faucet or reconditioning is sufficient instead
Not every sign of wear mandates replacing the basin; some issues can be resolved by swapping hardware or restoring the sink surface.
Minor chips, faded glaze, hairline cracks in the finish, or loose, leaking faucets often respond to reglazing, epoxy repairs, or faucet replacement.
Choose reconditioning when structural integrity is intact, mounting remains secure, and cost or disruption of full replacement outweighs benefits.
Quick answer: Measuring an Oval Bathroom Sink for Replacement in 3 Steps
The quick approach outlines three essential measurements—overall sink length and width, bowl length and width, and the distance between mounting or faucet holes—to guarantee a proper replacement.
It also lists the minimum tools needed: a tape measure, a straightedge or ruler, and a pencil for marking.
The following steps show how to capture each dimension accurately and compare them to replacement options.
What measurements you must capture for a proper replacement
Accurate measurements are essential when replacing an oval bathroom sink. The installer must capture three key dimensions—overall length, overall width, and basin depth—plus the position of the faucet holes and drain relative to the sink edges.
Also record countertop cutout dimensions, rim thickness, overflow location, and distance from drain center to back edge to guarantee proper fit and plumbing alignment.
Minimum tools required
Having recorded overall length, width, depth, and hole positions, attention turns to the minimal toolkit that will get the job done.
A tape measure, straight edge or ruler, pencil for marking, and a notepad suffice.
Optionally include calipers for precise hole spacing and a level to verify sink tilt.
Gloves and safety glasses are recommended for protection.
Preparing to Measure: What to Gather and How to Prepare the Sink Area
Before measuring an oval bathroom sink, one should gather a tape measure, masking tape, pencil, level, and a flashlight to guarantee accurate readings.
The work area must be cleared, dry, and well-lit, with water turned off and any sharp edges or clutter secured for safety.
Faucets, stoppers, and countertop items that could obstruct dimensions should be removed or moved aside before taking measurements.
Tools and materials checklist
A concise checklist of tools and materials guarantees measurements proceed smoothly and yield reliable results; essential items include a soft tape measure, a straightedge or level, a marker or pencil, a notepad for dimensions, a flashlight for underside inspection, and protective gloves.
Precise items and minor accessories are summarized below:
- Tape measure, straightedge, level
- Marker, pencil, notepad
- Flashlight, gloves, small mirror
Safety and workspace preparation
When preparing to measure an oval bathroom sink, the workspace should be cleared, well-lit, and free of standing water to prevent slips and verify accurate readings.
Protective gloves and safety glasses are recommended. Confirm adequate ventilation if cleaners are used.
Place a towel or non-slip mat to protect surfaces and catch debris.
Keep measuring tools within reach and document initial conditions before starting.
Removing accessories that interfere with measurements (faucet, stopper, countertop items)
Remove any items that could obstruct clear measurements: lift out countertop decor, unplug or set aside electrical devices, and detach the pop-up stopper and faucet handles if accessible.
Clear the area, label removed parts, and keep fasteners together.
Use basic tools to loosen mounting nuts without forcing components. Photograph positions for reassembly.
Confirm the sink rim and surrounding countertop are unobstructed for accurate length, width, and cutout measurements.
Step 1 Measure Overall Sink Length and Width
The first step is to measure the sink’s longest front-to-back length and its widest side-to-side width, using the outermost points of the oval.
Measurements should note whether they capture the external lip or just the basin edge so replacement fit and countertop cutouts are correct.
Care should be taken to avoid common errors such as measuring along a diagonal, rounding too generously, or omitting the flange.
How to measure the longest length (front-to-back) for an oval sink
To determine the longest front-to-back measurement of an oval bathroom sink, place a tape measure across the bowl from the very front rim to the very back rim, ensuring the tape passes through the sink’s center point for an accurate maximum dimension.
Record the distance in inches or millimeters.
Repeat measurement twice to confirm accuracy, noting any rim overhang that affects fitting.
How to measure the widest width (side-to-side) for an oval sink
Measure across the bowl at its widest point to determine the side-to-side dimension of an oval sink.
The measurer places the tape perpendicular to the front-to-back axis, spanning from inner edge to inner edge of the basin.
Record the reading to the nearest 1/8 inch.
Repeat once or twice to confirm accuracy and note any slight asymmetry.
Measuring external lip/flange vs. basin edge
Distinguishing between the external lip (flange) and the basin edge is essential before taking any overall measurements.
The flange is the visible rim that rests on the countertop; the basin edge is the inner curve where water collects.
Measure overall sink length and width including the flange if replacing a drop-in unit; measure only the basin for under-mount or recessed replacements to guarantee fit.
Common measurement mistakes to avoid
After confirming whether measurements should include the flange or only the basin edge, common mistakes to avoid when recording overall sink length and width become clearer.
Measure the longest internal and external points, keep the tape straight, and record to the nearest millimeter.
Do not round excessively, ignore asymmetric shapes, or rely on approximate center-to-center guesses.
Verify twice before ordering.
Step 2 Measure Inner Bowl Dimensions
Next, attention turns to the inner bowl, where the basin’s interior length and width are measured across the longest and widest points inside the rim.
The basin depth should be recorded from the deepest interior point to the rim, since depth affects water capacity and drain clearance.
Finally, note the slope of the bowl and the drain’s position relative to the basin center to guarantee proper fit and alignment with plumbing.
How to measure inner length and width of the basin
One clear measurement to take is the inner length and width of the basin, which determine the usable bowl area and guarantee the replacement sink fits the countertop cutout.
Measure the longest interior span for length and the widest interior span perpendicular for width.
Record measurements to the nearest 1/8 inch. Avoid including the rim; measure only the bowl’s inner edges.
Measuring basin depth and why it matters
Measure the basin depth by placing a straightedge across the rim and using a ruler to record the vertical distance from the straightedge down to the deepest point of the bowl.
This depth determines water capacity, splash potential, and compatibility with faucet reach and cabinet clearance.
Record the measurement in inches or millimeters and note if the bowl floor is flat or curved for accurate replacement fitting.
Measuring slope and drain location relative to basin center
After the basin depth is recorded, attention shifts to the bowl’s slope and the drain’s position relative to the basin center.
Measure slope by placing a straightedge across the rim and recording the vertical distance to the deepest point for several orientations.
Locate the drain by measuring from the basin centerline (lengthwise and widthwise) to the drain hole center; note any offset for alignment with plumbing.
Step 3 Measure Cutout and Mounting Details
Next, attention turns to the countertop cutout and how the sink mounts. The installer measures the cutout length and width, lip/overhang and reveal to determine whether the bowl is a drop-in or undermount, and records the distances from the cutout edge to the backsplash/wall and to the front countertop edge.
Finally, mounting clip or bracket locations and clearances beneath the counter are measured to guarantee access and proper fit for replacement hardware.
Measuring countertop cutout length and width
When preparing to record the countertop cutout, note both the longest and widest interior dimensions of the opening rather than relying on exterior sink measurements.
Use a rigid tape measure, record length (front-to-back) and width (side-to-side) at the countertop surface, measure to the nearest 1/8 inch, and document any non‑rectangular offsets or corner radii affecting fit for the replacement sink.
Measuring lip/overhang and reveal (drop-in vs. undermount)
With the countertop cutout dimensions recorded, attention turns to the sink’s lip (overhang) and the visible reveal to determine whether a drop-in or undermount replacement will fit and look correct.
Measure lip width all around, noting if it sits above or flush with the countertop.
Record reveal height from underside of countertop to sink rim.
Photograph mounting clips or adhesives for compatibility.
Measuring distance from cutout edge to backsplash/wall and front edge
Although careful measurements have been taken of the cutout itself, the installer must now record the clearances from the cutout edge to the backsplash or wall and to the front countertop edge.
These distances determine sink placement, faucet reach, and whether the new sink will interfere with walls or overhangs. Measure perpendicular distance to backsplash, front edge, and both sides; note any obstructions, tile returns, or splash guards.
Measuring mounting clips, bracket locations, and access beneath
After recording clearances to the backsplash, front edge, and sides, attention turns to how the sink is secured and what lies beneath the countertop.
Measure distance from the cutout edge to each mounting clip or bracket, note their type (screw, toggle, cam), and record vertical clearance for the clip hardware and plumbing.
Photograph locations and sketch measurements for installer reference.
Measuring Faucet and Drain Placement
Next, the installer counts the faucet holes and measures the center-to-center spacing to determine whether the sink is single-hole, centerset, widespread, or meant for a wall-mounted faucet.
They also measure the drain opening diameter and record its location relative to the cutout and cabinet reference points.
These measurements guarantee the replacement sink and plumbing align without additional modifications.
Counting faucet holes and measuring hole spacing (centers)
Count the number of faucet holes on the sink deck and measure the center-to-center spacing between them to determine compatible faucet types.
Use a tape measure or caliper, measuring from the center of one hole to the center of the next.
Note any extra holes for soap dispensers or sprayers.
Record measurements in inches or millimeters and photograph for reference.
Identifying single-hole, centerset, widespread, and wall-mounted options
When determining faucet and drain placement, identify whether the sink is configured for a single-hole, centerset, widespread, or wall-mounted faucet, since each type requires different hole layouts and clearances.
The installer then notes hole count, center-to-center spacing, and mounting surface.
- Single-hole: one combined spout/control.
- Centerset: compact 4-inch spacing.
- Widespread: flexible 8–16 inch spacing.
Measuring drain hole size and position relative to cutout
After noting the faucet type and hole spacing, attention turns to the drain: measure the diameter of the existing drain hole and its center point relative to the sink cutout.
Record distance from the cutout front edge and from either side centerline. Note overflow presence and tailpiece alignment.
Verify measurements against replacement drain specifications to guarantee proper fit and seal without repositioning plumbing.
Special Cases and Variations
Different installation styles require distinct measuring approaches: undermount, drop-in, and vessel oval sinks each need measurements taken from different reference points.
One-piece vanity tops and integrated counters demand measuring the finished opening and any molded edges rather than the sink rim.
Recessed basins and apron-front installations call for checking clearances, mounting lip dimensions, and cabinet cutouts to guarantee a proper fit.
Undermount vs. drop-in vs. vessel oval sinks measurement differences
How do measurement priorities shift among undermount, drop-in, and vessel oval sinks?
Undermount measurements focus on cutout dimensions and rim access beneath the countertop.
Drop-in requires outer rim-to-rim size plus cutout tolerance and countertop thickness.
Vessel sinks demand overall height, basin diameter, drain location and faucet reach above the countertop.
Each type alters fit, clearance and plumbing alignment considerations.
Integrated vanity tops and one-piece counters: measurement tips
When dealing with integrated vanity tops and one-piece counters, measurement priorities shift because the sink and countertop form an inseparable unit that affects removal, replacement, and plumbing alignment.
Measure overall countertop length, depth, and rim-to-wall distance; record exact sink bowl dimensions and centerlines for drain and faucet.
Note mounting flange thickness and backsplash height to guarantee replacement unit matches existing cutouts and clearances.
Recessed basins and apron-front installations
Several common variations—recessed basins set into counters and apron-front (farmhouse) sinks—require distinct measurement priorities because their edges, mounting methods, and support structures differ from standard drop-in or undermount units.
Measure visible rim width, cutout dimensions, and exposure depth for recessed basins.
For apron-front sinks measure overall projection, cabinet face cutout, and underside clearance for supports, plumbing, and brace placement.
Converting Measurements for Replacement Options
The section outlines how to match replacement sink dimensions to existing countertop cutouts and when a close fit is acceptable versus when resizing is necessary.
It explains typical tolerance ranges and the point at which countertop modification or a filler trim becomes required.
It also covers considerations for changing mounting types, such as converting a drop-in to an undermount or vice versa, and the structural or sealing adjustments those conversions entail.
How to match new sink sizes to existing cutouts
Matching a new oval sink to an existing countertop cutout requires precise conversion of three key measurements—length, width, and lip or flange depth—so the replacement sits flush without gaps or stress on the countertop.
Measure interior cutout dimensions, note rim overlap and mounting style, and compare manufacturer outside dimensions and required deck clearance.
Confirm drain and faucet alignment before ordering to guarantee fit.
Acceptable tolerances and when countertop modification is required
After confirming cutout measurements and rim overlap, attention should shift to acceptable tolerances and when countertop modification becomes necessary.
Typically a 1/8–1/4 inch lateral gap is permissible; anything larger risks instability or visible seams.
If the replacement’s outer dimensions exceed the cutout by more than tolerance, enlarge the opening.
If considerably smaller, add a filler template or replace the countertop for proper support and finish.
Adapting mounting type: converting drop-in to undermount and vice versa
Consider whether the sink’s flange, mounting hardware, and countertop thickness can accommodate a different installation style before choosing to convert between drop-in and undermount.
If converting, measure cutout shape and rim width; verify apron clearance and support requirements.
Undermounts need solid substrate and clamps or adhesive; drop-ins require accurate lip seating.
Adjust cutout and bracket placement, and confirm drain alignment and overflow compatibility.
Measuring for Common Problems and Constraints
The installer should note tight spaces around the sink, nearby cabinets, and existing plumbing traps that may limit replacement options.
A clear inspection underneath for the P-trap and any interfering pipes helps determine required clearances.
Accessibility measurements for installation and future maintenance guarantee the chosen sink can be fitted and serviced without obstruction.
Working around tight spaces, cabinets, and plumbing traps
Measure carefully when dealing with cramped vanities, narrow cabinet openings, or close-set plumbing traps, since standard sink dimensions often must be adapted to fit the available space.
Record countertop cutout width and depth, clearance to side walls and cabinet faces, and distance from finished wall to faucet/drain centers.
Confirm access for installation tools and any trim or flange that may restrict fit.
Checking underneath for P-trap and pipe interference
Lift the cabinet panel or kneel to peer under the sink to identify the P-trap, tailpiece, and any supply-line fittings that could obstruct a replacement basin.
Note pipe centerlines, offsets, and clamp or strap locations relative to the basin cutout.
Measure vertical clearance from underside of cabinet to highest pipe point.
Record any braces or crosspieces that may limit depth or repositioning.
Measuring accessibility for installation and maintenance
Evaluating accessibility for installation and maintenance requires noting clearances and access points that affect both initial fit and future serviceability.
Measure countertop overhangs, cabinet door swing, and drawer locations to guarantee tool and hand access. Confirm space beneath for trap removal and supply-valve access.
Note wall obstructions, faucet reach, and lighting. Record measurements and photograph areas for reference during replacement and repairs.
Verification and Final Checklist Before Ordering a Replacement
Before placing an order, the homeowner should cross-check all required dimensions against the original measurements and any mounting constraints.
They should photograph the sink, surrounding countertop, and key angles to share with the supplier or installer.
Clear, concise notes for the manufacturer or installer—including hole spacing, overflow details, and countertop thickness—should accompany the photos.
Cross-checking all required dimensions
At this stage, a final verification guarantees every measurement aligns with the replacement requirements: overall sink length and width, basin depth, rim-to-center of drain distance, faucet hole spacing, and cutout dimensions.
The installer or homeowner should cross-check documented figures against the physical sink and vanity, noting discrepancies before ordering.
- Confirm three core dimensions.
- Reconcile mounting and drain offsets.
- Validate faucet and accessory clearances.
Photographing measurements and key angles for supplier/installer
Photograph measurements and critical angles clearly to give the supplier or installer an unambiguous visual record of the sink and surrounding vanity.
Include overhead, front, and side views with a measuring tape or ruler visible, close-ups of faucet centers, drain location, countertop edge, mounting clips, and any cutout irregularities.
Timestamp or label photos, guarantee good lighting, and save originals plus annotated copies for reference.
Notes to give to manufacturer or installer
With annotated photos and measurements in hand, the homeowner should compile a concise checklist for the manufacturer or installer to verify dimensions, mounting method, finish, and drain/faucet locations.
Include sink outer and bowl dimensions, countertop cutout shape, rim thickness, overflow presence, faucet hole centers, drain type (pop-up or grid), mounting clips or undermount details, and preferred lead time and shipping constraints.
Installation Considerations After Measuring
After measurements are confirmed, attention turns to practical installation details such as appropriate sealant, compatible mounting hardware, and whether the chosen countertop material requires special fittings.
The homeowner should weigh the complexity of the cutout, plumbing access, and risk of damaging surrounding surfaces to decide between DIY and hiring a professional.
Finally, realistic timeline and cost estimates—factoring labor, materials, and potential unexpected repairs—help set expectations before ordering.
Sealant, mounting hardware, and countertop material compatibility
Several key factors determine the appropriate sealant, mounting hardware, and countertop compatibility for an oval sink replacement: the sink material (porcelain, cast iron, acrylic), countertop substrate (laminate, granite, solid surface), and whether the sink is drop-in, undermount, or vessel.
Match silicone or plumber’s putty to materials, choose brackets/cleats rated for sink weight, and confirm adhesive compatibility with countertop finish to prevent staining or failure.
When to hire a professional vs. DIY installation
Choosing the right sealant, hardware, and countertop adhesives is only part of the preparation; deciding whether to hire a professional or tackle the installation personally depends on factors revealed during measuring.
If measurements indicate custom cuts, cabinet alterations, complex plumbing alignments, or fragile materials, professional expertise is advised.
Straightforward drop-in swaps with matching openings and basic plumbing skills suit competent DIYers.
Estimating timeline and cost factors
Estimating the timeline and cost for replacing an oval bathroom sink hinges on the scope revealed by measurements: a straightforward drop-in swap with matching cutout and standard plumbing usually requires a couple of hours and minimal materials.
In contrast, custom-cut countertops, relocated plumbing, or vanity modifications can extend work to a day or more and substantially increase labor and parts costs.
Additional factors include fixture quality, permit needs, disposal, and contractor rates.
Common Mistakes and How to Avoid Them
Common errors include misreading the oval’s orientation and measuring from the wrong points, which leads to ill-fitting replacements.
Failure to check faucet hole spacing and type can make a new sink incompatible with existing fixtures.
Ignoring clearance around the basin and underlying plumbing risks installation problems and costly adjustments.
Misreading oval orientation and measurement points
Mistaking an oval sink’s orientation or where to take measurements is a frequent source of error that can derail a replacement project before it starts.
Measure overall length and width from the widest points, note front-to-back depth at the basin’s deepest center, and record rim-to-drain distances.
Mark orientation relative to countertop edges and fixture centers to guarantee the new sink aligns correctly.
Overlooking faucet hole compatibility
How should the installer confirm that a replacement sink will accept the existing faucet?
The installer checks hole count, spacing (centers), and diameter against the faucet’s requirements.
Verify single‑hole, centerset, or widespread compatibility and confirm deck thickness and mounting hardware fit.
Measure from outer hole edges and consult manufacturer templates or spec sheets to avoid mismatches before ordering the replacement sink.
Ignoring clearance and plumbing constraints
After confirming faucet compatibility, attention must turn to the physical space and existing plumbing that will receive the new oval sink.
Ignoring countertop clearance, cabinet depth, drain and trap alignment, or access for shutoff valves leads to installation failures.
Measure cabinet interior, countertop overhang, tailpiece length, and P-trap location.
Verify clearances for faucets, soap dispensers, and use adapters or reroute plumbing when required.
Tips for Choosing the Right Replacement Oval Sink
When selecting a replacement oval sink, attention should be paid to material, finish, and expected durability to match bathroom use and maintenance needs.
Style and ergonomic factors—such as bowl depth, rim profile, and compatibility with existing countertop cutouts—affect comfort and appearance.
Budget, expected lifespan, and warranty terms help balance upfront cost against long-term value.
Material, finish, and durability considerations
Material choice, finish, and expected wear are central to selecting a replacement oval sink because they determine appearance, maintenance, and lifespan.
Porcelain, vitreous china, stainless steel, cast iron, and composite materials offer varying scratch, stain, and chip resistance.
Glaze quality and protective coatings affect cleaning frequency.
Choose materials and finishes that balance durability, budget, and cleaning needs for anticipated usage levels.
Style and ergonomic factors for bathroom use
Although aesthetics matter, functional fit and user comfort should guide the choice of an oval replacement sink; its basin depth, rim profile, and faucet-clearance determine splash control, ease of use, and accessibility for different household members.
Consider countertop height, single versus double basin needs, ADA or mobility-friendly clearances, and faucet mounting.
Match style to bathroom scale to preserve circulation and maintenance practicality.
Price ranges and warranty considerations
Because budget and protection influence long-term value, buyers should weigh typical price tiers and warranty terms before selecting an oval replacement sink.
Consider material and finish, brand reputation, and warranty length when comparing options.
- Entry: basic vitreous china, limited warranty, low cost.
- Mid: glazed porcelain or composite, multi-year warranty.
- Premium: solid surface or cast stone, extended warranty and parts coverage.
Visual Aids and Diagrams to Include with Measurements
The article suggests including three clear diagrams to accompany measurements: a labeled top view showing outer length, width, and the counter cutout.
A cross-sectional diagram should indicate sink depth, lip/profile, and mounting type.
A third diagram must show faucet hole spacing and the drain center location.
Diagram: labeled top view with outer length, width, and cutout
A clear top-view diagram labels three critical dimensions for replacing an oval bathroom sink: the outer length (longest distance across the rim), outer width (shortest distance across the rim), and the countertop cutout (the opening’s length and width or the outline shape).
The diagram shows centerline axes, rim edge, cutout outline, faucet hole positions, and measurement arrows with units, enabling accurate replacement and template matching.
Diagram: cross-section showing depth, lip, and mounting type
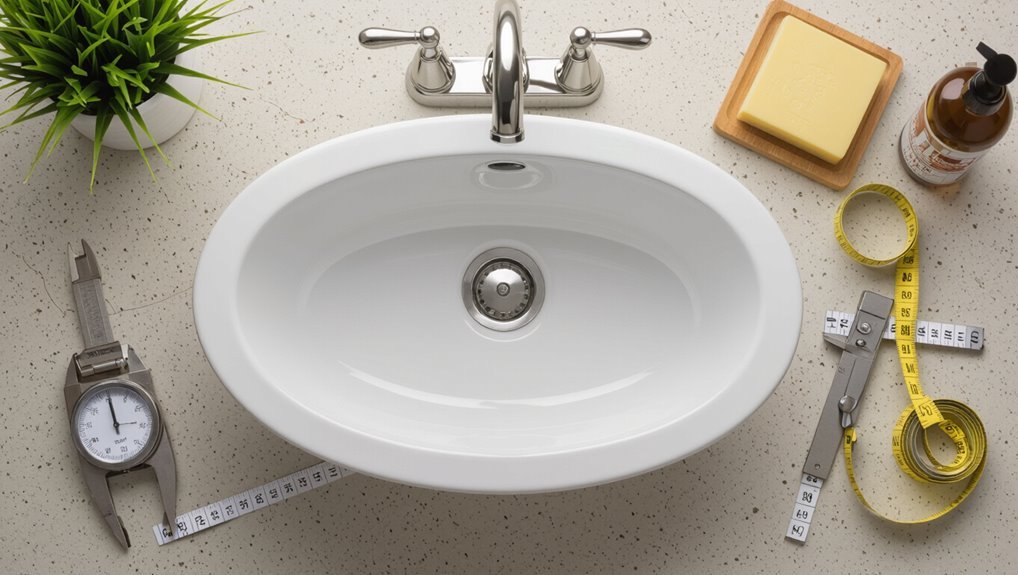
An annotated cross-section shows the sink’s vertical profile—depth from rim to basin bottom, lip thickness and overhang, and the mounting style (drop-in, undermount, or integral deck)—so readers can match functional fit and clearance requirements.
The diagram labels rim height, basin slope, drain centerline depth, and mounting flange dimensions, indicating countertop thickness limits and under-counter support needs for proper installation.
Diagram: faucet hole spacing and drain location
Most diagrams show exact faucet hole spacing and the drain centerline to guarantee new fixtures align with existing countertop and plumbing.
The diagram labels distances: center-to-center faucet holes (e.g., 4″, 8″), distance from faucet centerline to drain centerline, and rim-to-drain offsets.
It indicates hole diameters and mounting clearances, helping installers confirm compatibility with supply lines, pop-up drains, and countertop cutouts.
Sample Measurement Scenarios
The article presents three concise sample scenarios to clarify common measurement situations.
Example 1 walks through measuring a typical drop-in oval sink, including rim and cutout dimensions.
Example 2 covers an undermount oval in a one-piece vanity.
Example 3 explains what measurements and modifications are needed when changing sink mounting types.
Example 1 Typical drop-in oval sink measurement walkthrough
One straightforward example shows how to measure a typical drop-in oval sink ready for replacement: a technician records overall length, width, and rim-to-basin depth, noting cutout shape and faucet hole spacing. Measurements guide selection of a matching replacement and guarantee proper mounting.
| Length | Width | Depth |
|---|---|---|
| 22″ | 15″ | 6″ |
| Cutout | Holes | Rim |
Example 2 Undermount oval sink in a one-piece vanity walkthrough
Measure an undermount oval sink installed in a one-piece vanity by recording the basin’s inside length and width, the maximum depth from rim flange to basin bottom, the countertop cutout dimensions beneath the vanity surface, and the distance from the drain center to the cabinet face.
These values guarantee the replacement fits the existing countertop profile and plumbing alignments.
The inspector also notes overflow presence, mounting apron clearance, and faucet hole spacing.
Example 3 Replacing an oval sink with different mounting type and required changes
Consider a scenario where an oval drop-in sink is being replaced with an undermount unit: measurements must include inside basin length and width, the countertop cutout dimensions under the rim, flange overhang, and the distance from the drain center to the cabinet face, while also noting whether the countertop material requires additional support or a different cutout shape and whether the faucet and overflow locations will align with the new mounting type.
Install notes: confirm mounting lip clearance, support rails, and drain/faucet alignment; template adjustments and possible cabinet rework may be required for plumbing and structural support.
Resources and Next Steps
With accurate length, width, and rim-to-drain measurements in hand, the reader can match specifications to product listings and filter search results for compatible oval sinks.
They should prepare clear questions for suppliers or installers about mounting type, overflow alignment, and warranty to confirm fit and support.
Next steps include comparing dimensions across shortlisted models and requesting installation advice or templates from vendors before purchasing.
How to use your measurements to find compatible sinks online
Begin by matching the recorded dimensions—overall length and width, bowl length and width, drain-to-counter edge distance, and faucet hole spacing—to product listings’ specifications and filters. Most retailers allow searches by sink shape, mounting type, and exact dimensions so the installer can quickly narrow options that will fit the existing cutout and plumbing.
Verify material, rim thickness, and overflow placement, and compare cutout templates before purchasing.
Questions to ask suppliers or installers before purchase
What specific details should be clarified before committing to a purchase? Suppliers and installers should be asked about compatibility, lead times, and warranties.
Clear questions include:
- Exact sink model dimensions and mounting type compatibility.
- Installation costs, timeline, and required modifications.
- Warranty coverage, return policy, and damage handling procedures.
Confirm written estimates and ask for references or photos of prior similar installations.
Conclusion
Replacing an oval bathroom sink is straightforward when measurements are accurate and a homeowner worries it’s too complex. With simple tools and the three core dimensions—overall length and width, bowl length and width, and drain/center-to-center details—most replacements fit standard cutouts or require only minor countertop adjustments. Even if the sink’s underside or mounting differs, a professional can adapt the new basin; accurate measurements greatly simplify communication and reduce installation time and cost.