
How to Do Plumbing for a Washing Machine: Step-by-Step Guide for DIY Installation
To successfully install a washing machine, start by checking local plumbing codes and selecting a level location with accessible hot and cold shutoff valves, as well as a GFCI outlet. You’ll need to rough‑in a standpipe (18–30 inches high) equipped with a properly sized trap and vent. Use durable supply lines or braided hoses with the correct adapters, ensuring all threads are sealed and tested for leaks. Secure the drain hose to prevent it from dislodging, perform a full drain test, and make sure the washer is level. For detailed steps on fittings, testing, and troubleshooting, continue reading.
What You Need to Know Before Installing Washing Machine Plumbing
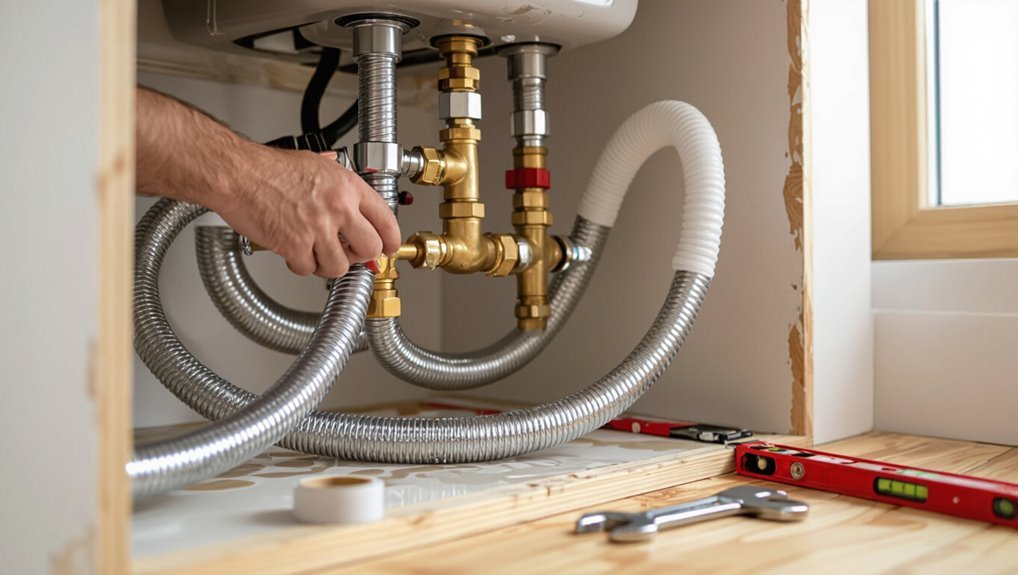
Before beginning washing machine plumbing, the installer should verify local codes, obtain any required permits, and account for safety measures such as shutoff access and proper drainage.
They should also identify whether the appliance is top-load or front-load to choose the correct connections and hoses.
A concise checklist of necessary tools and materials plus familiarity with basic plumbing terms will streamline the installation.
Local codes, permits, and safety considerations
Many jurisdictions require adherence to specific plumbing codes and permits when installing a washing machine, so homeowners should verify local regulations and obtain necessary approvals before beginning work.
Guidance on how to do plumbing for washing machine installations must reference permit requirements, venting, backflow prevention, and approved materials.
Safety considerations include using GFCI, proper drain sizing, secure hose connections, and following inspection protocols.
Types of washing machine connections (top-load vs front-load)
Different washing machine designs require distinct plumbing approaches: top-loaders typically need a standpipe height and inlet placement that accommodate vertical fill and occasional higher water discharge, while front-loaders demand lower drain connections and often a dedicated drain pan and condensation/overflow routing due to their front-facing doors and faster spin cycles.
Installers must match hose lengths, valve locations, and drain sizing to machine type.
Required tools and materials checklist
Having matched hose lengths, valve locations, and drain sizing to the washer type, the installer should assemble a focused set of tools and materials to complete the job efficiently.
Essential items include shutoff valves, reinforced supply hoses, P-trap/drain fittings, and appropriate sealants. Safety gear and basic plumbing tools prevent delays.
- Adjustable wrench, channel locks, plumber’s tape
- Hose kits and replacement valves
- PVC/ABS fittings, P-trap, clamp hardware
Common plumbing terms to understand
A basic vocabulary of plumbing terms helps installers interpret diagrams, select compatible parts, and communicate with suppliers or inspectors.
Key terms include supply valve, shutoff, riser, trap, P-trap, vent, hose bib, coupling, adapter, union, elbow, tee, compression fitting, sweat connection, braided hose, backflow preventer, pressure regulator, and drain standpipe.
Understanding these guarantees correct installation and code compliance.
How to Choose the Best Location for Your Washing Machine
When selecting a location for a washing machine, attention should be paid to drain access and standpipe height, the proximity of cold and hot water supplies with accessible shutoff valves, and the placement of a dedicated electrical outlet with GFCI protection.
The floor must be capable of supporting the machine, have proper slope for drainage, and be treated or protected against water exposure.
These considerations determine both functionality and long-term safety of the installation.
Drain access and standpipe requirements
Locate the washing machine where the drain and standpipe are easily reachable and meet local plumbing codes: the standpipe should be 18–30 inches tall, connected to a trap, and positioned to accept the washer’s discharge hose without kinking or excessive elevation.
Guarantee a secure, watertight connection and an accessible cleanout. Provide adequate floor drainage, slope, and clearance for maintenance while avoiding shared drains that may cause siphoning.
Water supply proximity and shutoff valve placement
After confirming proper drain and standpipe placement, attention shifts to water supply proximity and shutoff valve placement to guarantee efficient hookup and safe maintenance.
The washing machine should sit close to hot and cold feeds to minimize hose length and pressure loss.
Install accessible, clearly labeled shutoff valves—preferably quarter-turn—near the appliance at about waist height for quick isolation during repairs or leaks.
Electrical outlet placement and GFCI considerations
Because safe and convenient electrical access is as important as water and drainage, positioning the outlet for a washing machine requires balancing code compliance, appliance specifications, and user ergonomics.
The outlet should be on a dedicated 120V/20A circuit, within reach of the appliance cord but elevated to avoid water exposure.
Local codes may require GFCI protection; always verify and install per regulations.
Floor support, slope, and waterproofing recommendations
Beyond electrical placement, the floor beneath a washing machine must provide firm, level support, a slight slope toward a drain where appropriate, and waterproofing to contain leaks.
Subfloor reinforcement prevents bounce and noise; use plywood or concrete pads as needed. Confirm 1–2% slope to a floor drain in laundry rooms.
Install a watertight pan with drain, sealed seams, and durable floor membrane.
Preparing the Plumbing Rough-In
Before cutting walls or running pipe, precise measurements and markings for the hot and cold supply lines and the drain location must be established.
The author then describes step-by-step procedures for installing or relocating shutoff valves, setting the washing machine standpipe and P-trap, and sizing the drain, trap, and vent to meet code.
Practical tips on clearances, pipe materials, and common pitfalls are provided to guarantee a sound rough-in.
Measuring and marking supply and drain locations
Measure twice and mark once: locating the water supply valves and drain requires accurate dimensions from the finished floor and adjacent walls so fittings align with the washing machine’s inlet and waste connections.
Using the machine’s spec sheet, transfer inlet and drain heights to the wall. Mark centerlines, verify clearances for hoses and trap, and note stud locations for routing and future access panels.
Installing or relocating shutoff valves (cold and hot) step-by-step
Begin by shutting off the main water supply and draining the lines to prevent leaks while installing or relocating the washing machine shutoff valves.
Locate hot and cold runs, cut pipe to length, deburr, and clean fittings.
Install appropriate valves (ball or stop), using solder, compression, or push-fit per material.
Secure valves to framing, test for leaks, and restore water to verify operation.
Installing a washing machine drain/standpipe and P-trap step-by-step
Install the washing machine drain/standpipe and P-trap by positioning the standpipe near the appliance, setting its height to code (typically 36–42 inches above the trap weir), and aligning the trap arm to the waste outlet while maintaining the proper slope and trap-to-vent distance.
Secure piping, cut and deburr PVC or ABS to fit, glue or solvent-weld joints, install a properly pitched trap arm, and fasten supports.
Sizing drain, trap, and venting for washers
With the standpipe and P-trap located and secured, attention turns to sizing the drain, trap, and venting so the washing machine will discharge reliably and meet code.
Use a 2-inch standpipe or 1.5-inch where allowed, match trap diameter, maintain proper trap arm length, and provide a vent within code distance.
Confirm local codes for slope, fittings, and air admittance valve approval.
Connecting Water Supply Lines
Attention to water supply choices and connections guarantees a reliable washing machine installation.
The section compares flexible braided hoses with rigid piping, explains installing adapters and fittings, and covers correct hot-and-cold hookups with leak testing.
It also outlines anti-siphon and backflow prevention options to protect the household supply.
Choosing between flexible braided hoses and rigid piping
Many homeowners must decide between flexible braided hoses and rigid piping when connecting a washing machine’s water supply.
Flexible hoses offer easier installation, vibration absorption, and quick replacement but have limited lifespan and higher burst risk.
Rigid piping (copper or PVC) is more durable and leak-resistant long-term yet requires precise fittings and more labor.
Choice balances convenience versus permanence and risk.
Installing supply hose adapters and fittings
Begin by shutting off the house water supply and relieving pressure at the washing machine valves before fitting any adapters; this prevents unexpected sprays and makes connections manageable.
Select adapters matching pipe threads and hose ends, using brass or stainless fittings for durability.
Apply appropriate thread sealant or tape, hand-tighten then quarter-turn with a wrench, and support fittings to prevent stress on connections.
Properly connecting hot and cold lines and testing for leaks
Connect the hot and cold supply hoses to their respective valves, ensuring the hot hose goes to the marked (usually red) inlet and the cold to the marked (usually blue) inlet; confirm threads match and hand-tighten fittings before using a wrench for a final quarter-turn.
Open valves slowly, observe connections for drips, tighten slightly if needed, then run a short wash cycle to verify there are no leaks.
Anti-siphon and backflow prevention options
When washing machine supply lines are tied into a household plumbing system, preventing backflow and siphonage is essential to protect potable water.
Installing approved anti-siphon or backflow prevention devices—such as vacuum breakers, integrated check valves in the hose assemblies, or a registered backflow preventer—ensures contaminants cannot be drawn back into the supply.
Local code determines required devices; select rated fittings, install per manufacturer instructions, and test operation periodically.
Installing the Drain Line and Testing Drainage
The installer confirms the standpipe meets the required height and diameter to prevent siphoning and backups.
The drain hose is secured to the standpipe or laundry box to keep it from dislodging during cycles.
A full drainage test is run and, if slow or clogged, the technician clears the P-trap or standpipe and retests until flow is satisfactory.
Correct standpipe height and diameter
Proper standpipe height and diameter are essential to prevent siphoning, backups, and overflows during a washing machine’s drain cycle.
The standpipe should be 18–30 inches above the trap weir and at least 2 inches in internal diameter for residential machines; commercial units may need larger.
A properly sized, correctly positioned standpipe guarantees efficient drainage and compliance with typical plumbing codes.
Securing drain hose to prevent dislodgement
Following correct standpipe placement and sizing, attention shifts to securing the washing machine drain hose so it cannot dislodge during a high-flow cycle.
Fasten the hose to the standpipe with a proper high-loop or clip near the appliance. Use a sturdy hose retainer or zip tie at the inlet.
Guarantee the connection is snug but not kinked, and verify strain relief to prevent accidental pull-out.
Performing a water drainage test and troubleshooting slow drains
Begin by running a controlled drain test to confirm the standpipe and hose clear water at the expected flow rate: initiate a rinse and spin cycle, observe water entry at the standpipe, and time how long it takes to empty a measured load.
If drainage is slow, inspect hose routing for kinks, check standpipe height and venting, and verify trap configuration for restrictive bends.
How to clear a clogged P-trap or standpipe
To clear a clogged P-trap or standpipe, a technician first isolates the drain by turning off the water supply and placing a bucket beneath the trap to catch residual water.
Then the trap nut is loosened, the trap removed, and its contents inspected and emptied.
Remaining debris is flushed with water or a plumber’s snake; damaged seals are replaced and the assembly reinstalled, checked for leaks, and tested.
Electrical and Final Hookup Steps
Before powering the appliance, the installer confirms the outlet type, amperage rating, and proper grounding to match the washer’s electrical requirements.
The washer is then moved into place and its leveling feet adjusted so the cabinet sits stable and plumb.
Finally, hoses and the drain are arranged without kinks or strain, and a first-run startup is performed while monitoring for leaks, unusual noises, and proper fill and drain cycles.
Verifying outlet type, amperage, and grounding
Confirming the washing machine’s electrical requirements is a crucial safety step: the installer should identify the outlet type, verify the circuit amperage, and guarantee proper grounding before completing the final hookup.
Check whether the receptacle is 120V/240V and three- or four-prong, confirm breaker rating matches manufacturer amperage, inspect ground continuity, and replace faulty outlets or breakers prior to operation.
Positioning the washer and leveling feet
Place the washer close to its final location so hoses and the power cord reach without stretching.
Then check that the machine sits squarely in the alcove or on the floor with adequate clearances per the manufacturer’s specifications.
Adjust the four leveling feet by turning them until all feet contact the floor, lock the nuts, and confirm the drum is stable and does not rock during manual pressure tests.
Final hose and drain placement check
With the washer leveled and stable, attention turns to the final routing and connection of the hoses, drain, and electrical supply.
The installer verifies hot and cold hoses are secure, kink-free, and properly clamped. The drain hose is seated at correct height and fastened to prevent dislodging.
Electrical cord is routed to avoid strain and moisture, keeping access to the shutoff valves unobstructed.
First-run startup checklist and what to monitor
Before powering the machine, the installer follows a concise startup checklist that covers electrical connections, final hose mounting, and an initial test cycle to verify safe operation and leak-free plumbing.
They confirm grounding, correct voltage, and secure outlet; tighten hose clamps; position drain and overflow properly.
During the first cycle they monitor for vibrations, leaks, unusual noises, error codes, and stable fill and drain timing.
Common Problems and How to Fix Them
Common washing machine plumbing issues include leaks at supply connections, drainage failures that cause overflowing, excessive vibration or movement, and improper water pressure.
Each problem can be diagnosed with simple checks—inspecting fittings and hoses, clearing clogs or the pump, balancing and securing the machine, and measuring or adjusting pressure.
The following sections explain common causes and concise, practical fixes for each.
Leaks at supply connections causes and fixes
Leaks at washing machine supply connections often stem from a few predictable causes—loose fittings, degraded washers or O-rings, cracked hoses, or improper thread sealing—and can usually be resolved with simple inspection and targeted repairs.
Tighten fittings, replace worn seals, and swap damaged hoses. Confirm proper thread tape use and pressure testing before finalizing.
- Inspect fittings and seals
- Replace cracked hoses
- Use proper thread sealing
Washer not draining or overflowing diagnosis and solutions
Several frequent causes explain why a washing machine fails to drain or begins to overflow, ranging from clogged drain pumps and kinked or blocked hoses to malfunctioning water inlet valves and faulty pressure switches.
Inspect and clear pump filters, straighten or replace hoses, test and replace faulty inlet valves, and verify pressure switch function.
Check drain line height and clear household drain clogs before replacing major components.
Excessive vibration or movement prevention and remedies
After addressing drainage and overflow issues, attention should turn to excessive vibration or movement, which can damage the machine and surrounding plumbing.
Inspect and level the washer using adjustable feet and a spirit level. Tighten mounting bolts and transit bolts if recently moved.
Use anti-vibration pads, secure hoses and drain standpipe, redistribute loads, and replace worn suspension parts or shock absorbers.
Water pressure issues and how to adjust
Diagnose water pressure problems by checking both supply and inlet conditions: low pressure can lead to long fill times and poor cleaning, while excessively high pressure can stress hoses, valves, and seals.
Measure pressure with a gauge, inspect supply valves and aerators for clogs, and verify municipal pressure.
Adjust with a pressure regulator, clean filters, or install a booster pump; replace compromised hoses or valves promptly.
Maintenance Tips to Prevent Future Plumbing Issues
Routine maintenance can greatly reduce washing machine plumbing failures, starting with scheduled inspection and timely replacement of inlet and drain hoses.
Periodic flushing and cleaning of drain lines prevents clogs and odors, while a seasonal and long-term checklist keeps filters, valves, and connections in good condition.
Following these simple steps helps catch minor issues early and extends the system’s reliable service life.
Regular hose inspection and replacement schedule
Regular inspection of washing machine hoses prevents most water-damage incidents by catching wear, bulging, cracks, and corrosion early. Manufacturers and plumbers generally recommend visual checks every three months and full replacement every 3–5 years, or sooner if any defects appear.
Replace rubber hoses with reinforced braided stainless options. Check clamps and connections for leaks, and document replacement dates to maintain a reliable schedule and prevent failures.
How to flush and clean drain lines
Flush and clean washing machine drain lines periodically to prevent clogs, foul odors, and slow drainage that can lead to backups and water damage.
Begin by disconnecting the washer and removing visible debris from the trap.
Flush the line with hot water, a baking soda-vinegar mixture, or a commercial drain cleaner safe for plastic.
Rinse thoroughly and reassemble, checking for leaks.
Seasonal and long-term maintenance checklist
After cleaning the drain lines, attention shifts to a seasonal and long-term maintenance checklist that helps prevent future plumbing issues and extends the washer’s lifespan.
Inspect hoses and clamps for wear; replace every 5 years. Flush inlet screens and test shutoff valves. Keep the area dry and level to prevent strain and mold.
- Replace hoses regularly
- Clean inlet screens
- Verify valve operation
When to Call a Professional
Certain problems—persistent leaks, gas or electrical work, or failed shutoff valves—indicate the need for a licensed plumber or electrician.
Costs vary with scope, parts, and local rates, and homeowners should expect diagnostic fees, labor estimates, and clear warranty terms.
Before hiring, one should ask about licensing, insurance, written estimates, timelines, and references.
Signs the job requires a licensed plumber or electrician
When should a homeowner call a licensed plumber or electrician instead of attempting washing machine plumbing work themselves?
Obvious signs include persistent leaks, water damage or mold, inadequate or corroded supply lines, faulty shutoff valves, complex rerouting or code-required alterations, unclear electrical issues or a missing grounded outlet, and repeated tripping of breakers.
If uncertainty exists, hire a licensed professional for safety and compliance.
Cost factors and what to expect from a pro service
Cost considerations shape a homeowner’s decision to hire a pro for washing machine plumbing: labor rates, parts, permits, and the scope of work drive the final bill.
A professional provides accurate diagnostics, code-compliant installations, warranties, and safer electrical or drainage modifications. Expect transparent estimates and possible extra charges for difficult access or unexpected repairs.
- Hourly labor and flat fees
- Parts and permit costs
- Warranty and liability coverage
Questions to ask a contractor before hiring
What should a homeowner ask to guarantee a contractor is qualified, reliable, and transparent?
The homeowner should request license and insurance details, written estimates, timeline, permit responsibility, references, warranty terms, experience with washing machine hookups, and disposal procedures.
Ask about unforeseen cost handling and communication expectations.
Verify ID, check reviews, and insist on a clear contract before work begins.
Quick Reference: Step-by-Step DIY Installation Summary
The following quick reference outlines the essential pre-install checklist, a condensed sequence of installation steps, and key post-install testing and safety checks.
It presents only the critical actions and order to follow for a typical DIY washing machine hookup. Readers should use this as a concise guide and consult full instructions or a professional for atypical situations.
Pre-install checklist
Before beginning installation, gather all required tools and materials, confirm supply shutoffs and drainage locations, and verify the washing machine’s dimensions and electrical needs to secure a proper fit and safe connection.
The checklist assures preparedness, prevents delays, and highlights safety items before any plumbing or electrical work begins.
- Confirm water shutoff and drain accessibility
- Verify power outlet type and grounding
- Gather hoses, fittings, and sealant
Sequential installation steps (condensed)
Begin by positioning the machine near its final location.
Connect the water supply hoses to hot and cold valves, tighten securely.
Attach the drain hose to the standpipe or trap.
Level the washer using adjustable feet.
Reconnect or install electrical plug to a grounded outlet.
Open water valves slowly to check for leaks.
Slide washer into place, ensuring hose routing is strain-free.
Post-install testing and safety checks
Run a short diagnostic cycle and perform a visual inspection to verify proper operation and safety: check for leaks at supply connections and the drain, confirm the washer remains level during spin, make certain hoses are routed without kinks or tension, verify the electrical plug is grounded and fits securely, and listen for unusual noises or excessive vibration—address any issue immediately before regular use.
- Confirm no leaks under pressure
- Ascertain stable, level operation
- Replace damaged hoses or loose fittings
Conclusion
Properly installing washing machine plumbing guarantees reliable, leak‑free operation and long appliance life. For example, a homeowner in Portland avoided repeated leaks by relocating the machine to a reinforced laundry alcove, installing a 3/4‑inch shutoff, braided supply hoses, and a standpipe drain at the correct height; the result was improved water flow and no backups. With basic tools, careful measurements, and adherence to local codes, most DIYers can complete a safe, effective installation.
