How to Cap Off Sink Plumbing: A Step-by-Step Guide for DIYers
To cap off sink plumbing effectively, follow these steps: First, shut off the water supply and drain any remaining water from the lines. Choose the appropriate caps for your pipe material—options include threaded, compression, push-fit, or solvent-weld. Install the caps according to the manufacturer’s instructions and local plumbing codes. Finally, pressure-test the system to ensure there are no leaks. Remember to wear safety gear and verify compliance with local regulations. Detailed instructions and troubleshooting tips for different pipe types are provided below.
What “Capping Off” a Sink Means and When You Should Do It
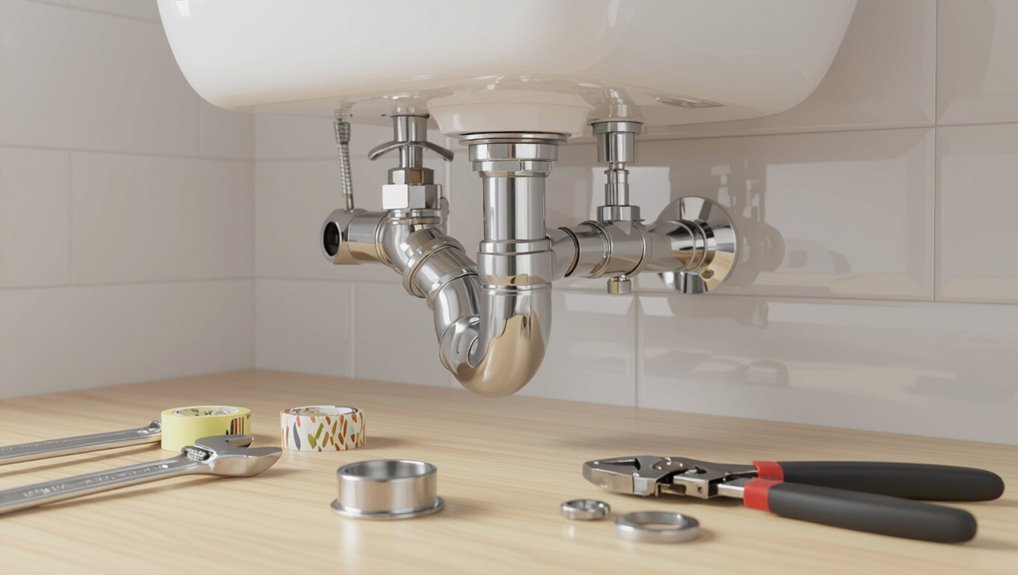
Capping off a sink refers to sealing the supply and drain lines to safely and permanently or temporarily remove a fixture.
This is commonly done during renovations, when a property will be vacant for an extended period, or after fixture removal to prevent leaks and odors.
Local plumbing codes and permit requirements should be checked before capping to guarantee the work meets legal and safety standards.
Definition of capping off sink plumbing
Sealing a sink’s drain and supply lines, known as capping off, permanently or temporarily closes the plumbing connections to prevent leaks, odors, and water flow.
The procedure involves installing threaded or push-fit caps on supply shutoffs and a drain cap or plug on the tailpiece.
Clear identification of lines, correct cap sizing, and basic tools are essential when learning how to cap off sink plumbing 2.
Common situations that require capping (renovation, long-term vacancy, fixture removal)
When a sink is removed for remodeling, left unused during a long vacancy, or permanently taken out of service, the plumbing connections should be capped to prevent leaks, odors, and accidental water flow.
Capping is common during kitchen or bathroom renovations, property vacancies, fixture upgrades, or when converting spaces (e.g., turning a laundry room into storage).
It preserves system integrity and simplifies future reconnections.
Legal and code considerations to check before capping
After a sink is removed or taken out of service, property owners and contractors must confirm that any planned shutoffs and caps comply with local plumbing codes, building permits, and health regulations.
Verify permit requirements, approved materials and methods, venting and trap integrity, backflow prevention, and required inspections.
Guarantee capped lines remain accessible and labeled, and consult a licensed plumber when codes or liability concerns arise.
Quick Overview: Tools, Materials, and Safety Precautions
The section lists essential tools—adjustable wrench, pipe cutter, pliers, plumber’s tape—and common materials such as rubber caps, threaded brass, PVC plugs, and compression fittings matched to copper, PVC, or PEX.
It also outlines safety gear like gloves and eye protection and the necessary water-shutoff and drain-isolation steps before work begins.
Readers are then guided to match cap type and installation method to the pipe material and job conditions.
Essential tools list
A concise toolkit and the right safety gear are essential before attempting to cap off sink plumbing. This list focuses on the specific tools, materials, and precautions needed to complete the job efficiently and safely.
Protective gloves and eye protection, fume-safe respirator for solvent use, and adequate lighting are recommended.
- Adjustable wrench, pipe wrench
- Hacksaw or tubing cutter
- Plumber’s tape, sealant, cap fittings
Typical materials and cap types for different pipes
Materials vary by pipe type, so selecting compatible caps—brass for metal threads, PVC/CPVC solvents for plastic, and rubber or compression fittings for temporary seals—ensures a reliable closure.
- Copper: threaded brass caps or sweat (solder) caps.
- PVC/CPVC: solvent-weld caps or threaded adapters.
- Flexible/tubing: rubber caps, hose clamps, or compression end fittings.
Safety gear and shutoff procedures
Several essential items and steps protect both worker and plumbing when capping a sink: personal protective equipment (gloves, safety glasses, and knee pads), appropriate tools (adjustable wrench, pipe cutter, soldering kit or PVC primer/cement), compatible caps or fittings, and a functioning shutoff procedure that isolates water and relieves line pressure before work begins.
Verify shutoff by testing taps, drain residual water, tag valves, and follow ventilation and fire safety when soldering.
How to Identify Your Existing Sink Plumbing Type
The reader is advised to first distinguish supply lines, which deliver pressurized water to fixtures, from drain lines that carry wastewater away.
Visual inspection should note materials—PVC and ABS (plastic), copper, PEX, or galvanized steel—using color, fittings, and rigidity as cues.
Finally, check for pressurization and the presence of traps or vents to determine whether a line must be isolated and capped differently.
Locating and identifying supply lines vs. drain lines
Recognizing which pipes deliver water and which carry waste is the essential first step before capping a sink.
The plumber or DIYer inspects under the basin: supply lines run from shutoff valves to the faucet, usually smaller and flexible; the drain is a larger pipe leading down from the tailpiece and trap to the wall or floor.
Trace connections to confirm function.
Common pipe materials (PVC, ABS, copper, PEX, galvanized) and visual cues
Different pipe materials have distinct appearances and textures that make on‑sight identification straightforward:
PVC is smooth, white plastic;
ABS is smooth, black plastic;
copper is reddish‑metal with soldered joints;
PEX is flexible, colored plastic tubing (red/blue/white) often with crimped fittings;
galvanized steel is dull gray, threaded, and may show rust.
Visual cues include color, joint type, rigidity, and surface finish.
Determining whether the line is pressurized or part of a trap/vent
How can one tell if a sink line carries pressurized water or is simply part of the trap/vent assembly?
Inspect for valves, shutoffs, or flexible supply lines indicating pressurization; feel for firmness and connection to service lines.
Trap/vent piping is larger diameter, gravity-sloped, and connects to the P-trap or vent stack.
Check for water flow when fixtures run and listen for air movement.
Step-by-Step: Capping Sink Water Supply Lines
Before capping sink supply lines, the water must be shut off and the absence of pressure verified.
The faucet supply lines are then disconnected and matched to the appropriate cap or plug—copper, PEX, and braided flex each require different fittings such as compression, threaded, or push-fit caps.
Once installed, the caps are tested for leaks to confirm a secure seal.
Shutting off water and verifying no pressure
Shut off the appropriate valves and verify water is fully depressurized before capping sink supply lines.
The homeowner locates shutoff valves (under sink or at main), turns them off, then opens a nearby faucet to relieve remaining pressure.
After water flow stops, they check for dampness or leaks and use a towel to confirm lines are dry prior to proceeding with caps or plugs.
Disconnecting the faucet supply lines safely
Loosen the nuts that secure the flexible supply lines to the faucet tailpieces using an adjustable wrench or basin wrench, taking care to support the faucet to prevent twisting.
After loosening, detach lines slowly to release residual water into a bucket.
Inspect fittings and washers for damage.
Cap exposed shutoff valves or threads temporarily, wipe connections dry, and store hardware for reassembly.
Choosing the right cap or plug for copper, PEX, and braided flex lines
With the supply lines detached and fittings inspected, the next step is selecting caps or plugs matched to the material—copper, PEX, or braided flex—to guarantee a watertight temporary seal.
Choose corrosion-resistant brass or copper caps for copper tubing, PEX-specific plugs or capped fittings for plastic lines, and compatible metal or nylon caps for braided flex.
Verify size, thread type, and pressure rating.
Installing compression caps, threaded caps, and push-fit caps
Begin by confirming the water is off and lines are drained.
For compression caps, slide the nut and ferrule, seat the cap, then tighten evenly to compress the ferrule.
For threaded caps, wrap male threads with PTFE tape and hand-tighten before final snug with a wrench.
For push-fit caps, make sure the pipe is cut square, fully insert to the shoulder, and verify secure engagement.
Testing for leaks after capping
After the caps are installed, restore water pressure slowly and observe each connection for at least several minutes.
Inspect joints, ferrules, and seating areas for any drip formation, weepage, or bubbling at threaded seals.
Use a dry paper towel or tissue to detect slow leaks, re-tighten or reseat fittings if needed, and pressurize again.
Confirm dryness, then monitor periodically over 24 hours.
Step-by-Step: Capping the Sink Drain Line
The procedure begins with identifying the trap and tailpiece so the P-trap can be removed and the drain stub-out inspected for damage or obstructions.
Temporary seals such as rubber test plugs or mechanical plugs allow safe, short-term closure, while permanent options include solvent-weld PVC/ABS caps or threaded adapters for a secure finish.
Attention to venting and correct sealing is emphasized to prevent sewer gas leaks and guarantee code compliance.
Understanding the trap and tailpiece components
A sink’s trap and tailpiece form the immediate drainage assembly beneath the basin: the tailpiece is the straight vertical pipe that carries waste from the sink, and the trap is the U-shaped (or S-shaped) section that holds water to block sewer gases.
The tailpiece connects to the trap inlet; materials include metal or PVC. Compression nuts, slip joints, and washers secure joints and allow disassembly.
Removing the P-trap and inspecting the drain stub-out
With the tailpiece and trap identified, attention shifts to removing the P-trap to access the drain stub-out below the wall or floor.
The person loosens slip nuts, drains residual water into a bucket, and detaches the trap.
They inspect the exposed stub-out for corrosion, damage, and proper alignment, clearing debris and noting pipe material and size before planning a permanent cap or repair.
Temporary capping methods (rubber test plugs, mechanical plugs)
Begin by selecting an appropriately sized temporary cap—either a rubber test plug for smooth stubs or a mechanical expanding plug for irregular or threaded openings—and confirm it matches the pipe material and diameter.
Insert the plug, tighten per manufacturer instructions, and test for leaks with a small water flow or gentle pressure.
Recheck tightness after initial use and mark the capped pipe for future work.
Permanent capping options (PVC/ABS solvent-weld caps, threaded adapters)
Several permanent capping options exist for sink drain lines—most commonly solvent-weld PVC or ABS caps for smooth-cut pipe ends and threaded adapters for fixtures with threads—each chosen based on pipe material, end condition, and planned future access.
Solvent-weld caps require clean cuts and primer/solvent for a watertight bond.
Threaded adapters seat with plumber’s tape or sealant and permit removal for future work.
Ensuring proper venting and avoiding sewer gas issues
After choosing an appropriate cap for the drain line, attention must turn to venting and preventing sewer gas entry when the sink is permanently capped.
The vent system must remain uninterrupted; if the removed fixture contained the only vent, install an alternative vent or reconfigure plumbing to tie into the existing stack.
Test with water and a smoke or odor check before finishing.
Capping Under-Sink With Minimal Tools (Quick Methods)
The section outlines quick under-sink capping options that require only basic parts and minimal tools.
It covers inside-threaded adapters paired with test plugs and push-fit caps suitable for both supply lines and drains.
It also compares the advantages and limitations of temporary versus permanent quick fixes to help choose the right approach.
Using inside-threaded adapters and test plugs
Install inside-threaded adapters and test plugs when a quick, reliable cap is needed and external access is limited. They thread into existing female fittings, sealing with tape or compound.
Suitable for temporary or long-term use if torqued correctly.
- Choose correct thread size and material compatibility
- Use PTFE tape or pipe dope on threads
- Tighten to manufacturer torque specifications
Push-fit cap solutions for supply and drain
When inside-threaded adapters or test plugs are impractical due to limited access or missing threads, push-fit caps offer a fast, tool-minimal way to seal both supply lines and drain tails.
These caps press onto pipe ends or flexible tubing, creating a reliable compression seal. They suit copper, PEX, and PVC with compatible models.
Remove gradually to inspect and replace when reconnecting fixtures.
Pros and cons of temporary vs permanent quick fixes
Although quick caps and tape can stop leaks within minutes, choosing between temporary and permanent fixes requires weighing durability, cost, and skill.
Temporary methods offer speed, low cost, and minimal tools but risk failure, limited lifespan, and code issues.
Permanent solutions demand more time, tools, and expense yet provide reliability, compliance, and reduced maintenance.
Select based on urgency, budget, and planned reuse.
When to Replace or Reconfigure Instead of Simply Capping
When visible corrosion, persistent leaks, or poor drainage affect the existing piping, replacement rather than simple capping is often the safer option.
Similarly, homeowners planning to convert the line for a washer or utility sink should reconfigure fittings and venting now to meet fixture requirements.
If future reuse is likely, installing proper access points or cleanouts during the work simplifies maintenance and avoids repeated interventions.
Signs that existing piping needs repair or replacement
How can a homeowner tell if a simple cap will suffice or if the sink plumbing requires replacement or reconfiguration?
Visible corrosion, persistent leaks, warped or cracked pipes, slow drainage despite clearing, recurring clogs, foul odors indicating biofilm or root intrusion, and brittle aging materials (galvanized, polybutylene) signal replacement.
Excessive joint failures or mismatched, improvised fittings also warrant reconfiguration rather than mere capping.
Converting sink plumbing for other fixtures (washer, utility sink)
Having determined whether existing sink piping needs repair or replacement, the next consideration is converting that plumbing to serve another fixture such as a washer or utility sink.
Evaluate trap orientation, drain size, venting, and water supply location.
Replace damaged sections with appropriately sized piping, add required appliance hookups and shutoffs, and reconfigure layout to meet code for slope, trap placement, and ventilation before finishing.
Planning future reuse and installing access/cleanouts
One clear rule for deciding whether to cap, replace, or reconfigure sink plumbing is to plan for likely future reuse before sealing any lines.
Evaluate anticipated fixtures, access needs, and potential code changes. Prefer installable cleanouts, removable caps, or rerouted dry vents when reuse is plausible.
Replace degraded segments rather than permanently capping to simplify future conversions and avoid costly reopenings.
Common Problems and How to Troubleshoot Them
After capping a sink, common issues include persistent leaks at the cap, sewer gas odors from venting or seal failures, and corroded or damaged threads that compromise the closure.
Technicians are advised to inspect the cap’s fittings, the trap and vent seals, and the condition of threads before declaring the job complete.
Simple fixes range from tightening or re-taping threads and replacing seals to cutting out and rethreading badly corroded sections.
Leaks after capping where to check
Where to look when a capped sink still leaks depends on the type of cap used and the connections involved.
Inspect the cap threads or compression ferrule for loose fittings, check condition and seating of rubber washers or O‑rings, examine jointed trap and tailpiece seams, verify soldered or glued joints for cracks, and confirm supply shutoff valves and upstream fittings are fully closed and dry.
Sewer gas smell venting and seal issues
Leaks around a capped sink can allow sewer gases to escape, but odor problems also arise from venting and seal failures elsewhere in the drain assembly.
Inspect P-trap water seal, vent obstructions, and any dry traps on adjacent fixtures.
Check slip-joint and solvent-weld seals for gaps or degraded gaskets.
Use smoke or smoke pencil testing and restore seals or clear vent blockages to eliminate smells.
Corrosion or damaged threads repair approaches
Addressing corroded or damaged threads requires careful assessment of the threaded connections on caps, tailpieces, and fittings to determine whether repair or replacement is appropriate.
Minor thread damage can be cleaned with a wire brush and resealed using thread sealant or plumber’s tape; severely corroded or stripped threads warrant replacement of the affected part or use of an adapter coupling to guarantee a reliable, leak-free closure.
Cost, Time Estimates, and When to Call a Professional
Typical DIY cap-off tasks usually take one to two hours and cost mainly for materials like caps, sealant, and basic tools.
More complex shutoffs or pipe replacements raise time and expenses.
Licensed plumbers should be contacted for gas lines, corroded or hard-to-reach piping, persistent leaks, or when local codes and permits are involved.
Before hiring, homeowners should ask about licensing, insurance, written estimates, warranty on work, and expected timeline.
Typical DIY time and cost breakdown
A straightforward sink cap-off can often be completed by a homeowner in under two hours, with costs ranging from a few dollars for basic materials to $100–$200 if repair couplings or a new trap are needed; however, more complex situations—corroded piping, hard-to-reach fittings, or code-mandated modifications—will increase time and expense and may require professional intervention.
| Task | Time | Typical Cost |
|---|---|---|
| Simple cap | 30–90 min | $5–$30 |
| Replace trap | 45–120 min | $20–$150 |
| Repair coupling | 60–180 min | $30–$200 |
Scenarios that require a licensed plumber
When concealed leaks, deteriorated cast-iron or copper pipes, multiple connected fixtures, or visible sewage backflow are present, a licensed plumber should be engaged because these conditions carry safety, code, and warranty implications that exceed routine DIY work.
Typical professional costs vary widely—expect $150–$600+ for diagnosis and simple caps, $800–$3,000+ for replacements.
Call a pro if risk, complexity, or permit needs arise.
Questions to ask a plumber before hiring
Following identification of conditions that warrant professional help, homeowners should know which questions to ask a plumber before hiring one—particularly about cost, time estimates, and when to call for assistance—to avoid unexpected expenses and delays.
Ask for itemized estimates, hourly rates, permit needs, and warranty terms.
Request expected start and completion times, contingency plans, and criteria that trigger immediate professional intervention versus reasonable DIY follow-up.
Preventive Measures and Long-Term Maintenance After Capping
After capping a sink line, the homeowner should clearly label and document the capped pipes and their locations to aid future work.
A simple periodic inspection checklist—checking for leaks, corrosion, and secure fittings—helps detect issues early.
If reopening is required later, instructions should emphasize turning off water, testing for pressure, and following proper reconnection steps or calling a professional.
Labeling and documenting capped lines for future work
Any capped plumbing line should be clearly labeled and documented to prevent confusion and unnecessary excavation during future work.
Labels should include date, capped pipe type, direction, and reason for capping.
Create a durable map or photo record showing exact locations and depth, store with property records, and inform homeowners or contractors.
Update documentation if any changes occur to maintain accuracy.
Periodic inspection checklist
With capped lines clearly labeled and recorded, a concise periodic inspection checklist helps guarantee long-term integrity and prevents unnoticed failures.
Inspect caps for corrosion, cracks, and secure fittings; check for odors or dampness; confirm surrounding seals and insulation remain intact.
Maintain simple records of dates and findings.
Suggested routine checks:
- Visual cap and joint inspection
- Moisture and odor check
- Recordkeeping and follow-up scheduling
How to safely reopen or reconnect a capped line later
Plan the reconnection process before removing a cap to guarantee safety and code compliance: identify the capped line’s purpose and endpoints, verify shutoffs and branch isolation, and obtain necessary permits or professional assistance.
Inspect the cap and fittings, clean threads or solder joints, pressure-test the line, replace damaged components, and use approved materials.
Restore water slowly while checking for leaks and proper venting; document changes.
Visual Guides and Reference Diagrams
The article presents clear diagrams of a typical sink plumbing layout, labeling the trap, tailpiece, shutoff valves, and supply lines to orient readers.
It also shows examples of common cap types and fittings, including threaded plugs, compression caps, and push-fit stoppers, with notes on their designated locations.
These visuals serve as quick references for identifying components and selecting appropriate caps during a capping project.
Typical sink plumbing layout and parts
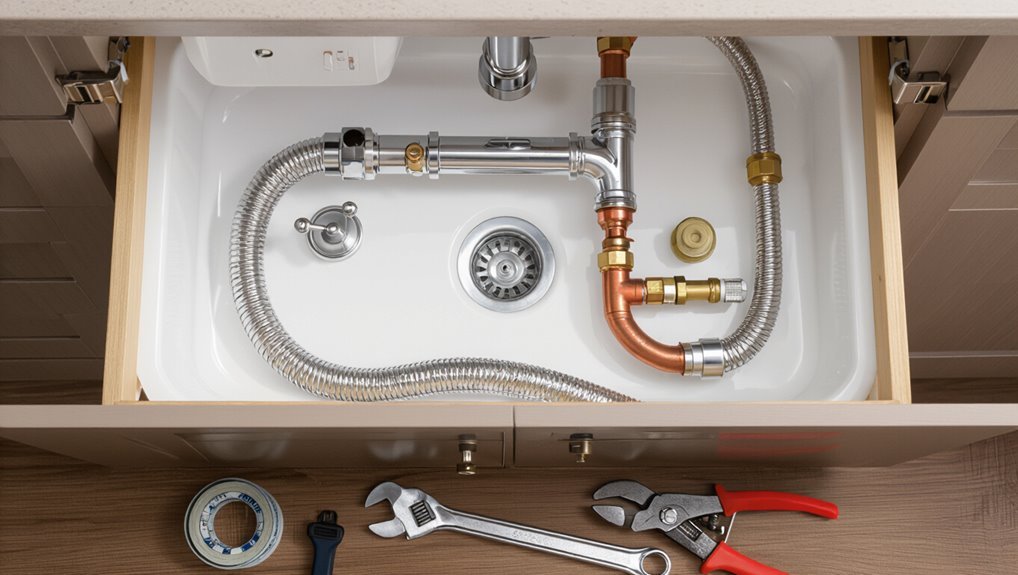
A standard sink plumbing layout consists of a basin, drain assembly, P-trap, trap arm, and supply lines, each shown in diagrams to clarify spatial relationships and connection points.
Diagrams label valves, shutoffs, tailpieces, slip nuts, wall outlets, and mounting brackets.
Measurements indicate typical clearances and slope for trap arm.
Color-coding distinguishes hot, cold, waste, and venting paths for quick reference.
Examples of common cap types and fittings
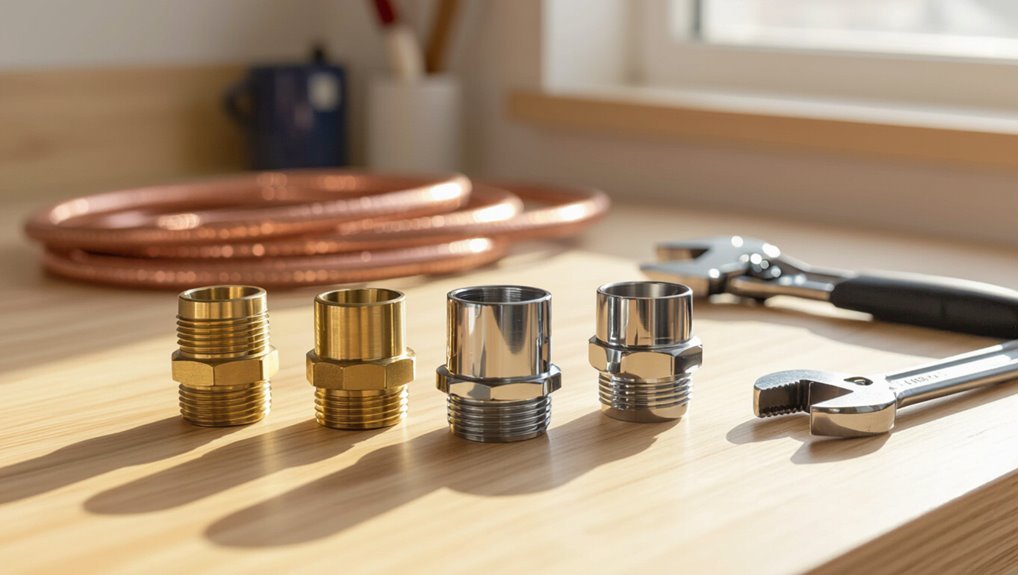
Illustrations and labeled diagrams show common cap types and fittings—such as slip-on caps, threaded end caps, test plugs, and compression caps—alongside measurements and material notes to aid selection.
Each visual identifies application (PVC, ABS, copper), size variations (½”–2″), sealing method (glue, thread tape, rubber gasket), pressure ratings, and installation tips.
A legend compares durability, cost, and reuse potential for quick reference.
Conclusion
A simple act — sealing a forgotten pipe — can feel both final and hopeful. One moment, an exposed stub recalls past routines; the next, a neat cap promises order and protection. The DIYer’s careful hands bring permanence, yet also leave options: a capped line is both an ending and a quiet pause, preserving future possibility. In that small, sealed space, practicality and sentiment meet, turning an ordinary task into a thoughtful, measured choice.